Saturday, 16 September 2023

One Hour WW2 at COW 2023

 I first ran my WW2 variant of Neil Thomas's rules at VCOW back in the depths of lockdown in 2020, and back then remote gaming was a brave new world. Since then the rules have evolved and we've been busy playing the more recent hex based version, which is more manageable for remote games. I've already posted a few reports on the blog, but I was persuaded it was worthy of inclusion at this years COW at Great Missendon. This would be its first outing for f2f play with strangers.

I went for the 'Leshnov 1941' scenario as it has lots of reinforcements arriving during the game which adds a bit of surprise, and it has lots and lots of tanks. WW2 gamers seem to like tanks. It also exercises all the main game mechanisms as it includes airpower, artillery, AT guns and all the major unit types including Heavy Tanks and recce.


Table from the south. The Soviet 8th Mechanised Corps enters from the road at the south side and needs to get four units off the north edge road, thereby cutting off Panzer Group 2 who are somewhere to the east. Easy peasy.


The only thing in the way is a single infantry battalion in the hamlet of Leshnov, albeit reinforced with a Flak battalion.


8th Mechanised Corps at roughly 25% strength, thanks to breakdowns and the Luftwaffe. The three tank divisions have two or three 'regiments' each, the combat equivalent of battalions. The tanks are the usual 1941 mad mix of BTs, T26s, T34s and KVs. There was even the (one and only) battalion of T35s here, but my T35 is a bit big for the 10cm hexes. All the motorised infantry are walking, having lost most of their transport.

The heavy artillery and aircraft are available for a pre planned bombardment of Leshnov.


German reinforcements in the box. Recce battalion, motorcycle battalion and an entire panzer regiment. These will assail each side of the Russian advance, eventually.


The Russians lead with 12th Tank Div up the road (very historical) while 15th Tank Div follows up and veers slightly westwards. Both these divisions have a mix of light and medium armour, including T28s although the 12th has some additional close support artillery.


12th Tank Div makes it to Leshnov and fighting breaks out. The defenders took some losses from the preliminary bombardment but are still quite strong and entrenched too. 

15th Tank Div is distracted by the arrival of 11th Panzer Recce battalion with armoured cars and a motorcycle battalion from the southwest.


While all this is going on, 34th Tank Div rolls up. This is the strongest division with a large proportion of KVs, T34s and a fleet of BTs. Their infantry are stuck in a traffic jam down the road somewhere.

Although they are outnumbered, the Germans have a more effective combined arms team. Their offboard artillery is particularly useful as it can slow and disrupt the Russian units. 


33rd Panzer Regiment rolls up from the southeast. The Russians have a strategic decision to make at this point. Do they try and defeat the German reinforcements, or do they break off and try and bull their way off the table to the north? Judging by the facing of the Soviet tank regiments, it looks like fighting is the plan.


The battle for Leshnov is hard fought. The German defenders have taken enough losses to disorganise them, but the Russian losses are heavier. Really they needed three combat units to stand a good chance of taking the town, two was marginal at best, but the rest of the Russians are stuck further south and now another German leg infantry battalion turns up from the north.


The tank component of 12th Tank Div are destroyed, and as the German reinforcements arrive at Leshnov, the Luftwaffe turns up too and the remaining Russians are destroyed in a concentric attack.

The rest of the Russians are pocketed further south and gradually whittled away, so the prospects of a breakthrough fade away and once two more Russian units are destroyed, it is all over.

That was an interesting play through. I suspect the Russians spread themselves a bit too thinly between fighting and advancing. When I've played it before solo and with players,  the Russians carried out a mad dash northwards, leaving a speedbump blocking unit behind them, so the panzers had to dash after them. If the Russians are going to stand and fight, they need to concentrate, but in this game they tried to do both. All the Germans can really do is respond to the Russians, but they did that very effectively.

So, apologies to the Russians who perhaps didn't have the best experience, albeit a fairly historical one.

We did at least get to showcase all the game mechanisms, and many of the players quickly grasped the tactical decisions about if and when to engage, and also, when to stop and reorganise. Hats off to Rob Doel who saved 15th Tank Div by constantly reorganising. We also finished handily within the allocated 1hr 45 minute timeslot, despite none of the players having played before, and had time for a debrief too.

As I usually set these things up to be played remotely, the tables are quite small (3x3 in this case), and an interesting logistical problem was actually fitting all the players around the table. I could have accommodated eight player roles but in the end went with six active players as that is all that could comfortably fit.


Wednesday, 13 September 2023

NQM at COW 2023


I’ve had various discussions with Chris over the years about NQM and I have several different versions of the rules. Various ideas from them have also made their way into my own rules, but until this year I’d never actually played a game of NQM until I had a visit Chez Kemp and we spent the day pushing a couple of Corps around, as reported recently on the blog.

I’m a big fan of grid based games and I think for operational games they solve a lot more problems than they introduce. The main thing is to get the players thinking like Generals and not Corporals.


Chris runs through the concepts with the assembled multitudes. There was a big turnout for this session.

I dropped in on this session to observe, but after some introductions to the game and a description of how the latest version worked, virtually everyone there got roped in to play, so I found myself commanding a Panzer Corps, which was a bit of a surprise.


Here is our Panzer Corps! Two infantry divisions and a Panzer division. Although notionally using battalion sized elements, these were pretty big units, the infantry regiments typically had four stands, as did the Panzer Regiment, and there were a ton of divisional and corps level assets.

The game was set up as a tutorial, so the plan was only to play a few turns to get a feel for the mechanisms and flow. We were slightly thrown in at the deep end, so after hastily scribbling a Corps defence plan, I spent much of the game helping my divisional commanders understand what units they actually had, and what they could (and and couldn’t) do.


We were defending a major river in late 1943, with two towns as bridgeheads on the far side, as two entire Soviet Armies rolled up to assault our positions. 

Here is the first division, most of it is on our side of the river with a bridgehead in the town. The divisional artillery is positioned to cover the whole divisional front (each square is 6km at this scale). 


And our second division. More of it is on the far bank holding the town, and the river here has two bridges across it (rail and road). The Russians have apparently concentrated a lot of force here!


The defence to the west held out OK, but in the east the Russians inflicted heavy losses and fought their way into the city behind a torrent of artillery fire and bombing. The Luftwaffe attrited the enemy gun positions, but there was just so much of it.

Eventually we were ejected from the far bank in short order, albeit having inflicted heavy losses, and fell back behind the river as the bridges went up to thunderous explosions.

It was a pretty good tryout of all the mechanisms, including air power, recce, ammo resupply, casevac etc as well as the more mundane things like moving and fighting. At the conclusion of the session a number of copies of the rules were offered for sale at a nominal price and were snapped up by the participants, so clearly a successful session.


Tuesday, 12 September 2023

15mm Desert pocket armies - British stage one. Bumper 700th blog post edition!

Blimey, 700 posts, that sounds a lot. If only I got paid per word! As fitting such a momentous occasion, I'll cover my current big project.

 As mentioned in an earlier post, I'm doing some 15mm WW2 desert forces to supplement my 6mm stuff. As I haven't done a multi-army 15mm project for years, I'm (supposedly) starting small, just doing enough stuff for a 'Neil Thomas' type army to cover smaller scenarios at various levels of representation. Even starting small, doing all three (British, German, Italian) armies is a bit daunting, let alone adding in the Indians and Australians.


This is stage one for the British. It took a surprisingly long time to get here as I hadn't realised what a steep learning curve painting larger scale desert stuff would be. Whereas I've been painting European and Russia front stuff for decades in larger scales, I've only ever done desert warfare in 6mm apart from a brief foray into Command Decision in the late 90s in 15mm. 

If ever I regret selling an army, it was my old 15mm Command Decision British Armoured Brigade and Support Group. I can remember painting hundreds of (8th Army) knees, and I had an entire motor battalion with all its trucks and carriers, back in the days when Peter Pig tanks cost 3.50 each. Hilariously I also bought a second hand DAK force to go with it, which I later sold, although I kept the tanks, guns and transport to form the core of my 1940 German force, while I sold the infantry. 

Anyway, no point crying over spilt milk. Well I will. A bit.


First up the infantry. These are all Peter Pig figures as after my 90s experience, I can't really imagine painting any others, and they are always such nice figures. 


The actual 'infantry' are these 12 bases on the left. Each group done as a rifle base of three figures, a rifle/command base of three figures which includes an NCO and an LMG base. So in theory this will do for a rifle platoon at 1:1, a rifle company at 1 base per section, a rifle battalion at one base per platoon, an infantry brigade at one base per company, and infantry division at one base per battalion etc etc.

Normally I'd aim to do a Command Decision sized regiment/brigade (so three battalions at 1 base = 1 platoon), which is what I did for all my previous 15mm WW2 armies, and for the Russians, I did an extra SMG battalion as well. I have so much to paint though, that for now I just kept it to one battalion. 

I'll aim to grow this in future.


The other bits are support elements aimed at various levels of game from tactical to operational. There are four HQs, four engineer stands, a pair each of Vickers guns and 3" mortars, and couple of spare blokes with binos (from the Vickers pack) to act as FOOs. The numbers are partly a function of the PP pack size.


Transport is somewhat modest. Three Bedford lorries and a couple of carriers. That will do for now. I do have masses of British transport already, but I cant quite bring myself to use green stuff in the desert, Tunisia apart.


The Royal Artillery element. A pair of 25pdrs and a pair of 2pdr Portee. Again, I have masses of green guns already, but no good for the desert. That will do for an NBC scale artillery Regiment and AT company. I do have a wicked thought about repainting some existing guns in SCC2 brown, which with a heavy dry brush would do for both Europe and the Med. A lot of British artillery was still brown in NWE in 1944. The same goes for transport as well. Mmm, I shall think on. 


Finally, the nightmare which is British desert armour. So many types in service in such a short space of time. For the first tranche I went with Crusaders, as you can't really go wrong with Crusaders. I also have a particular fondness for the death ride of 22nd Armoured Brigade at Bir El Gubi, and you need lots of Crusaders for that. Six Crusaders is enough for Bir El Gubi using one hour WW2, at two models per Regiment. 

I also got a couple of Valentines, as I like Valentines, but in retrospect I should probably have gone with Matildas. I was thinking Gazala rather than Operation Crusader.


Finally the odds and sods. The Dingo can do double duty as recce or some sort of armoured HQ type thing. The Humber is there just because it would have been neglectful not to have any recce at all.

Thats it for stage 1. Stage 2 will be to paint all the stuff I bought for stage 1 but couldn't face painting. Primarily some Stuarts, 15cwt trucks and some Quads for the 25 pdrs.

 After that I need some early cruisers (A9, A13 etc), Matildas, more armoured cars, more carriers, more infantry, more guns, more transport and more HQ stuff. Plus some later campaign heavy tanks - Grants and Shermans and some heavy artillery.

Still, lets walk before we run. Got to do some Germans before I tackle that lot.

I'll run through the individual models in more detail as part of my 'modelling' thread of posts, and I imagine this project will generate many future posts. Thanks for reading and see you all at 800!


Saturday, 9 September 2023

Little World Wars revisited

 After playtesting his new 54mm WW2 rules with myself and Russell f2f, Tim tried it out on our regular weekly remote gaming group. Tim ran the same scenario as before, but I could only attend for the Tuesday. Pete, myself and Simon were the Russians, John and Russell the Germans. Graham also dropped in for a chat.


A certain degree of dodgy headwear was in evidence, and I took the opportunity to put on my Soviet WW2 1st Lt uniform, which I haven't had a chance to wear for a while.


John also entertained us with his new Lancaster as we all attempted to guess the scale.


As before, the Russians jammed into the village. Those Lone Star Carriers got another outing.


And the wicked Germans lined the hedgerows, two companies up and one back.


The German armour was hiding in the woods behind, which also happened to be the target of the Russian preliminary bombardment.


The Pz IV platoon had a nice line of fire down the road, down which my BA 64 recce platoon was feeling the way forward. 


The German reserve company mounted up while the Flak platoon moved out of the heavily shelled woods.


One thing about remote games, it is very hard to estimate the movement distances sometimes. I didn't mean to end up quite as close as this to the very angry German panzerschreck team!

I actually quite like the limited (player) visibility aspect of some remote games, it seems more realistic, and is certainly atmospheric. 


The BA64s had obviously found the enemy by now, so the T34s moved up in support, shaking out into an inverse wedge and freeing up some deployment space for the infantry behind. The T34/76s were the first line of the wedge, and the T34/85 behind, hull down on the hill.


The BA64 platoon  was in easy range of both the Pz IV and the Panzerschreck.


With predictable results. The BA64 having drawn the enemy fire, the T34s took the opportunity to move a bit closer.


Perhaps a bit too close! Some T34/76 went up in flames.


The German Panther platoon now put in an appearance, supporting the reserve SS panzergrenadier company.


The German HQ team was perched on top of the church steeple watching proceedings.


The Russian infantry were up with the tanks now and giving the Germans something to think about. The remaining Soviet tanks focussed on the Pz IV platoon, and destroyed it.


German defensive fire from MGs, mortars and artillery tore great holes in the Soviet ranks as they closed in.


All the German infantry were up front now, providing a nice target for the Soviet mortar, MG and infantry gun platoons, but the Panther steadily worked its way through the remaining Russian tanks.

We broke for the evening at that point and I couldn't attend on Wednesday. I gather the Russian attack eventually broke down under the weight of German defensive fire and the German held on this time.

Tim had tweaked things a bit since our f2f game, and in particular, the infantry was more mobile, which I thought was a big improvement. We bungled the Russian attack and ended up attacking piecemeal without proper mutual support, so it is nice that we lost due to poor tactics and didn't just roll over the enemy by sheer weight of numbers.

I'm looking forward to seeing how this plays on future outings. 


Wednesday, 6 September 2023

15mm QRF Universal Carriers

 For my 15mm desert project I needed some carriers. Now, I already have more carriers than I can use, and if needs be I can repaint some in sand, but I wanted to get some new ones anyway as they aren't hugely expensive. 


And here they are motoring across the dining table. QRF do a wide range of carrier variants but I just went for Universal carriers.


 They are very neat little models and come with seperate tracks, two (partial) crew figures and no less than two Brens and  a Boys AT rifle. There was little bit of flash to clear up, and I had to slightly prise the front mudguards apart to get the tracks in, but they went together very well. 


I had a go at getting the ATR into the front weapon slit but in the end I just propped it up as there wasn't room for the rifle and the gunner. Of course I should have cut the breech off. Doh. I so propped up a Bren in the back and didn't bother with the (supplied) mount. If I get any more of these I'll mount the weapons in different combinations. 


The extra cew figures are from my huge bag of Old Glory carrier crew figures, which I have had for 25 years and is apparently inexhaustible. They are in NWE uniforms, but it was easy enough to file down the helmets and trim down the No 4 rifles. 

The carriers themselves I under coated grey then painted in a plain Light Stone finish. Vallejo Desert Yellow with a dark brown inkwash, followed by a heavy drybrush of the yellow again followed up with a light drybrush of Pale Sand. 

I'd normally do the tracks and running gear in mud, but for the desert I did the tracks khaki with and ink wash and a highlight of gunmetal. 

I have a system for painting 6mm desert stuff so that the Germans, British and Italians all look different, but for 15mm I need to come up with a more varied subtle technique. It is good to learn new stuff though. For the British transport I'll probably stick to this general approach, but I'll mix it up a bit more for tanks. I came across some useful basic painting guides on the Battlefront site, so I'll use those as a starting colour guide. 


Monday, 4 September 2023

Advancing Companies - Crisis at Ulianovo

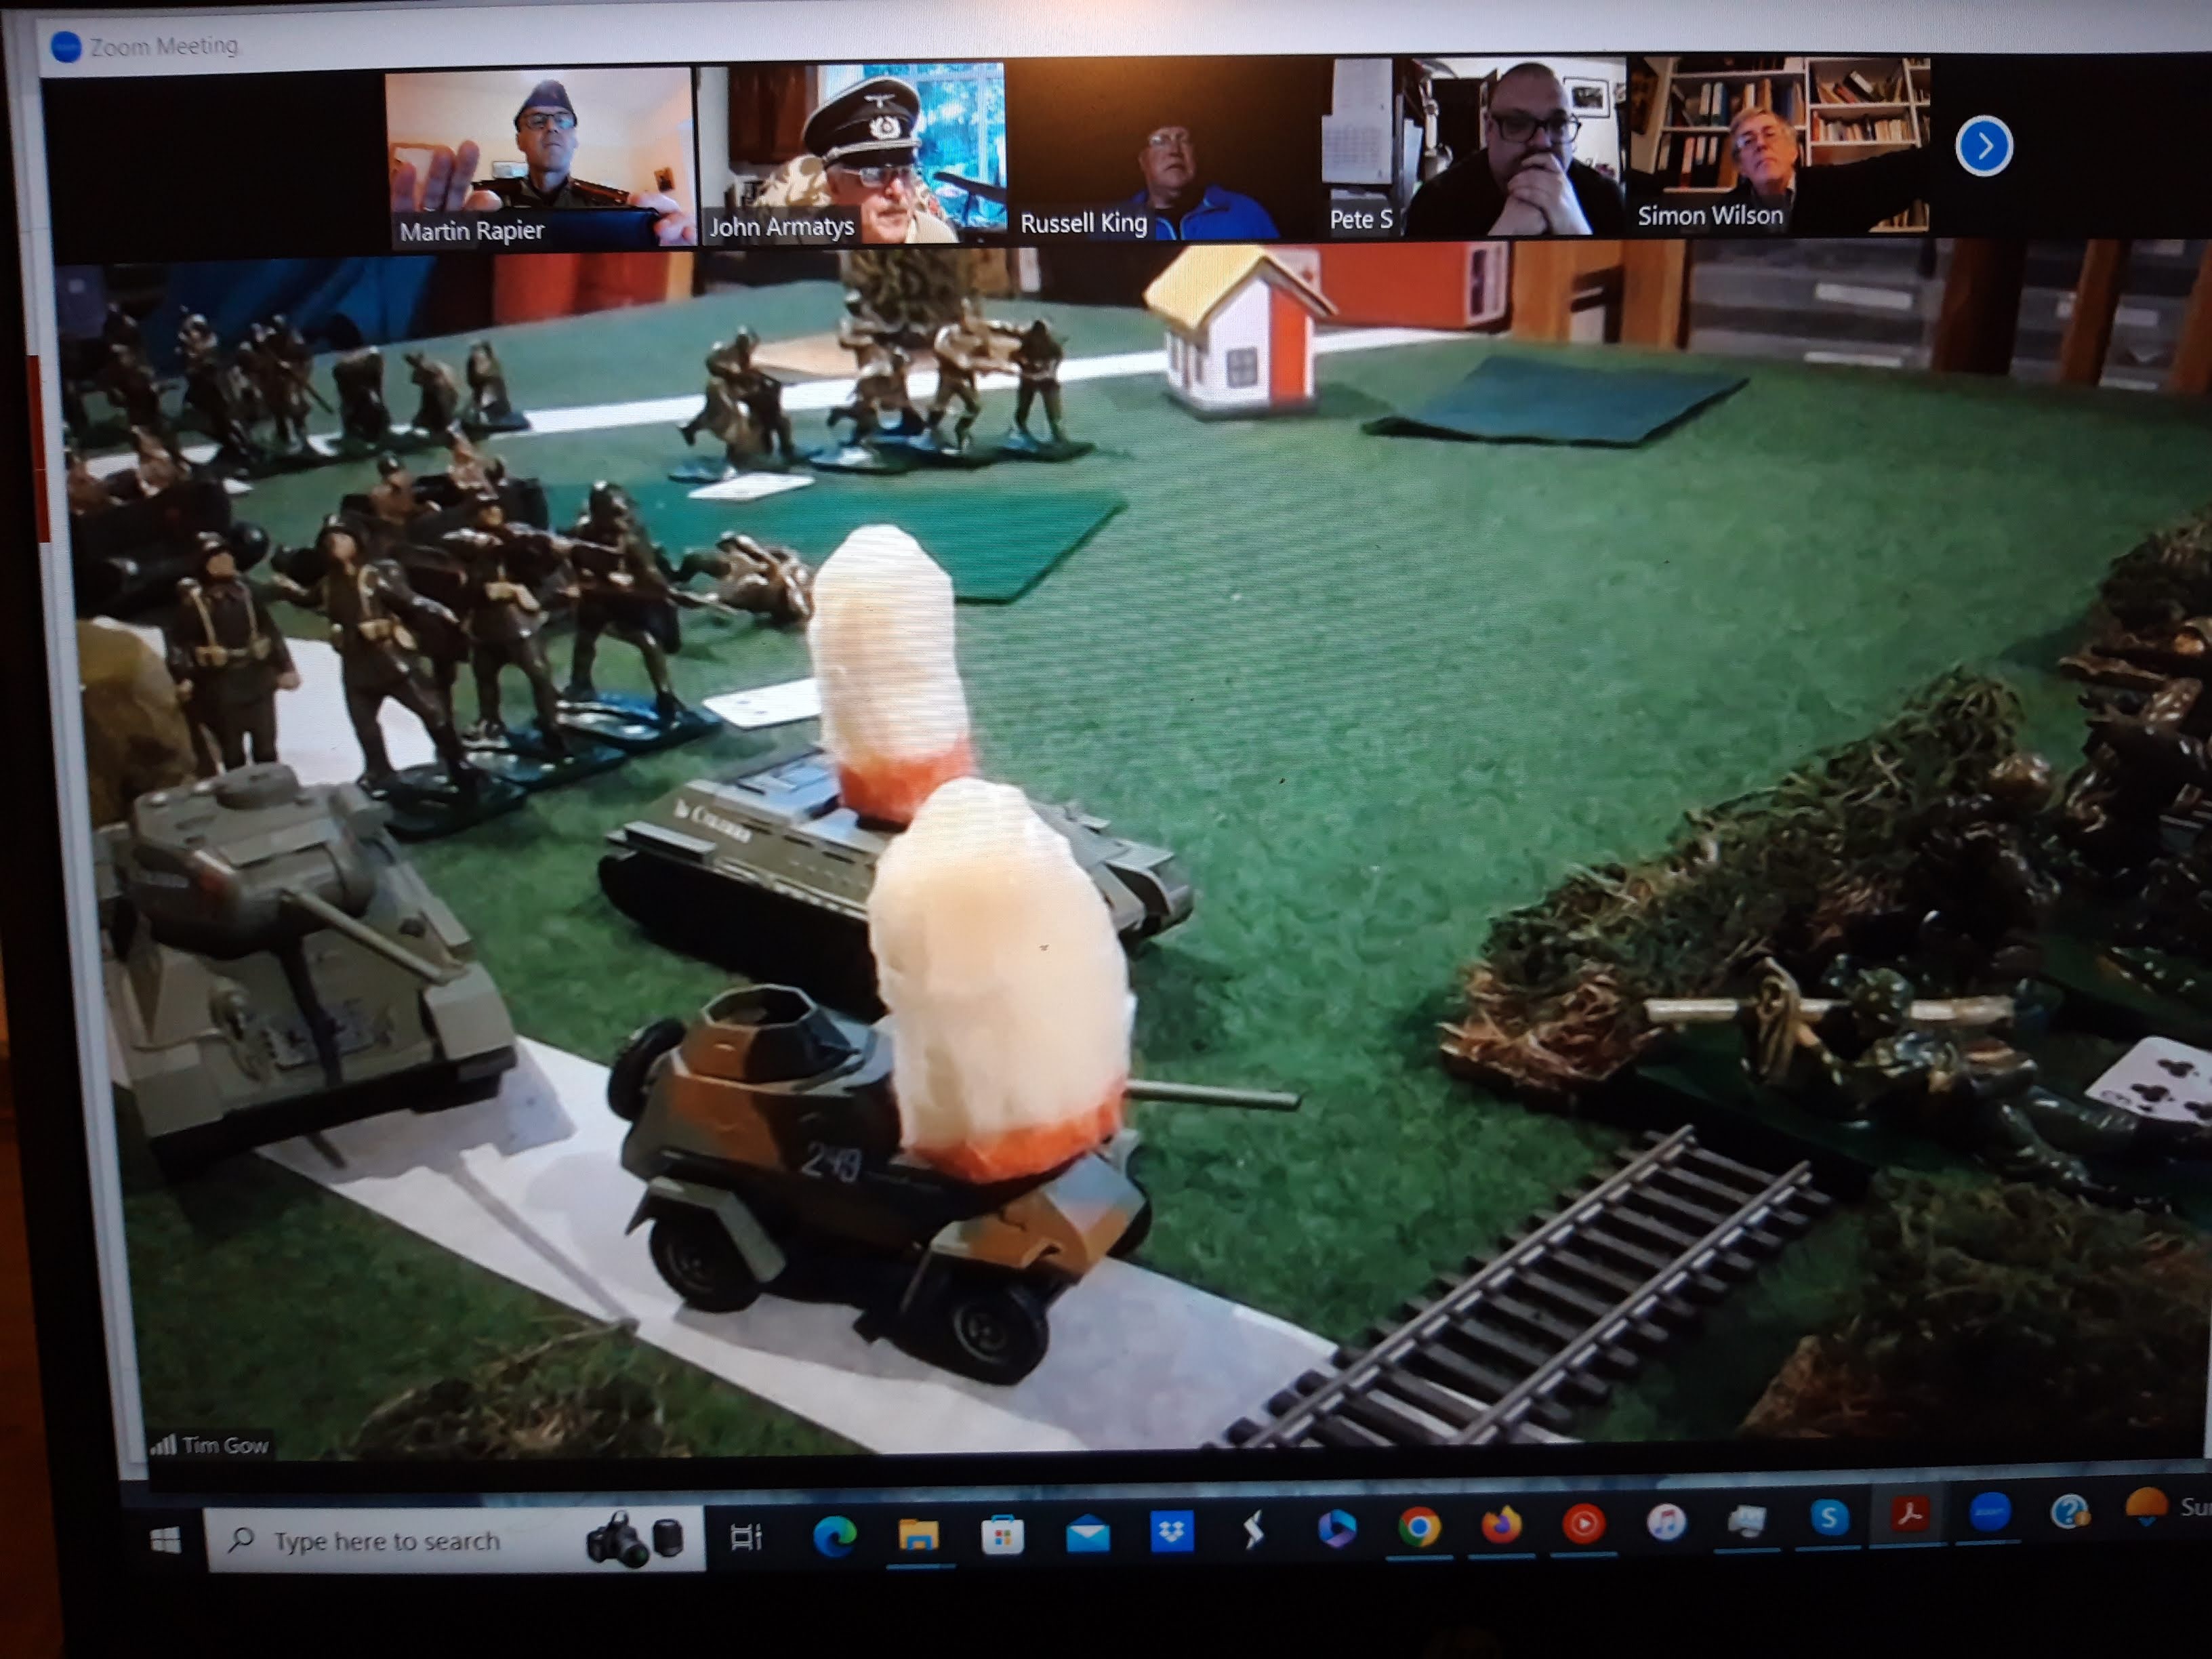
 This is the second scenario in the 'Panzer Relief' campaign in July 1943 and covers 5th Tank Corps assaulting  positions held by 18th Panzer Div after moving through 11th Guards Army. Another test for Advancing Companies, and this time featuring a much more complex mix of unit types than the last game.


Battlefield from the south, Germans in the east, Russians in the west. Yes, the Russians are attacking the flank of 18th Panzer Div. The Skirmish Campaigns terrain is often quite sparse, so I've been quite generous converting it to terrain squares. The main features here are the long N-S ridge and the marshy stream which is impassable to wheeled vehicles. There are various patches of light woods. 

As I learned in the last game, being in the open is bad, and there is an awful lot of open terrain here (the hills just block LOS).


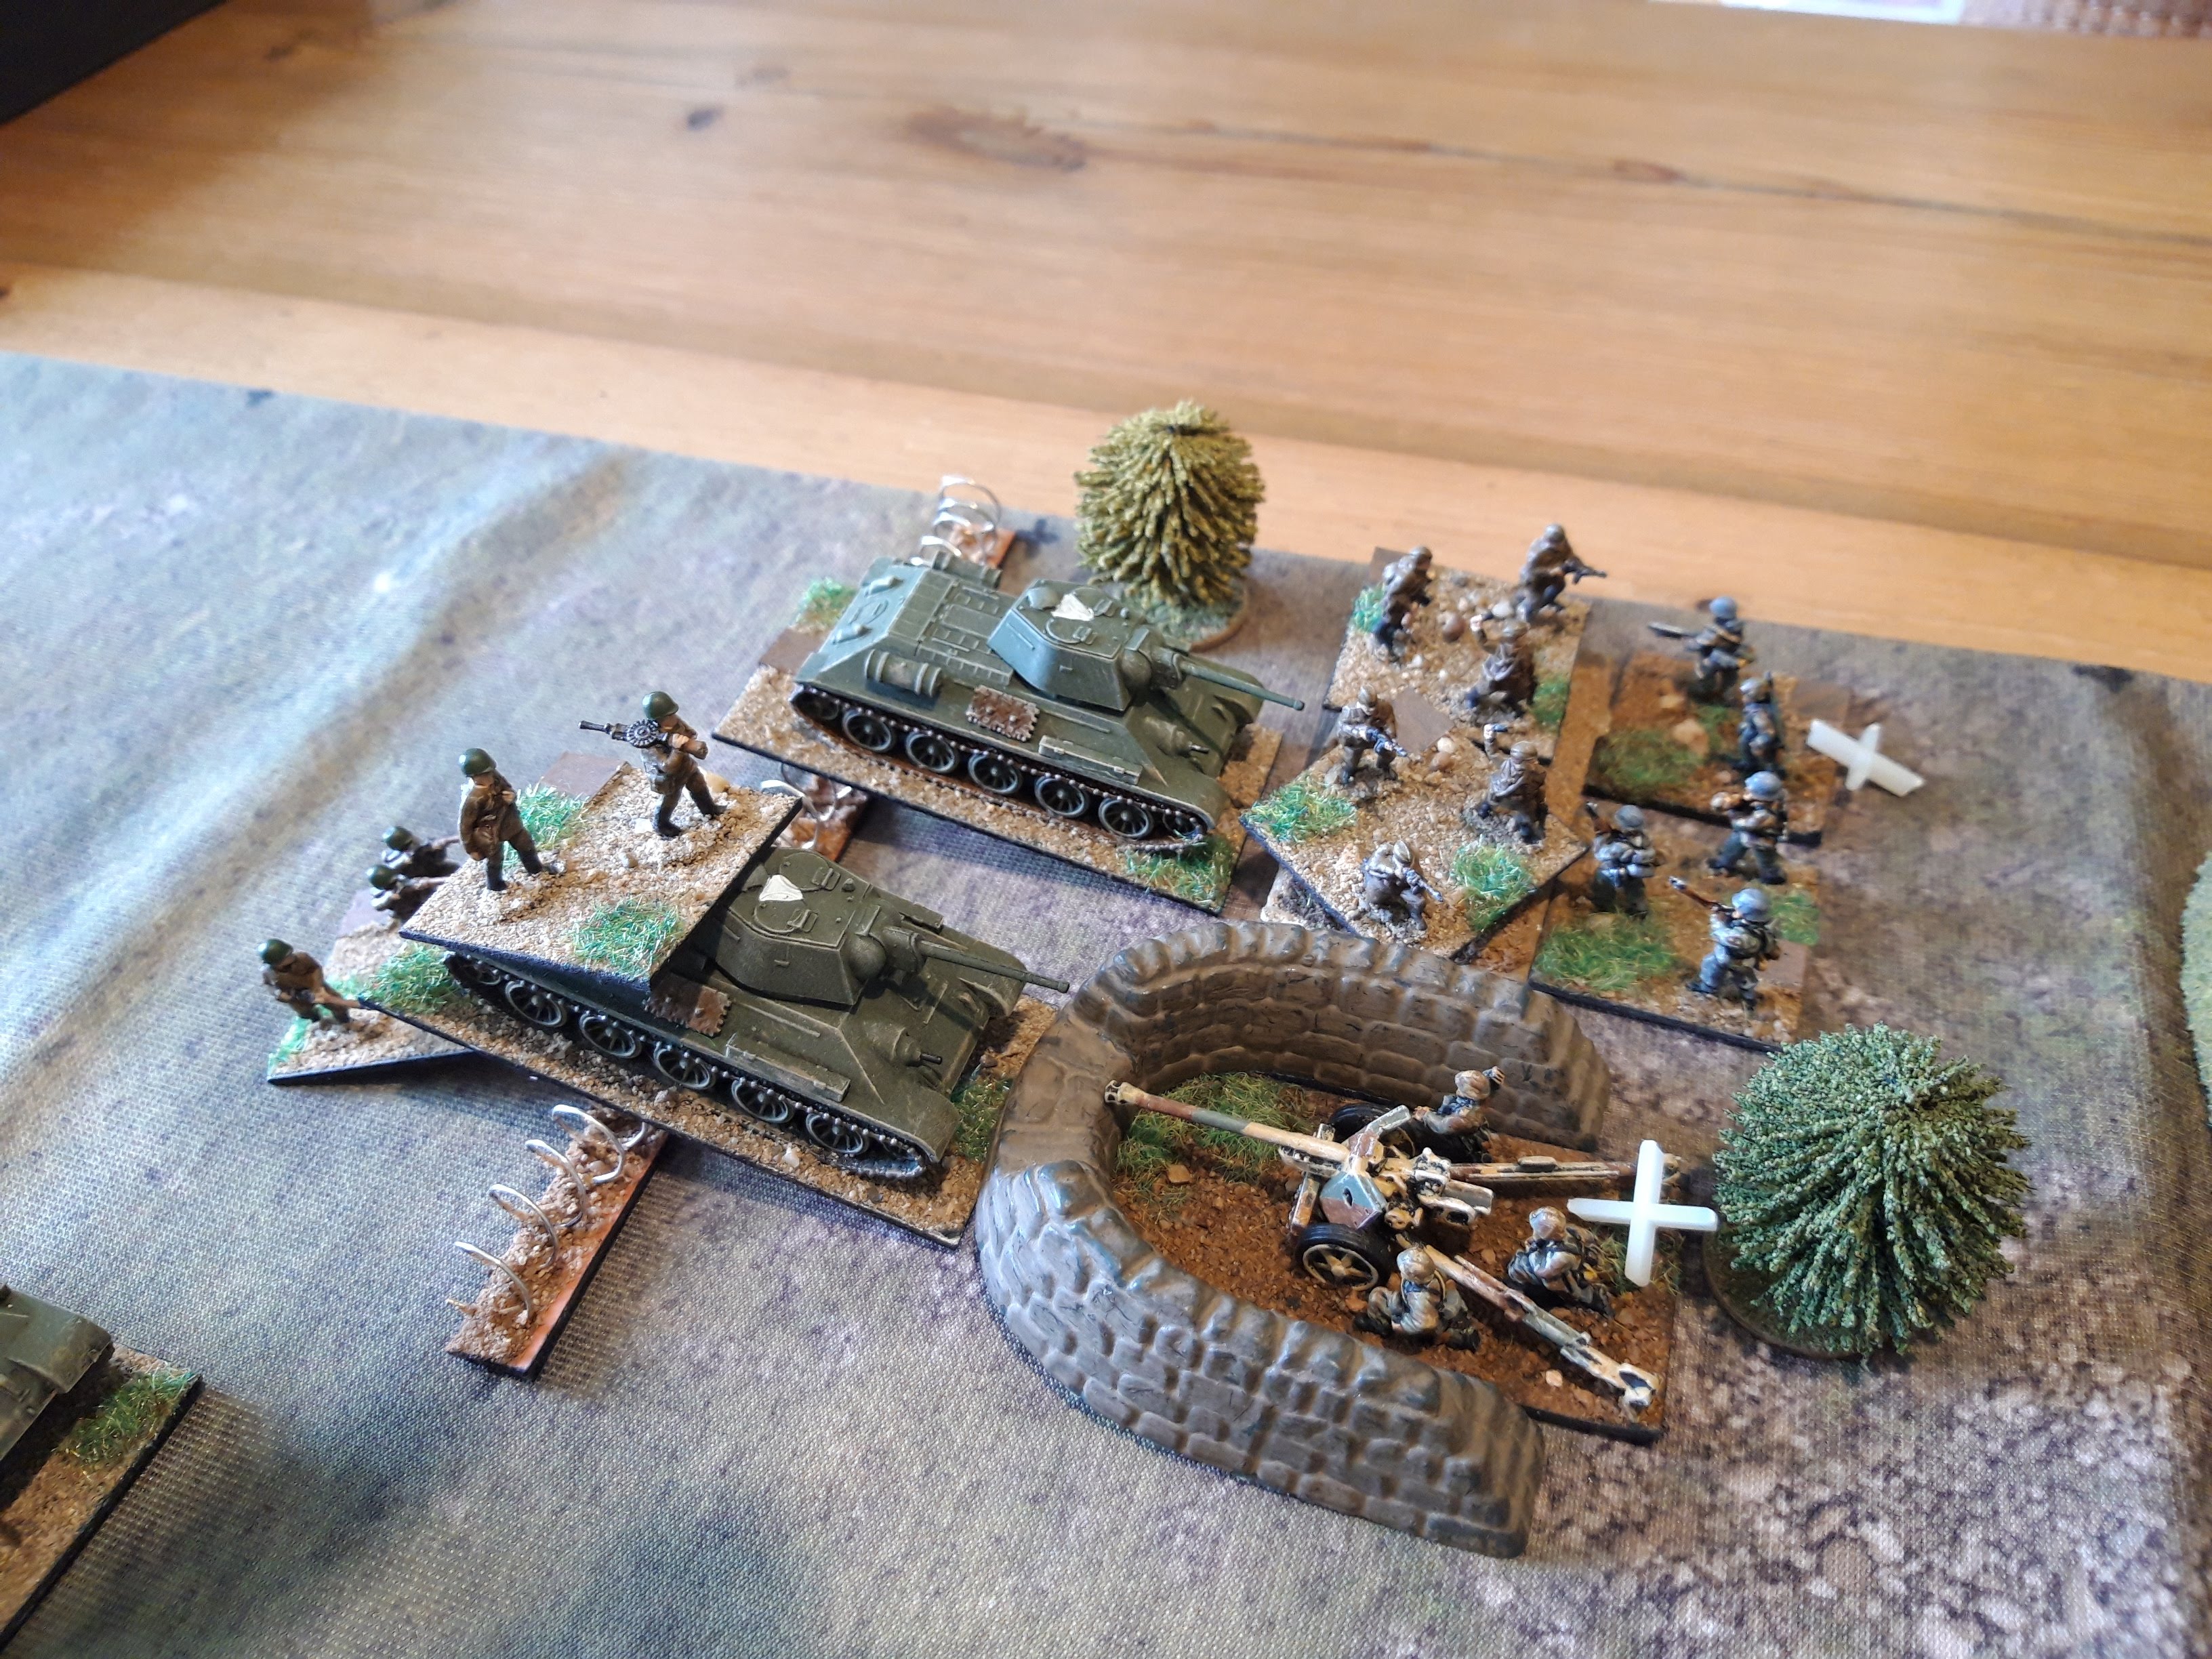
18th Panzer Div defenders. One 'rifle section' which I scaled up to two panzergrenadier squads, a PAK 40 and a pair of Pz IVs. For their variable attachment the Germans rolled up a pair of Marders, which will arrive in a few turns.

After mulling the game over a fair bit, I decided the 1:1 representation just wasn't working for me, it felt too much like those Squad Leader scenarios where a random selection of equipment and infantry brawl over some nameless bit of terrain, and the ranges are really, really short.

So, I have decreed that the units represent 'sections' in the Charles Grant sense ie 2-3 tanks or support weapons or 2-3 real infantry sections. Which means the infantry are actually platoons, and a pair of Pz IVs actually represents a platoon of five. That is much better! Now I can pretend I am playing 'Battle'!

So what the Germans have here is a company sized combat team with two infantry platoons, a tank platoon, an SP gun platoon and an anti-tank battery.

The Germans also get some defences, a length of barbed wire, a gun emplacement and some foxholes for the infantry.


The Russians have tons of kit. Six sections of T34s, Three T70s and a couple of motorised rifle 'sections' in the first wave. One Rifle, one SMG. The variable attachments were another pair of Motor Rifle sections and a command T34. This lot rolls on from the west, and has to destroy or force offtable all the German armour in 12 turns.


I spent quite a while considering the German defence. The options really are reverse slope or up front. In the end I went with up front. The AT gun and one PG section are dug in to the wood on the right, protected with wire, while the second section is dug in on wooded hill on the left. The Panzer IVs are covering the ridge from a wooded hill on the far side of the boggy stream and the Marders will enter later.


I used the optional preparatory bombardment rules, so a barrage rolled across the German lines. Amazingly 76.2mm field guns turn out to fairly useless against dug in infantry and medium tanks. The infantry squad supporting the gun was supressed and that was all. 


The Germans got lucky with their reinforcements and the Marders rolled on in the woods next to the Pz IVs.


On came the Russian tide. You can move everything out of the offtable box on one activation, so I did. T34s up the middle, T70s on the flanks, with the infantry riding the tanks. My 'plan' was to use the T70s against the flanks as they are as good against infantry as the T34s, and use the tanks to dump the tank riders in the midst of the enemy positions after suppressing them. The mass of Tt34s would park up in the middle and blast stuff as required.


First blood to the Pak 40 which took out a T70. The tank riders dismounted suppressed.


The Germans rolled two activations so the Pak 40 took out another T70 and now the Pz IVs opened up and damaged one T34 and destroyed another. Things could be going better for the Russians!

The problem with the Russian plan now became apparent - I'd just handed the Germans a very target rich environment, whereas I'd moved up a load of Russian stuff of which I could only active a portion each turn.


The Germans continued to blaze away with their tanks and finished off the T34s on the ridge. Russian return fire from the T34s behind the ridge suppressed the Pak 40 though.


Time for some death or glory! The T70s on the Soviet right assaulted the German trenches, dropping off an SMG squad as it did so.


This actually succeeded in destroying the German infantry, although the T70 was damaged and the SMG gunners went down in close combat as well. Over on the other flank, some T34s tried to overrun the suppressed Pak 40. They could really have done with some infantry support, and the attack went wrong with the German defenders staying suppressed, but managing to knock out one of the T34s.


At this point the Russians had passed their break point and their morale failed. The entire force fell back suppressed and with only a couple of turns left, I called it a day at that point. I think I did morale wrong and should have tested each square individually, anyway, it didn't make much difference.

OK, that was a useful learning experience, time to try again. This time, I'll try and bit more subtlety and pick the German defences apart bit by bit. I think I need to play this game more like Phil Sabins 'Fire & Movement' and a bit less like 'Spearhead'!


The Germans kept the same defence as before, after all it worked so well last time. Once again the 76.2mm barrage rolled ineffectively over the German lines.


This time, I just brought SOME of the Russians on. A group of T34s in the centre for fire support, and once again, a couple of T70s with some tank riders to assault the German right. The Russians all carefully hid from view from the Pz IVs behind the ridge.


As before, the Pak 40 scored a kill, but concentrated return fire suppressed the AT gun.


Then one T70 providing suppressing fire, while the other rolled over the German trenches, dropping off its SMG squad. A proper 'Panzerblitz' attack!


The Germans had meanwhile brought on their Marders, but the Pz IVs were unlucky and only managed to suppress the T70 on the ridge. The combined arms Russian assault had destroyed the defenders on the ridge. 


We tried that again on the left flank, this time T34s with tank riders rolled over the Pak 40 position, the tanks forcing routes through the wire. I forgot to roll for damage to the tanks for doing that.


Once again a T34 went up in flames in the assault (I must remember that suppressed units are still dangerous in close combat) but the defenders were eliminated as I had one unsuppressed Russian infantry in the square, and the suppressed defenders had to retreat over open ground. Very Squad Leader, I like that. 


While this was going on, the German armour finished off the T70 on the ridge and the Russian reserves came on. I'd cleared the German first line for the loss of three tanks and some disorganised infantry.


The Russians now rolled up over the ridge en masse, German return fire damaged one tank but another Russian activation put a T34 platoon right in front of the Germans.


Next turn the Russians got the drop on the Germans, knocked out a Marder and a Pz IV and the rest fell back as their morale failed. There was an unusual run of activations in the sequence so I ran  the last couple of turns again.


In this iteration the Germans got more return fire and knocked out some of the T34s in the valley. Soviet return fire did great execution however.


It became an armoured slugging match.


Until the last Pz IV had enough and ran away. Interesting, so the unusual sequence of activations in the previous iteration didn't actually affect the final outcome once the Russians had taken the ridge position, apart from inflicting higher losses on the Russians. 

That was a very useful set of run throughs, I'm getting a much better feel for how this works now. The extra firepower from the tanks meant the infantry didn't get bogged down in hopeless firefights, and the tank battle was suitable vicious and decisive. The main thing I've learned is you have to (attack) in a systematic fashion, if you just throw everything in and hope for the best, it is likely to fail. Superior numbers of troops are therefore useful to generate reserves to replace losses in the front line, not just a means to throw more bodies into the line.

That action was a Russian victory in the end, the Russians got a lot of VPs for killing all that German stuff. Game VPs German 9, Russian 20. Running totals now German 16, Russian 22. Both sides have 2 attachment credits for the nest battle.