Time for another Market Garden game using NBC, this time covering the attack by 107th Panzer Brigade on Veghel on 22nd September 1944. As usual, lifted from the relevant Command Decision scenario.
Veghel was defended 2/501st PIR, with various other units (including the bulk of 506th PIR) scattered up and down Hells Highway. KG Walther assembled an assault force comprising 107th Panzer Briagde and KG Richter, the remains of II/SSPGR 21 supported by a couple of platoons of Panthers and the armoured engineer company from 107th Panzer, as well as a battalion sized infantry 'regiment' (GR 16) which until very recently was Ersatz Battalion 16.
Russell and Jerry took the Allies, while John, Tim and Pete took the Germans.

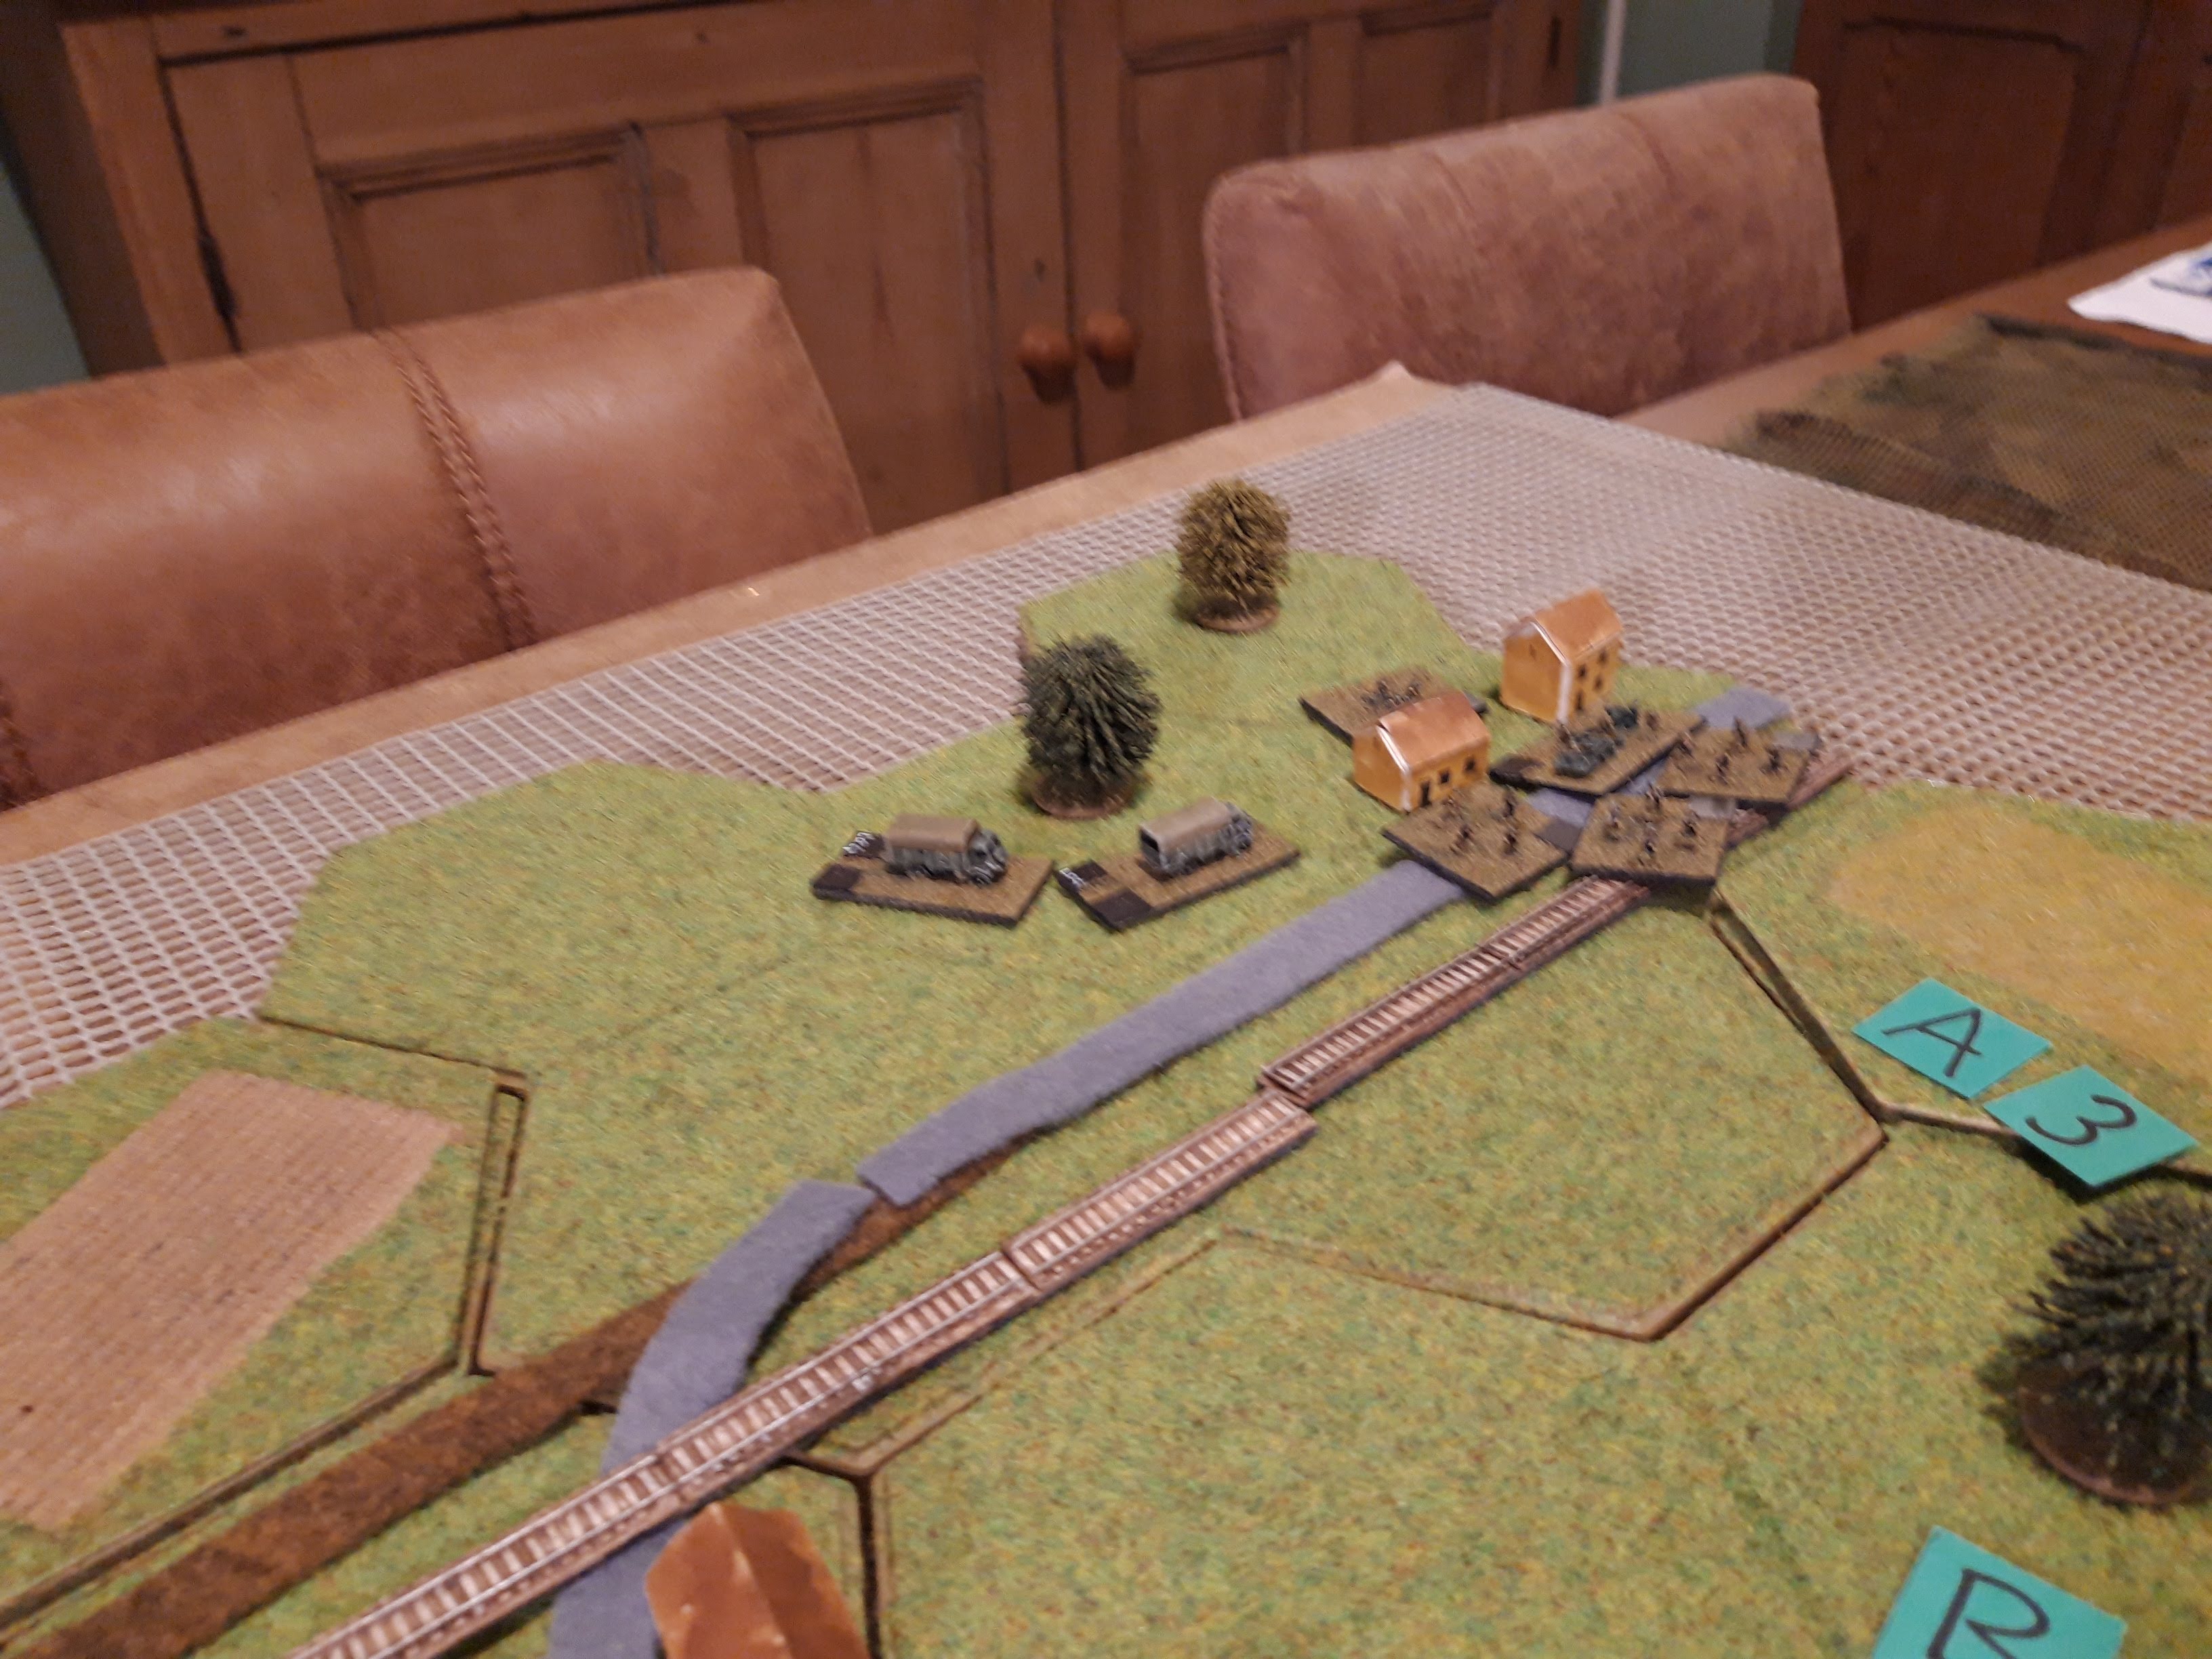
The battlefield from the south. Veghel is the town along the canal in the foreground. Hells Highway is the grey road leading northwards and a rail line crosses the canal west of Veghel. The villages of Erp and Marineheide are in the middle distance, and Udem is in the top northwest corner. The Germans are massed around Erp, while Veghel is held by 2/501st.

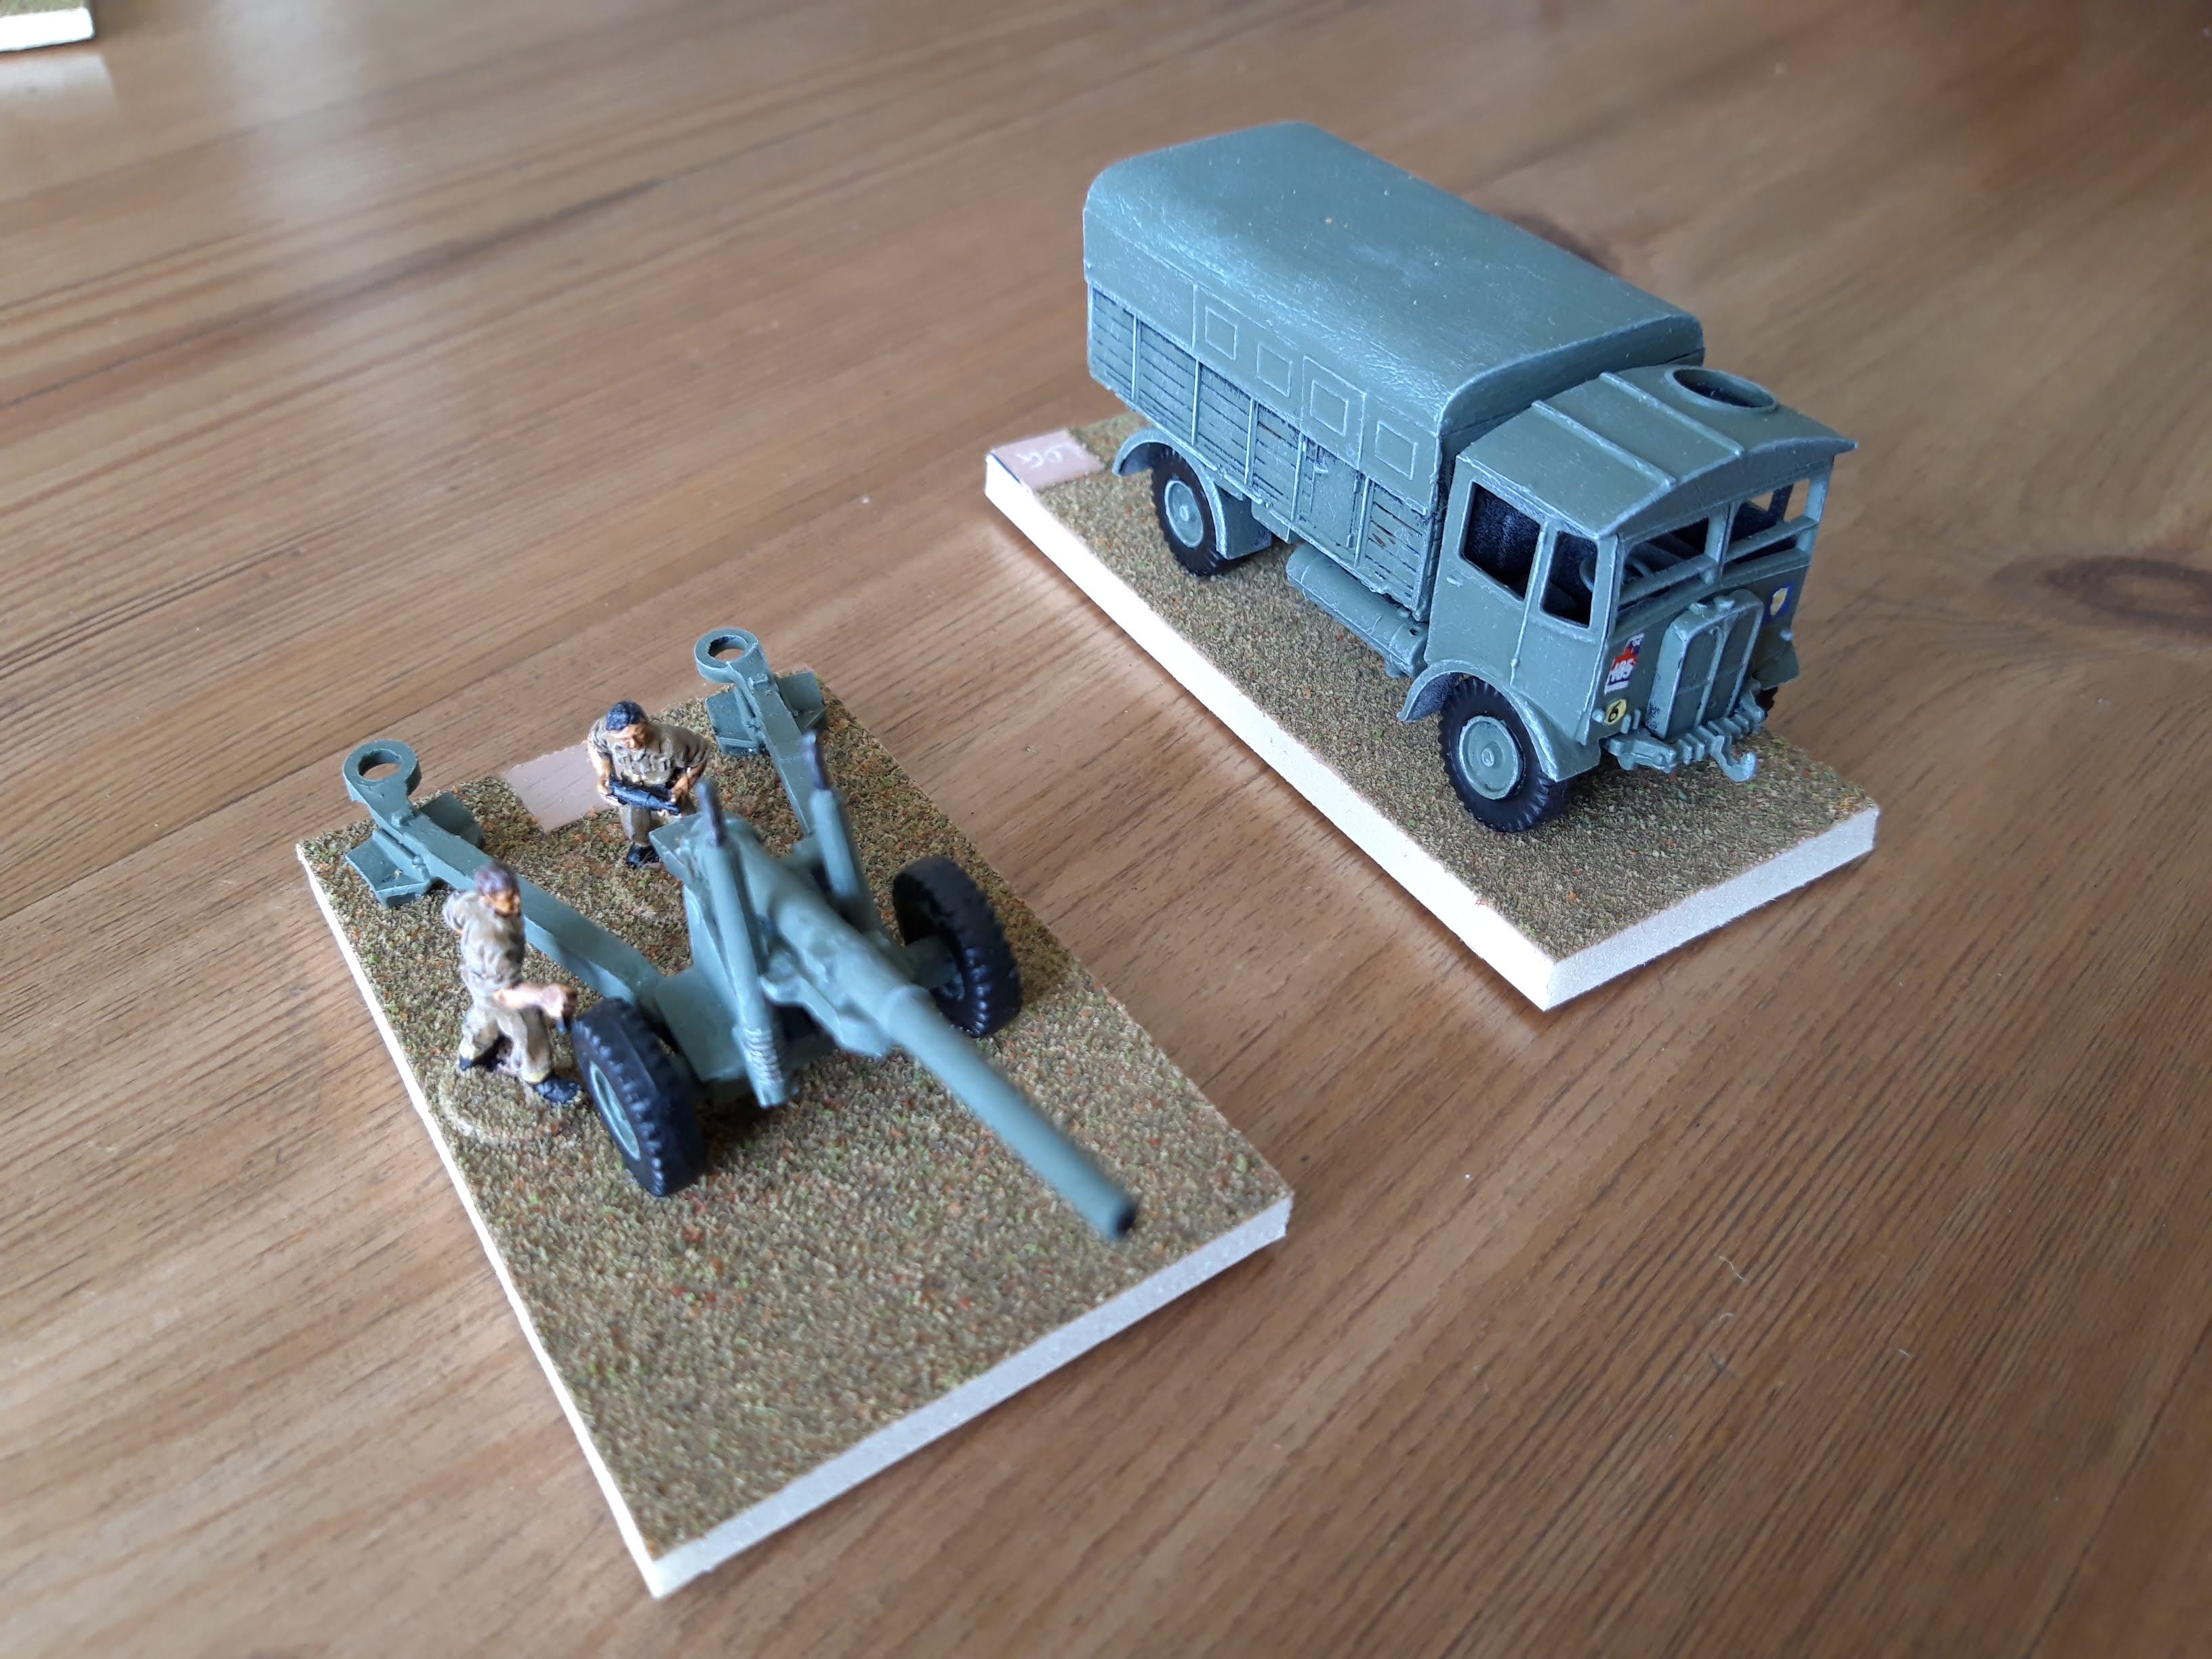
I had originally hoped to do this in 15mm, and just to prove I can, here is 107th Panzer in 15mm! 1944 pattern Panzer Battalion on the left with Panthers and Jagdpanzer IVs, fully armoured Panzergrenadier battalion on the right which includes Stummels and integral platoons of Sdkfz 251/22c 'Drilling' in each company. Brigade HQ has a 120mm mortar company, a full company of 'Drilling' and a panzer engineer company.

Sadly, the vehicles were just too big en masse for the Hexon hexes (especially all those Panthers), so I went with it in 6mm instead. It still looks quite impressive in the smaller scale.

2/501st in Veghel. They are split along the water front to cover both bridges, and have a 57mm AT platoon as well.

Coming up the road along with a load of XXX Corps supply trucks is an AA battery from 2nd Army. The Luftwaffe was very keen on bombing the bridges up Hells Highway (there were massed bombing raids on Eindhoven), so AA protection was a priority. This battery has both 40mm Bofors guns and 3.7" guns. I do have some 3.7s in 15mm, but only Bofors on 6mm so that will have to do.

Vast quantities of Allied reinforcements would turn up in a few turns. In sequence, 2/506th PIR, 3/327th GIR, 44th RTR and 3/506th PIR. So the Germans had better get cracking before this lot rolls up.

KG Walther assembled northeast of Veghel in the woods and fields around Erp. KG Richter on the left and 107th Panzer on the right. irl both forces were meant to advance on the bridges via the canal, KG Richter in a fairly direct approach, while 107th Panzer would loop across the main road and attack from the northwest. The whole lot was supported by an artillery battalion from 180th ID as well as the integral 120mm mortars.

KG Richter. GR 16 on the left, and II/SSPGR 21 on the right, reduced to a couple of companies. The 'Panther' is amalgam of the attached Panther platoons and the surviving Jagdpanzer IVs from the10th SS Panzerjager Abteilung.
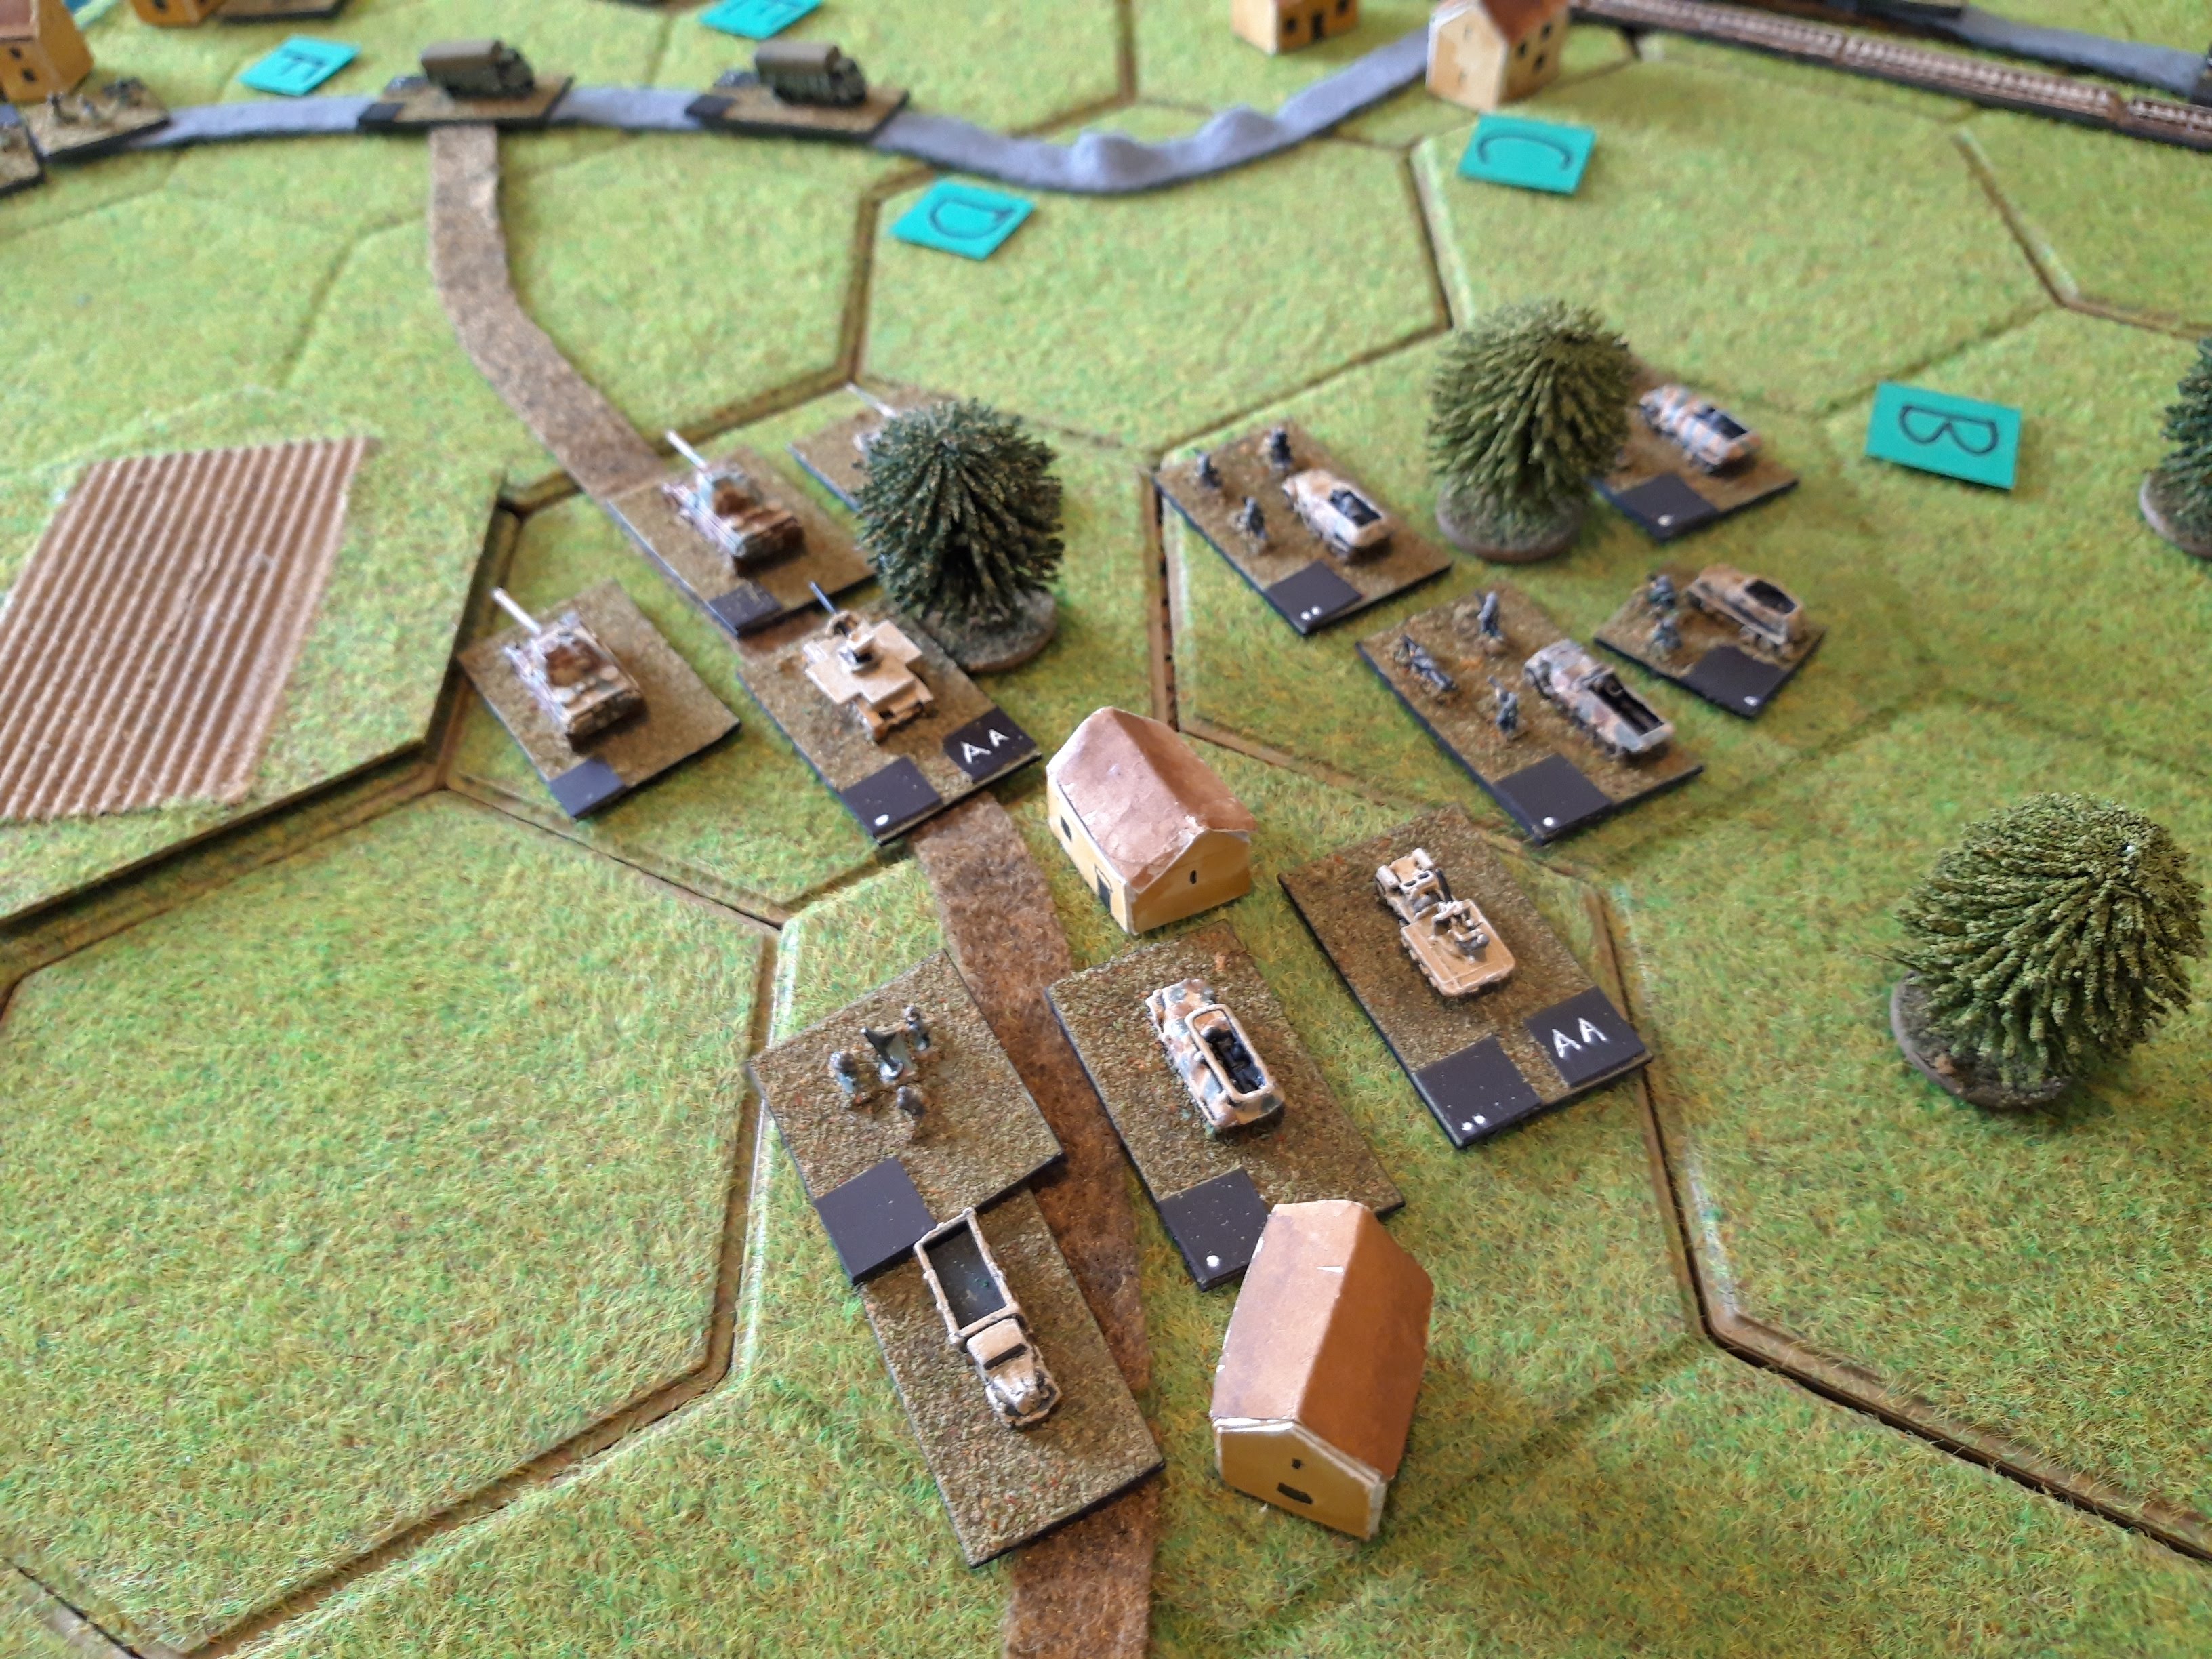
107th Panzer. Panzer battalion on the left, Panzergrenadiers on the right, Brigade HQ in Erp. I gave the Germans the opportunity to cross attach companies but they chose not to.

They look quite scary from the front. Almost like the shot of the German tanks hiding in the woods in 'A Bridge Too Far'. The main problem with this unit was the low level of training of the tank crews.

The action opened with a Ju 88 raid on Veghel! It scattered bombs quite close to the bridge but otherwise had no effect. First outing for my new H&R Ju 88.

107th Panzer rolled forwards, shooting up some of the supply trucks as they went. The Panzergrenadiers occupied Marienheide (one of the German objectives) while the Panzers cut the road. The faster Panthers left the Jagdpanzers and Flakpanzers behind.

The British AA battery rolled up and unlimbered on the south side of the road bridge, under German shell fire.

KG Richter advanced. The SS pushed up to the edge of the fields and came under ineffective artillery fire from British Sextons. GR 16 was reluctant to move however.

Next turn KG Richter pressed on. GR 16 finally moved into the fields by the canal, but SS PGR 21 was pinned by artillery fire and suffered some losses from the US paras in Veghel. The British AA engaged the Panthers at point blank range and the Germans morale failed (despite being SS, German morale isn't very good in this battle). The SS infantry went to ground and the armour withdrew back to the edge of the fields.

107th Panzer pressed on around the top of Veghel. The Panzers massed to provide fire support and the Panzergrenadiers closed in on the town. They took minor losses from US defensive fire and the US managed to drop their final protective fire barrage on their own positions! Fortunately it was ineffective.
The Germans called in artillery and mortar fire on the US Paras which bracketed their position. Direct fire was more successful and one of the US companies was hit. All those Panthers, Jagdpanzers and Flakpanzers put down quite a lot of HE firepower...

Over in the east the 25pdrs finally got the range, and coupled with US small arms fire, the SS infantry packed up headed back for Germany. That open hex next to the bridge was looking very unattractive to the Germans.
At this point 2/506th came on marching up the highway from the southeast.

Realising they didn't have much time, KG Richter advanced again. The remaining panzers fired and advanced, inflicting some losses on the defenders. GR 16 marched straight into the British barrage, but despite taking losses, their morale held!

Not so the 107th Panzergrenadiers who broke under the US artillery barrage. They took advantage of their armoured halftracks to mount up and withdraw to the woods to reorganise. German artillery fire inflicted another loss on the defenders.

More US defensive fire knocked a hit off the 107th panzer engineers but they held on.
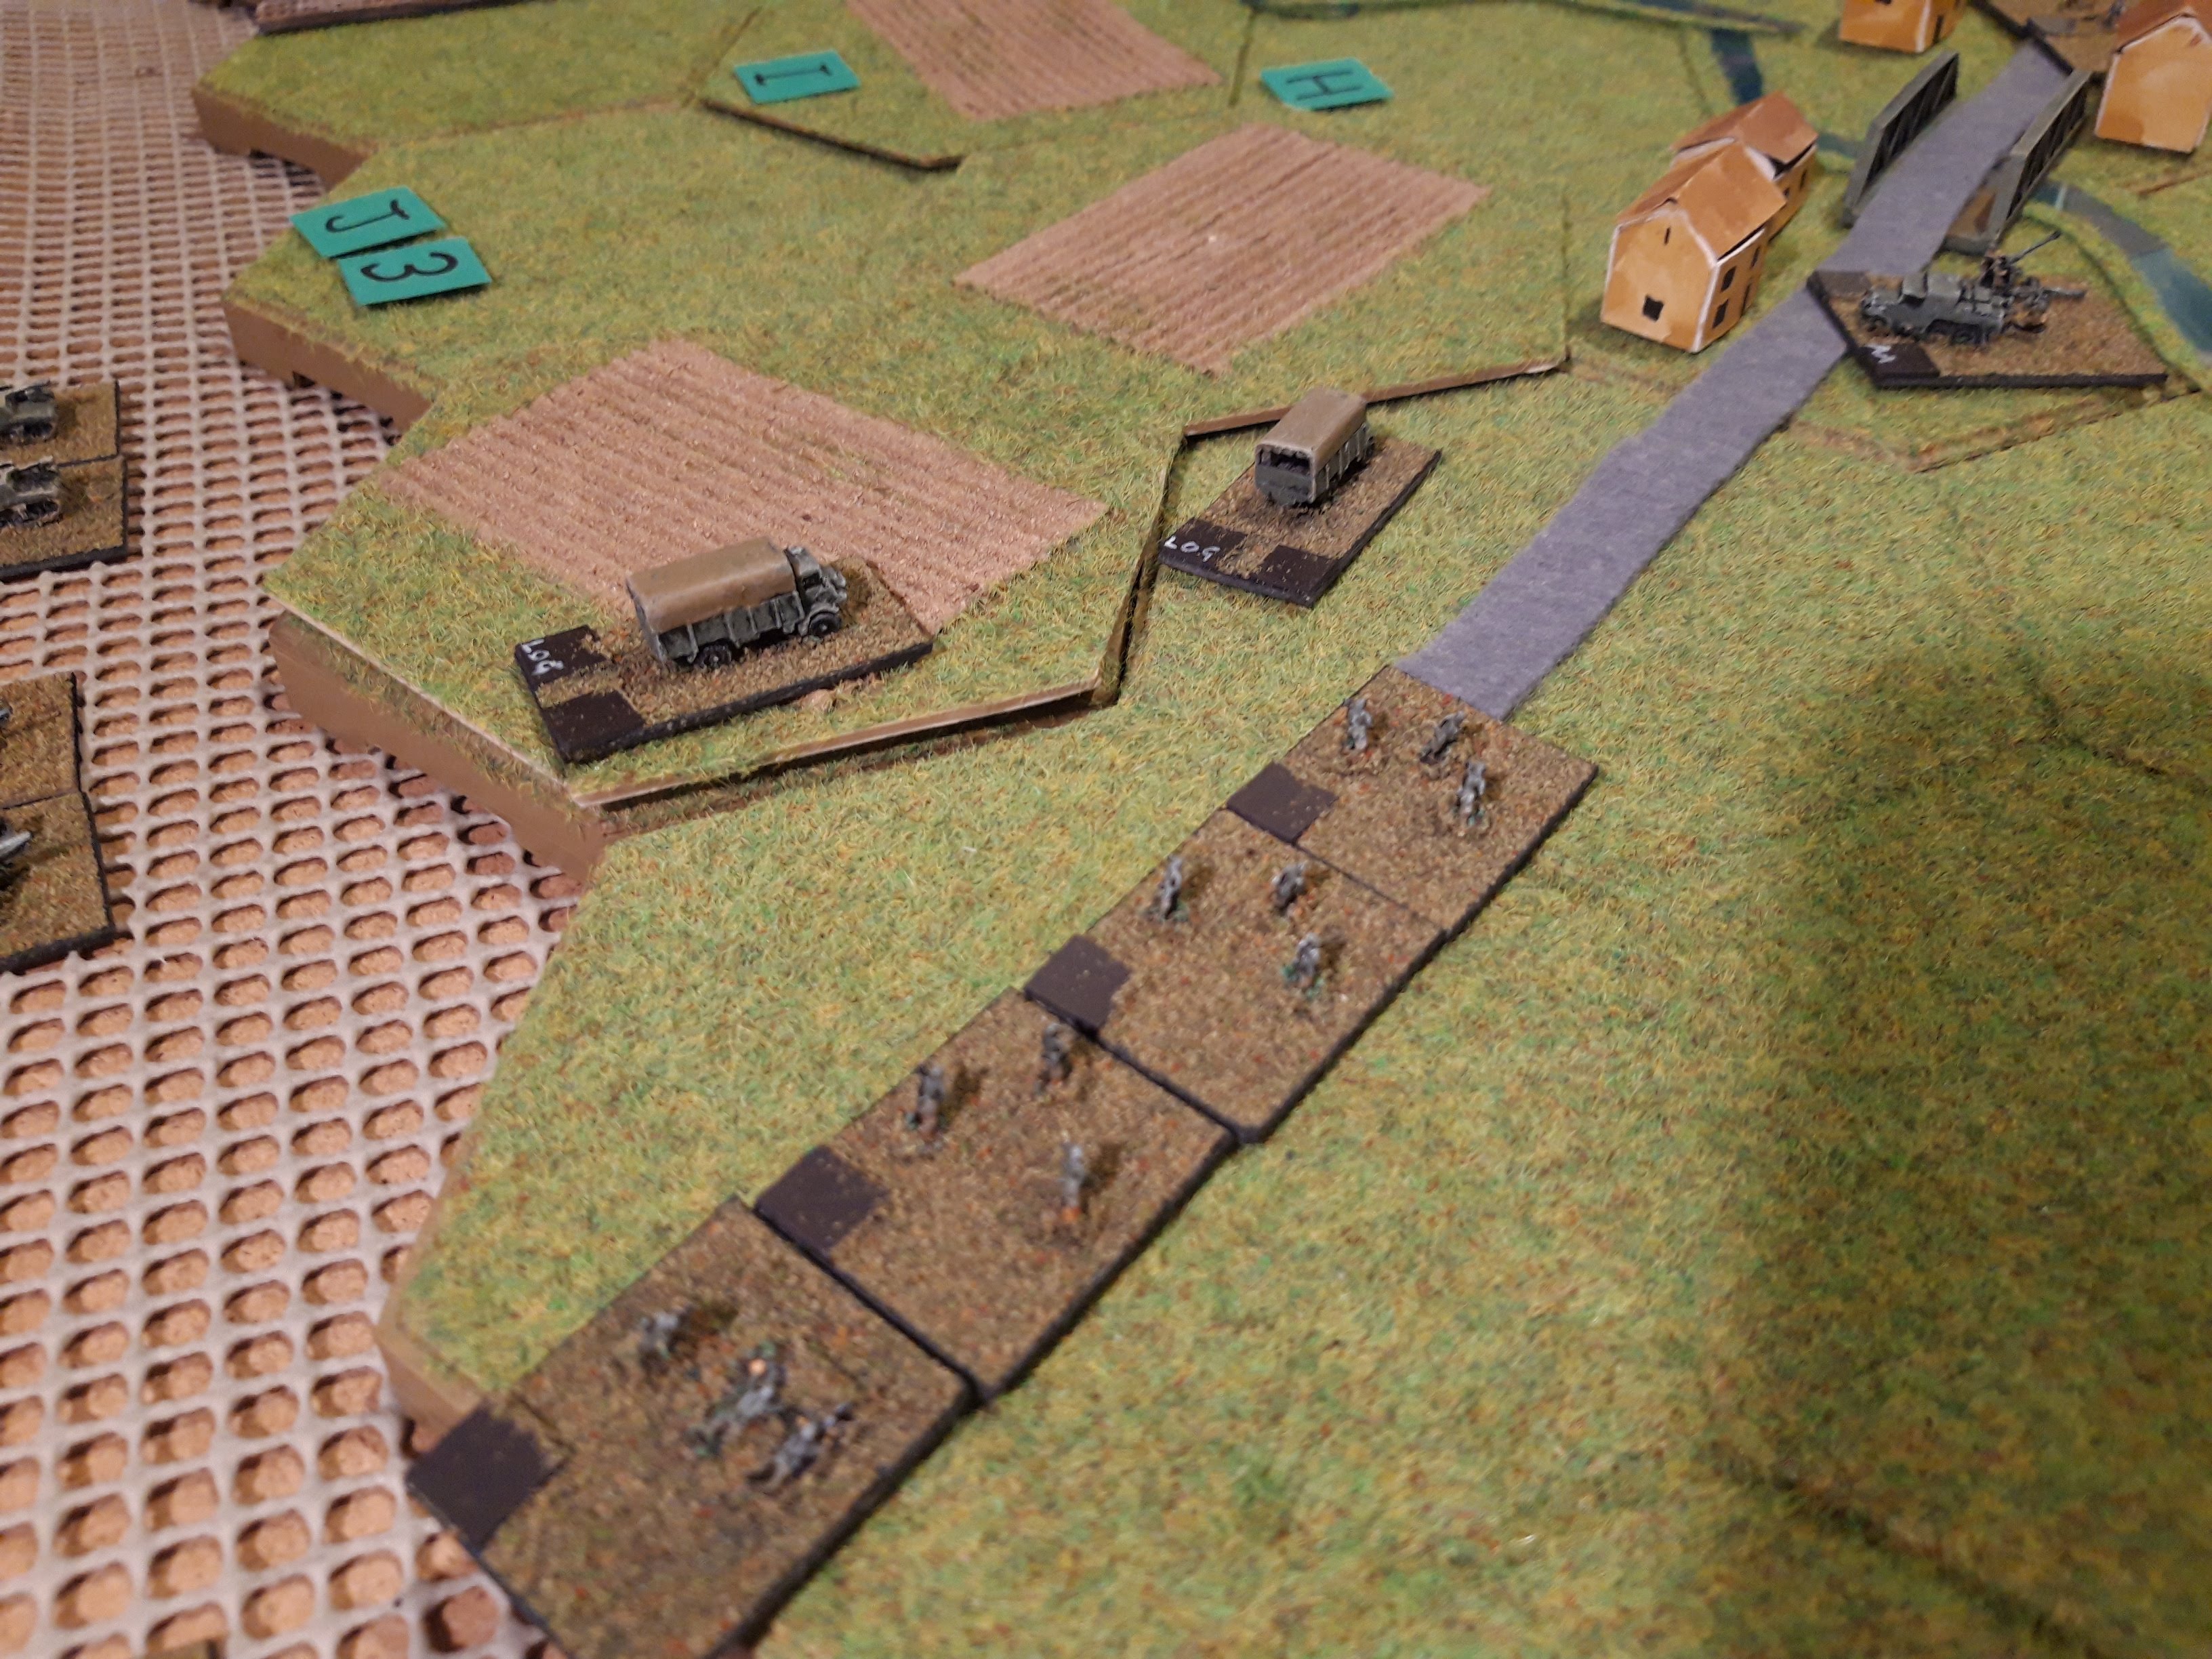
Ooer, whats this? 3/327th Glider Infantry came marching back down Hells Highway from the north and occupied Udem. This strong battalion (glider troops have more heavy equipment than Paras) now threatened both Marienheide and Erp.
At that point we broke for the evening as both sides pondered what to do next.

2/506th piled up the highway in march column to get into Veghel rapidly. This left them hideously vulnerable to to GR 16 who poured withering fire into the packed column and inflicted heavy losses.

Behind them came 44th RTR, and faced with the traffic jam and German fire ahead, set off cross country across the fields to the other bridge.

As the 107th Panzergrenadiers reorganised, the panzer battalion poured fire into the western end of Veghel. Coupled with artillery and mortar fire this removed the last of the US paras in this part of town and the survivors went off to skulk in the cellars. Under fire from 45 tanks and SP guns supported by 30 artillery pieces and heavy mortars, this was hardly surprising.

At the eastern bridge, the Germans unleashed their Wunderwaffen, the SP flamethrowers of the 107th Panzer Engineers! This removed another US Para company but their morale held.

In the north the Panzers relocated to Marienheide to defend the town against the 327th. Trying to defend a BUA with armour isn't ideal, but the panzergrenadiers were busy elsewhere. The glider infantry moved stealthily through the woods as the tanks moved into position.

Hoping to take advantage of the narrow streets to stalk the armour, the Glider troops advanced across the fields in waves planning to break into the town.

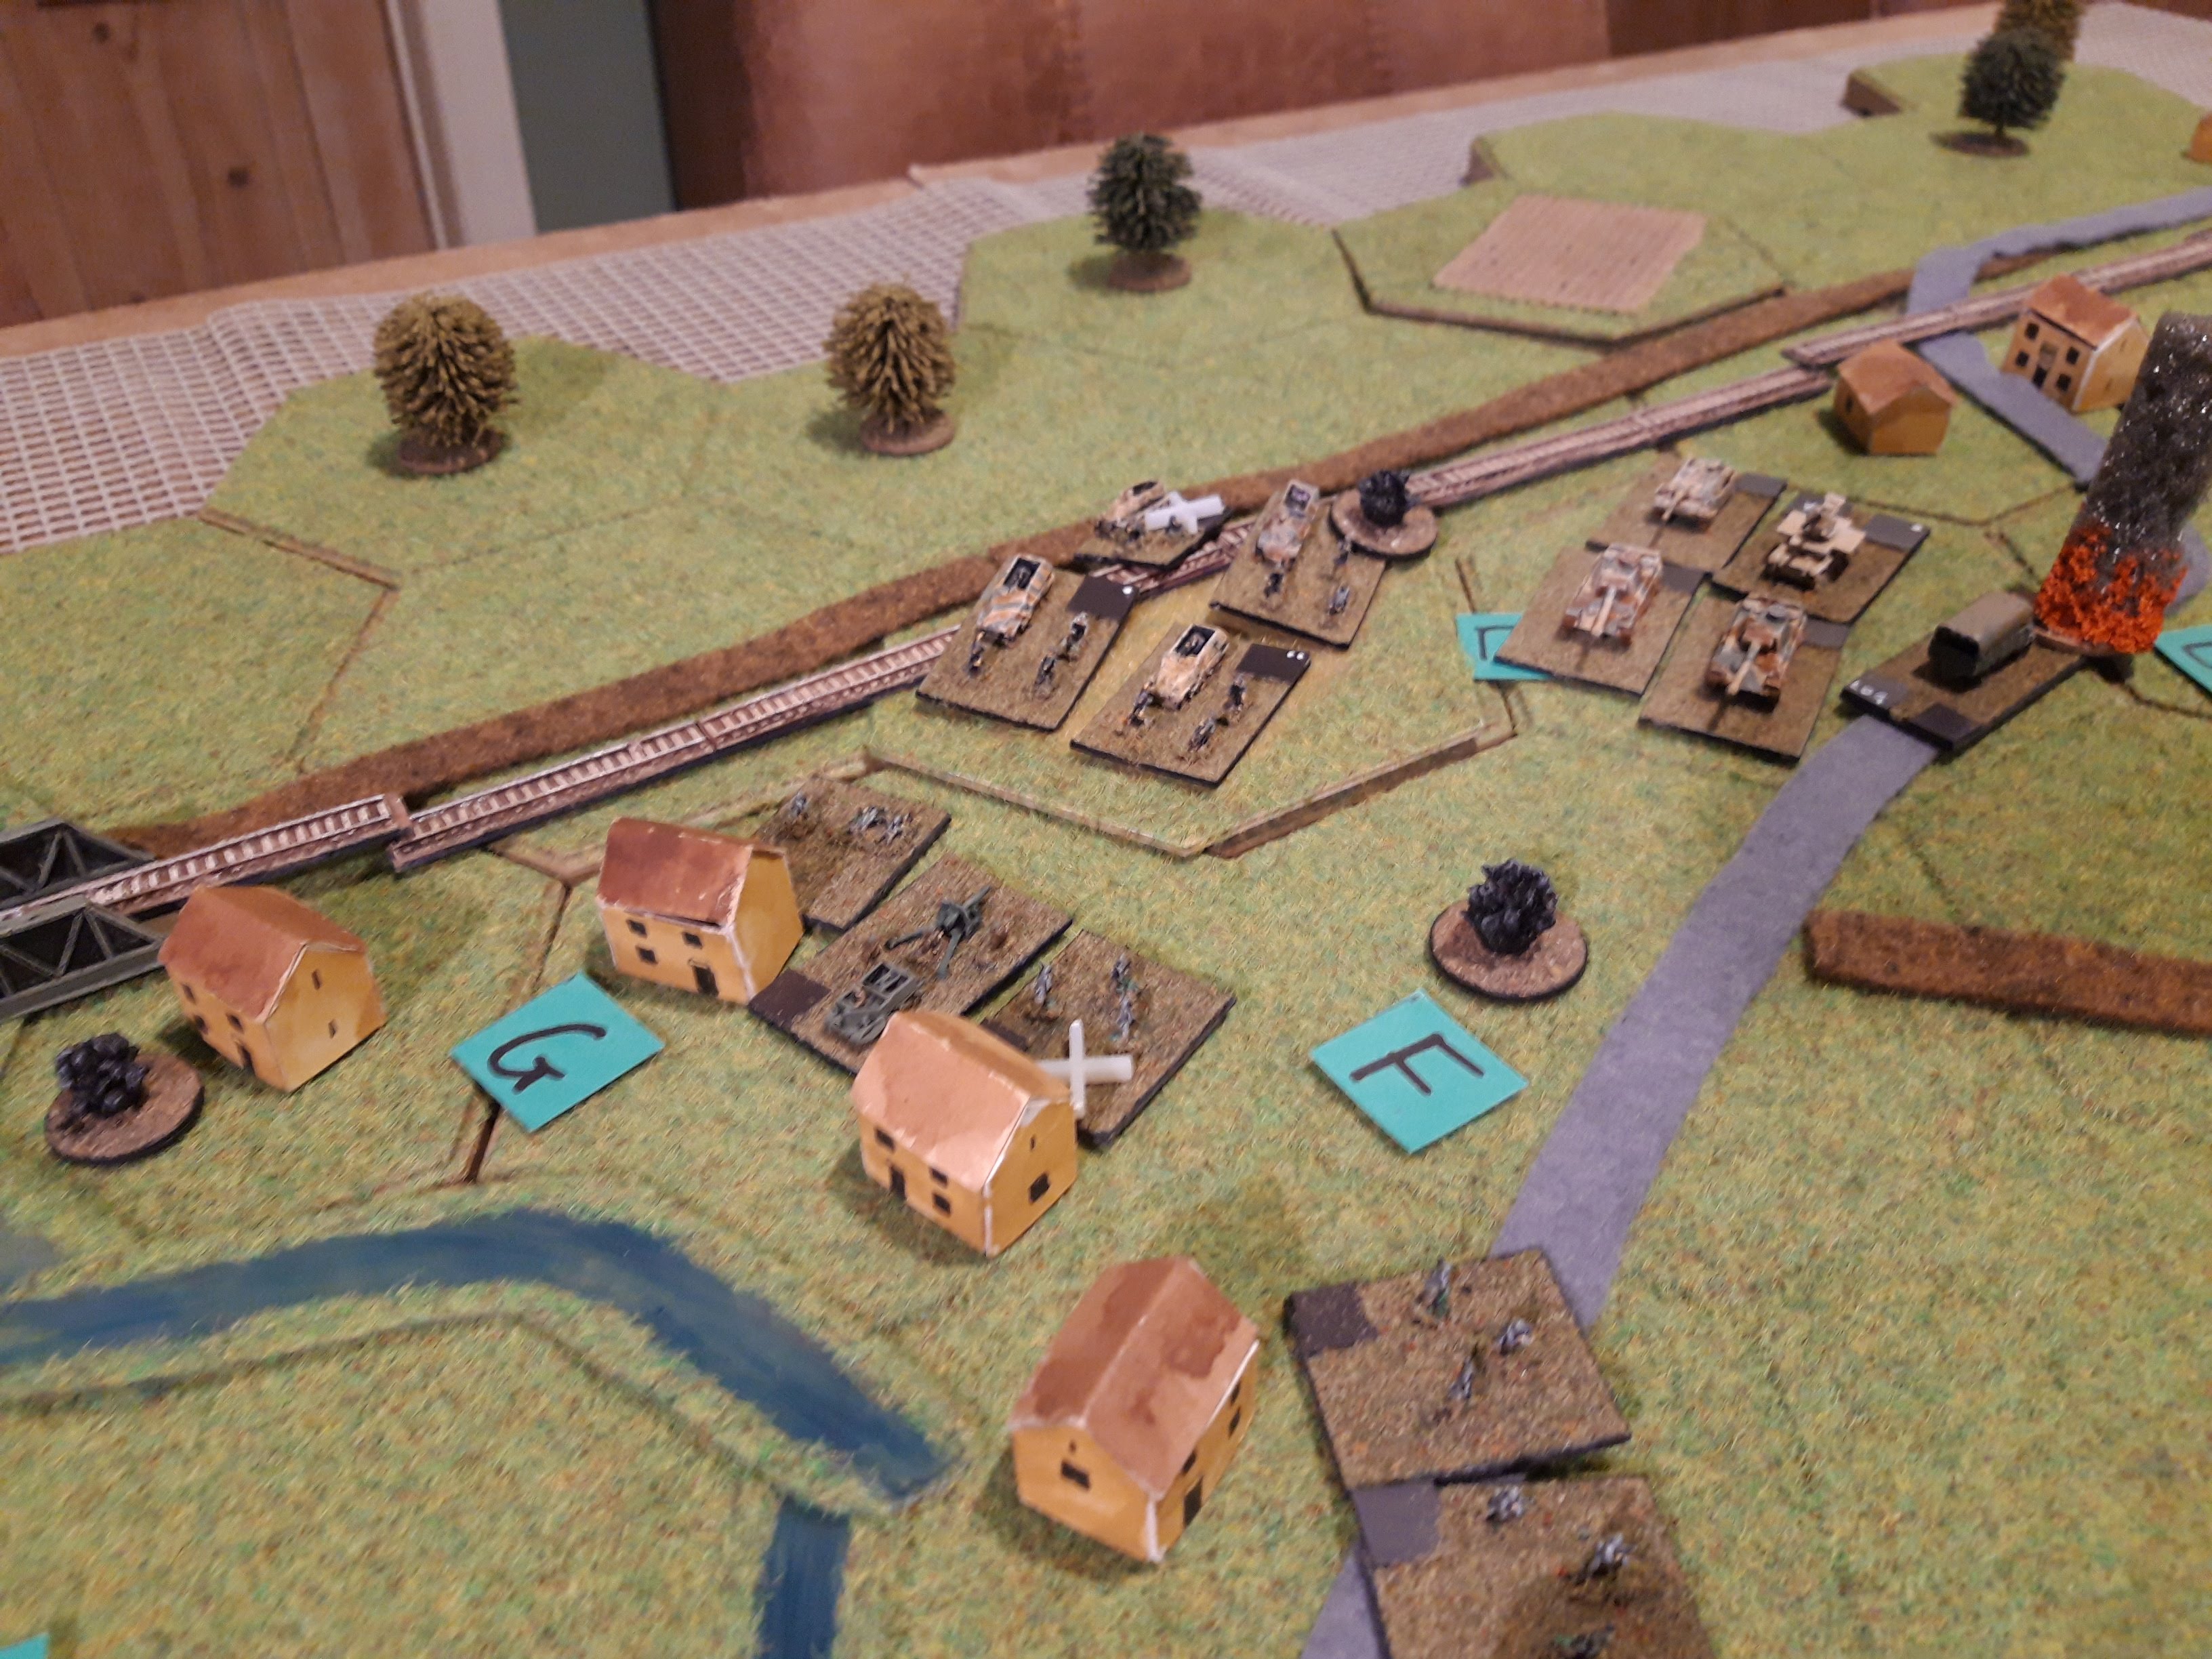
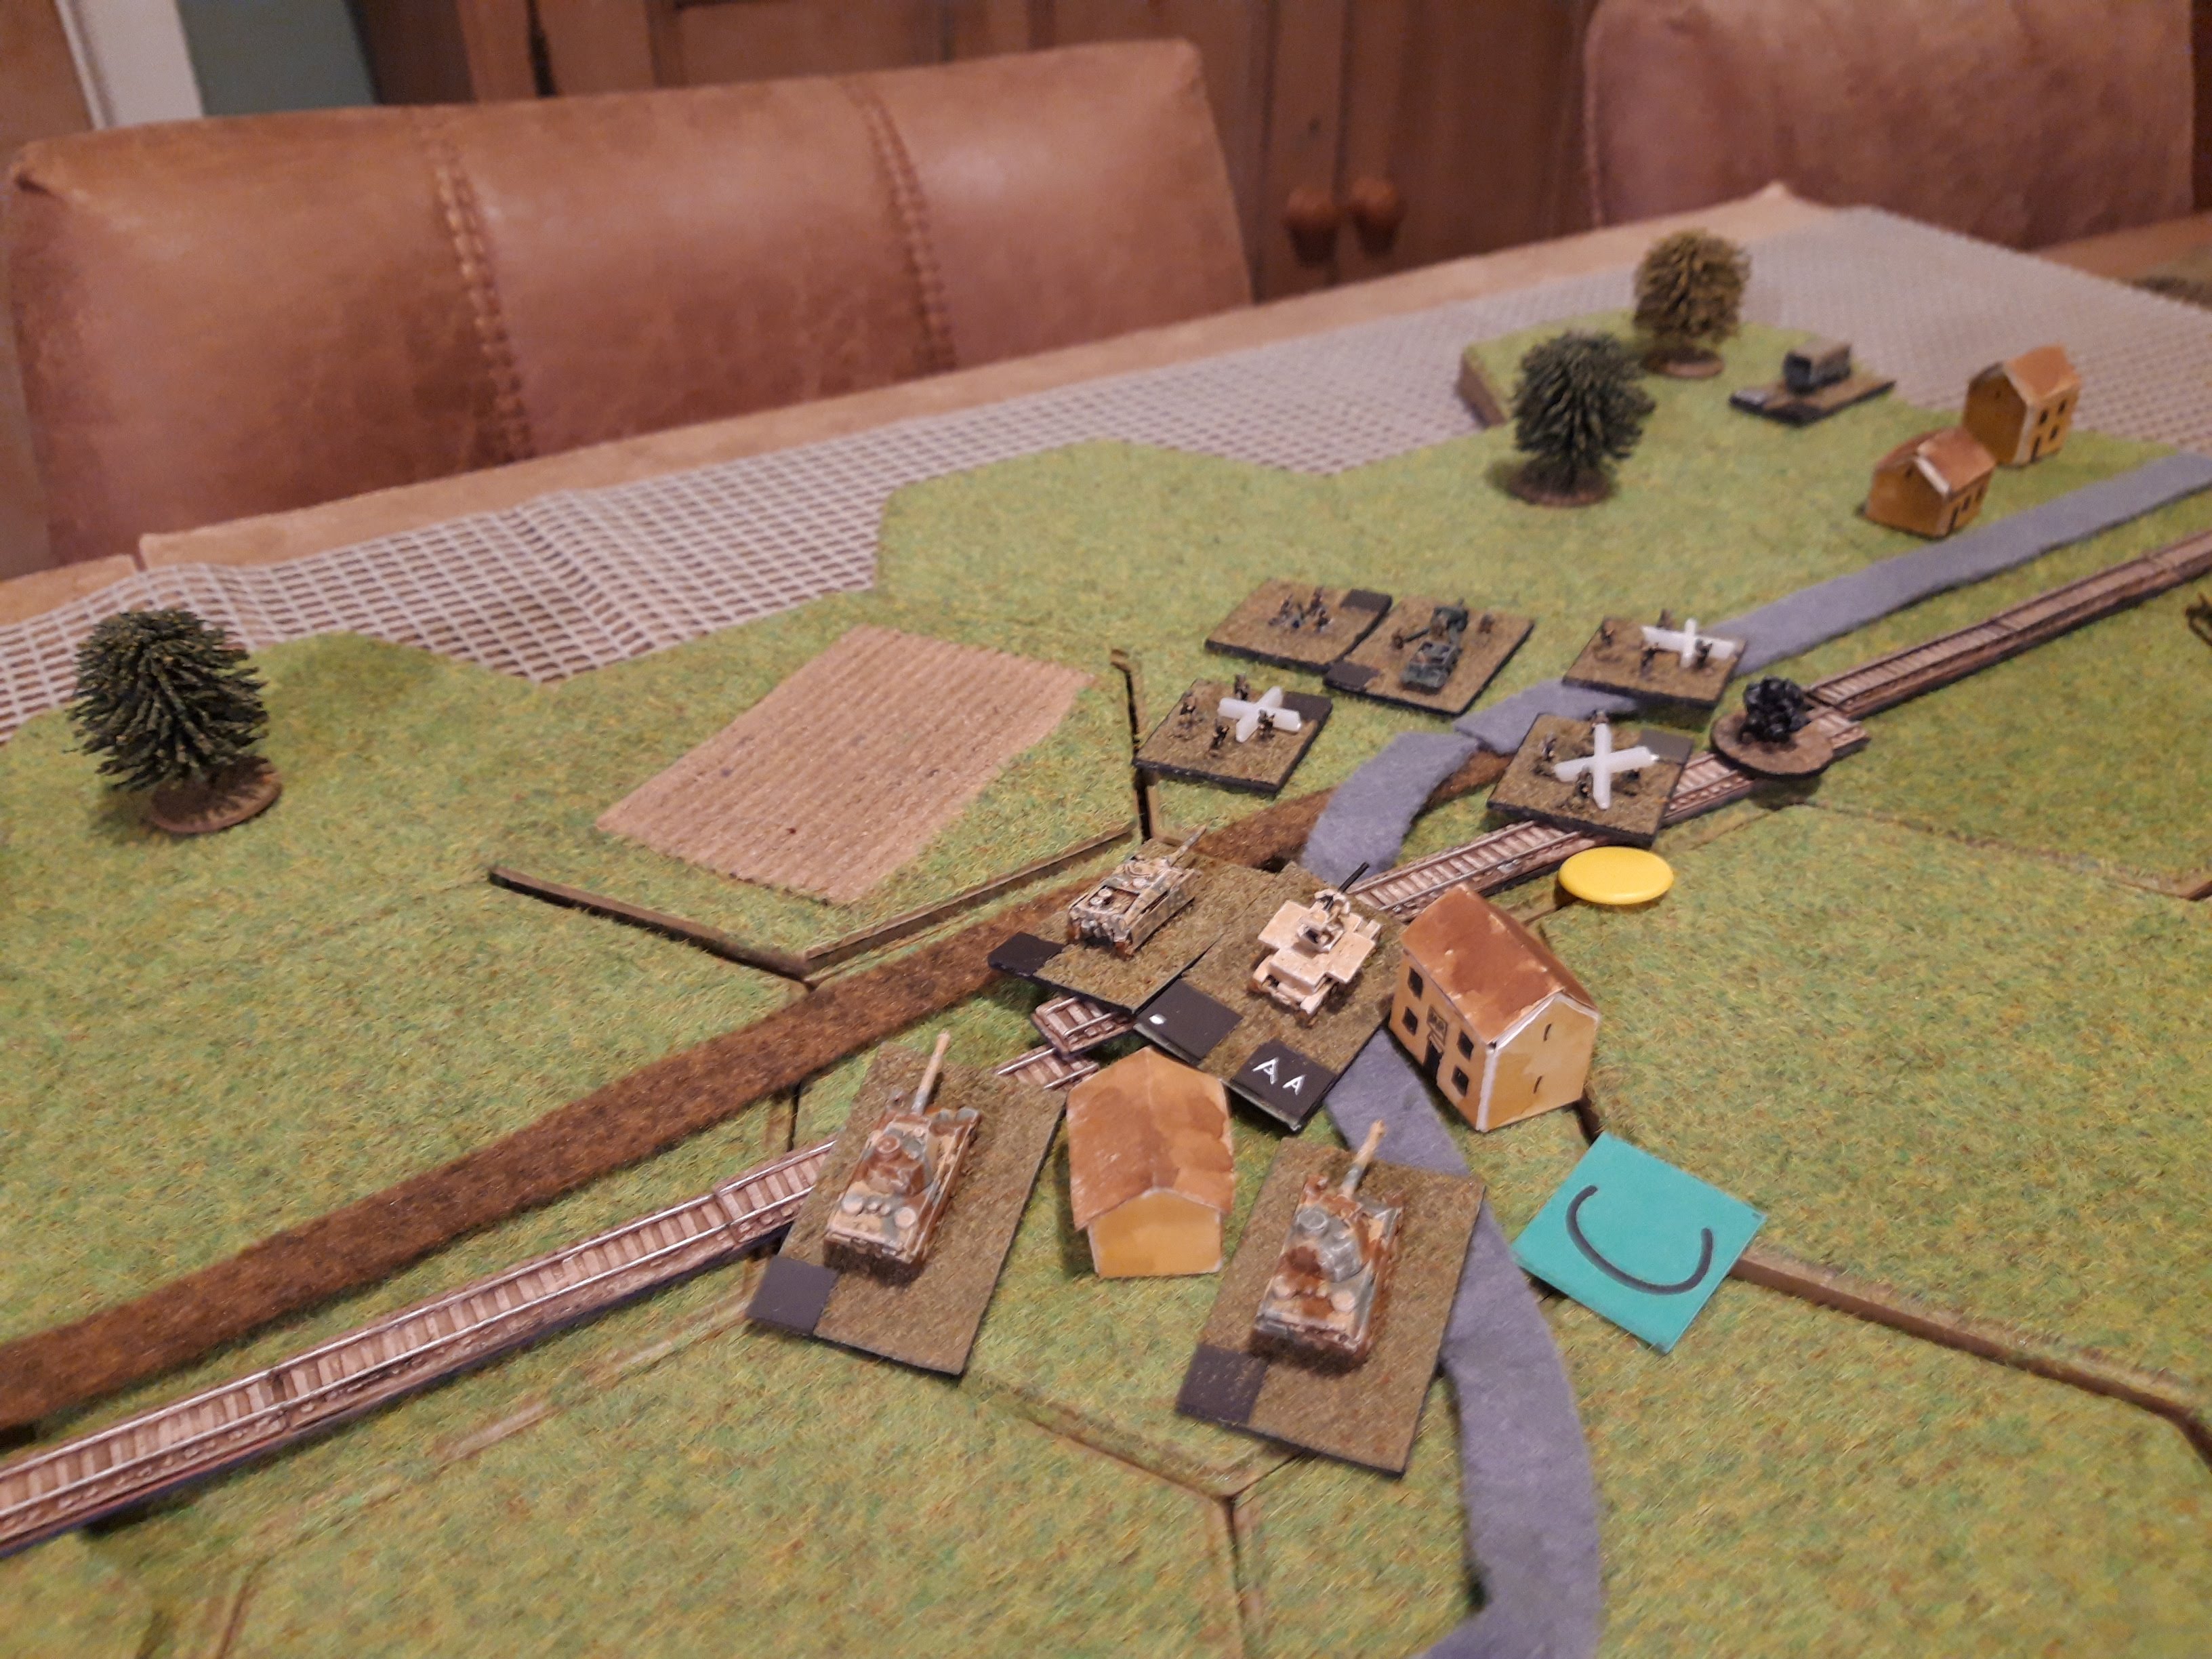
Meanwhile back in Veghel GR 16 were being slowly whittled away by fire, so the armoured elements of KG Richter moved to support them. They took the opportunity to flamethrower the US positions on the far side of the bridge. The Paras weren't too bothered but the AA gunners didn't like that at all and packed up and left in some disorder.
Meanwhile at the west end of Veghel (just visible in the distance), the 107th Panzergrenadiers dashed forwards into the vacated US positions and seized the north end of the bridge! 44th RTR moved up the canal bank to engage them.

Panzergrenadiers take the North end of the bridge. A bit blurry.
The Glider troops advancing on Marienheide fell apart under a storm of direct gunfire and artillery fire. They were actually a bit unfortunate with their morale test (anything but a 1), but the result felt right.

They fell back to the woods next to Udem to reorganise.

At the eastern end of Veghel, GR 16 had finally had enough and headed back to the cover of the fields. This sector settled into stalemate as the US paras couldn't effectively engage the German armour out in the open, while the Germans were very reluctant to put their unsupported armour in the town.
The US still controlled both ends of the bridge (the handful of survivors from 1/502nd were still hanging on), but the bridge itself was interdicted by the guns of the Panthers.

Over at the other bridge, there was a furious exchange of fire between the Shermans and Panzergrenadiers (the PG companies had integral Flak platoons as well as the Stummels of the heavy company) supported by artillery. The Shermans took some losses but the Germans came off a bit worse.
Under the covering fire of the Shermans, 3/506th, who had been marching up the road from the southwest, launched a heroic charge over the bridge.

The Germans were in cover, the US Paras in the open, crossing a canal but far higher quality troops. When the smoke cleared, both sides were hanging on, locked in brutal close combat fighting.

Another round of fighting saw the remaining Germans defeated and the surviving US Paras reoccupied the north end of the bridge. That was a close run thing!

Time was running out now. Although the glider infantry reorganised, the Germans still had firm control of Erp and Marienheide.

44th RTR crossed the canal via the rail bridge. The going was rather slower than up the main highway and they just got to the edge of the town.

Back in the east, the AA guns moved back into position to try and drive off the German tanks, but it was too little too late and as the game ended, the Germans were still interdicting the main highway here with their tank guns.
With the road cut in two places and the German line of communications still open via Erp, that was enough for a German victory, even if they hadn't managed to actually demolish one of the bridges. That was actually pretty close to the historical outcome, except IRL it was the 107th Panzer Battalion which cut the route at the western bridge, while KG Richter was defeated in the east. In any case, the highway was thoroughly cut which would severely hamper XXX Corps efforts to break through to Arnhem.
That all went very well, although I thought it was all up for the Germans by turn four, they managed to turn things around. Medals all around to 2/501st who still hung on in Veghel despite massive losses, and to 3/506th for their heroic river/canal assault.