Monday 27 January 2020

I have been to.... Prague

Along with the club games day, another seasonal outing was a long weekend in Prague after New Year (I wasn't due back at work until the 6th Jan). I was fairly unfamiliar with the history of the city, apart from highlights from the Thirty Years War (the Defenstration of Prague and the Battle of White Mountain) and all that unpleasantness in 1938 and 1968.


This s the Powder Tower, part of the old city defences built by Charles IV on the northeastern side of the inner city. The walls are now rows of shops and the old moat is a boulevard.


The Old Town Hall, which features an amazing astonomical clock which is around 600 years old.


A memorial to Jan Hus, of Hussite Wars fame. Also an inspiration to Erasmus and to a greater extent Martin Luther (the original one, not the 1960s one).


The Powder Tower again, with some traffic to give an idea of its size.


The boulevard which was old moat leads down the Charles Bridge on the south side. This was also built by Charles IV, by which time the Old Town had been supplemented by the 'New Town' outside the old defences. The New Town was built in the 1400s... 


Like Berlin, Prague has a museum dedicated to the years of communist rule. This one occupied a similar size as the DDR museum in Berlin.

I think the caption rather says it all.


I was rather taken with this cheery Russian accordian player.


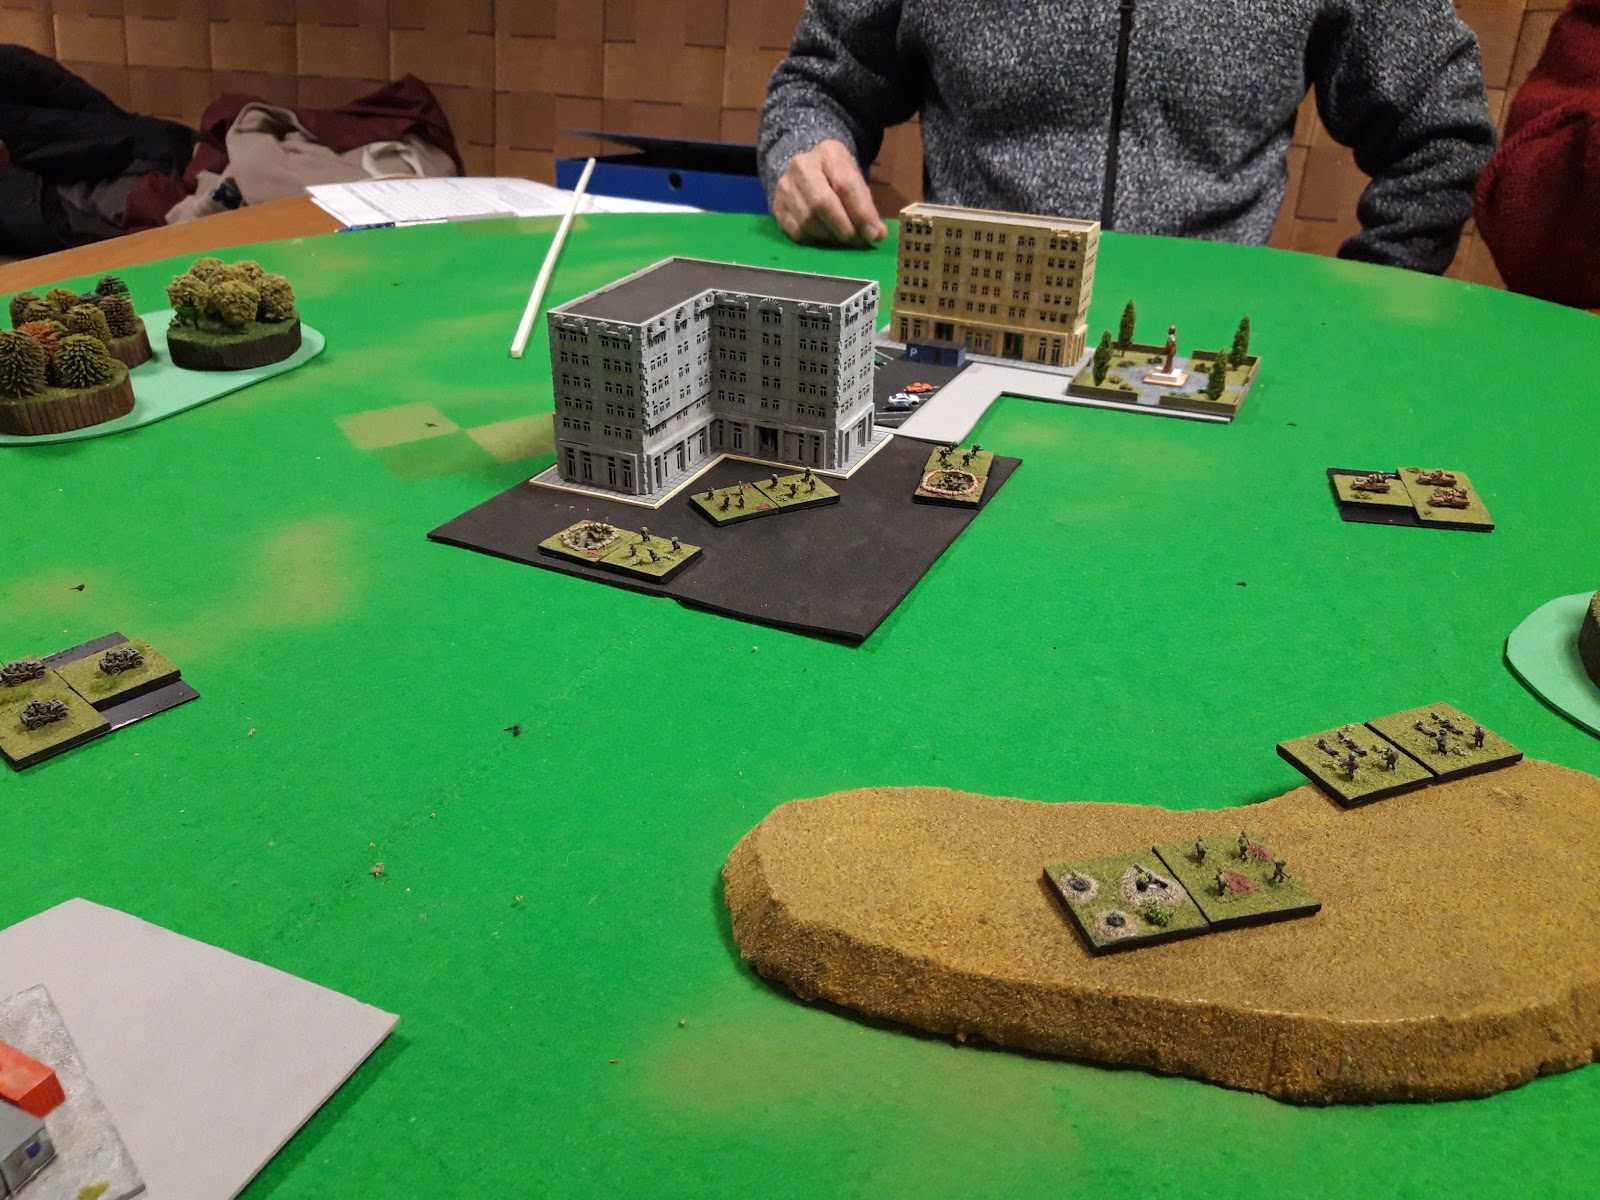
Czech volunteers crossing the Charles Bridge.


There was a posing spot with Stalin and Lenin. How could I resist? Power to the People!


And an interesting display about Chernobyl. The VI Lenin Nuclear Power Station isn't that far from Prague, as radiation clouds blow.

A moderately high rated radiation dosimeter. This one goes up to 3,500 things (I guess rads not sieverts). 

There were examples of typical shops, workshops and this school room.
The museum was OK, but not as good as the Berlin one, far too wordy.

The Old City of Prague is nestled in a curve of the Vlatava river, a reasonable defensive position which meant the walls didn't have to be as long. On the other side of the river is a big hill, which is naturally a much better place to put the castle. Here it is looming on the horizon. It overlooks the Charles Bridge.


The 'castle' is pretty grand, more a collection of huge palaces as it was the capital of Hapsburg Empire for quite a long time. Now that was something I didn't know.

Ceremonial guards armed with very shiny SKS carbines. Soldiers with camo uniforms and AKs can be seen lurking in the background. It was very, very cold so the fur hat and coat were a good idea.


Prince Schwarzenberg Palace. This housed both the Barque art collection and was the temporary home of the Renaissance art collection.

This is one of the Medici's, Cosimo I think.


One of the numerous Breugal winter scenes.

Tucked away in a corner was this Byzantine painting (it looked like it was painted on wood). Amazingly it dates from the second century, I think it is the oldest modern style painting I've ever seen.

St Vitus Cathedral. This is a vast building and dominates the skyline of the city.

One thing I was very excited to discover close to our AirBnB was a musuem to the Czech paratroopers who assassinated Reinhard Heydrich in 1942.


There is a plaque outside, bullet holes still in evidence.


The paras made their final stand in this Church after being betrayed to the SS. The museum is in the basement and crypt.


The basement museum has lots of photos, background information and various artefacts.


I was particularly taken with the jump helmet and this useful piece of parachute as a colour reference.


There is loads of information about the operation, they jumped from this Halifax. The map shows the Luftwaffe plot óf the flight route. Although this museum is also quite wordy, it works much better than the Museum of Communism as it is so much smaller and more intimate.


The six Czechs who fought at the church.


The aftermath of the gun battle at the Church. The paras mainly committed suicide rather than be taken prisoner


Heydrichs car after been partly demolished by an anti-tank grenade. He died of wounds later, a very unpleasant person and good riddance. The Germans inflicted appalling atrocities on the Czech population in reprisal and it has become a symbol of Czech resistance to occupation.

I've not really done the museum justice, it really was excellent and very moving. It is also free, with voluntary donations. 


On a more cheery note,I was pleased to find that the Czech diet is similar to the Hungarian one, mainly meat and beer. Here is a healthy eating option, yes there really are one or two vegetables amongst the pile of meat and beans.


Thursday 23 January 2020

Club Christmas Games Day

Traditionally the Sheffield Wargames Society has an extended meeting over the Christmas period. This year it was on the 27th December. I went along after lunch and found a number of games running.


There was this rather grand 28mm Napoleonic game.


I'm not quite sure who the Lancers are. Spanish maybe?


There was another Napoleonic game, this time at the other end of the scale being a big 6mm bash.


I was intrigued by the basing as it is very similar to Twilight of the Sun King with each unit represented by two bases (allowing Line, Column and Square to be easily represented).


We mainly played Nicks 'Bush Horizon' which is a fictional modernish game covering Warring factions in an unnamed region. The game works as a mini campaign with a series of small battles as part of a larger set of operations. Note the circular table!


Within each campaign segment, players allocated their forces across a range of objectives. If the force ratios looked OK, then the battles were fought on the tabletop. 


In this scenario the baddies are defending an urban area, mainly with infantry.


My chaps tried to envelop the defenders. Light armour and SP guns on the flanks, infantry in the centre.


My armed jeeps sped around this very pretty water tower.


Later on there was a much bigger battle! Masses of infantry, with some armour support.


More armed jeeps speeding the other way.


Nicks vast collection of stuff to make the force selections from.

Although I'd brought some things to play, in the end we just played this for most of the afternoon. A very pleasant way of spending the gap between Christmas and New Year.

Saturday 18 January 2020

Sollum, 1940

Tim produced another 54mm WW2 game, this time using the WW2 version of 'Fistful of Lead', which I was keen to try out. For this adventure we were off to North Africa and the heady days of 1940 and Operation Compass. Tim has taken the scenario from the relevant Skirmish Campaigns book (I'm a big fan of those). Jerry, Gary and myself were the wicked Italians, while John was the British (the Welsh Guards no less).


The battlefield, a line of sand dunes lies in front of Sollum and the Egyptian border. View from Libya (west).


The plucky Brits, a rifle section and small HQ element (officer and a Tommy Gun toting Sergeant). These are Airfix 8th Army figures.


The somewhat larger Italian force, three rifle sections and an HQ. Figures from a range of manufacturers and very nice indeed. I was particularly taken with the barechested LMG gunner.


Our chaps had to capture the Stucco building rapidly and ideally get off the far edge rapidly, encircling the British. Our setup are was behind the convenient sand dunes. Deploying in a long line seemed like a good idea as speed was of the essence.  Garys section and mine, I was also apparently in command.


Jerrys guys lurking.


And off over the dunes we went, a mixture of walking, creeping and lying down. Sadly the crest of the dunes revealed the British in very unsporting trenches and even worse, barbed wire and minefields across some of the front. Some of our chaps were wounded or pinned by defensive fire, but in the main the British fire was fairly ineffective.


Our return fire went rather better, the LMGs managed to hit one of the dug in riflemen. I rather like the FFoL activation system, you are dealt as many card as active soldiers and the cards activate in value/suit order, but you choose who gets which card an some of the cards have special abilities (like +1 shooting or automatic reloads). So there is a degree of friction, coupled with some tactical decision making, which enlivens what would otherwise be the dull dice throwing contest so typical of skirmish games.


Even better, one of our riflemen managed to get the Bren gunner. That was lucky. At this end of the line, the dunes were very close to the British trenches, so our rifles were well within effective range.


Things got a bit sticky in the centre and some of our men went down.


But LMG fire managed to pin a lot of the enemy (the yellow markers). By this time the Sergeant had put in appearance, blazing away with his Thompson. He was christened Sergeant Bass (fans of the 'The Defence of Bowler Bridge' will be familiar with the character). At close range, the Tommy Gun was quite scary, especially as we were quite bunched up.


Jerry pushed cautiously up to the wire. One of his men was pinned.


My LMG team. They had done loads of damage as I'd made good use of the activation cards, '2' cards let you roll two dice for each attack and pick the best, which meant they'd been able to blaze away with little chance of a low ammo result. The downside of 2 cards, is they activate a lot later than all the picture cards etc.


Jerry was through the wire, covered by LMG fire! The arm waving Italian Sergeant led the way. A very heroic figure.


Less heroic was the British office who chose this moment to skedaddle, are we sure these are proper Guardsmen? Sergeant Bass grimly hung on however.


Garys riflemen pushe dinto the British trencehs, supported by the LMG team. The platoon CO led bravely from the rear (well, he's only got a pistol, but does give a rally bonus to troops in LOS within 12").


As the Italians closed in on the stucco building, Sergeant Bass made a run for it too, and the British officer was pinned and wounded in a hail of bullets.


Meanwhile Jerrys section took the other British trenches, covered by my LMG.


Sergeant Bass heroically fought off his attackers in close combat, but was wounded in the process.


Jerrys soldiers cleared the remaining buildings and the game was clearly up for the British as they'd only got a couple of men away while the Italians had captured the town and still had the required 12 soldiers left to exit the far edge.


The situation at the end of the game. A decisive Italian victory, which in the Skirmish Campaigns system will give the Italians an advantage in the next battle.

Well, that was a load of fun and worked really well. It seemed to move much faster than the black powder version, possibly because there was a lot less reloading. In hindsight I wonder if the British would have been better wiring/mining the closer sand-dunes and putting the Bren out to cover the much bigger open space at the far end. In any event they were very unlucky to lose their Bren team early on, and the carnage wreaked by the Tommy Gun wield NCO indicates how things could have gone for the Italians. Good stuff!