I wanted to try a remote game of One Hour Napoleonic, but rather than re-hash some of the existing games, I was drawn to Friedland for some reason. It struck me the battle had a big similarity to the OHW 'Bridgehead' scenario, allbeit spread over three days (13th-15th June 1807), so I did a 'sort of' Friedland covering both Lannes' initial action on the 14th and then the full battle on the 15th.

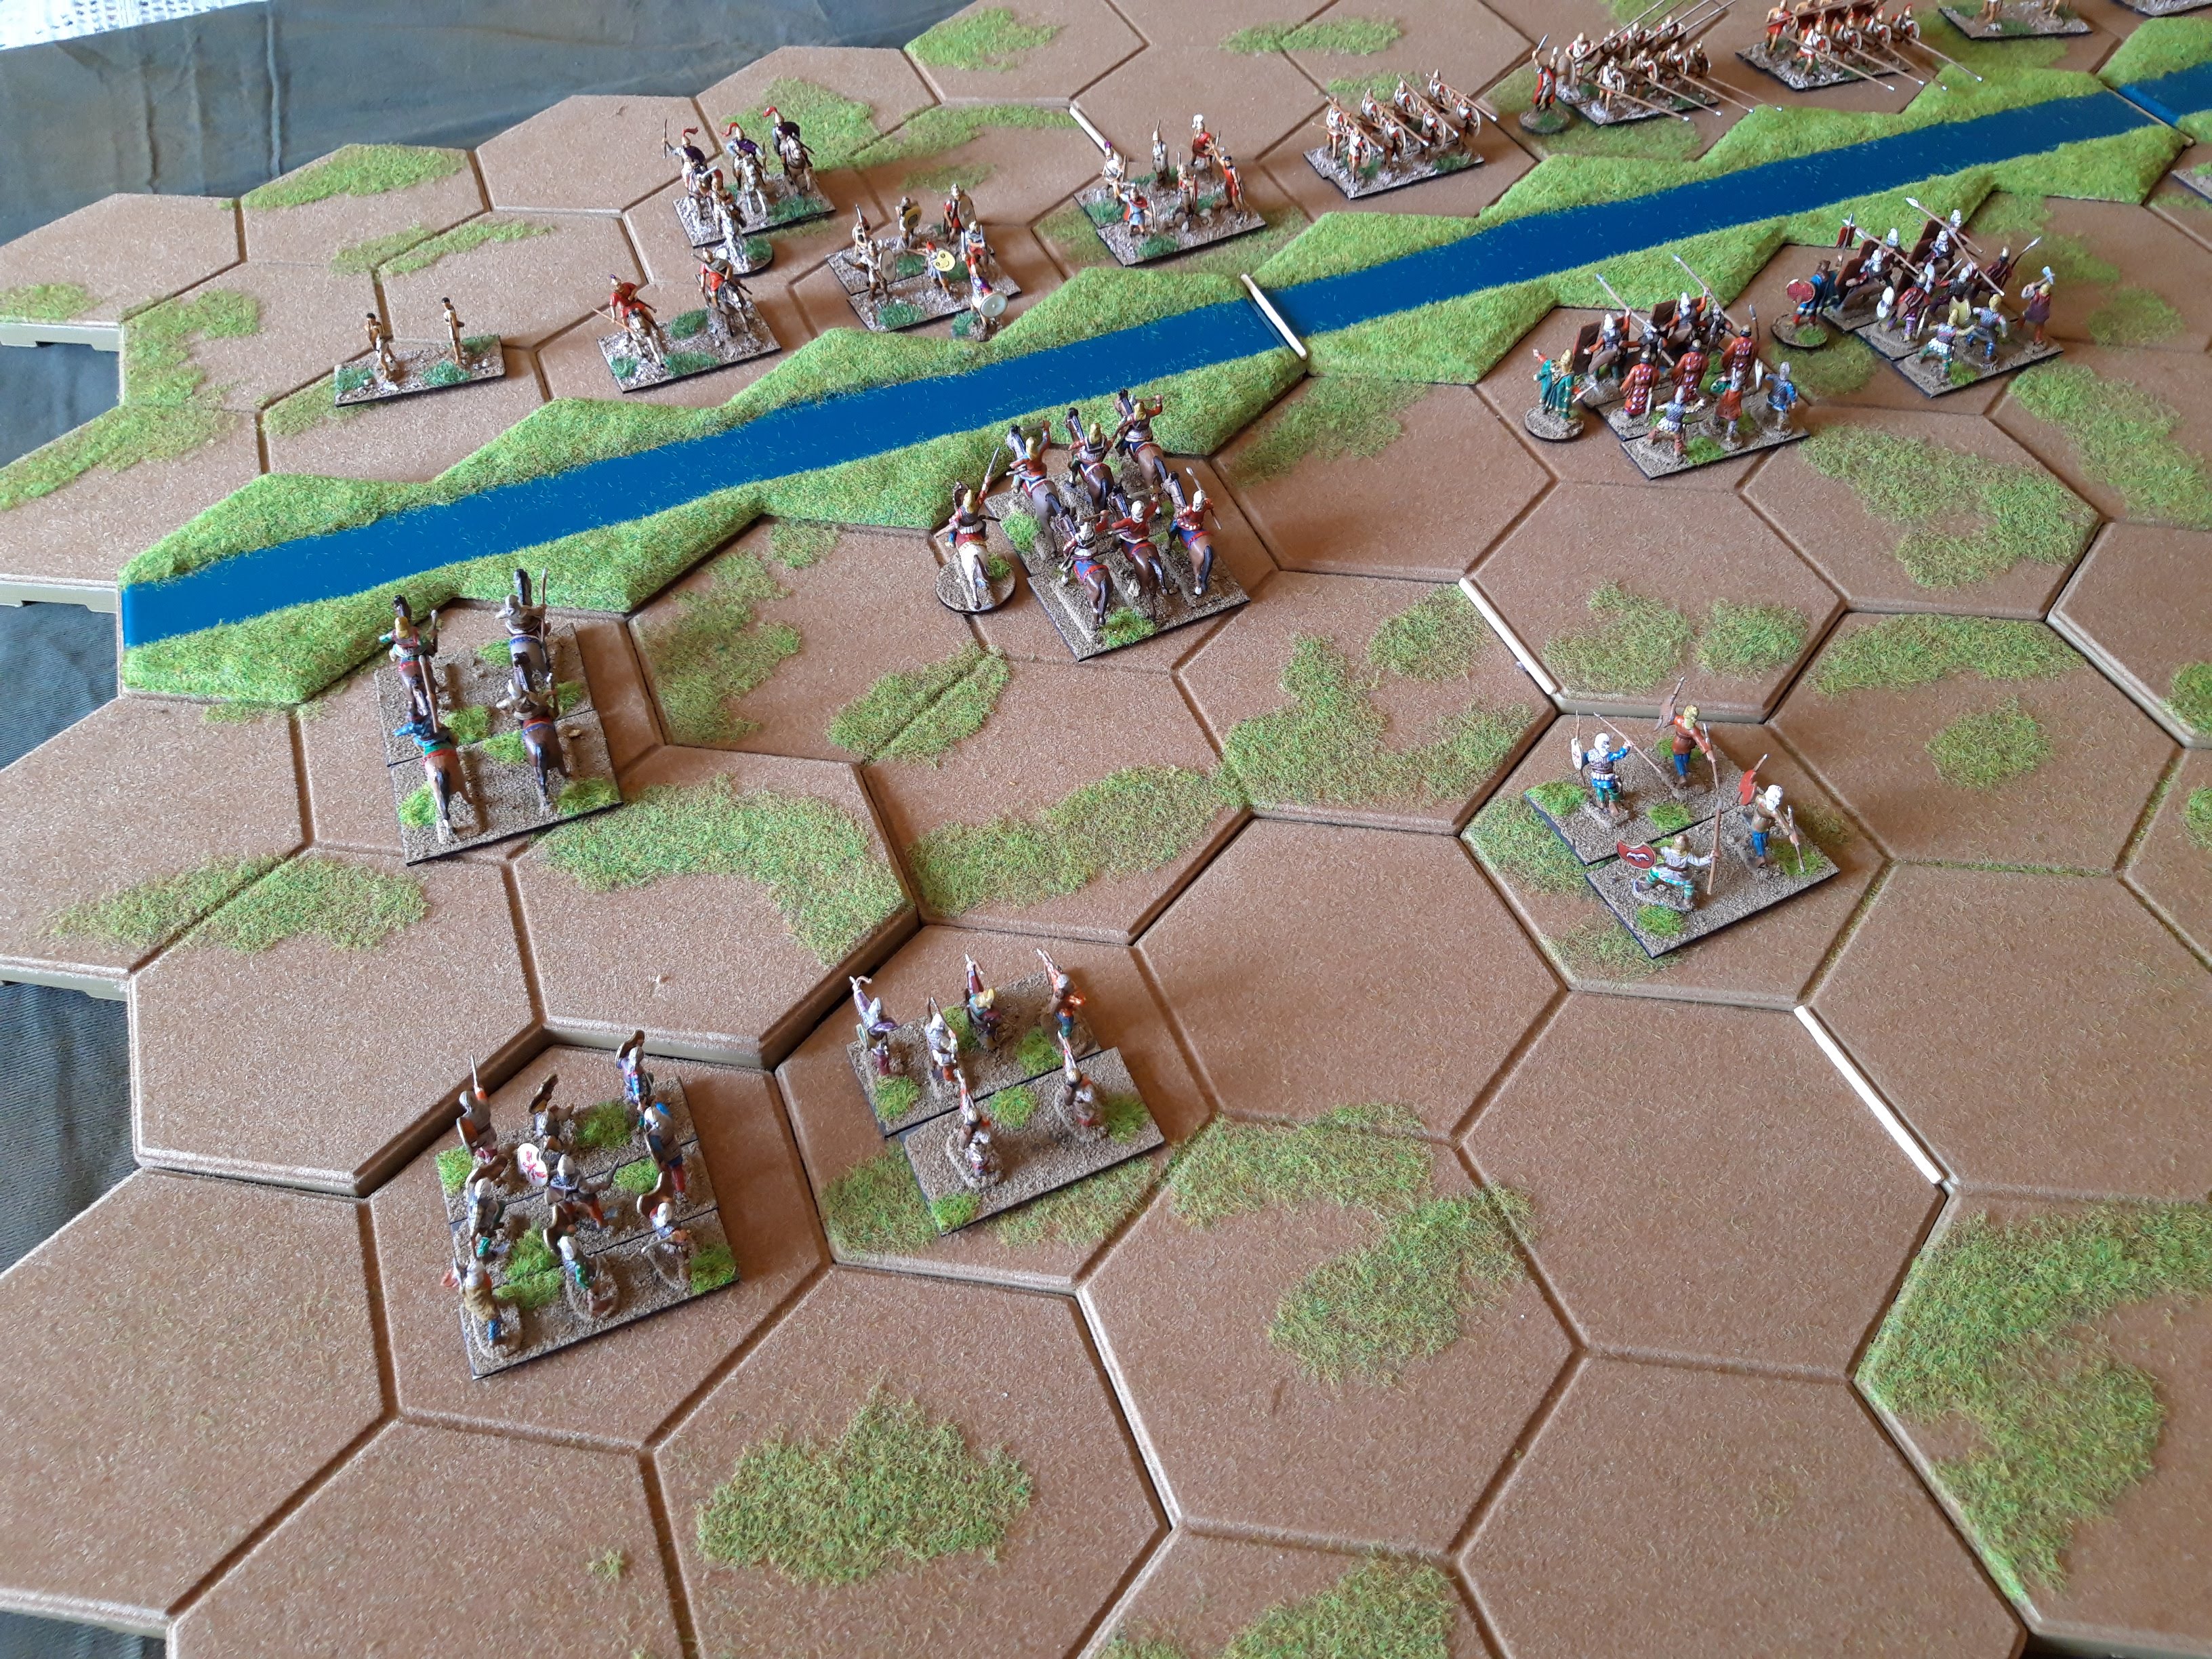
Battlefield from the south. You can see how it looks very similar to the OHW Bridgehead map. Fridland is the the town on the Alle River. I added two roads leading west (one to Eylau, one to Koenigsberg) with the two critical villages one them which Lannes fought so hard to hold. I also added some terrain features based on the real battle, particularly the big forest which was Neys attack route against Bagration. I didn't put all the meanders of the Alle in, but one hex is impassable (irl it has a huge meander in a gorge in it, neither side entered it in the battle), with a bluff to the east where irl the Russians deployed their Grand Battery.

A critical feature irl was the Heinrichsdorf ridge, which Lannes just managed to grab before Bagration did. Mortiers Corps later marched up there in support. I also added a ridge NW of Friedland, irl the Russian Guard were held in reserve behind it.
I used fixed entry for the French rather than random, and started with Bagrations wing in road column but occupying Friedland - presumably busy throwing extra pontoon bridges over the river. Lannes would enter in turn 1, followed by the rest of both armies in dribs and drabs - so hopefully we'd have a covering battle while both sides deployed, and then the slugfest.
I kept the 'Bridgehead' victory conditions, so a 'do better than history' aim for the Russians. If they can keep the French away from Friedland by the end of the game, they win (whereas irl Bennignsen hoped to smash Lannes then march off to Koenigsberg).

The Russian Army. Bagrations Wing with two infantry and one medium cavalry (roughly Corps sized units). Then Gortchakovs Wing with two more infantry, heavy cavalry and reserve artillery. Finally Constantines Reserve with another infantry and the Russian Guard. Bagration warrants a Leader figure, while Bennigsen will just sit on a hill and supervise.

The French:
Lannes Corps (Infantry, Grenadier Division and Heavy Cavalry Corps, plus Lannes).
Mortier (Two infantry) coming up on the French right.
Ney (Two infantry, Medium Cavalry Corps)
Victor (Two Infantry)
Imperial Guard (One Guard Infantry).
Ney, Victor and the Guard all come up on the French right from Eylau. Lannes can come along both roads on turn 1, so he can occupy the villages.

For the game on Tuesday night, Micheal was Bagration, Simon Bennigsen, Mark Lannes/Mortier and John was Napoleon. Bagration set up with his lead infantry in Friedland with the rest of his wing coming up the road.

Bennigsen set up camp on a nearby hill to watch proceedings.

Lannes advanced and occupied the towns - Grenadiers on the left, infantry configured as Light Infantry on the right, and aggressively pushed his cavalry out front. All units in march column. Bagration responded in kind, fanning out from Friedland.

Next turn they both just deployed for battle, although the Russian cavalry couldn't resist the temptation and charged the Cuirassiers, inflicting a couple of hits. irl all the Russian Jaegers were massed with Bagrations vanguard, so I was tempted to allow them one unit of Light Infantry, but in the battle they very much avoided the forest so in the end I assumed they were just factored in as part of the general skirmish screen. There were only a few thousand of them anyway.

The first shots we exchanged as both Mortier and Gortchakov came on. The fire was long range gunnery and skirmishing, so largely ineffective and the cavalry kept jabbing at each other. The Russians main problem was getting all their stuff along the road, and the guns languished at the rear.

Now more infantry were coming up, the cavalry withdrew and deployed to the wings, to threaten unwary infantry from straying too close. The Russians occupied more of the ridge while continuing to cross the river. Mortier fanned out to support Lannes in the north.

More skirmishing and gunnery as the last of the Russians cross the Alle. Ney has just appeared along the road from Eylau. The cheeky Russian cavalry have moved wide on their left flank, threatening to cramp the French deployment. Napoleon sets up his HQ on the hill in the southwest.
The Russians aggressively push their infantry forward in the centre, to cover the reserve artillery deploying on the ridge.

The centre erupts in close range musketry and case shot as the Russian Reserve marches through Friedland, Guards at the front. The Saxons put up a magnificent fight and inflict lots of damage on the Russians. The French cuirassiers have however failed their morale, despite the presence of Lannes to gee them up. They got hammered in the covering battle.

Over on the Russian left, their cavalry comes off worst as Ney leads the other French cavalry Corps in repeated charges. The Russians fall back to get out of the French charge arc. This allows Ney to deploy his infantry from road column to battle formation.

More heavy fighting on the Russian right and centre. The Saxons managed to rout their opposite numbers and advance to the base of the ridge.

The Russians poured fire into the victorious Saxons who had now taken five hits, and the Guards moved up to block the road to Friedland.

But over on the left, the Russians couldn't escape Ney, so made a charge to cover their infantry. Ney began filtering Light Infantry into the forest and advancing north east. Victor and the Imperial Guard arrived, adding to the huge traffic jam near Napoleons HQ.
We broke for the night at that point after 7 turns. I was really pleased with how that went, irl both sides cavalry fought a covering action while the armies deployed, which the players did too, and while we didn't have the Russians assaulting Lannes, there is certainly heavy fighting on the Russian right. Now Napoleon has turned up, it is the main event.

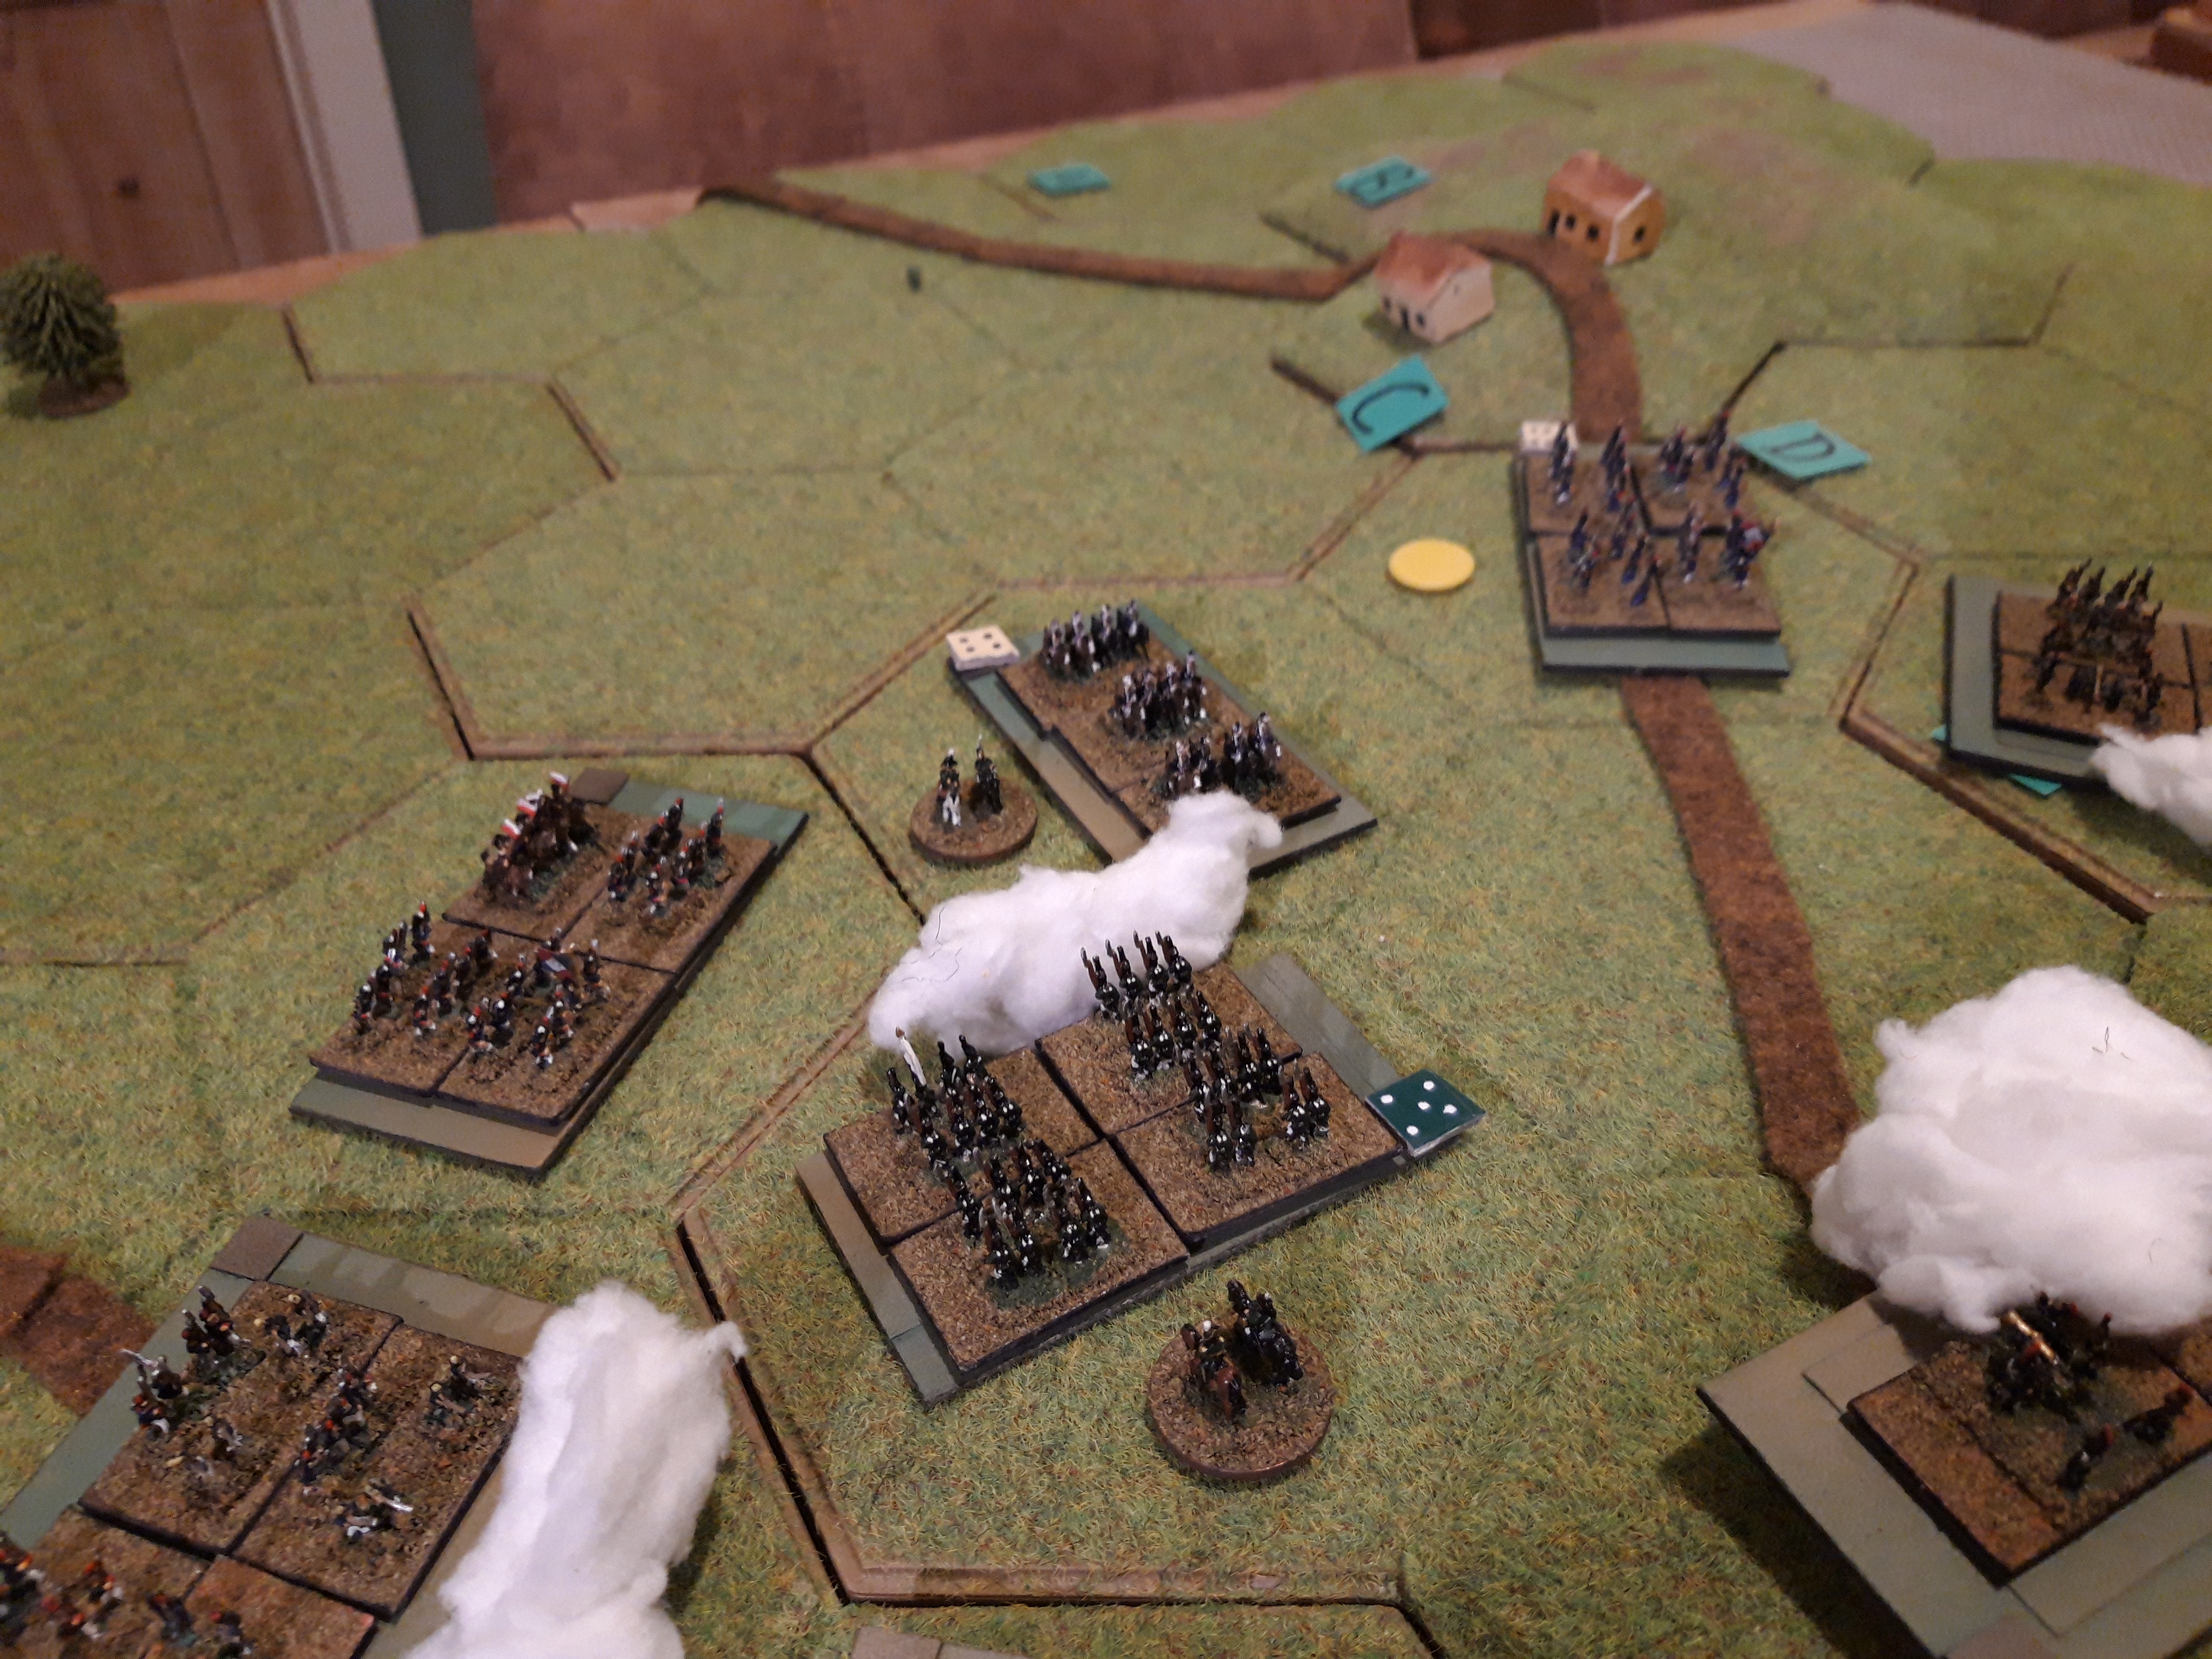
View from the Russian right. The Russian Cuirassiers are intact, a useful cavalry reserve. Lannes/Mortier is outnumbered so just needs to hold the Russians for now.

Over on the Russian left, Ney and Victor threaten to build up an overwhelming local superiority, as well as being better placed to operate in the congested terrain. Lets see if they can turn that into victory before night falls.

View from Napoleons HQ. Still got more stuff to deploy. irl Napoleon managed to concentrate 80,000 men to Bennigsens 60,000, so there are more French units than Russians on table by now, but the Russians still have local superiority around Friedland.
A change in personnel for Wednesday, Russell took over the French left (Lannes).

With more units deployed, firing is breaking out all along the line. The weakened Saxons in the centre are routed by the Russian Guards, but in the forest, Ney aggressively floods it with light infantry, while working the cavalry around the wood to threaten Friedland from the south.

The Russian cavalry reserve is committed against Lannes in the North, working around the flank.

Quite a lot of French movement this turn as Victor's Corps and the Imperial Guard deploy, so it is mainly the Russians firing. The French infantry in the centre surge forward to assault the Russian positions.

In the North the Russians charge, forcing the French to 'form square' ie pivot to face or suffer a 6D6 attack! This of course messes up their firing arcs and exposes their flank to the Russians on the hill.. What a clever and subtle mechanism. The cavalry inflict some damage but then bounce.

The French rout the Russian infantry on the road and close in on Friedland. The Russians in the south fall back towards the town to avoid being cut off by infiltrating Chasseurs.
The Russian Guards are bolstered by Prince Bagration, good job as the Imperial Guard marches towards them, while Lannes leads a cavalry charge against them! The Russians hold firm.

Sadly the Russian resistance collapses, the Guards rout and the French advance against the Ridge. Lannes charges the weakened Russian infantry, but fails to do any damage (cavalry are disadvantaged attacking uphill) and the charge is repulsed. The Russian cavalry managed to rout one of the French infantry though, and the other wavers.

The crisis of the battle is upon us! Everyone who is engaged blazes away at point blank range. Losses are horrific (irl the battle produced in excess of 30,000 casualties).

However Lannes manages to repel another Russian cavalry charge, while personally leading the Cuirassiers (on five hits!) right over the Ridge. Only the Russian grand battery is left up there now.

The Russians south of the town are then weakened by the French infantry and finished off by Ney leading a cavalry charge, also with an almost exhausted Cavalry Corps. Well if Lannes can do it... the French cavalry are blown however, and withdraw.

As night falls, the French see off the last Russian cavalry and the Imperial Guard overrun the Russian artillery. However in vicious House to House fighting, the Russian defenders of Friedland are reduced to 0 hits, only the presence of Bagration is holding them together. Will he survive? Yes, he does, so the Russians hang on, enough to garner a draw in game terms. The Russians have done it by one hit!
The French have very tough victory conditions in this, they need to wipe out the Russians west of the river to win the scenario, whereas irl Bagrations wing hung on until nightfall. The Russians just need to keep the French a couple of hexes away from Friedland (whereas irl their left wing collapsed). So both sides need to do better than history to win.

That all went pretty well in the end. It was slightly chaotic at times as there were a lot of moving parts and several players, but it was great to see the battle develop as both armies deployed while skirmishing and looking for positional advantage, but then as time began to run short, the French had to launch a series of assaults almost regardless of casualties to force a decision. One thing which skewed the results a bit was a series of appalling dice throws which resulted in a number of 3D6 attacks inflicting no damage at all or just 1 hit. I think that was a bit demoralising for both sides, but I guess it will just have to be the vagaries of war.
One thing which did work well were the bolted on leader and morale rules. I found them a bit cumbersome when I was playing solo, but running a game with players it didn't get in the way at all and meant that (occasionally) badly damaged units would refuse to advance and it introduced a degree of buggeration into the proceedings. The leaders worked really well, everyone likes a leader, they didn't have undue influence, but did make a difference at critical times - without Bagration, the Russians would have been annihilated. None of then were seriously wounded but Ney came close on a couple of occasions.
One final thing I need to ponder - Lannes cavalry corps was held in reserve for many turns, and Mark asked plaintively if he could try and rally some hits off (they had four hits at this point). I've played quite a few games of these now and I'm a bit reluctant to introduce rallying as it can become a get out of jail free card for the defending side (that is why I've limited rallying in the WW2 set). However, if a unit really is out of danger, and particularly if they have a leader with them, perhaps some rallying should be possible. Thinking about it, I could probably integrate it into the morale tests, like Fire & Fury. I shall think on.