I needed to playtest my hex based ACW rules with actual people before taking them to COW and had planned on running Chickamauga with the usual crew, but having solo played it I realised it is a very complicated battle due to the nature of the terrain and the way the reinforcements for each side arrive. Too much for an introductory game, so time for plan B. Instead I had a look at Antietam, as it has some similarities to the Shiloh game I'm planning, in that the Union forces start in a state of some command confusion.
Antietam is also a tough battle to game as the Union has such a vast numerical superiority, so some extra command restrictions on McLellan are in order.

The battlefield from the south. The mighty Potomac to the left, and Antietam Creek to the right, Sharpsburg is centre left. One of the players has walked the battlefield and I was keen to get the right sort of trees on the table. Fortunately the site is so well preserved that even modern photos give a good idea of the gently rolling Maryland countryside.

Time to put out a few of those 6mm boats I'd recently painted.

The raft made quite a neat ford marker. Better than a counter anyway.

The initial forces deployed. I borrowed heavily from the Volley and Bayonet Antietam scenario for the OOB, setup and scenario restrictions. Essentially Lee's Army of Virginia is deployed in a (thin) arc in a big bend of the Potomac in front of Sharpsburg, while McLellans Army of the Potomac has a huge traffic jam of Union corps packed in around Pleasantville to the east.

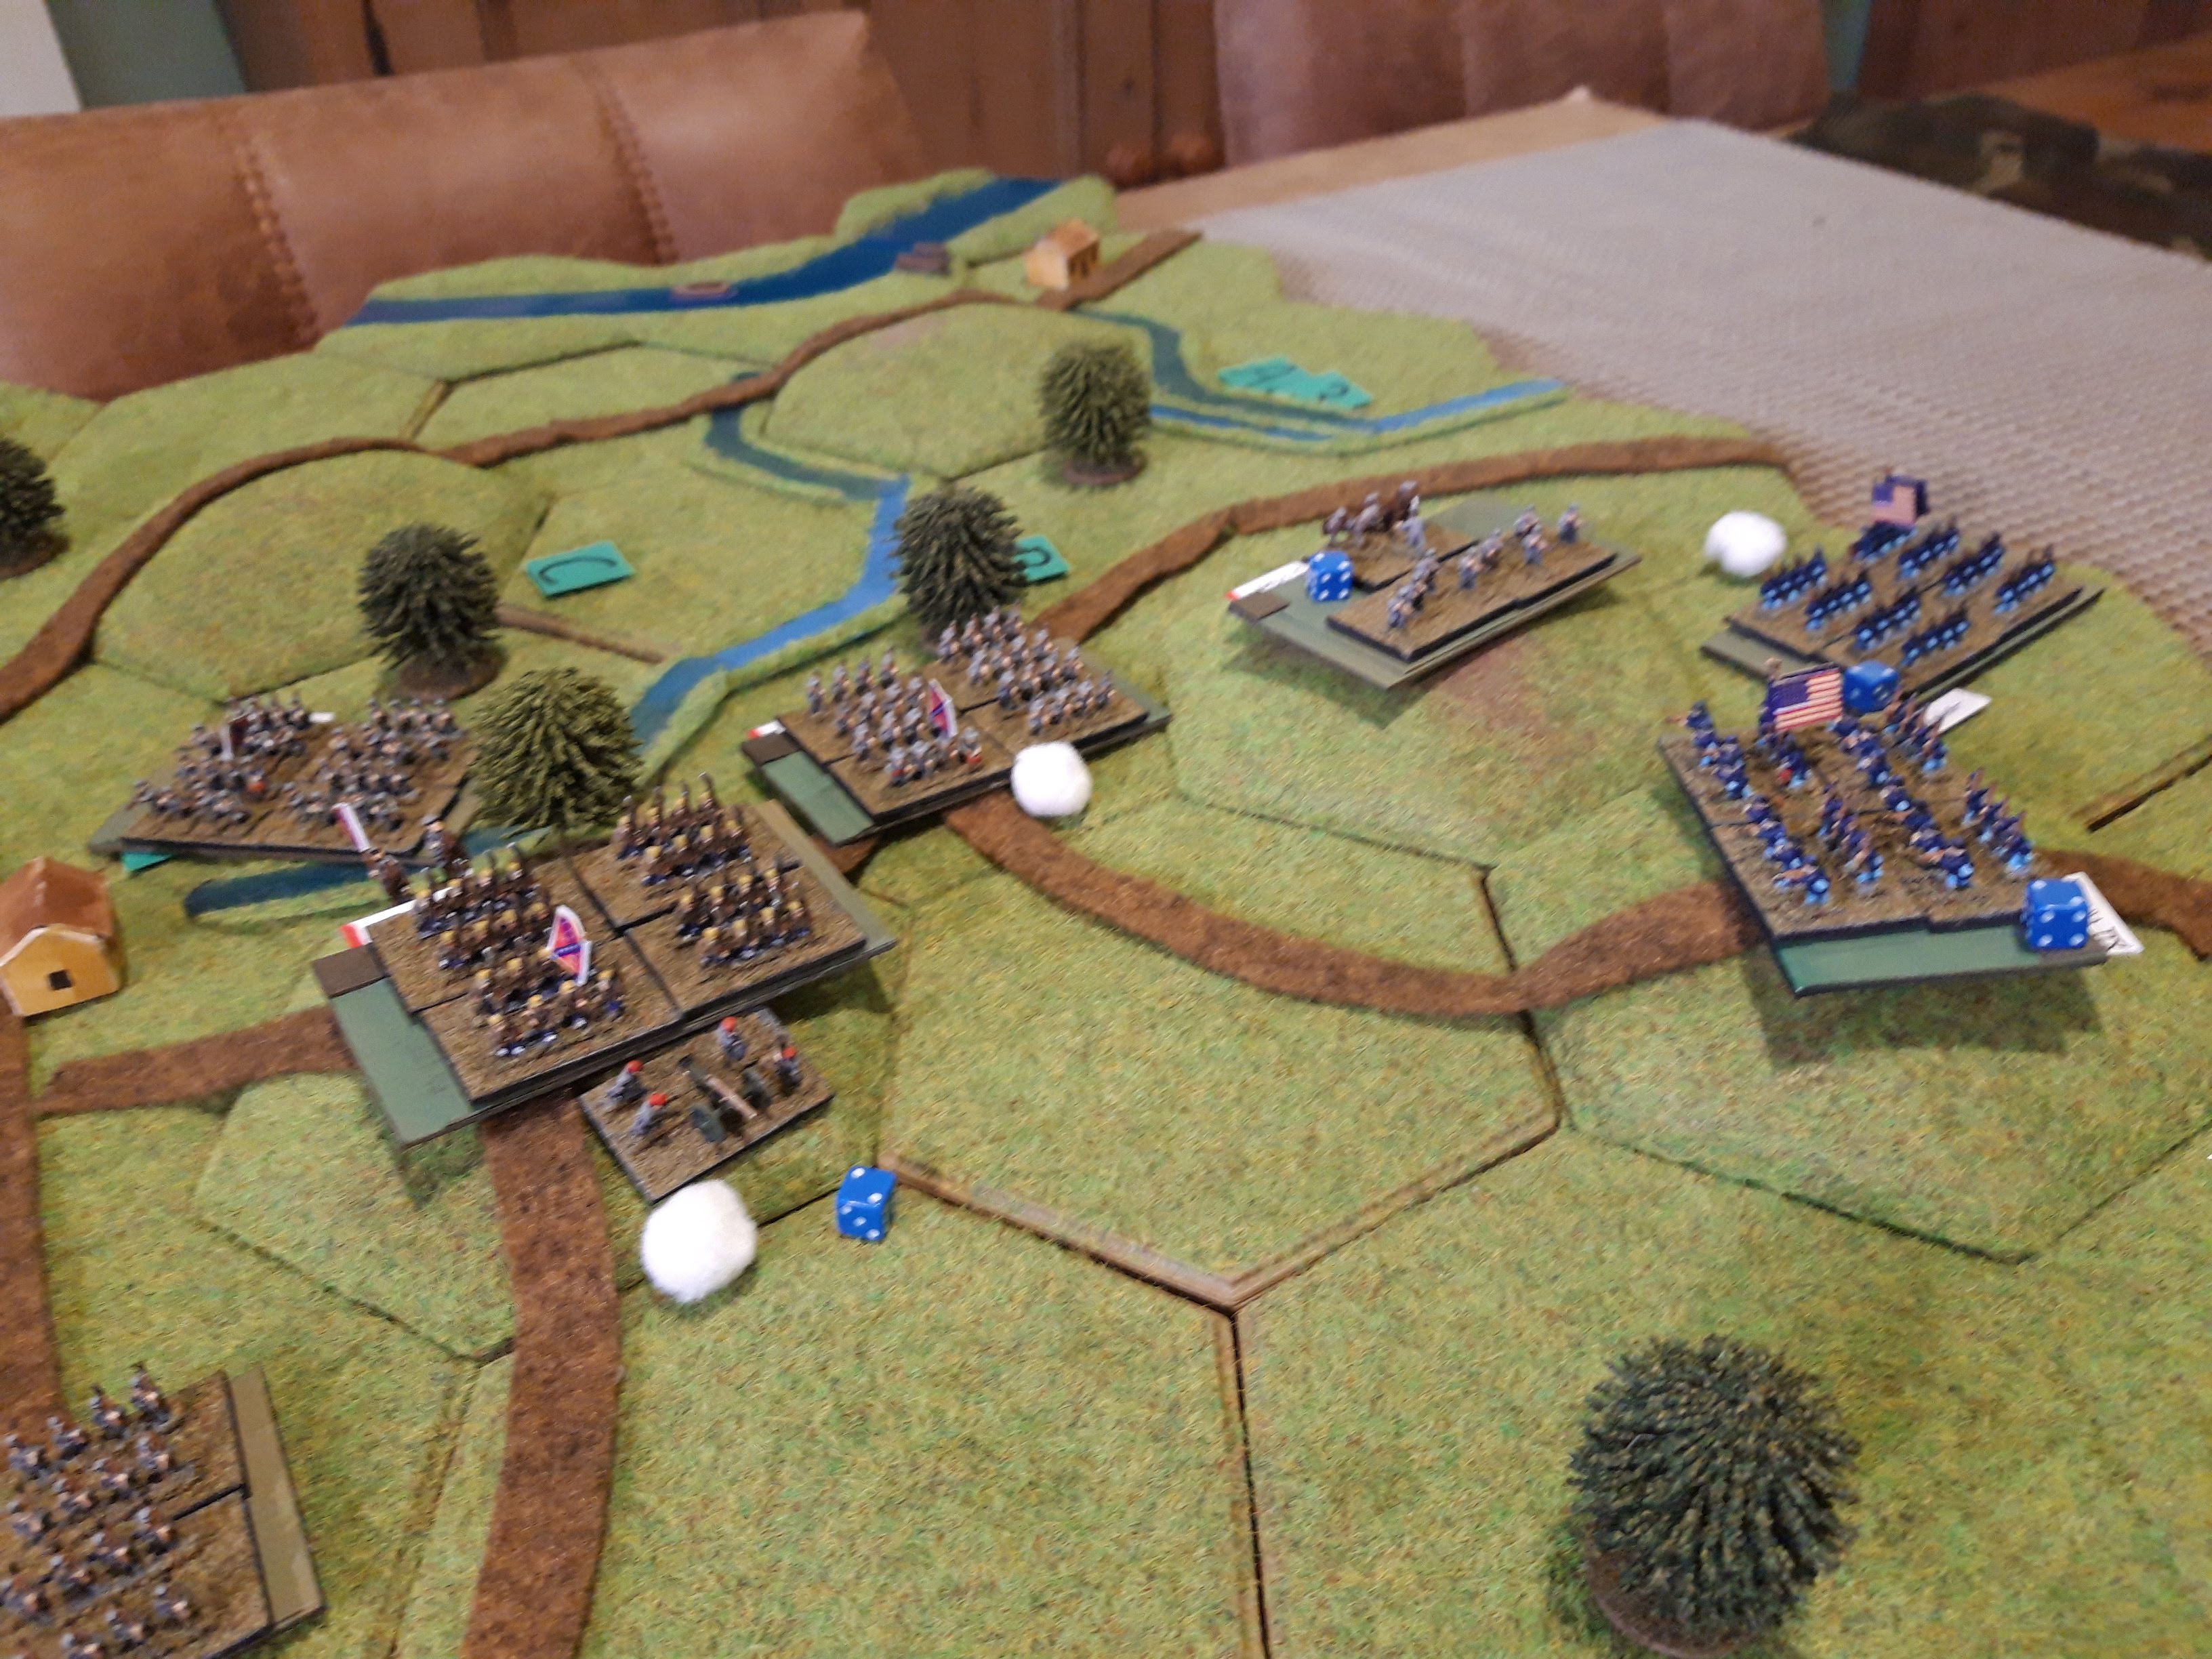
Jeb Stuart and Hoods Texans hold the left, Anderson is in reserve in Sharpsburg and Lawton has the point of honour on the hill northeast of the town, accompanied by Lee himself.

The south is more thinly held. D. Hill holds the sunken roads behind the bridge and Jones is on the ridge. Each Confederate unit represents about 6,000 infantry or 3,000 cavalry.

The Army of the Potomac is jammed into its deployment area. Burnsides Corps on the left, Sumner on the right, Pleasantons Cavalry and a smaller Corps (Morrell) make up the centre. Each unit is around 8,000 infantry as the Union troops in general weren't as good as Lees veterans. I had to amalgamate a lot of small divisions into bigger elements.

On the right flank Hookers Corps leads the way, followed by Mitchell. Both these Corps had very weak divisions, especially Hooker who only had 7,000 men in total, so they only warrant one unit each.
McLellan managed to saddle his army with very complex command arrangements due to anomalies in the seniority of the officers involved, and on the day, he simply bypassed them and issued orders direct to the Corps themselves. This led to huge delays in the Union units receiving their orders, and in game terms this meant that only one new Corps per turn could be activated to fight, so it will take most of the day to activate the Union army. On turn one the only active units are Hookers Corps and the Union cavalry.

There are even more Union units arriving as reinforcements through to day and overnight. The Confederates have only a single division arriving (A. Hill) so will end up outnumbered over 2:1 as historically.

The action opens at dawn on the 17th September. Six turns per day as I'm planning on playing the 18th as well.

With some many inactive units, Hooker stays still and the Union Army opens fire on the targets it can see. For the inactive units this will be fairly ineffective until they get their marching orders, as it just represents desultory skirmishing. Despite this they inflict some losses on the forward CSA units.

The CSA returns fire, having no great need to leave their positions and scatters some losses along the Union line. Eagle eyed readers will note the Union cavalry has crossed the creek in the north and is currently hiding behind a treeline.

The south looks more promising so in the next couple of turns, McLellan activates Burnside, Morrell and Sumner. The greater weight of Union fire pushes both Jones and Hill back, and Morell crosses the creek to take the sunken road, while Burnside crosses the bridge in the south to take the ridge.

Sumner pushes up to the creek in the centre, but the Union cavalry are repulsed after an ill timed foray forwards into the trees, where they ran into the concentrated fire of Hoods Texans who had also advanced to support Lawton.

In the south, Burnside is pushed back off the hill again, but Morell hangs on in the sunken lane despite converging fire from every CSA unit in range.

The northern flank is relatively quiet. Stuart and Hooker skirmish along the northern edge, the CSA cavalry find out the hard way that taking on an entire infantry corps supported by artillery with sabres, revolvers and carbines isn't going to end well. Stuart pulls back to the trees. Mitchell still hasn't received any marching orders so Hooker is unsupported.
Mitchell eventually gets rolling and moves up to the ridgeline to support Hooker, only to run into a hail of fire from Hood. Jeb Stuart pushes onto the ridge once more to close the range.

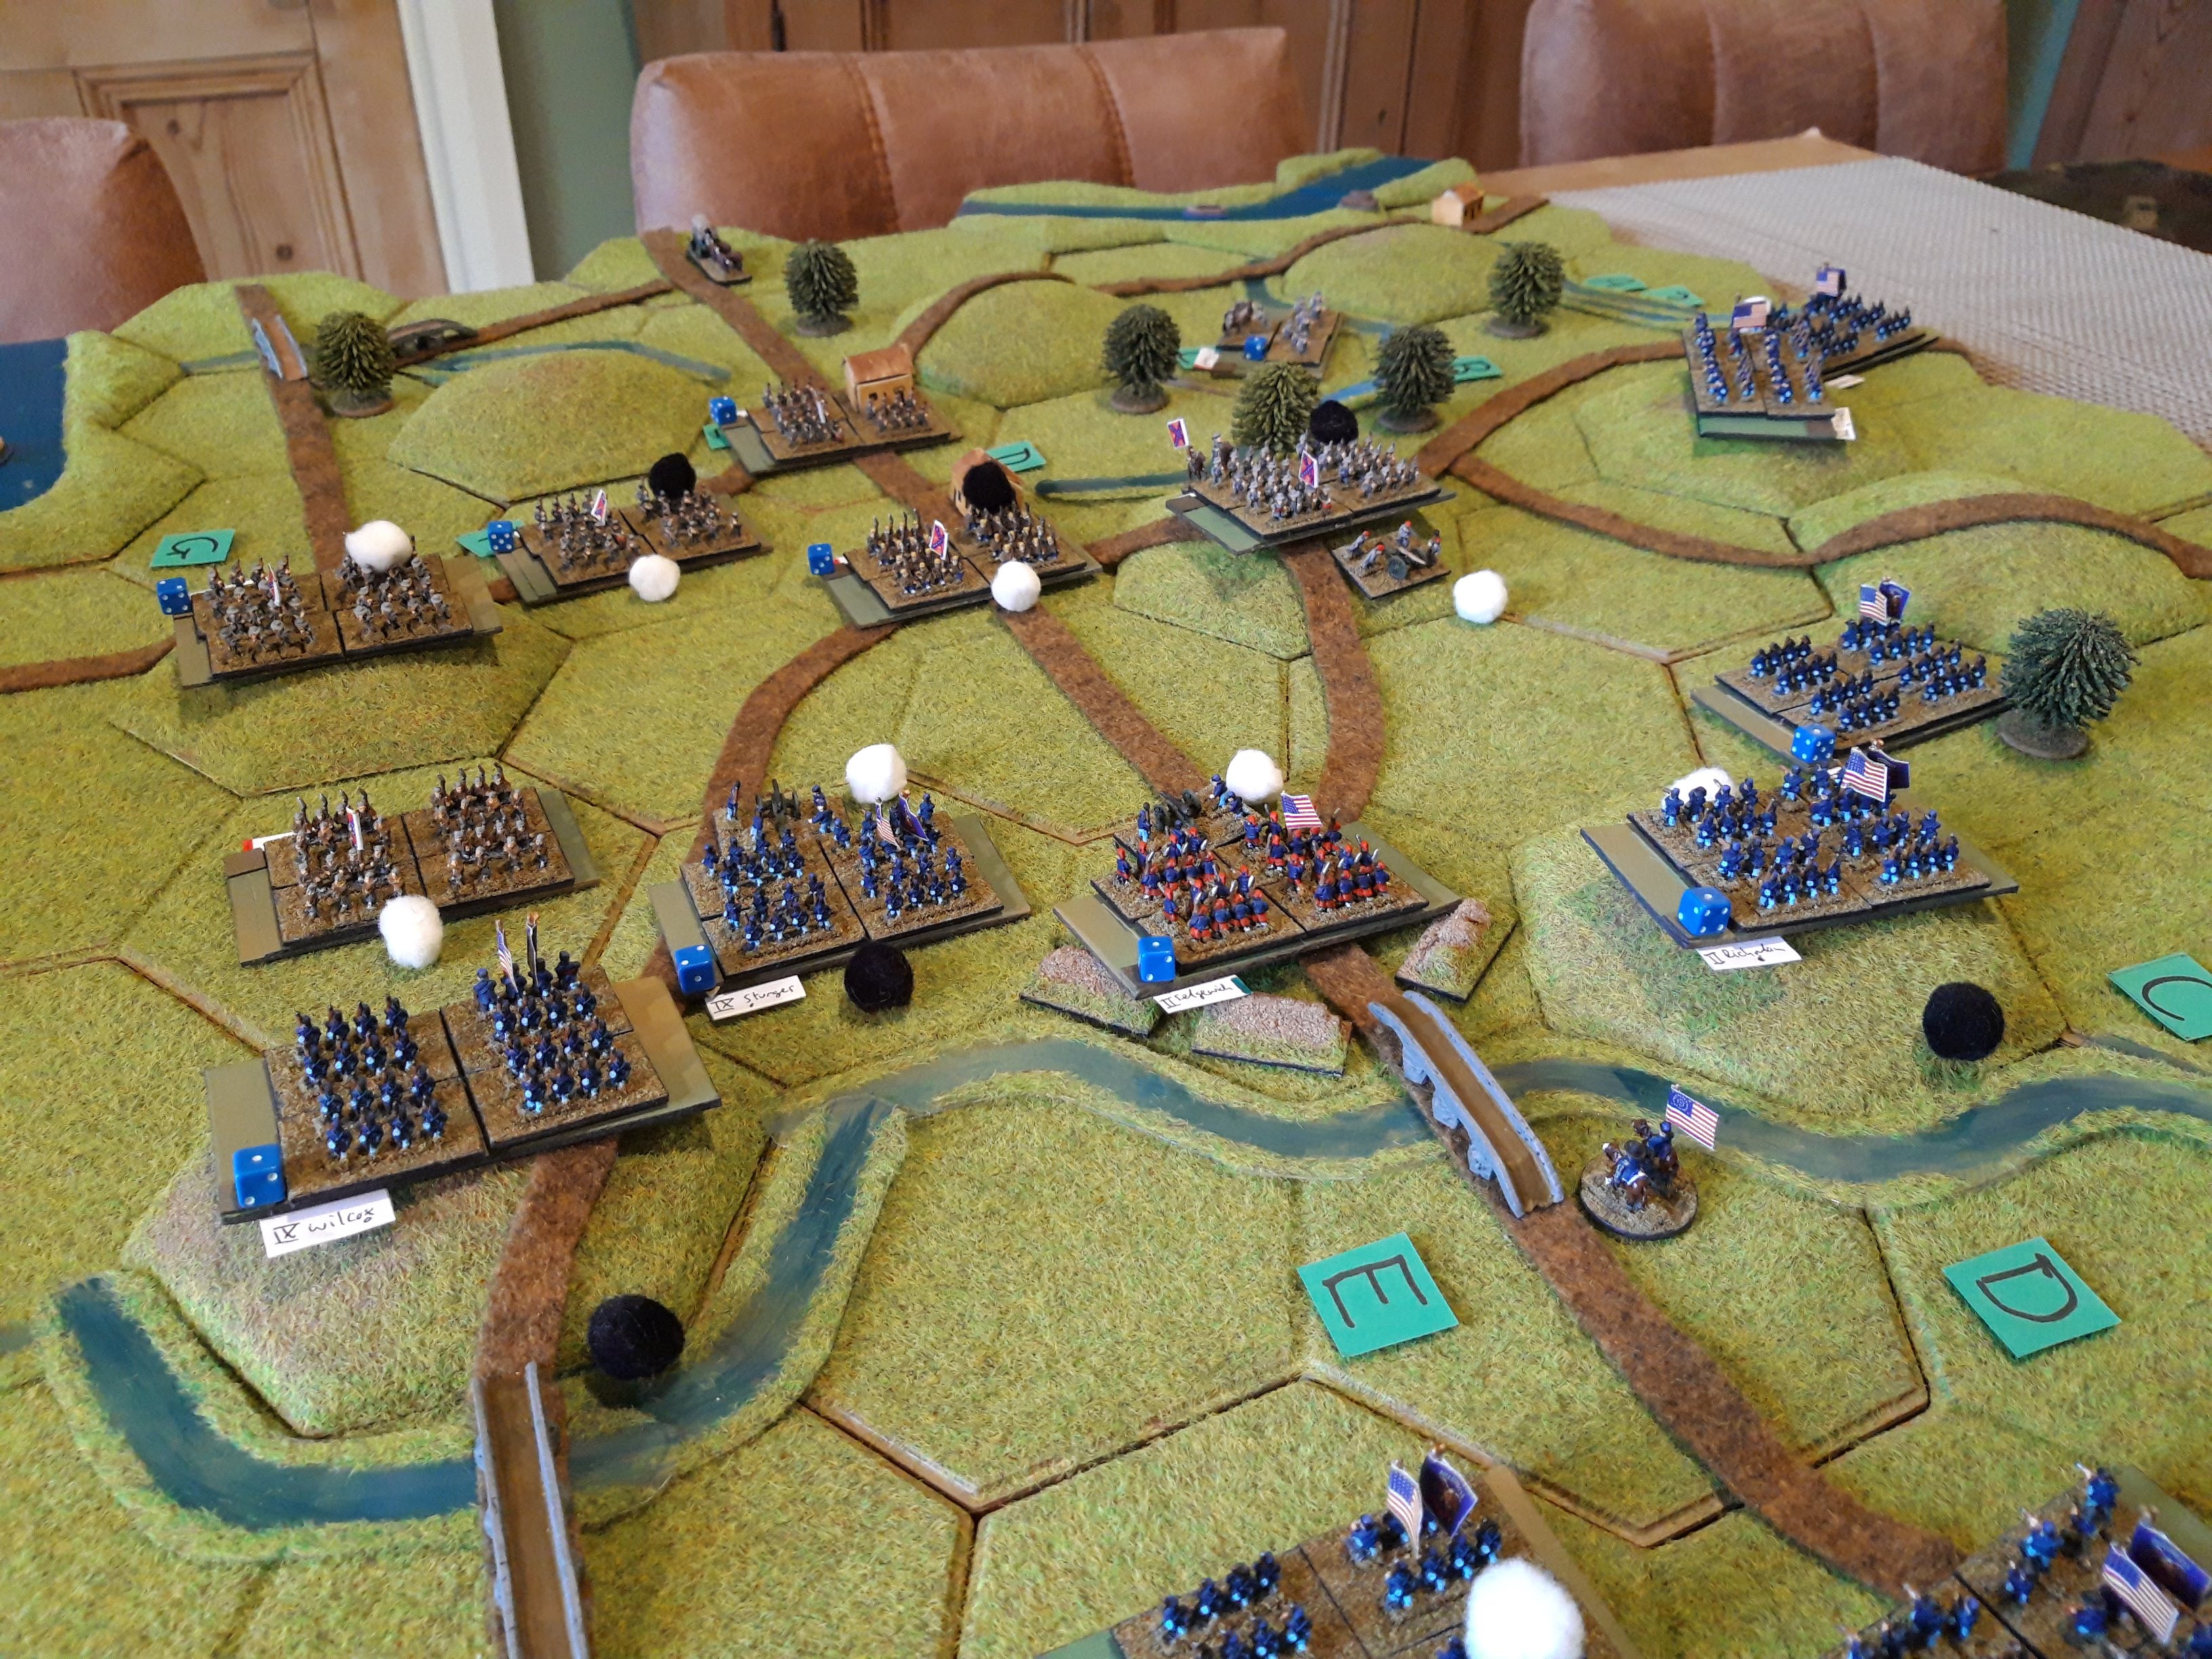
In the centre, Sumners first division crosses the stream and takes the ridge on the far side. The Army Artillery is stuck on the far bank as it needs a bridge to cross though. Further south the brutal slogging match continues as both sides knock lumps out of each other. Hill is so badly battered he falls back to Sharpsburg to reorganise, and Anderson moves up to take over. Burnside has both divisions over the creek now, and Morrell is grimly hanging on to the sunken road.

As the Union cavalry reaches the ford in the south (they used the turnpike east of the creek), the CSA throws everything it has against the Union brideghead. Hill, now recovered, moves up to plug the gap in the line while everyone else blazes away at Burnside and Morrell. The CSA reserve (also Hill!, but A. Hill) marches on from the west, but too far away to help.

In the north Mitchell is driven back and Jeb Stuart withdraws, followed up by Hooker, who is once again looking a bit isolated. He now has the banks of the Potomac in sight though. Hood meanwhile inflicts enough casualties on Richardson (one of Sumners divisions) to force them back.

As night falls, the CSA line is still looking very strong, but Hooker has pushed right forwards. Sumner now has both divisions across the Antietam and is poised to advance in a more coordinated attack.

In the south, A. Hills reserve division rapidly marches to fill the gap, and the final effort by the CSA pushes back both Morrell and Burnside, leaving a tenuous bridgehead on far side of the creek held by one of Burnsides divisions, and a regiment of Army Artillery in the sunken road with no infantry support.
At sunset, both sides get a chance to reorganise and redeploy for the struggle in the morning. This seemed like a good point to stop for the night, and we resumed the following day.

Overnight both sides recovered some losses, but both Morell and Jones had sufficient losses to leave them both down a base permanently. The Union shuffled some units around, pushing Mitchell up to support Hooker more closely, and more importantly, put some units back into the bridgehead. Another Corps arrived overnight and went into reserve at the Pleasanton road junction.

The CSA also reorganised their line. Lawton came down off his hill to block the turnpike to Sharpsburg, and Hoods Texans took over the defence of the ridge. Two of the CSA units were in reserve now, to await developments.

The next day got off to a more leisurely start as action commenced at 8am with a devastating Union barrage which drove back large sections of the Confederate army, even Jeb Stuart. Only Hood and Hill hung on, the latter blocking the route from Burnsides Bridge and now looking quite isolated. Sumner also pushed forward in strength across the creek and Mitchell aggressively attacked across the Corn Field.
The CSA rallied Stuart and pushed Jones up to support Hill, while everyone else fired as hard as they could into the dark blue Union ranks.

Which pushed Burnside and Sumner back again. We'd lost track of how many times Wilcox had been up and down that hill in front of the bridge by now. The Union bridgehead in the centre hung on though with some excellent morale throws.

Up in the north, Hooker pushed forwards to make contact with Stuart again, while Mitchell provided supporting fire. With so many CSA units drawn to the centre and south, the force ratios here were now looking bad for the Confederates. The Texans in particular were now taking a battering.

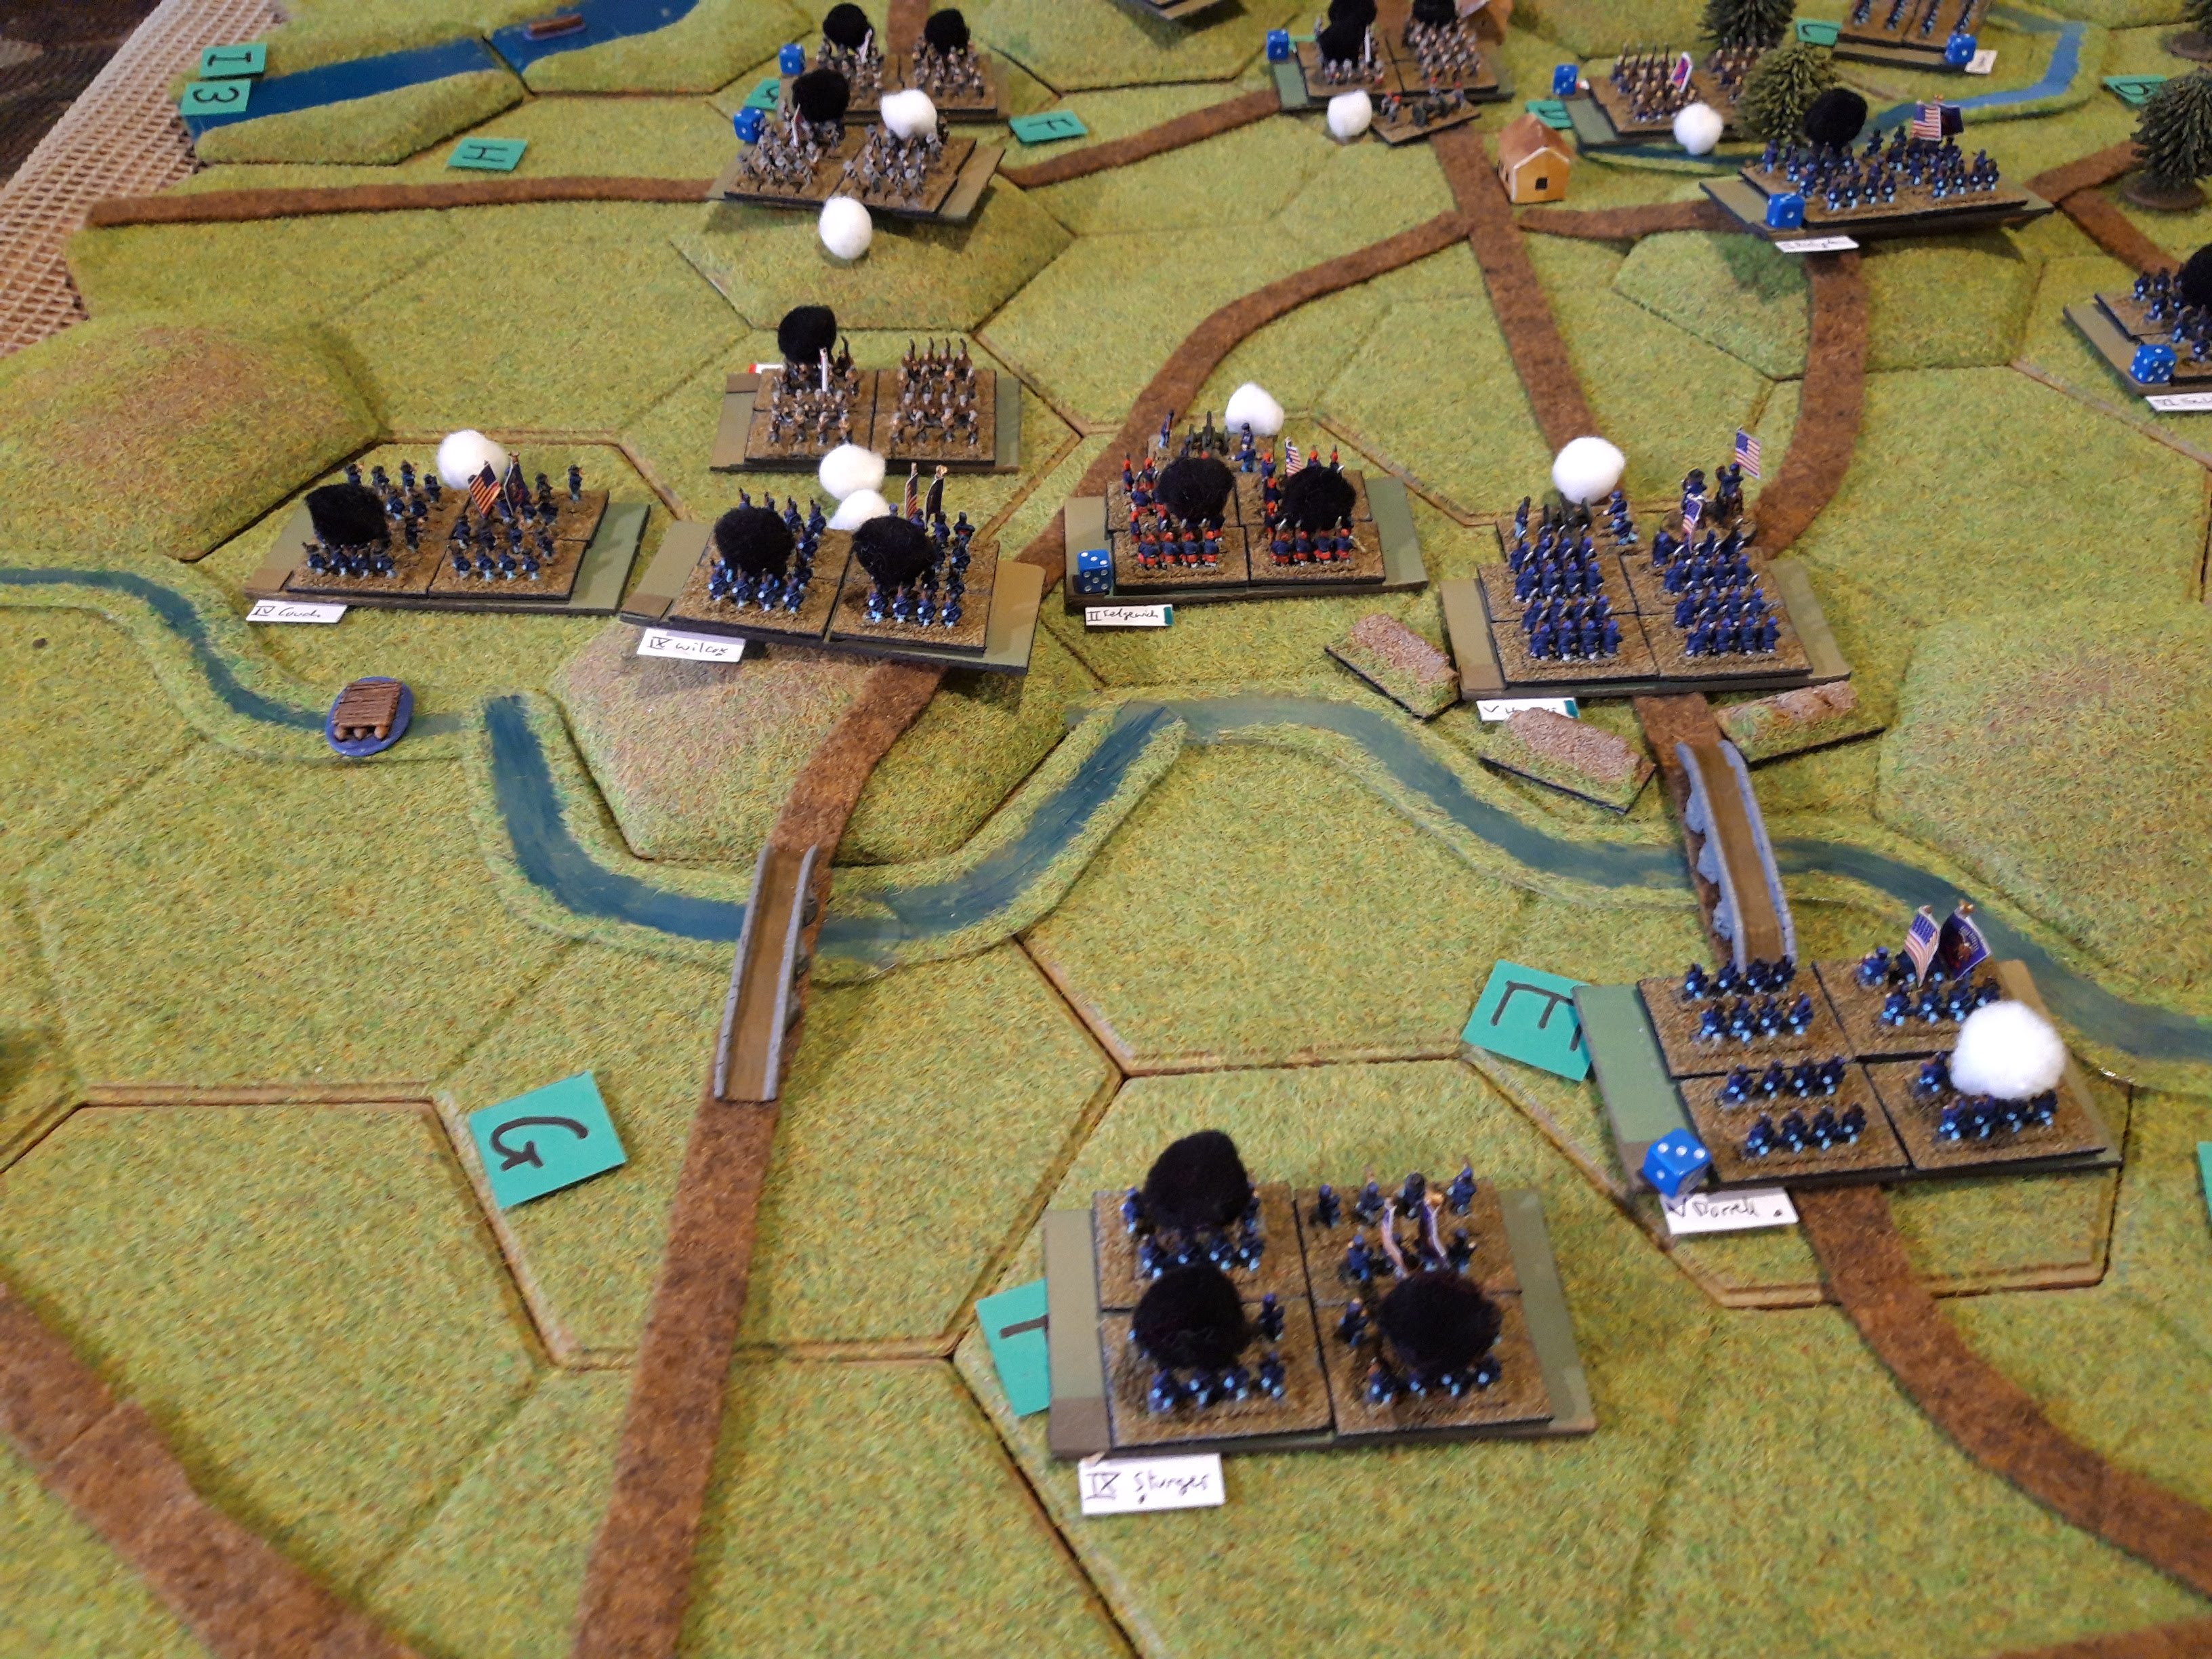
More CSA units became engaged in the south, and managed to drive Burnsides other division back over the creek. The bridgehead was tenuously held by one division and the gun line of the Army artillery. Lee intervened to steady the Texans as they lost another base.

This was the point when Pleasanton managed to put in a cavalry charge against Hills right flank. He'd been working his way slowly around the south of the battlefield. Despite their flank advantage, they were heavily outnumbered by Hills veterans and beaten off with heavy losses.

Burnside was now supported by a number of other units and they made another effort to cross the creek, and this time they held their ground despite crippling losses.

The CSA northern flank was collapsing too as Jeb Stuart was sent back in headlong retreat by close range fire from Hooker, and converging fire from Sumner and Mitchell finally drove the Texans off their hill and into Sharpville, despite Lee's personal intervention.

The Union now had such a numerical superiority that it could just pull back badly shot up units and put fresh ones into the line.

The Union poured fire into the Confederate ranks as Sumner dashed forwards and captured the unoccupied heights above Sharpville and Hooker pressed his advantage against Stuart who was forced to retire again.

Disaster in Sharpville, the Texans are one hit away from complete destruction, and as Lee tries to rally them he is hit and carried from the field. The Texans fall back further into the town.

View from the Confederate lines, they have been mainly pushed back into an arc around the ferry crossing over the Potomac, and Sumner and Hooker are hard up against Sharpville in the north. Stuart has rallied for a last stand on the ridge northwest of Sharpville.

Meanwhile Hill is still holding up the entire southern wing of the US on his own! Pleasantons cavalry can be seen reorganising in the top right corner. Hill is in a very precarious position, outnumbered 4:1 now.
The writing is clearly on the wall for the Army of Virginia as they haven't got much more space to retreat into, however as night falls, they are still unbroken despite the loss of Lee and a review of the Army of the Potomac reveals that they only have one undamaged unit left, so aren't in a position to follow up the retreating Confederates. A well earned win for Lee, despite him ending up in the field hospital.

End game, the northern flank. Sumner and Hooker are pushing hard here, only a couple more hexes until they take Sharpville. Stuarts cavalry are on the open ridge in the top centre.
In the south though, the Union troops are thoroughly shot up, and it is all they can do to hang onto the bridgehead they won at such cost. I expect Hill will have a tank named after him, or at least a military base.
That went really well, and in fact I could probably have run it as a one day game instead of two. One of the players is very familiar with the battle and said that we'd pretty much got to the same point as the real protagonists and the end of the 17th, although irl McLellan refused to commit his final reserve whereas in the game the Union had shot their bolt.
The rules worked well with real players, although there are a couple of minor tweaks I may make. I'll try them as-is at COW, but I'm minded to simply differentiate Union and Confederate artillery as distinct types rather than worry about whether they are rifled or smoothbore (similar to the approach in Horse, Foot and Guns). I'm not playing tactical division sized games here, and most of the artillery is factored into the infantry units firepower. I just used six facings with the hex grid instead of twelve, and that worked fine, so I'll keep that approach.

martin, could you drop me an email? I only have your old email address?
ReplyDelete