OK, time for a break from Panzerblitz and instead another solo run at my version of the One Hour Napoleonic Marengo variant. This time it is off to Ligny in an attempt to get a working scenario.

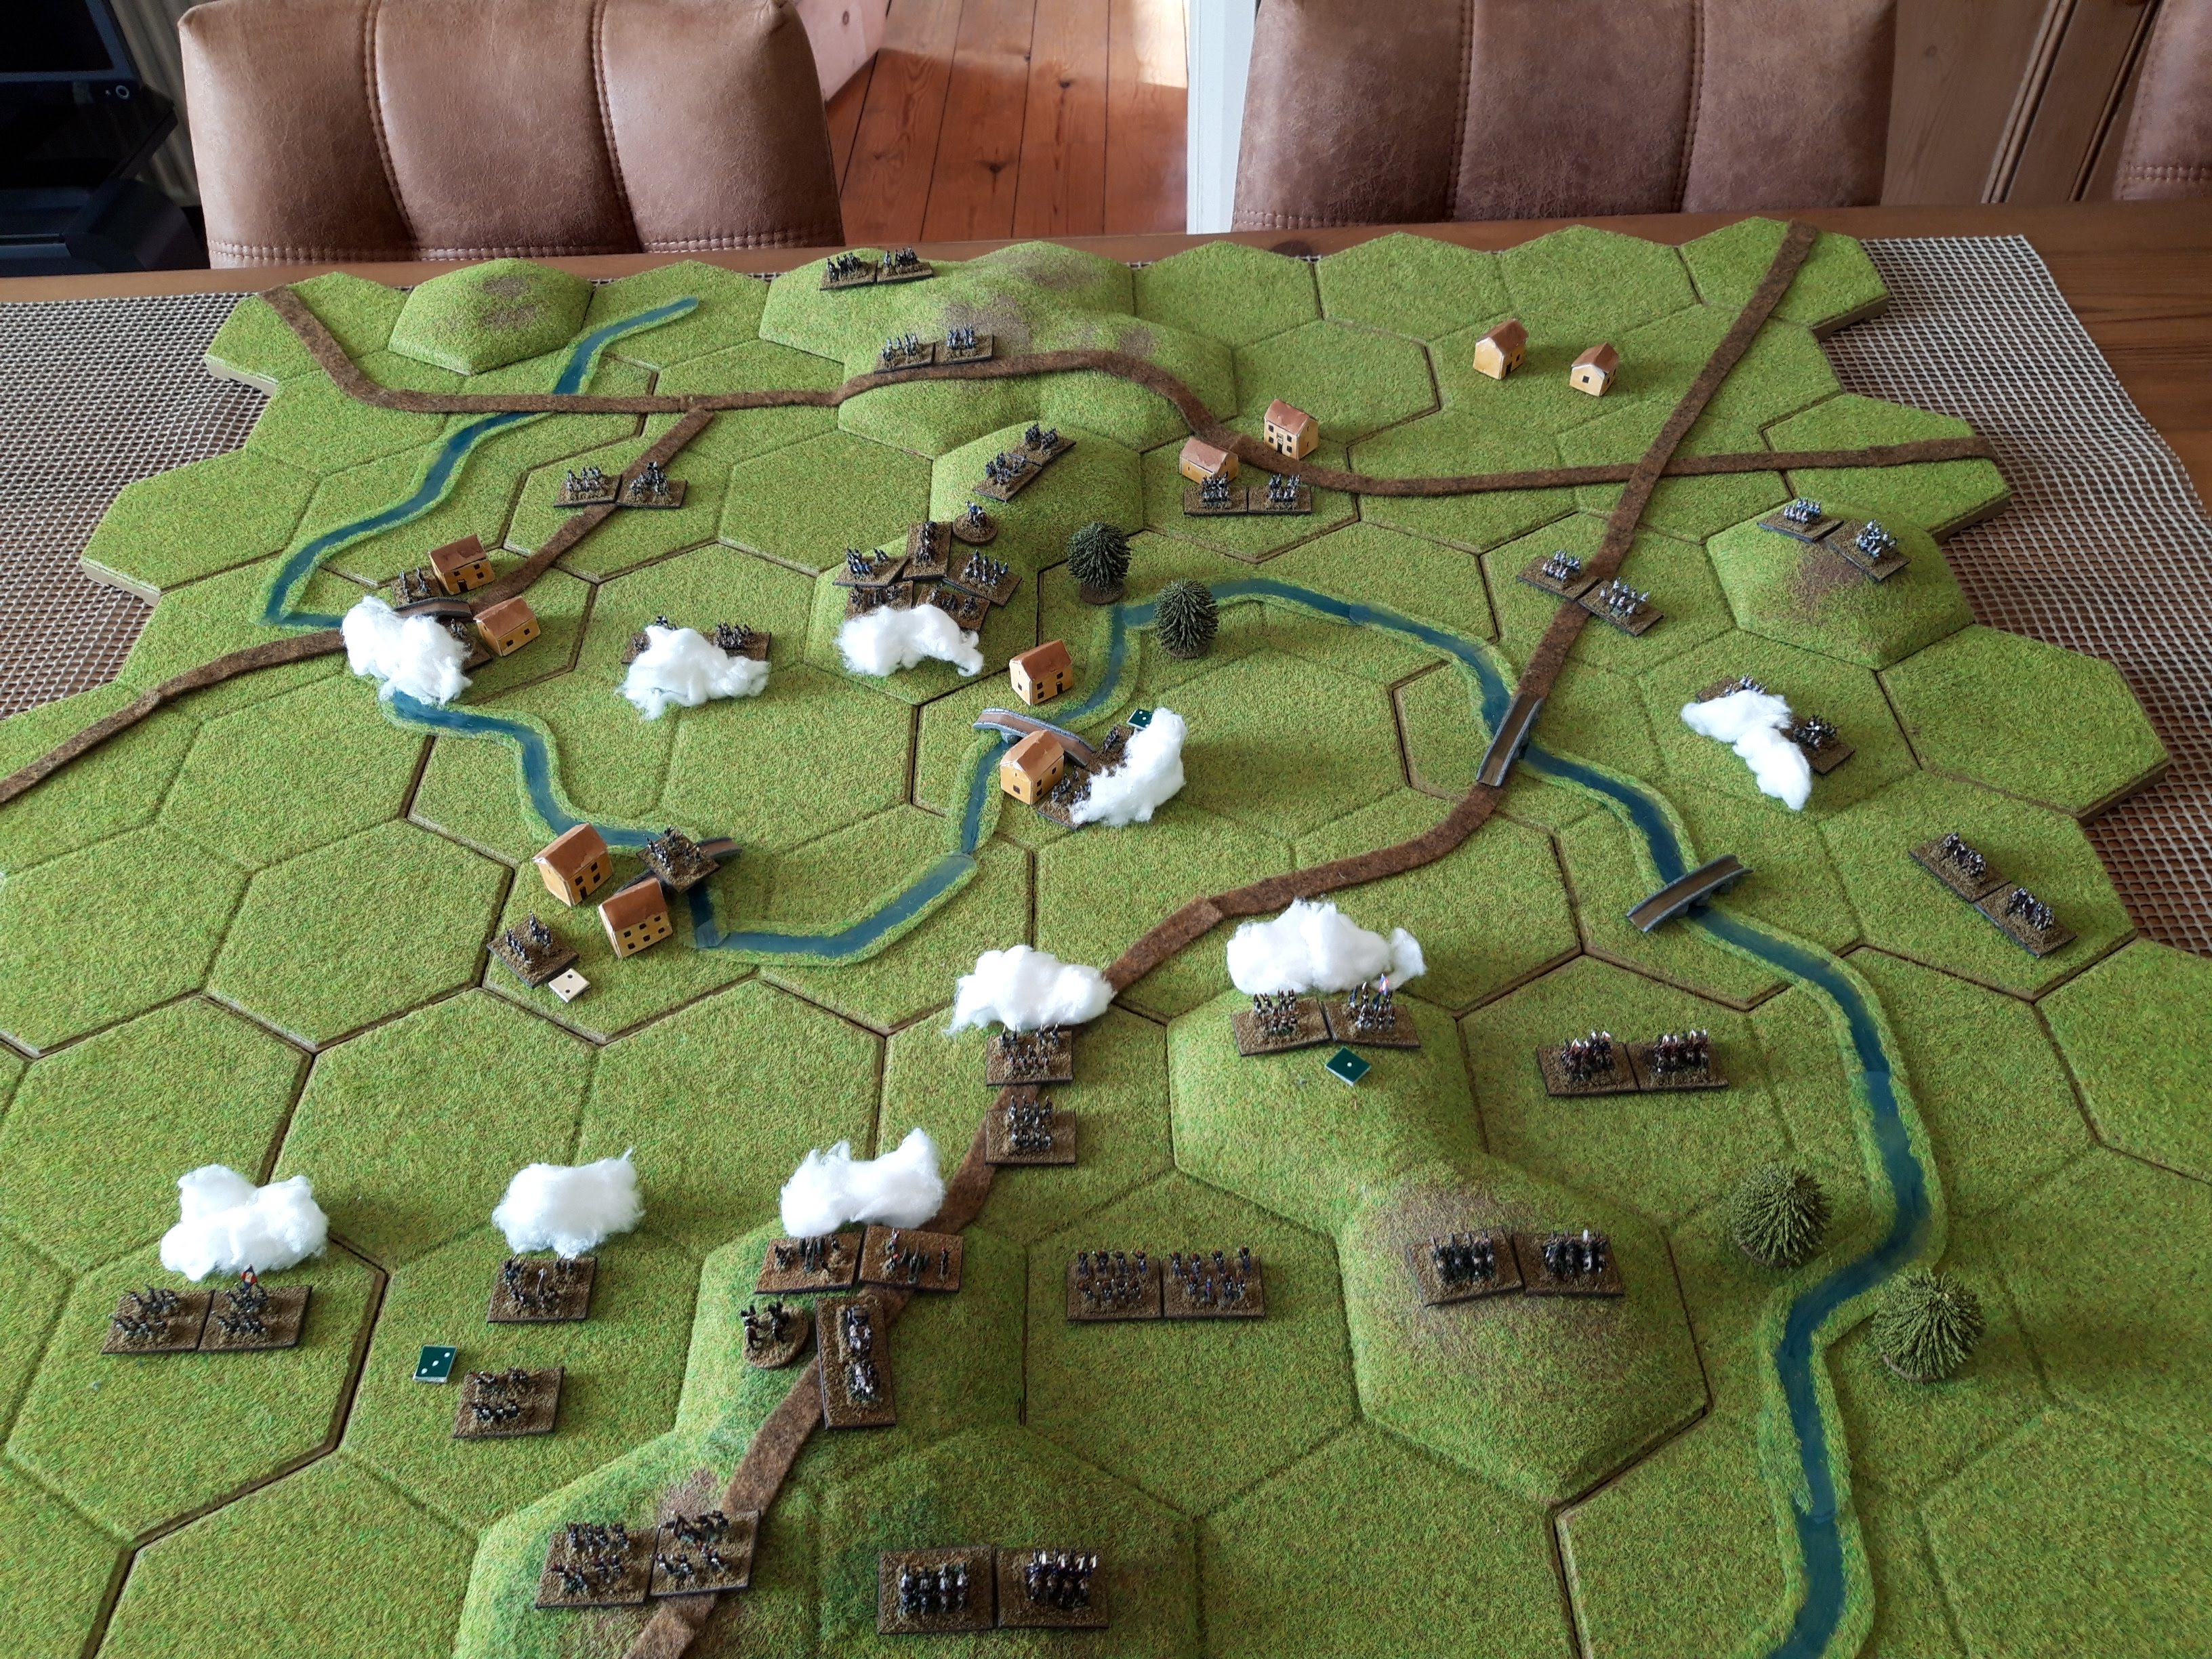
Battlefield from the south. This is very similar to the layout I used before with the PW. I ran the streams through the middle of the hexes to account for the marshes on either side. I didn't model the villages on the eastern flank as they are so small and were only occupied by some Prussian skirmishers. The scenario also didn't work properly in terms of relative unit locations, having the LOS blocked at ground level on that flank. I did put the larger villages of St Amand and Ligny on the river though, with Sombreffe behind. I guess one of the limitations of a small grid is trying to accommodate the nuances of terrain.

Zietens I Corps occupies the river line. I thought long and hard about how to model the (enormous) Prussian Corps. In the end I gave them all four infantry 'brigades', albeit rated as raw to account for the high proportion of Landwehr. I Corps had more artillery than the others, so warranted a separate Grand Battery, the rest of the guns are factored in.
I've using small, two element units for this as it is less stuff to get out of the box and move solo, but it means the units look a bit anaemic. I also didn't bother with the sabot bases for this game.

Rather than starting on-table, I had the rest of the Prussians marching on. Pirchs II Corps on the right (four infantry and one cavalry), Thielmans III Corps on the left (three infantry and one cavalry - Thielmans was the weakest Corps). Thielman would come one down the Namur Road, while Pirch would come on northwest of Sombreffe.
I did consider all sorts of complex C3 rules to model the relatively static nature of the Prussians in the battle, but in the end I just restricted Pirch to guarding the road to Quatre Bras and Thielman the road to Namur. In the real battle they just sat there while I Corps was flattened, but any sensible wargamer would simply line the stream with the entire Prussian Army. Tbh, I'm baffled how Blucher managed to lose this one.
The French win if they take either the road to Namur or the road to Quatre Bras by game end.
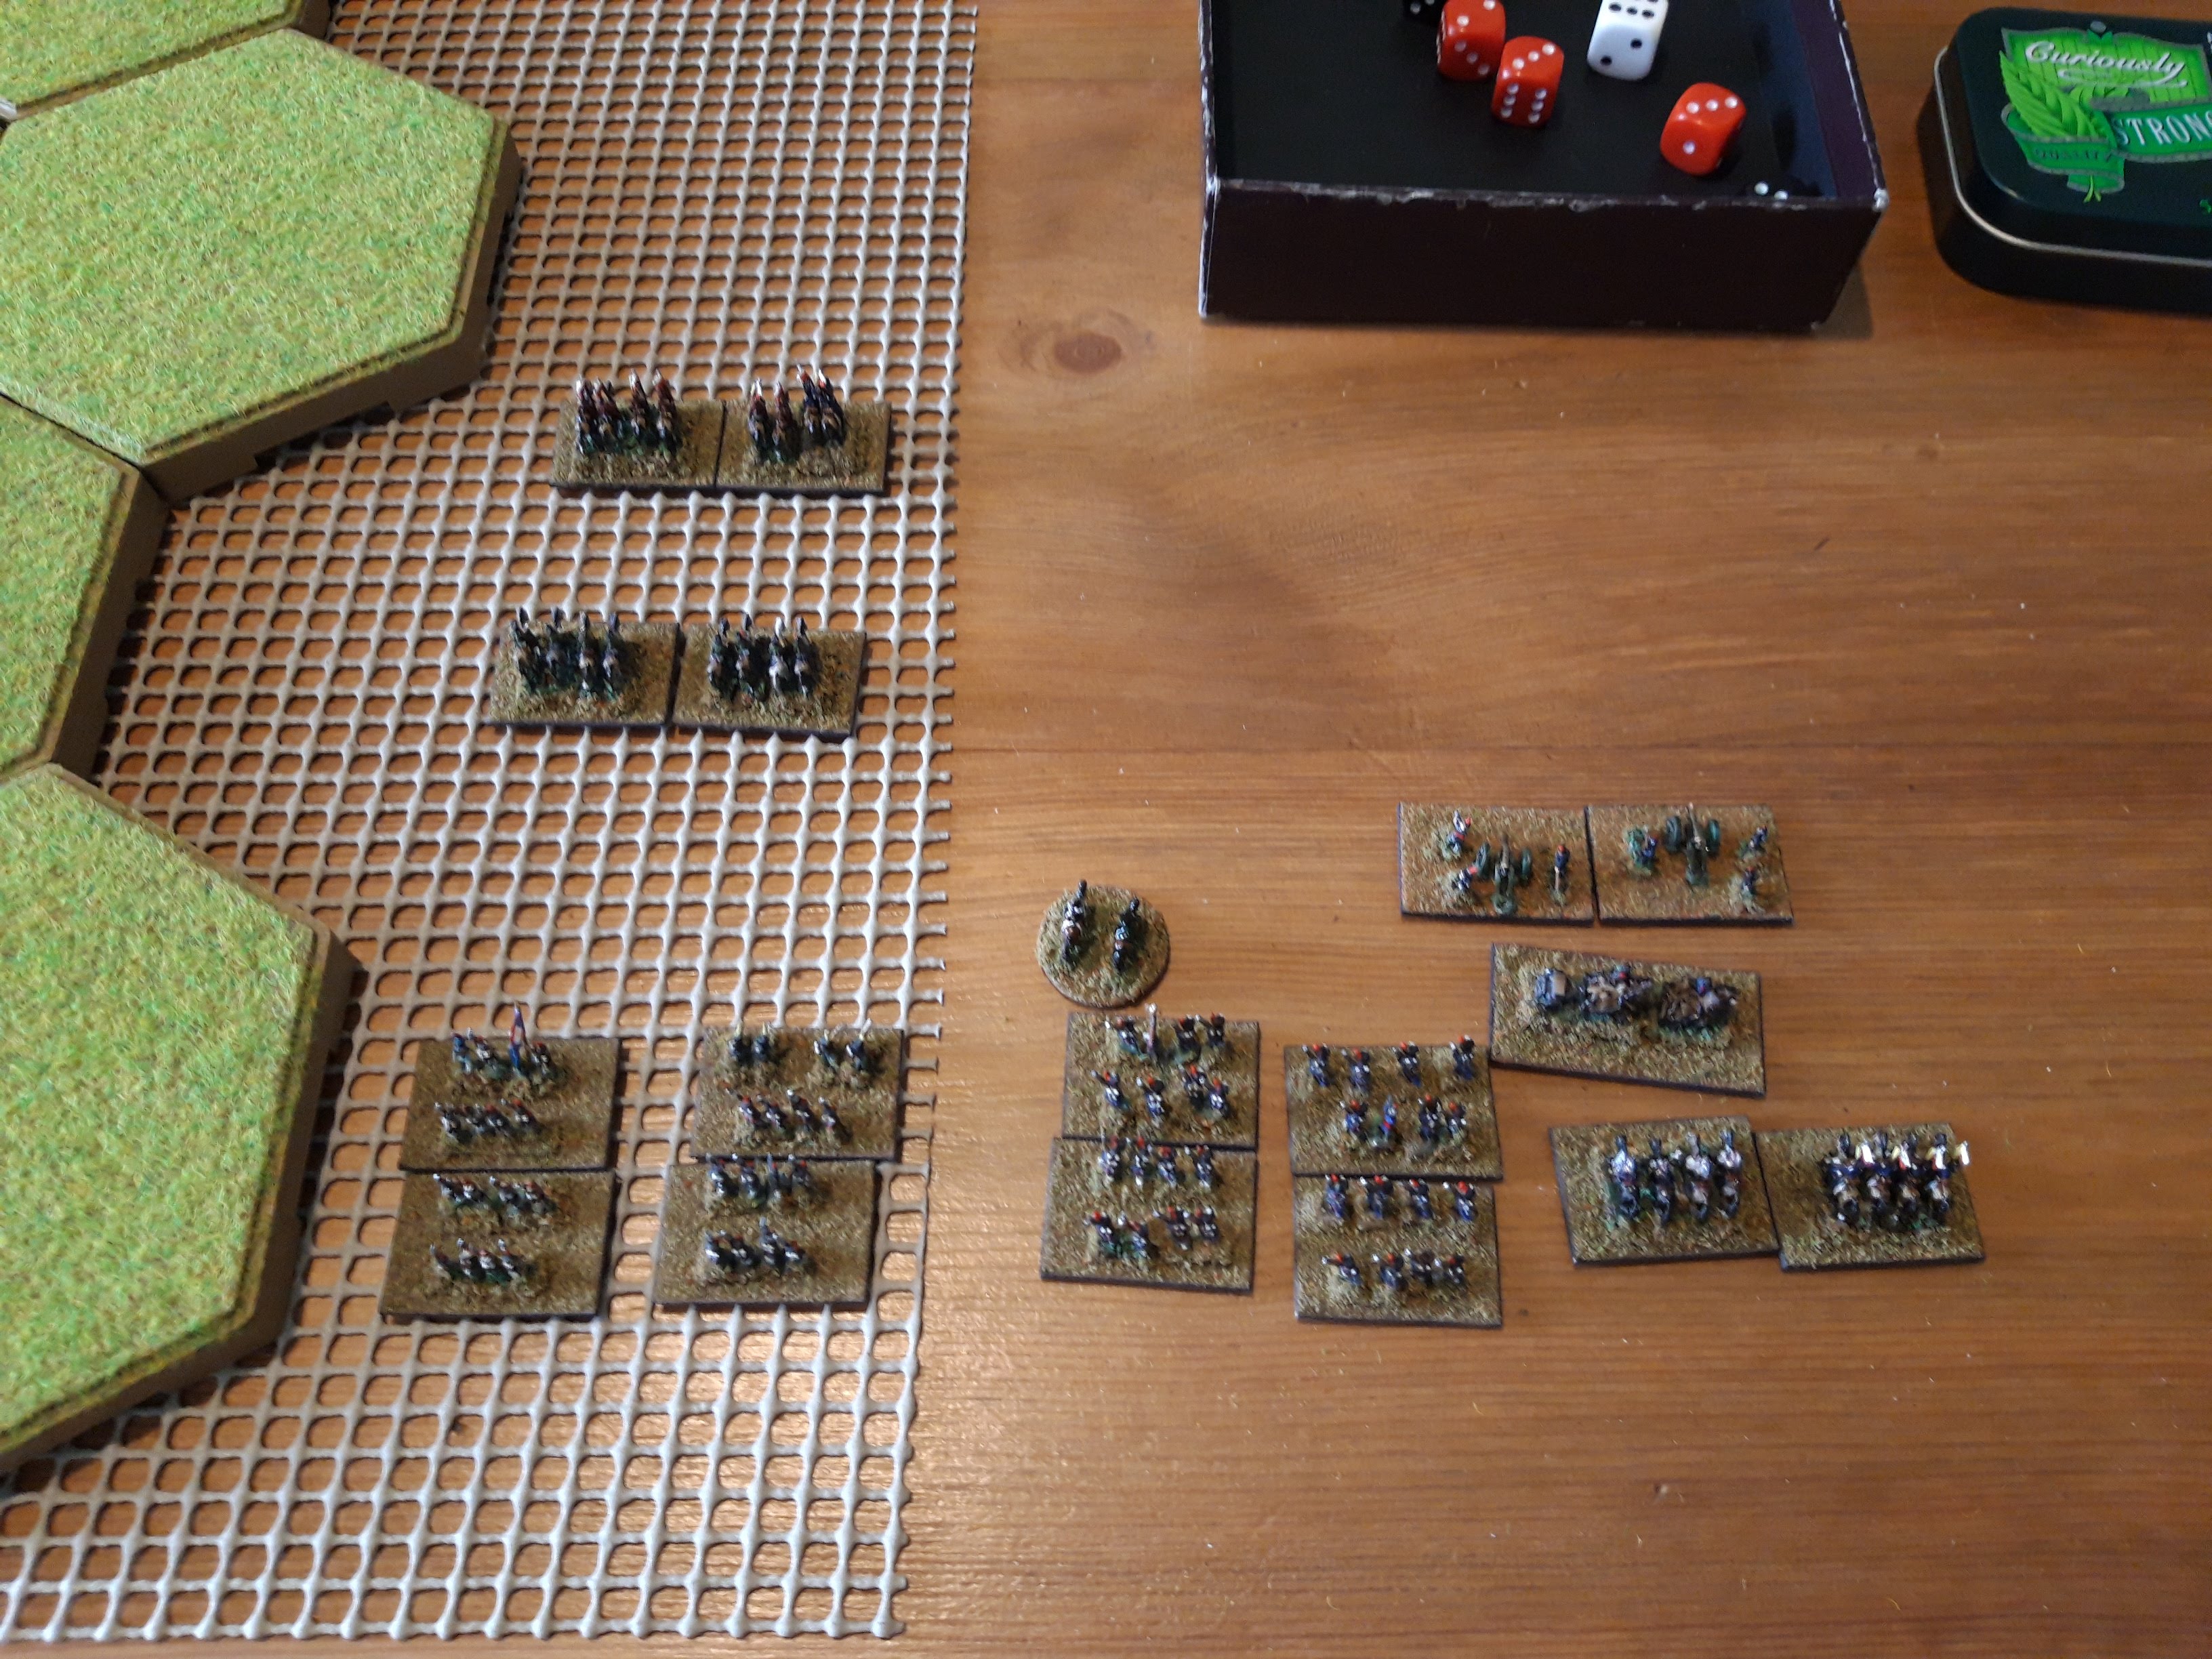
The French. Grouchys two Cavalry Corps top left, Gerards Corps left, Imperial Guard right. Lobau will turn up on turn five with a couple more infantry units.

Vandammes Corps. It was slightly stronger than Gerard, so I gave it three units (which sort of averaged out for Lobau too). As at Wavre, half the French can operate as Light Infantry Divisions.
The French are all average, except the Guard who are elite (7 hits). Each unit is around 6000 infantry or 3000 cavalry.

I went with the historical French entry. The Cavalry screened the right, Vandamme went left, Gerard up the middle and the Imperial Guard clustered around Fleurus at the bottom. I've just realised I forgot to put the actual house models for Fleurus on the table!

All the Prussian units in range opened fire. This is my new hamster bedding smoke, it looks much better than those little cotton wool balls. The firing ranges are so long as it is assumed the units have attached artillery and skirmishers thrown forward.

Pirch rolls on from the northwest, and Thielman locks down the road junction. III Corps led with its cavalry to screen the infantry brigades in column of route. I much prefer to have units marching on, although it precludes a precise historical setup. This something you can't easily do with CnC Napoleonic as the move distances are so short.

The French sort themselves out and Vandamme starts to fire back. Those villages give the Prussians a big advantage, not least a 360 degree arc of fire. The French are still mainly moving, so not much fire yet.

Thielman sets up a strong position behind the river. The extended range means they can fire across it (imagine there are little settlements at the river crossings full of Prussian skirmishers).

Pirch pushes south as far as he is allowed by my deployment restrictions. In real life there must have been some reason he didn't just march up and occupy the river line, but I've no idea why not.
The French are now mainly lined up and mass firing breaks out!

Under concentrated skirmisher and artillery fire, the garrison of St Amand soon breaks and one of Gerards divisions occupies the town.

The French push up. On the right Gerard is facing off in oen order against Thielman. The French cavalry are supporting them to prevent any unfortunate Prussian charges over the bridges into th French skirmish lines.

Ligny falls to the Imperial Guard! They are now adjacent to the Prussian I Corps artillery.

The centre of Prussian I Corps has gone and they aren't in a position to counterattack. The Prussian artillery withdraws. Thielman and Gerard are still blazing away at each other on the right.

The French feel the critical moment is approaching and the Imperial Guard marches into the teeth of Pirch's stop line. Lobau and Vandamme move up in support.

On the right, one of the French Cavalry Corps charges the wavering Prussian infantry over the bridge, and scores no hits! Disaster! The cavalry are routed by point blank musketry.

In an even worse reverse, the Imperial Guard on the hill accumulate eight hits from massed musketry, and flee in disorder, taking Grouchy with them! Dear me. I should have softened up the Prussians a bit more first, but that reverse slope is a pig to attack. Maybe that is why Pirch stayed there in the real battle.

Fortunately the French have more infantry in reserve. I should have put them in first. The lines settle down to more furious firing.

Prussian routers heading for Namur. Rather than taking the units off, I just let them run towards their LOC, in a ragged mob. That is six units gone, really quite a lot...

More hammering.

The Imperial Guard cavalry managed to overrun a shaken Prussian brigade, but in turn are obliterated by point blank cannister fire and musketry. Pirch is still holding out. The road to Quatre Bras really is a bloodbath. If only D'Erlon was here....

Over in the East, Thielman is suddenly looking rather thin on the ground however.

In a shock development, Prussian III Corp suddenly collapses! French infantry columns cross the stream, the Prussian cavalry counterattack is defeated and then routed by the last French cavalry. Well blow me down, that was a surprise.

The French now pile across the river on the right and head for the critical road to Namur, a great mass of Prussians flee before them.

Fighting still continues on the centre and left, but both sides are running out of units. Many of the damaged French divisions refuse to advance (trying out the new morale rules, vaguely based on Fire and Fury) .

As night falls, Pirch is still hanging on. Blucher is even still on his horse directing proceedings.

However the road to Namur is firmly cut, and the Prussians have no choice but to retreat to Gembloux.
Blimey, that was tough, and in the end the French victory was very unexpected, despite the scenario rules which hamstrung the Prussians. Quite how Boney pulled that off in real life I don't know.
The rules revisions worked OK, but tbh, I'm not sure they added a great deal, but they didn't get in the way particularly either. I need to think about scenario design to better accommodate them, and I'm not convinced I've got Ligny as a battle sorted either. The Prussians outnumber the French by quite a margin, so attacking in those circumstances is always going to be hard. In retrospect, I should have done the streams along the hexes, or allow them to be forded (at a penalty) as the current terrain setup is far too restricted.
Anyway, the rules work well enough, so I'll leave them for now.

That was a surprise towards the end! And in any case, as you say, Ligny is difficult to recreate because it isn't particularly obvious how Napoleon managed to do so well IRL! Terrain granularity is another interesting issue, especially with hexes and squares, and how best to translate the maps into an actual game terrain. Nothing ever seems to fit 'just right'...
ReplyDeleteIt is always nice to have a surprise, especially in a solo game. I was so focused on the tactical problems of attacking the Prussian centre, that I hadn't noticed Thielmann falling apart.
DeleteAs for the real outcomes me, I suspect the French troops were just much better than the Prussians. I gave them a 25% advantage in this to allow for the Landwehr.
It's always hard to model terrain characteristics 1:1 in a hex fight but you have done a good job of representing thr critical terrain elements here.
ReplyDeleteRe the surprise ending, didn't Napoleon himself say "the fate of battle is dubious?" :)
I generally try to identify the critical terrain, but this is a complex battlefield with lots of features of varying importance. As I said above, surprises are nice!
DeleteInteresting item, Martin! You had me looking over (and comparing) my own Ligny action of 18 months ago. In the number hex-cells my board is about double yours here, which probably gave me more flexibility in designing the opposing forces. One thing, though: it seems I forgot in my articles to include the Army Lists (hiatus valde deflendus!). I rather think I made the opposing forces too nearly equal - in fact slightly in favour of the French, at least in terms of 'Strength Points'. Against that were the extra stands making up the Prussian Brigades, which proved problematic for the French in close combat.
ReplyDeleteAlthough I had Pirch's Corps march to the aid of Ziethen, progress was so slow (1 hex per turn) and the arrival of orders so chancy, that I think just a couple of Divisions saw action as night was drawing in.
None of the battle maps I consulted showed as much in the way of elevated features that you have done, here, though I was forced to exaggerate the conical hill close by south of Ligny itself.
The dramatic collapse of one of the Prussian army corps would have signalled for me a very satisfactory game action. In solo actions, I always enjoy the moment something unexpected happens. Of Napoleon's comment in respect of battles, he did say, apparently, that they occurred when two armies met and tried to frighten each other. Decades earlier, Feldmarschall Graf von Daun thought his adversary, Frederick the Great, rather too keen on accepting the hazards of battle.
Great looking game, Martin -
Cheers,
Ion
In terms of head count, the Prussian army is bigger, but in terms of combat power, the French have it. It just depends how that is reflected in unit numbers and strength points.. In this scenario there are 14 Prussian units vs 11 French, but 73 Prussian SP vs 69 French SP. So more even. Some of the hills are a bit exaggerated, but they are quite low impact in game terms.
DeleteEnjoyable, thanks. I have played the Ligny scenario in the Commands and Colors series (GMT) and their map has some ‘contortions’ to it, but I think that is to deal with the Prussian set-up being quite far back and so units were retreating off the table too easily, some ‘misplaced’ villages gave some extra anchor points to keep the Prussians on the table - of itself an interesting dimension to scenario building and tweaking.
ReplyDeleteYes, I've played the CnC Ligny scenario too.. The villages are real tough nuts to crack.
Delete