Sunday, 10 June 2018

Day of Days

As it was the 6th of June , we thought it would be appropriate to put on a D-Day anniversary game. What better than Easy Company, 506th PIR assaulting the German gun battery at St. Marie-Du-Mont.

The scenario was largely lifted from the one in Fireball Forward, and converted to play with Blitzspiel. We played it on Johns 2x3 game mat (representing 400x600 yards), using my 15mm toys. This was the first serious outing for my PSC 15mm US troops, not that anyone noticed.


The Americans were suitably slovenly and enthusiastic. Johns beaten up old M1 hlemet was horribly rusty but the liner was very smart.


While the Germans were somewhat thoughtful. The offer of my Germans officers cap was declined.


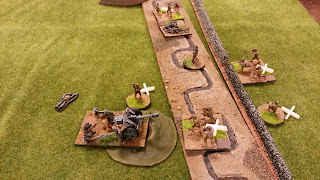
The battlefield from the east. The gun positions are marked, but otherwise there aren't any Germans in sight. The Americans have to destroy the German guns before than can fire 24 shots at the beach. I modified the original scenario victory conditions as in Fireball Forward a lot more happens in each turn than in Blitzspiel and the move distances are larger. I was worried I'd made it too hard for the US as the Germans could in theory win in six turns if all four guns got off shots each turn.


The Germans opened the game with some distraction tactics. Jaffa cakes.


And these the fine Dutch sweets courtesy of Tim.


Lieutentants 'Dick' Winters and 'Buck' Compton led their handful of men up to the first hedgerow. E Company had around 20 men in the actual action, including some hangers on from Battalion HQ. The Germans gunners and the support elements numbered around 60. I gave the US paras a significant initiative advantage based on their historical performance.  Would +2 initiative be enough to deal with a force three times their size dug into trenches?


Compton was pinned by German MG fire from the battery defence platoon, but Winters successfully assaulted the gun position. One down and three to go. The rest of the German guns were banging away at the beach, while the two US .30 cals established a base of fire behind the hedgerow.


Some Germans from battery HQ made their way along the trenches towards Comptons platoon. As the US troops were so reduced I let them operate as teams (historically Winters organised them into 'squads' of three men each!). The Germans, being regular artillerymen albeit having spent most of the war digging holes and carrying boxes around, had to operate in sections.


Elements of the German battery defence platoon engaged the US base of fire (the .30 cals).  Some of them are still hiding in cover.


Comptons men destroyed the second gun as Winters moved up in support. The Germans had accumulated nine shots by this point.


Lt Spiers platoon then appeared from the north and ran over the open field to the hedgerow. Lt Spiers may or may not have executed some prisoners in Normandy, so I gave him a figure with a Thompson, as he was so armed in 'Band of Brothers' in the infamous execution scene.


Unfortunately the rest of the German battery HQ opened up from the behind the hedge, pinning most of the Americans. One group made it over the hedge and up to the gun.


The German battery defence platoon were largely pinned by this point, but their officer ran up to rally them. Their return fire had pinned one of the .30 cals.


Comptons platoon was tied up fighting the German riflemen in the trench, so as the battery defence platoon was pinned, Winters led his group at a run across the open ground. The artillerymen continued to pound the beach.


The MG42 managed to pin the last of Spiers platoon while the German battery CO, Hauptmann Stransky took cover in the trench.


Meanwhile Winters had blown up the third gun and pressed on over the open ground, 30 yards away from the somewhat surprised MG42 team.


The US seized the initiative and Winters dashed forward, only to be pinned by Stransky!


Compton assaulted the MG42 team using the trench for cover , but the other MG42 shot down Winters men in the open. Spiers men remained pinned. Meanwhile the German gunners continued to fire, up to nineteen shots at this point. Stransky was surrounded by pinned or dead Americans.


In desperation Compton led a rush across the open ground, only to be pinned by Stransky and his artillery Luger. However, Spiers managed to get some of his men moving again. Bang went the last 105mm gun.


Spiers moved into the assault, personally taking on Stransky with his Thompson.


Bang went the 105mm one last time before Spiers men overran it. Stransky died for the Fatherland in close combat with Spiers. The Germans had got 21 shots off before being overrun.

I must confess I was surprised how well that went. At first I thought the US Paras were doomed (attacking superior numbers in an entrenched position!), then as the US qualitative superiority tore through the Germans I thought they were doomed instead. In the end Stransky's heroic stand made the game a real nailbiter, and with slightly better shooting from the German battery defence platooon they could have swung it.

In the end the result was amazingly historical, although irl it was half of Spiers platoon who were shot down in the open rather than Winters. I can see why Winters was awarded the Silver Star!

Many thanks to the  players who made the whole thing so enjoyable.

Saturday, 2 June 2018

Outflanked at Bir Hakeim

For some time I have been mulling over some basic dissatisfaction with Memoir 44, namely that compared to CnC Napoleonics and Ancients, a lot less 'stuff' happens each turn. This is mainly a function of the card deck, which has a much lower proportion of group activation cards than the later games, which largely reflects its age. Various bloggers had come up with solutions which involved the use of different selections of cards from multiple decks, but sadly replacement decks are no longer available since Days of Wonder were taken over and don't appear to be in the business of actually printing any of the Memoir 44 components any more.

 I could have made my own deck of course, but far more rewarding was tracking down the (apparently) last 12 printed copies of the Winter Wars supplement in the entire world to a games shop in Germany, which includes the mighty 'Breakthrough' deck. The Breakthrough deck is somewhat bigger than a standard Memoir 44 deck, and along with more group activation cards, it also modifies the standard cards to allow extra units to move (but not fight).

My shiny new deck duly arrived from Germany, and I mixed in a few extra standard cards as per various suggestions on the internet to generate a 90 card deck. To try it out I picked a fairly straightforward scenario from the desert expansion, 21st Panzer and Ariete vs 1st Free French Brigade and 3rd Indian Motorised Brigade during the battle of Gazala. Jerry took  the Afrika Korps and John the Allies (so he could wear his new RTR beret, Jerry borrowed my DAK cap). We used my 6mm desert stuff on hexon terrain


1st FF dug in at Bir Hakeim, wire, mines, bunkers etc. 3rd Indian are visible in the distance. The Bir itself is a supply dump and can regenerate damaged units. The two bunker hexes are also Axis victory hexes.


Ariete, M13s and Semovente to the front, dismounted infantry to the rear. Historically they dismounted after coming under artillery fire from 1st FF. 21st Panzer visible in the distance.


3rd Indian Motorised. I'm not convinced at all by this scenario deployment as historically they were in an actual box, and being a motor brigade had no less than four(!) companies of 2pdrs although they were missing half of them. I left it as-is but added in their field regiment, which in the real battle seems to have done the most damage to the Panzers.

Also unlike real life, the Stuart squadrons of 4th Armoured Brigade are somewhat closer to the front than in real life. It wouldn't be any fun if the British didn't have any tanks though? The Stuarts are sitting on three Axis exit hexes which score them points for units exited. Fair enough as irl the aim was for DAK to outflank Bir Hakeim and tear off around the back of the Gazala LIne.


21st Panzer. Motorised infantry, engineers, Pak 38s, various types of tanks (including a company of Mark III specials) and the inevitable 88s. I also gave them some Italian truck mounted 107mm naval guns, because I'd painted them. The 88s and 107s functioned as a heavy AT unit instead of the artillery unit in the standard scenario. 


The battlefield from the southern end. The Axis need to make the running in this as the Allies can win simply by sitting in their fortifications and shelling the Germans. The Axis can try and win either by taking Bir Hakeim (which would yield two victory hexes plus four dead units) but is behind two layers of mines and wire. Or they can try and get stuff off the exit hexes by driving round/over 3rd Indian. Rommel decided to do that in the actual battle, and that is what Jerry decided to do here. 


21st Panzer rolls forward in the distance while Ariete side slips into the centre section. The new deck really helped with these manouvres, and there was a lot less of the piecemeal commitment of individual units we'd seen in standard games.


21st Panzer stands off and shells 3rd Indian. The Indians return the favour and a unit of Stuarts engages the Panzers in the far distance. Very wisely Jerry didn't think just running at a load of dug in infantry and guns with tanks without any sort of preparatory fire was a good idea.


After several turns of shelling, German infantry closely supported by Italian tanks and SP guns assaulted the Indian lines, routing the defenders but sustaining losses themselves.


The Indian artillery regiment bravely held the Axis infantry and tanks at bay for a time while the Stuart provided moral support. 


But the Italians and Germans eventually closed in for the kill.


And Ariete rolled off the table to claim victory.

That all went pretty well. The Allies managed to knock a big hole in the Axis armour (as in real life), but Jerry's concentration of force and fire & movement tactics carried the day. John had an unfortunate run of cards, which the new deck didn't help with, but in general it all went fine. When I playtested this at home I managed to lose as the Axis when my assault on Bir Hakeim came unstuck in the minefields. We'll play a few more games with the new deck and see how it goes before any more tweaks.

The next thing I want to try is a home grown scenario with a deeper board (12x12 instead of the standard 9x12) to see if I can translate some Command Decision and Spearhead scenarios into Memoir 44.

Saturday, 26 May 2018

Gladiators

Tom made a welcome reappearance at the club recently, having got a new job which left his Wednesday evenings free. He brought along a set of gladitorial combat rules he'd written for us to try out. Tim, John and me took various heavily armoured chaps, whilst Jerry (ever the rebel) took a pair of lightly armoured but more nimble characters.


Here we are scattered around the beermat arena. The Emperor can be seen lurking in the distance. My chap has a little red dice next to him.


Amongst the various more conventional actions available to our heroes (charge, throw spears etc) are some more entertaining ones such as showboating for the crowd and taunting enemies.  Whilst Tim entertained the plebs with impressive displays of sword whirling, I managed to very successfully taunt one of Jerry's characters who came rushing towards me. This was all very jolly as moving around in all my armour was liable to make me tired, whereas if the enemy came to me...


My characters various vital statistics. He was called 'Fulbert' and the various numbers covered things like skill at arms, endurance etc. He also had various special skills, mainly relating to how he used his armour and shield.


Battle was duly joined and we slugged away. An excellent opportunity to stress test the combat rules as we had a multi-figure engagement and wildly different basic skills, weapons, armour etc. After several rounds of combat with the advantage swinging either way and the crowd cheering, both sides broke off exhausted and it seemed a good time to break for a washup.

It was a good session and most of comments were around streamlining some of the mechanisms and clearing up some ambiguities in the rules. Many thanks to Tom for bringing it down. I'm afraid I don't know what make the figures are, but they were very pretty.


Saturday, 12 May 2018

Bush Horizon

Nick brought a new version of Bush Horizon along to try out. This covers bush wars in Africa, with a lot of the  mechanisms based on Command Horizon. The company sized elements are made up of bases of varying types (infantry, tanks, support weapons etc.).


This scenario was a standup fight for control of a railway station. Our chaps bore a distinct resemblance to a motor rifle battalion and set off in textbook formation.


Our objective.


As our chaps were riding APCs, and the enemy were walking, we unsurprisingly got there first. Our dismounted infantry occupied the station and started shooting at the other lot, with rather mixed results. (The big puff of smoke is a bad thing).


Our tank company went left flanking, while some enemy lurked in a nearby village.


Over on the other flank, the UN tried to intervene, and were engaged by our support company.

Once it became apparent that the enemy weren't go to take the station, we had a washup about the revised mechanisms and a useful discussion about some of the mechanisms and the scope and feel of the game.


Saturday, 5 May 2018

I have been to.... Australia

We recently went to Australia for my niece's wedding, and as we were there, took some time to travel around the country. I am sure my loyal blog readers aren't particularly interested in pictures of the Sydney Opera House or Great Barrier Reef, but I did see a few things of historical interest in Brisbane.


The Australian Army treated us to a flyby from a group of Blackhawks.


A German 77mm gun, now outside the Queensland parliament building.


The highlight though was visiting HMAS Diamantia in Queensland maritime museum. She is a River class frigate, commissioned in 1945 and fitted with state of the art (for 1945) radar and sonar.


The paint had faded a bit in the tropical sun, and it was a miserable wet day so I had the ship to myself. It was fantastic, just like being in the Cruel Sea.


Forward 4" gun.


Radar array.


Bofors gun in front of the bridge. The ship had quite a hefty complement of Oerlikens and Bofors.


ASDIC office. The radar, sonar and wireless offices were all jammed in behind the bridge and in the 30 degree heat, were stifling. I can't imagine what it was like to be on duty in them. 


Rear Bofors mount. There were a pair of these on the rear deck.


Depth charges, both rail and mortar deployed.. The ship was also fitted with Hedgehog on the foredeck but this was removed after the war.


The working parts for the 20mm AA in the armoury (I'd noticed the 20mm guns were missing the shooty bits when I was on deck!).


Rifle rack. No. 4, SMLE, Martini Henry and Jungle Carbine. Sadly the actions were all welded up.


Engine room.


Starboard turbines opened up.


Rather swanky showers. 


Rather less swanky loo.


Boiler. Sealed off due to asbestos risk.


Officers mess.


Warrant Officers bunks (fitted post war). Very like those in the Kelvedon Hatch nuclear bunker.


A small display on the Royal Marines.


Hammocks.


Contrasted with bunks.


Highly recommended!

That is the closest I'll get to being on a WW2 small ship, and it was really very atmospheric. I could almost see poor old Commander Erickson on the bridge. So that means I've done a sub,  a 'destroyer', a cruiser and a carrier. I just need to find a complete WW2 battleship somewhere to complete my personal game of Battleships (there are several in the USA). I think handling various bits of blown up WW1 battlecruisers and dreadnoughts doesn't count. 

Oh OK then, a few holiday snaps.


Yes, there were snakes. I met this ones living pal when I was out running. A brown snake, evidently highly venomous and aggressive!


More hazards. Dangerous cliffs this time,


Very beautiful though.


And crocodiles. The saltwater ones like eating people.


Mmmm. Advice in Cairns was not to walk from the airport to the town. Because of the Crocs.


A Wombat. This is what they do most of the time.


Very cute (and not dangerous).