I've been vaguely thinking about running an Arnhem full campaign game again as it is a while since I've done one and have been tinkering with a Megablitz scenario, but tbh my heart isn't in it as I've done it with MB twice now, similarly I've done it twice with 'Arnhem in an Afternoon'. Anyway, I was kicking a few ideas around when David Crook mentioned he was looking at the Memoir 44 'Overlord' (double board) scenario and that piqued my interest.
I do actually have multiple Memoir 44 boards, as well as enough Hexon to do a double sized board too with 10cm hexes too, and now we have resumed face-to-face play, perhaps something to think about.

Anyway, after some downloading of scenarios and rules, here we are, the 'Overlord' Memoir 44 version of Market Garden. The Neerpelt bridgehead over on the right, and Arnhem over on the left. I set the terrain up with model trees and buildings as I don't have anything like enough tiles to to set the scenario up otherwise, and they look nice. I used the green board for the boggy bit over towards Nijmegen and Arnhem, and a desert board for the heathland around Eindhoven.

There are special rules about roads in this scenario and they are pretty key. I tried setting them up using felt but that didn't work, so instead I used the game tiles to mark out areas of offroad 'bad going', and the clear bits are where the roads are. If playing on Hexon, I'll be able to use my normal roads. In this iteration of the setup I had to use some of the game tree tiles as I ran out of model 6mm trees.
Eindhoven in the centre, Veghel is the bridge on the left the little town on the right is Valkenswaard.

The north end. Arnhem on the left, Nijmegen on the right. The geography has been skewed to cope with the Memoir 44 format, so it is topographically incorrect but topologically it works as the battlefield is divided up by rivers into distinct sectors. It does mean that the 82nd come on from the wrong direction, but the terrain is reversed so it works. When I played it, I realised how ingenious the designer had been. I wish I was that clever.

After fiddling around with various terrain configurations I remembered I had an emergency box of dodgy 6mm foam trees which were hastily pressed into service, and that looked much nicer. I could now use all the game tiles to mark out marshy bits, leaving the clear bits as roads. Job done. The trees and roads are key in this scenario as they deliberately funnel the action into specific (historical) areas.
I represented the units with 6mm toys as they look much nicer than the standard M44 models.

XXX Corps deployment. The terrain is skewed 45 degrees to fit them in, but basically they have to drive up a narrow wooded corridor and break through to Valkenswaard. So close enough. I reckon the units represent roughly two battalions each, and the plethora of armour will be combined tank/infantry combat teams from both Guards Armoured and 8th Armoured Brigade supporting 43rd Infantry Div.
KG Walthers crust is missing, but Valkenswaard is held by dug in 'elite' infantry, presumably 6th FJR and KG Richter (from IInd SS Panzer Corps) . There is a mysterious German tank lurking in the top right, which I will assume is the 10th SS Panzerjaeger Bn with Jagdpanzer IVs. In the scenario this is specified as a Tiger, but that offended my historical sensibilities too much. The only Tigers saw action around and south of Arnhem, although a few Jagdpanthers turned up near Veghel.

Eindhoven and Veghel. There is a minimal German garrison at each, and the 101st are mysteriously attacking from the west, not the east, but hey ho. The 101st have five elite infantry, call it ten battalions. I guess the others are busy holding off the Germans elsewhere.

The reason the US paras are in the west are all these German tanks and motorised infantry in the east! I guess these are supposed to represent the 107th Panzer Brigade, KG von Furstenberg (which had some SP guns) and possibly bits of 59th Infantry Division supported by the Jagdpanthers of 654th Panzerjaeger Bn? Who knows. Anyway, I assumed the guys on the right were the 107th so they got a Panther, some SP guns and infantry in halfracks. The guys on the left got some lorried infantry and an SP gun as KG von Furstenberg.

Nijmegen. The 82nd have a mere four elite infantry (around two Thirds of the division, which had twelve combat battalions) , although three of them have assault boats. They are also coming from the wrong direction, but I guess the game assumes the US regiment at Groesbeek is far too busy to attack the city. The force ratios here mean the 82nd face an uphill task until XXX Corps arrives.

The German defences are quite strong here. Two entrenched infantry and artillery in the city, with KG von Furstenburg and another infantry (the 406th Infantry Div?) waiting to intervene. The 82nd will have to be careful. I guess this represents the German defence after KG Euling arrived along with 10th SS Flak Battalion, as irl the bridge was only held by a hastily assembled battalion of policemen and railway workers supported by the SP gun company from the 9th SS recce battalion.

At Arnhem the mighty 1st Airborne has a whopping six units of elite infantry, so all 12 battalions of the division. Or maybe just six battalions of the Parachute Regiment. There is one lonely German infantry unit dug in at Oosterbeek, presumably Kraffts 16th SS Erstaz Bn plus the Luftwaffe signallers and KG von Allworden. 1st AB look to be in with a chance here.

The mighty IInd SS Panzer Corps lurks in the east. They've obviously got the ferry at Pannerden working as 10th SS is already south of the Rhine, but hemmed in by the elite infantry in front and woods to the sith, so they aren't going anywhere until the infantry shift.
9th SS has two leg infantry and one armour unit, which is probably about right if including KG Knaust, 280th Stug Brigade etc. I gave them a Pz IV, but it should probably be a Stug.
10th SS has two elite armour units! Possibly a bit of an exaggeration, but two regiments supported by a company each of Pz IVs, Panthers and Tigers? Perhaps. I reckon the elite infantry unit is supposed to be Graebners 9th SS recce bn, so I gave them an Sdkfz 250 and an armoured car. The German armour is all boxed in by infantry, so will take ages to get into action. This is a standard technique in early M44 scenarios, later on designers discovered the concept of off table reinforcements.
The real genius of this scenario is the way the Command Cards are handled. The Allies start with no less than 13, while the Germans start with 3.... This ensures that the German response is going to be very muted while the Allies stomp all over Holland. The Germans increase their card deck size, and reduce the Allied deck, by destroying Allied units, so as losses mount, the Germans will gradually get far more command flexibility, and the Allies will be reduced. The Allies therefore need to maximise their early advantage and avoid early losses, while the Germans need to kill stuff, fast.
There are VPs for terrain objectives too. Each of the three bridges is worth one, but must be uncontested control. An enemy unit adjacent counts as contested. Whoever controls the majority of the thirteen town hexes also gets a VP, so controlling all the terrain at start, the Germans get 4 VP. First to 12 VP wins. The Allied paras therefore need to grab terrain objectives and avoid losing too much stuff in the process, while XXX Corps kills as much as possible.

As this is multi player Memoir 44, there are restrictions on card play. The board is still divided into left right and centre, but each of those also has a left and right. Commanders who can play up to three cards overall, which may be split between the Left/Right/Centre or doubled up in one. There are various restrictions or changes in the play of certain cards to cope with the new format. This was a lot of extra stuff to take in so I just used the basic Memoir 44 rules for movement and combat, the mods I kept from Memoir 45 were all units being able to Battle Back in assault and restricting grenade hits to assault only. I also used the standard terrain rules, which make woods almost as bad for armour as towns.
The Allies had some great cards in their 13 card deck(!), including some infantry assault cards. I thought I'd get the paras moving towards their obejctives, so I played cards on the 1st, 82d and 101st Divs, leaving XX Corps to its own devices for now.

1st AB used Infantry Assult to activate all six units and pile forwards towards Arnhem. The buildings restricted who could get into contact, but as these are elite, they can move 2 hexes and fight. The initial assault on Krafft was beaten off, but 1st AB was well up to the city now.

At Nijmegen the 82nd perhaps unwisely split their force with half the units crossing the river in their boats and the others attacking the western outskirts. Although they did inflict a few losses, they suffered too, and looked very vulnerable out there in the open. I'm using the 'Breakthrough' deck for this, which is much more generous in terms of unit activations per card, it is more like the Ancient or Napoleonic card deck, rather than all the tedious 'activate one unit' cards in Battle Cry and standard M44.

The 101st made a dash for the bridge at Veghel and got adjacent, so at least it was contested now. Like the other paras, they also made an attack on the outskirts of Eindhoven which was inconclusive.

The German response was fairly muted with only three command cards (and you can only draw two replacments a turn). Their priority is to kill stuff to get extra command cards, but it is a bit chicken and egg with such a small deck. One of the SS infantry moved to the woods north of Arnhem, but couldn't fight as it had entered a wood.

The Eindhoven sector didn't get any cards and instead rolled an (optional) 'initiative' dice. An infantry or tank activates one unit of that type, a star anything, while a flag forces a friendly unit to retreat and a grenade inflicts a hit! Another Overlord specific rule.

The main German effort was at Nijmegen, the key in every single Market Garden I've played. Combined infantry and artillery destroyed one of the exposed US paras, and I moved up two reserve units of infantry and motorised infantry, which unblocked the armour behind. The Germans now have four command cards and the allies twelve.

Time to get XXX Corps moving. The initial terrain is awful for an armoured attack, those woods and towns are all -2 for tanks, so I pushed up the supporting infantry and combined with artillery, began battering the right hand village (KG Richter). As they are dug in, so can ignore one retreat result, this may take a while.

Happily though, the 101st destroyed the Eindhoven defenders. The way was now open to occupy the rest of the city, and three town hexes towards the majority town control VP. The allies also got a VP for the destroyed unit.

SS Kraft was also destroyed at Arnhem and 1st AB began to occupy the city. There was a bit of a skirmish in the woods to the north, but basically the British have got a free run here. Another VP to the Brits for the destroyed German unit.

Down near Eindhoven the Germans got 107th Panzer rolling in anticipation of XXX Corps breaking out. The Jagdpanzers set off for Veghel while the Panthers moved to cover the road north of Valkenswaard.

At Arnhem 1st AB occupied the city, so Graebner activated and moved his battalion up to the south side of the to bridge to contest it. No charging across it however!

The 101st put two battalions over the river at Veghel and captured the bridge. They made contact with the 406th Div infantry in the woods to the east. Another VP for the Allies for the bridge.

At Arnhem 1st AB plays a dig in card, the city is now a fortress. Things aren't looking too good for the Germans here. The bridge remains contested however.

Down south a big effort by XXX Corps wipes out KG Walter and captures Valkenswaard. Two more VP and the Allies now control the majority of BUA hexes so get another VP. The Germans are really on the ropes now.

Things suddenly change though. The Guards Shermans run into 107th Panzer on the road to Nijmegen and take a bit of a battering.

And at Veghel one of the 101st battalions is overrun by combined infantry, assault guns and Panzergrenadiers. The bridge is contested again and another German command card is gained.

The 107th goes down in a blaze of glory with an Armoured Assault card. They take out two battalions of Shermans before being destroyed though. Ouch.

The remaining Shermans link up with the 101st at Eindhoven.

The 9th SS trys its luck at Arnhem and is bloodily repulsed. I'm not sure the Germans can do much here with the Paras dug in to the city.

At Valkenswaard the 10th SS Panzerjaegers come into action, but are heavily outnumbered.

The Shermans swarm the Jagdpanzer IVs.

With predictable results. Some of the Guards and43rd Div tanks are knocked out but the 10th SS Panzerjerjaeger Bn is destroyed.

At Veghel the 101st are in big trouble and the 107th Panzer and KG von Furstenburg retake the bridge. Guards Armoured needs to get rolling northwards.

Rather than waste effort on Arnhem, 10th SS go hunting the 82nd Div units which had crossed the Waal. The Germans need to rack up kills as fast as possible, and their armour units aren't much use in all these woods.

The bulk of XXX Corps drives past Eindhoven. They need to find more German units to kill as the bottom half of the map is now clear. That is something else I hadn't figured out at first, I should probably have got XXX Corps moving before committing the 82nd at Nijmegen.

This lot will have to do as the next XXX Corps target - the German units now holding Veghel. On the wrong side of the river, they may be a tough target.

With the 10th SS infantry off para hunting, the armoured units park at the bottom of Arnhem Bridge to continue to contest it. The tanks can't do much to the infantry in the city, but the infantry would be mad to try and attack the armour across the bridge.

Graebner and the other SS infantry destroy one of the 82nd units with a Close Assault card. That is now 11 German VP to 10 Allied.

The Germans make a last ditch attack at Veghel, which pushes a US unit back but it survives. I bungled the German attacks this turn and ended up making three poor attacks instead of two strong ones, which would have probably won the game for the Germans . Guderian wouldn't have approved. Now the Allied riposte.

Supported by fire from the Shermans, the 101st knock out the assault guns at Veghel, but the German infantry just hang on with 1SP left.

The bridge is now contested so the Germans drop to 10VP and now the Allies are on 11.
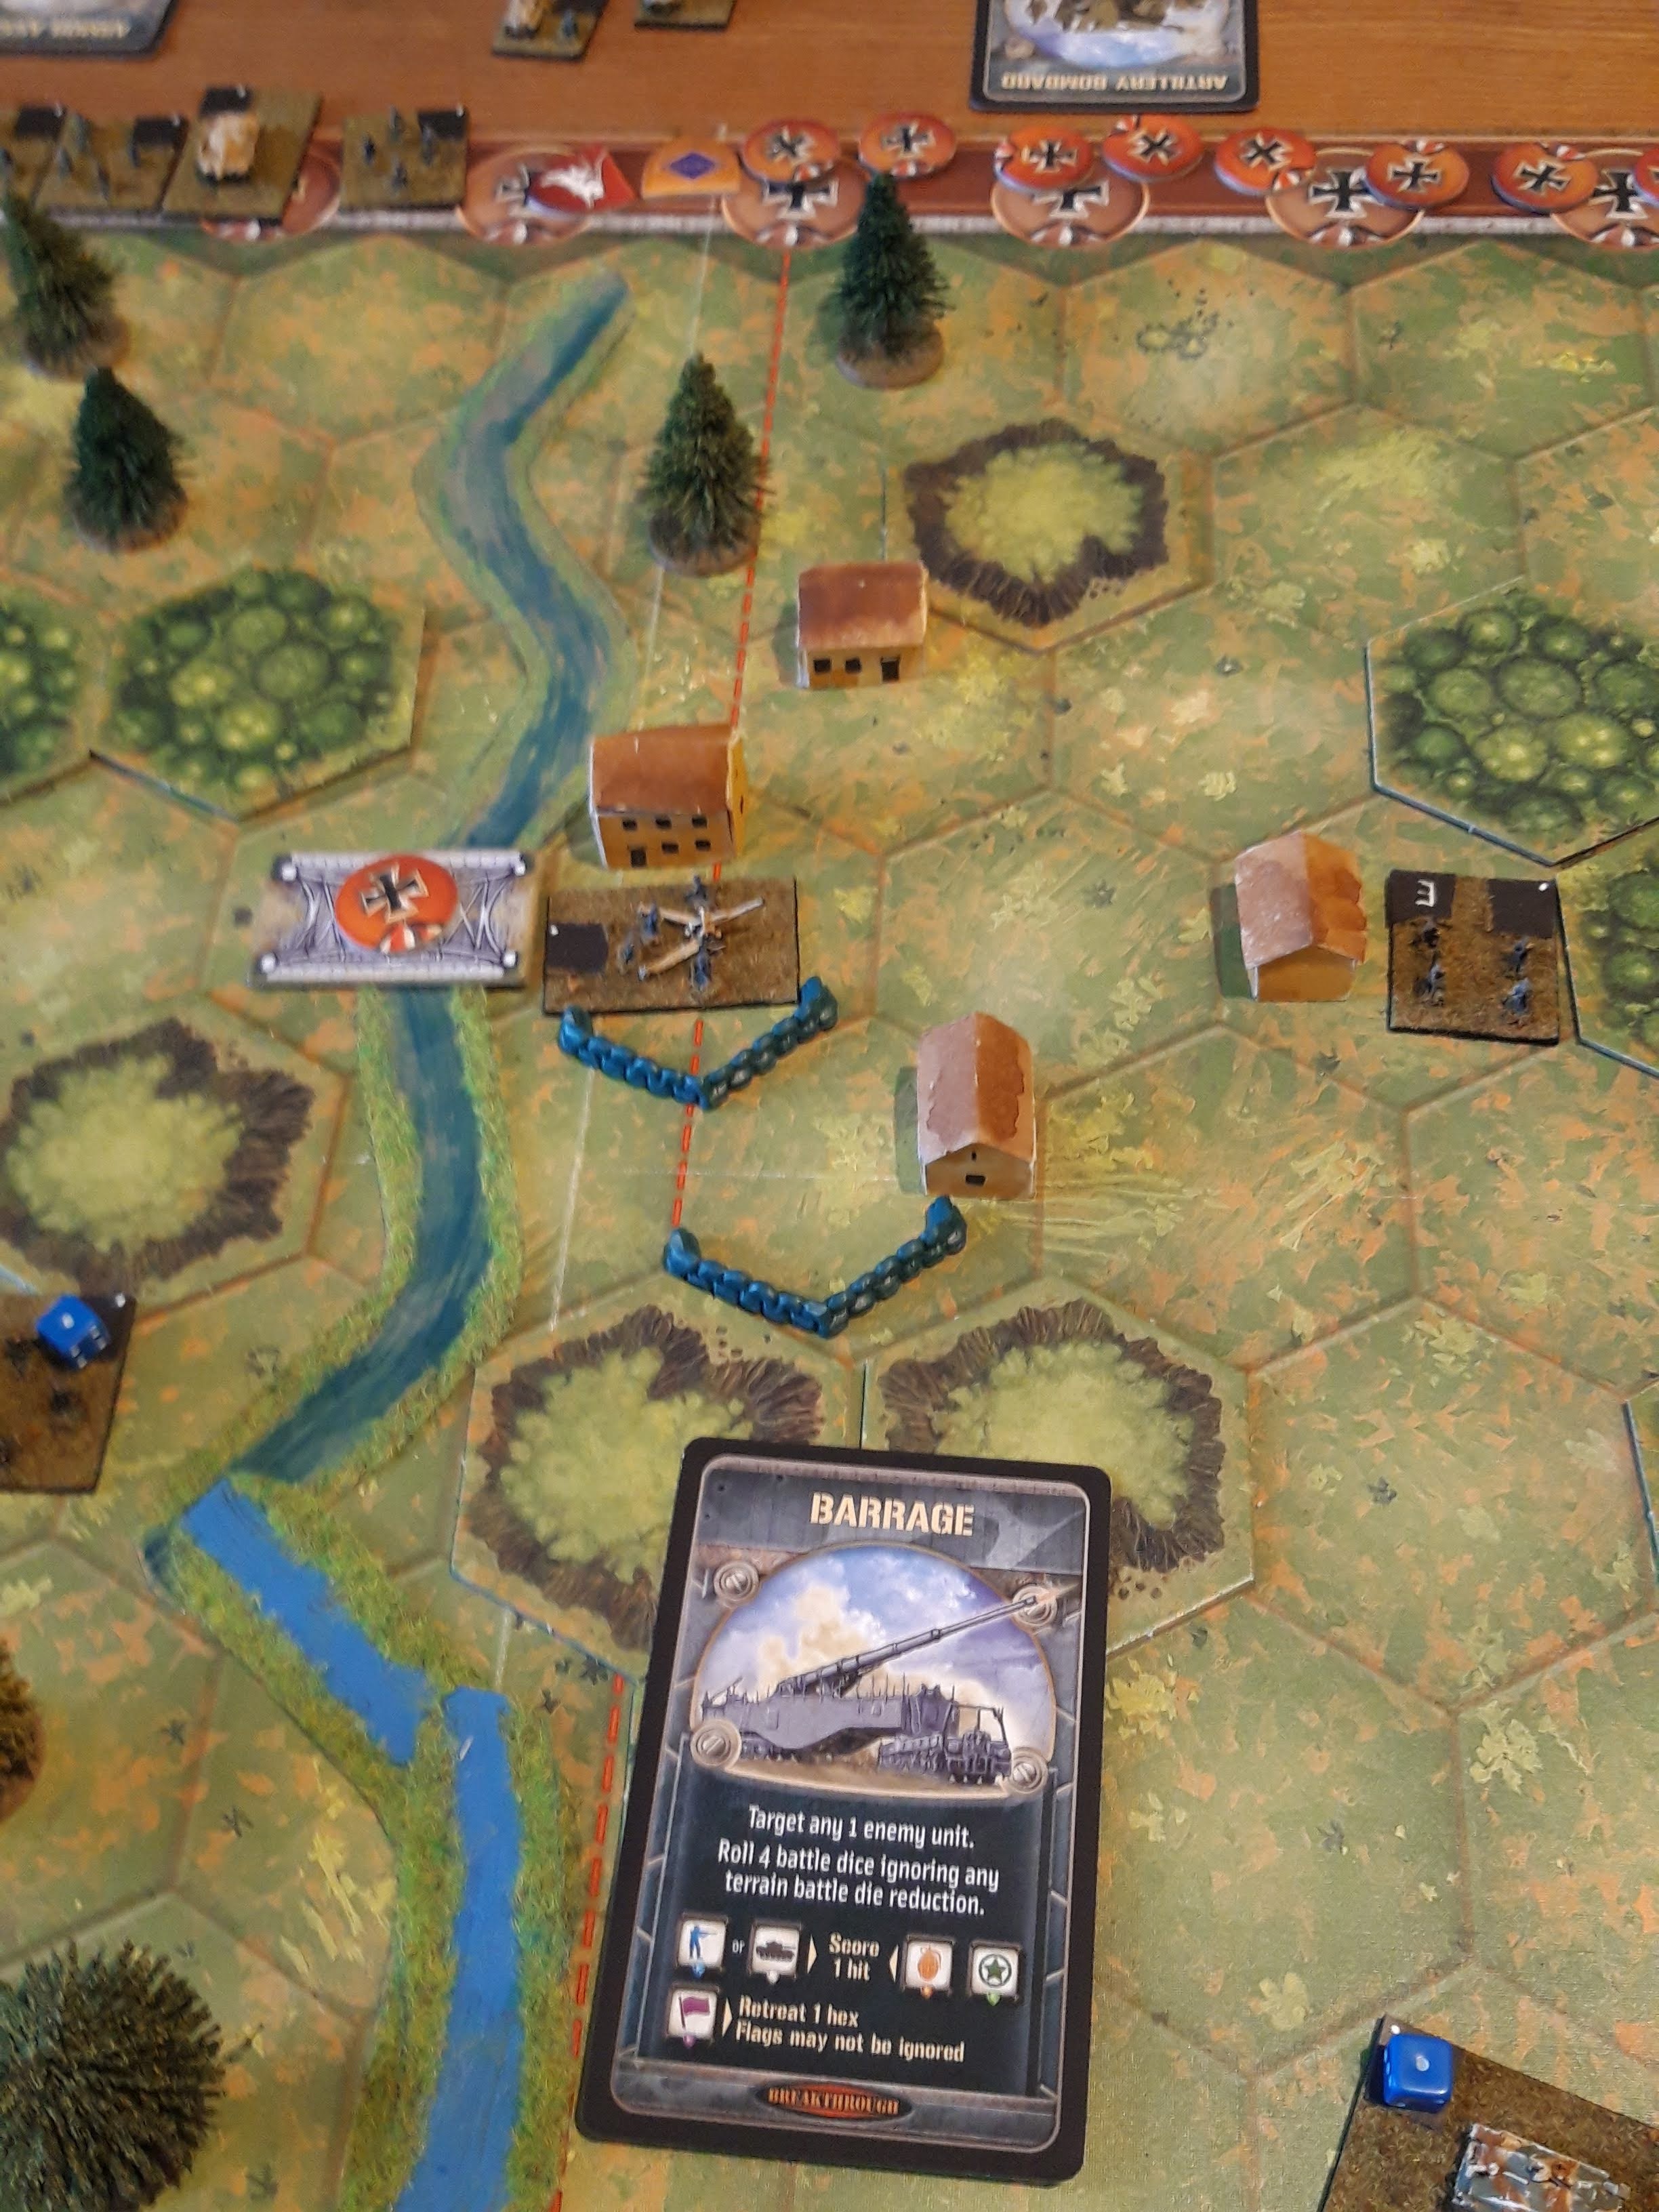
The Allies play their trump card, a Barrage, which obliterates one of the Nijmegen defenders and gets the Allies to 12VP. An Allied victory! That was a close run thing though.

The southern end of the map is completely clear of German units. Interesting, so for future reference, for the Allies to win this scenario are going to have to destroy some of the stuff north of the Wilhems Canal. I guess down here the German need to delay and survive as long as possible.

The 82nd attack at Nijmegen has largely petered out now, and German infantry and armour are roaming around the area. I badly misplayed this sector for the Allies. The 82nd don't have a hope against Nijmegen without support, I should have just hunkered down in the woods and waited for the cavalry.

At Arnhem the German armour is fairly impotent, as long as the 1st AB stick to town and woods hexes. The British Paras are in pretty good shape and perhaps I should have been more aggressive with them early on to destroy the isolated 9th SS infantry North of the Rhine, as it takes a while for the German armour to get into action.
What a great game, very enjoyable and a very close result. Having played it through, I can appreciate how I might do it better next time, although I'm not sure if 1st Airborne were incredibly lucky to take Arnhem so easily or if the force ratios are such that it is inevitable. The role of the 82nd at Nijmegen certainly needs some less aggressive tactics!
It took a while to get my head around the changes to the card play in this much bigger game, but I gradually came to appreciate how clever the scenario design was. I think it should work as a big group game for one of our Friday f2f sessions, and I think I can introduce some of my Memoir 45 mods without breaking the game, but I won't overdo it. I may do a scenario specific play sheet with some specific unit types. The most important thing is including the special movement rules for armour, otherwise XXX Corps is doomed from the start.

A very interesting battle report.
ReplyDeleteI also have all the Memoire '44 boards needed for this game, and reading your account has made me realise that I ought to get it out and use it again soon.
All the best,
Bob
It was lots of fun, although I'd rather play it with some humans. The terrain takes far more M44 tiles to set up than I own, which is why I ended up using models.
DeleteThis comment has been removed by the author.
DeleteHello old chap,
ReplyDeleteThat was a great report! My own effort was very short lived in that the Allies more or less breezed into Arnhem in fairly short order with few casualties. In fact it was actually quite a non event which is why I did not post it on my blog! It was a combination of some frankly incredible cards available to the Allies and some superb dice rolling. I was using the Overlord cards for this and am thinking that it would make a great project for 3mm models.
Great job!
All the best,
DC
Ah, I wondered what had happened to your version! Yes, it would look good in 3mm. I could probably have fitted two 6mm bases in each hex but I was just having a bit of a push around. My aspiration would be to do it on Hexon in 15mm.
DeleteThat was great, I enjoyed that so much, really want to do something similar myself. Funnily enough my baseline Market Garden experience is the old CCS computer game and in that one, Nijmegen is probably the least important element (since it is relatively straightforward for the 82nd), whereas Arnhem itself is much tougher.
ReplyDeleteI've done Market Garden dozens of times, mainly with board games but also a few times with figures and a few of the computer game offerings. Generally , Nijmegen is the toughest to crack, particularly if the Germans make good use of the Pannerden ferry and re route 59th Div to attack Grave, not waste their time Best near Eindhoven. The M44 version was a lot of fun, although quite abstracted, it captured the essence of the campaign well and warrants a replay.
ReplyDeleteThat was a great report to read and a fascinating insight into the scenario configuration.
ReplyDeleteThanks Shaun. I can't imagine how much playtesting it must have taken to design it. Very clever indeed, and a lot of fun to play.
Delete