Some time ago I picked up the desert expansion for Memoir 44, and it has eight interesting scenarios. I ran the Bir Hacheim scenario some years ago at the club with my 6mm stuff, but now I have some 15s, it was time to revisit them. It is some time since I've played my M44 variant Memoir 45 too, so it was good to have a refresher as we are hopefully going to have another Command and Colours day playing f2f.

Battlefield from the east. This scenario covers the attack by 11th Indian Brigade, supported by 5th RTR during Operation Battleaxe. The Axis have a heavily entrenched position covered by wire and minefields, while the British have no less than five(!) heavy tanks - Matildas.

The southern half of the pass is predominantly held by three companies of Italian infantry, with a company of German AT gunners accompanying them. Wire and mines cover the front, with artillery in support.
I don't much like the Italian special rules in the supplement, so I just made the Italian infantry raw (3 hits instead of four).

Having just painted them, I'm using my Italian 75mm guns, in Airfix gun emplacements naturally.

The northern side of the pass is more Germanic, four German infantry, also including some AT gunners, and another artillery piece. The 'hills' are sandy, so both function as hills but are also obstacles to movement, something I completely forgot about during the game.
The central section of the pass is covered by minefields, these are deployed hidden and range in strength from 0 to 4! One of the expansions added a load more 0 and 1 strength minefields, so they aren't as scary as in the basic game, but even 0 strength minefields are obstacles to movement. In the absence of engineers, the only way to find out how strong they are is to move into them. The strikes me as a job for the infantry, not expensive tanks.

In reserve are a couple of companies of Panzers, both Pz III.

The badges each side of the road indicate exit hexes - the British get VPs if they can get units off between the markers.

The northern half of the British line has four infantry and three Matildas. Apologies for using green Matildas, but I only have five, of which only two are in desert camo. The desert ones get swapped around in the photos for visual effect.
The Matildas are rated as heavy tanks, so take four hits instead of three. That makes quite a difference. They also only move two hexes.
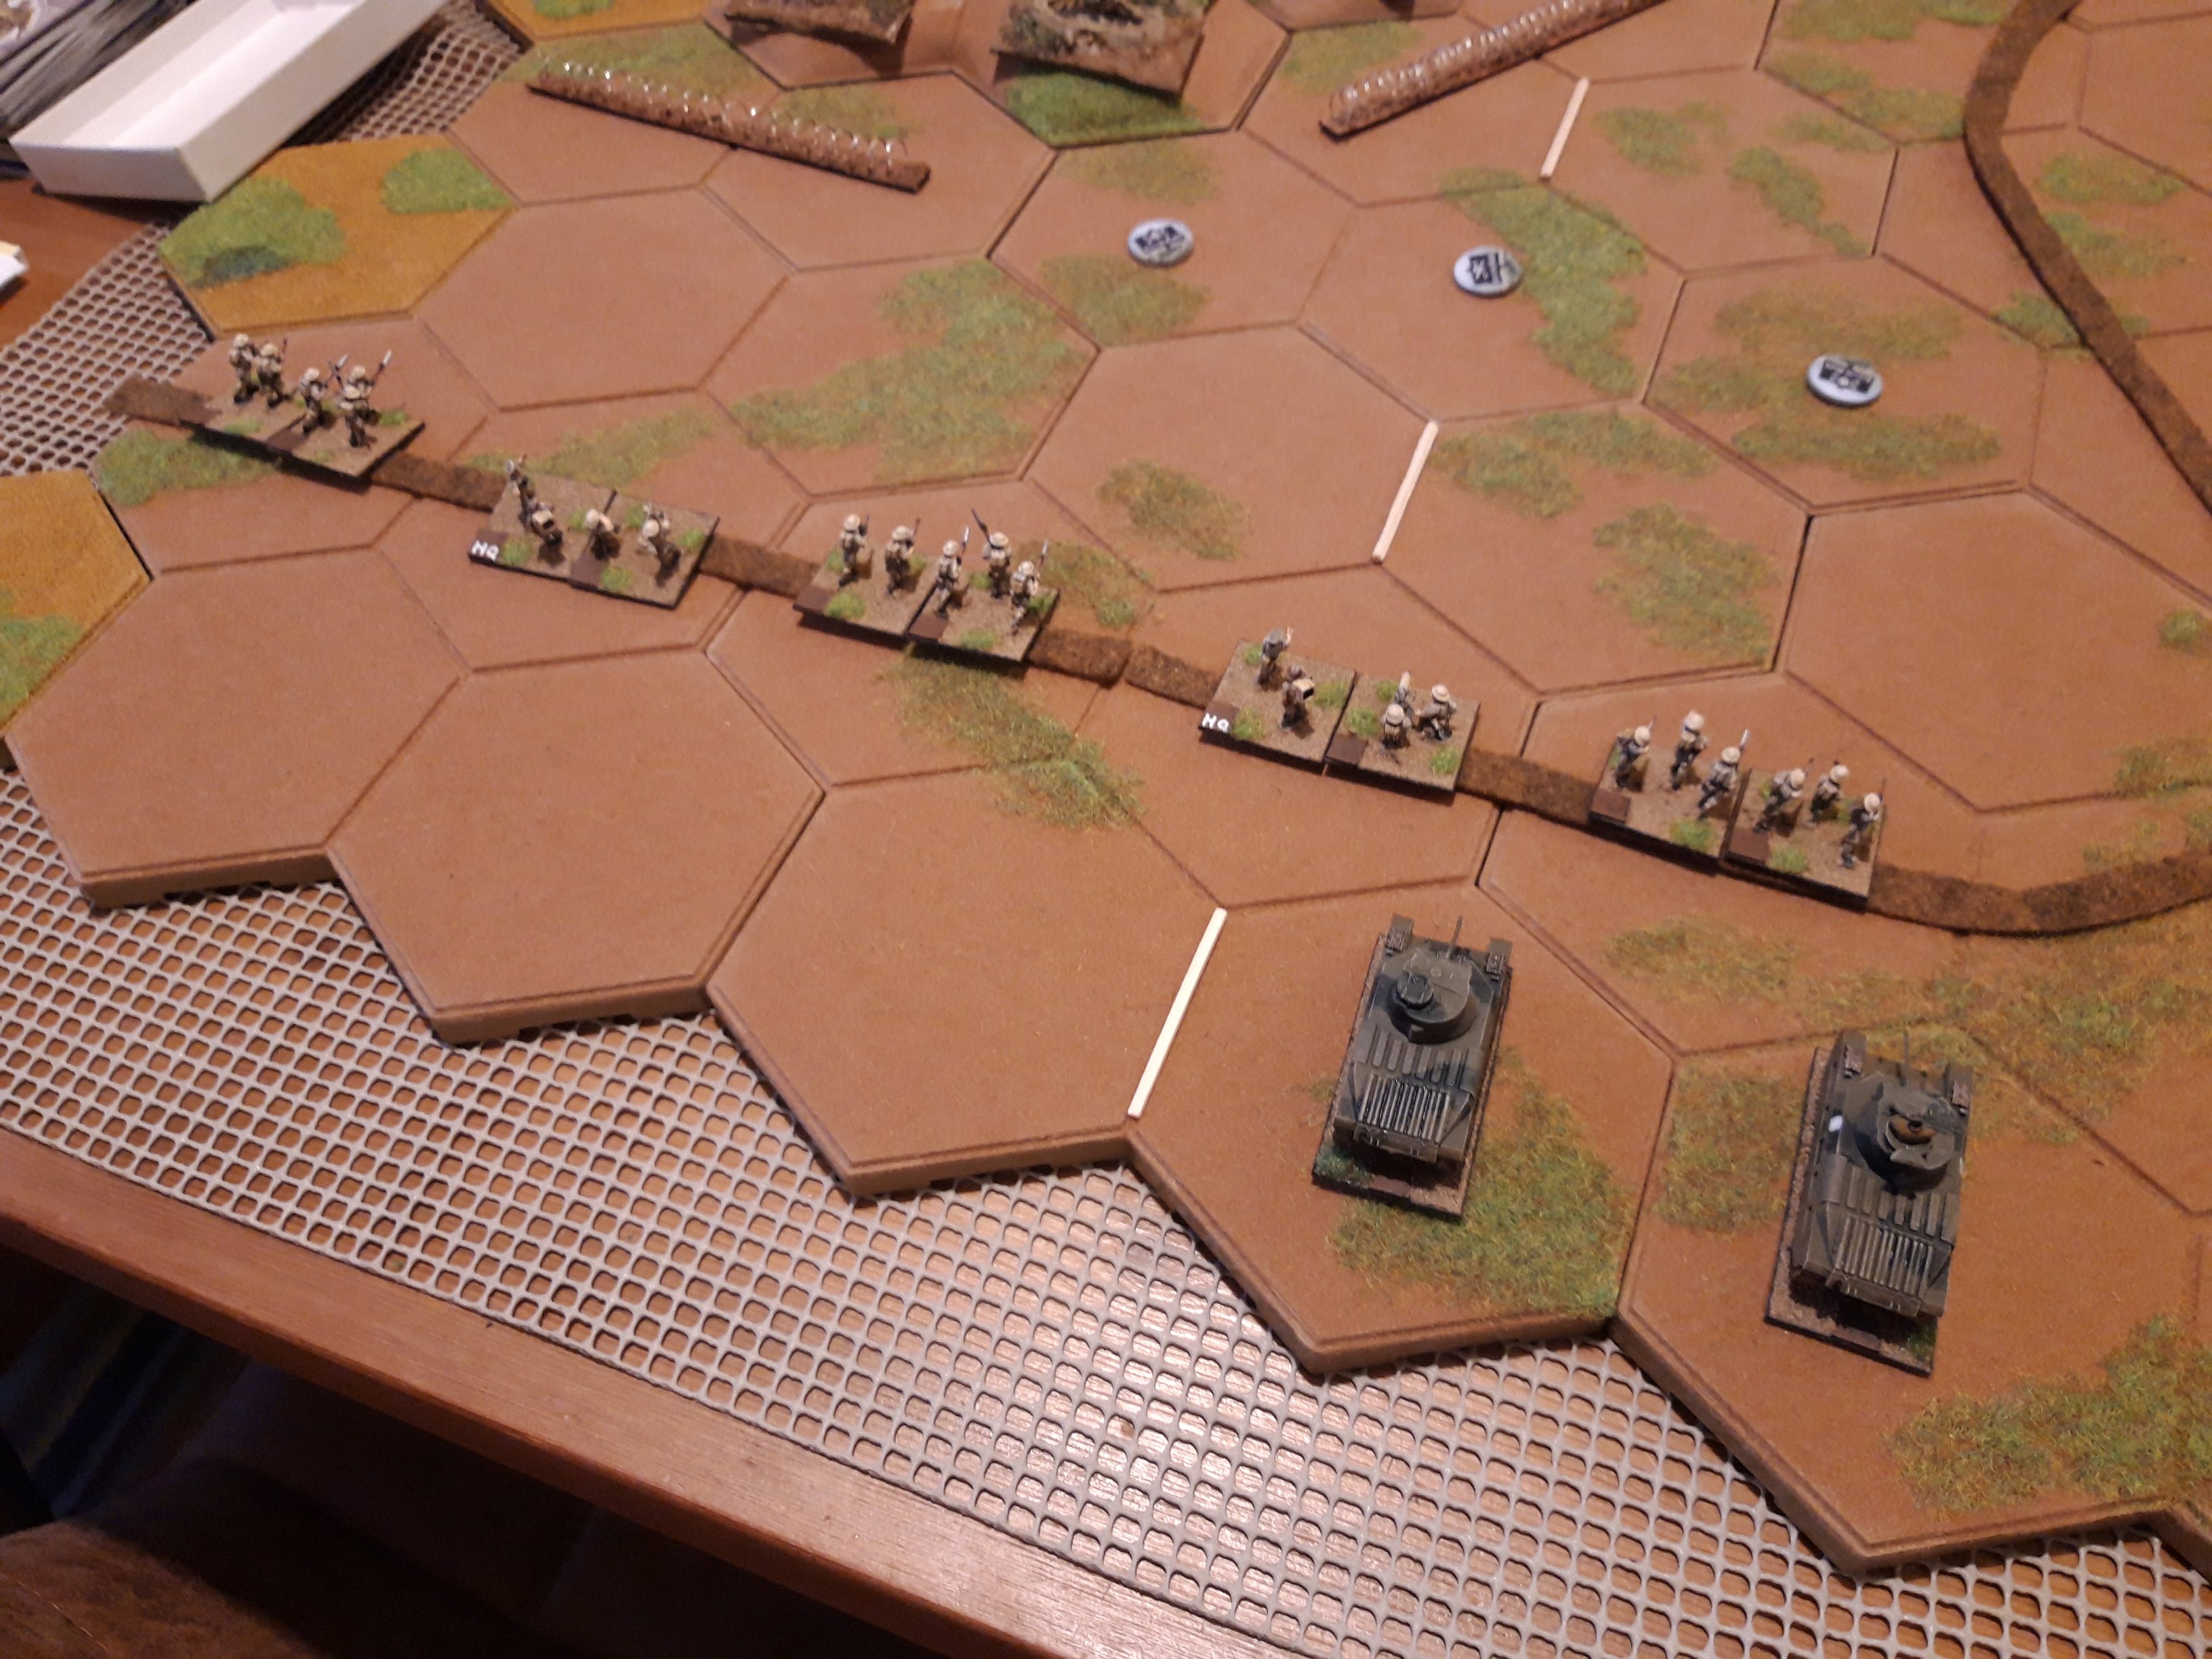
The southern half has two more Matildas and five infantry companies.
The British only get four command cards whereas the Germans get six, the low deck size was a real problem for the British.

I had some left flank cards and the Italians are a bit weaker than the Germans so I rushed some infantry up to clear the wire and check for mines. A two strength field, ouch.
The Italian infantry fought back and casualties were heavy.

Undaunted we managed to clear some of the wire and the damaged units fell back to be replaced by fresh ones. A hopeful Matilda began to move up as well, looking to exploit any weakness.

I ran out of cards for the left so sent more infantry forwards in the centre into the pass and uncovered some 0 strength (dummy) minefields, Result! They are still obstacles to movement, but no losses. In fact I played that incorrectly. I should have just removed the 0 strength minefields as they were uncovered.

We finally cleared the wire away on the left, but lost an infantry unit to artillery fire. The units here are all battered. Of course it would have been far easier to simply drive some tanks over and crush the wire with them. Doh.

British infantry heroically storm some of the Italian trenches as Matildas move up. One of the Pz IIIs is driving to the rescue.

With Matildas in support, all the Italian front line trenches are cleared and even the German infantry are driven back.

The Germans try to form a line further back with their tanks and AT guns, but now Matildas are pushing forward on the left and centre.

The German infantry on the left are destroyed, but the Matilda tank losses (hits) are mounting. The Axis are looking quite thin on this flank now.
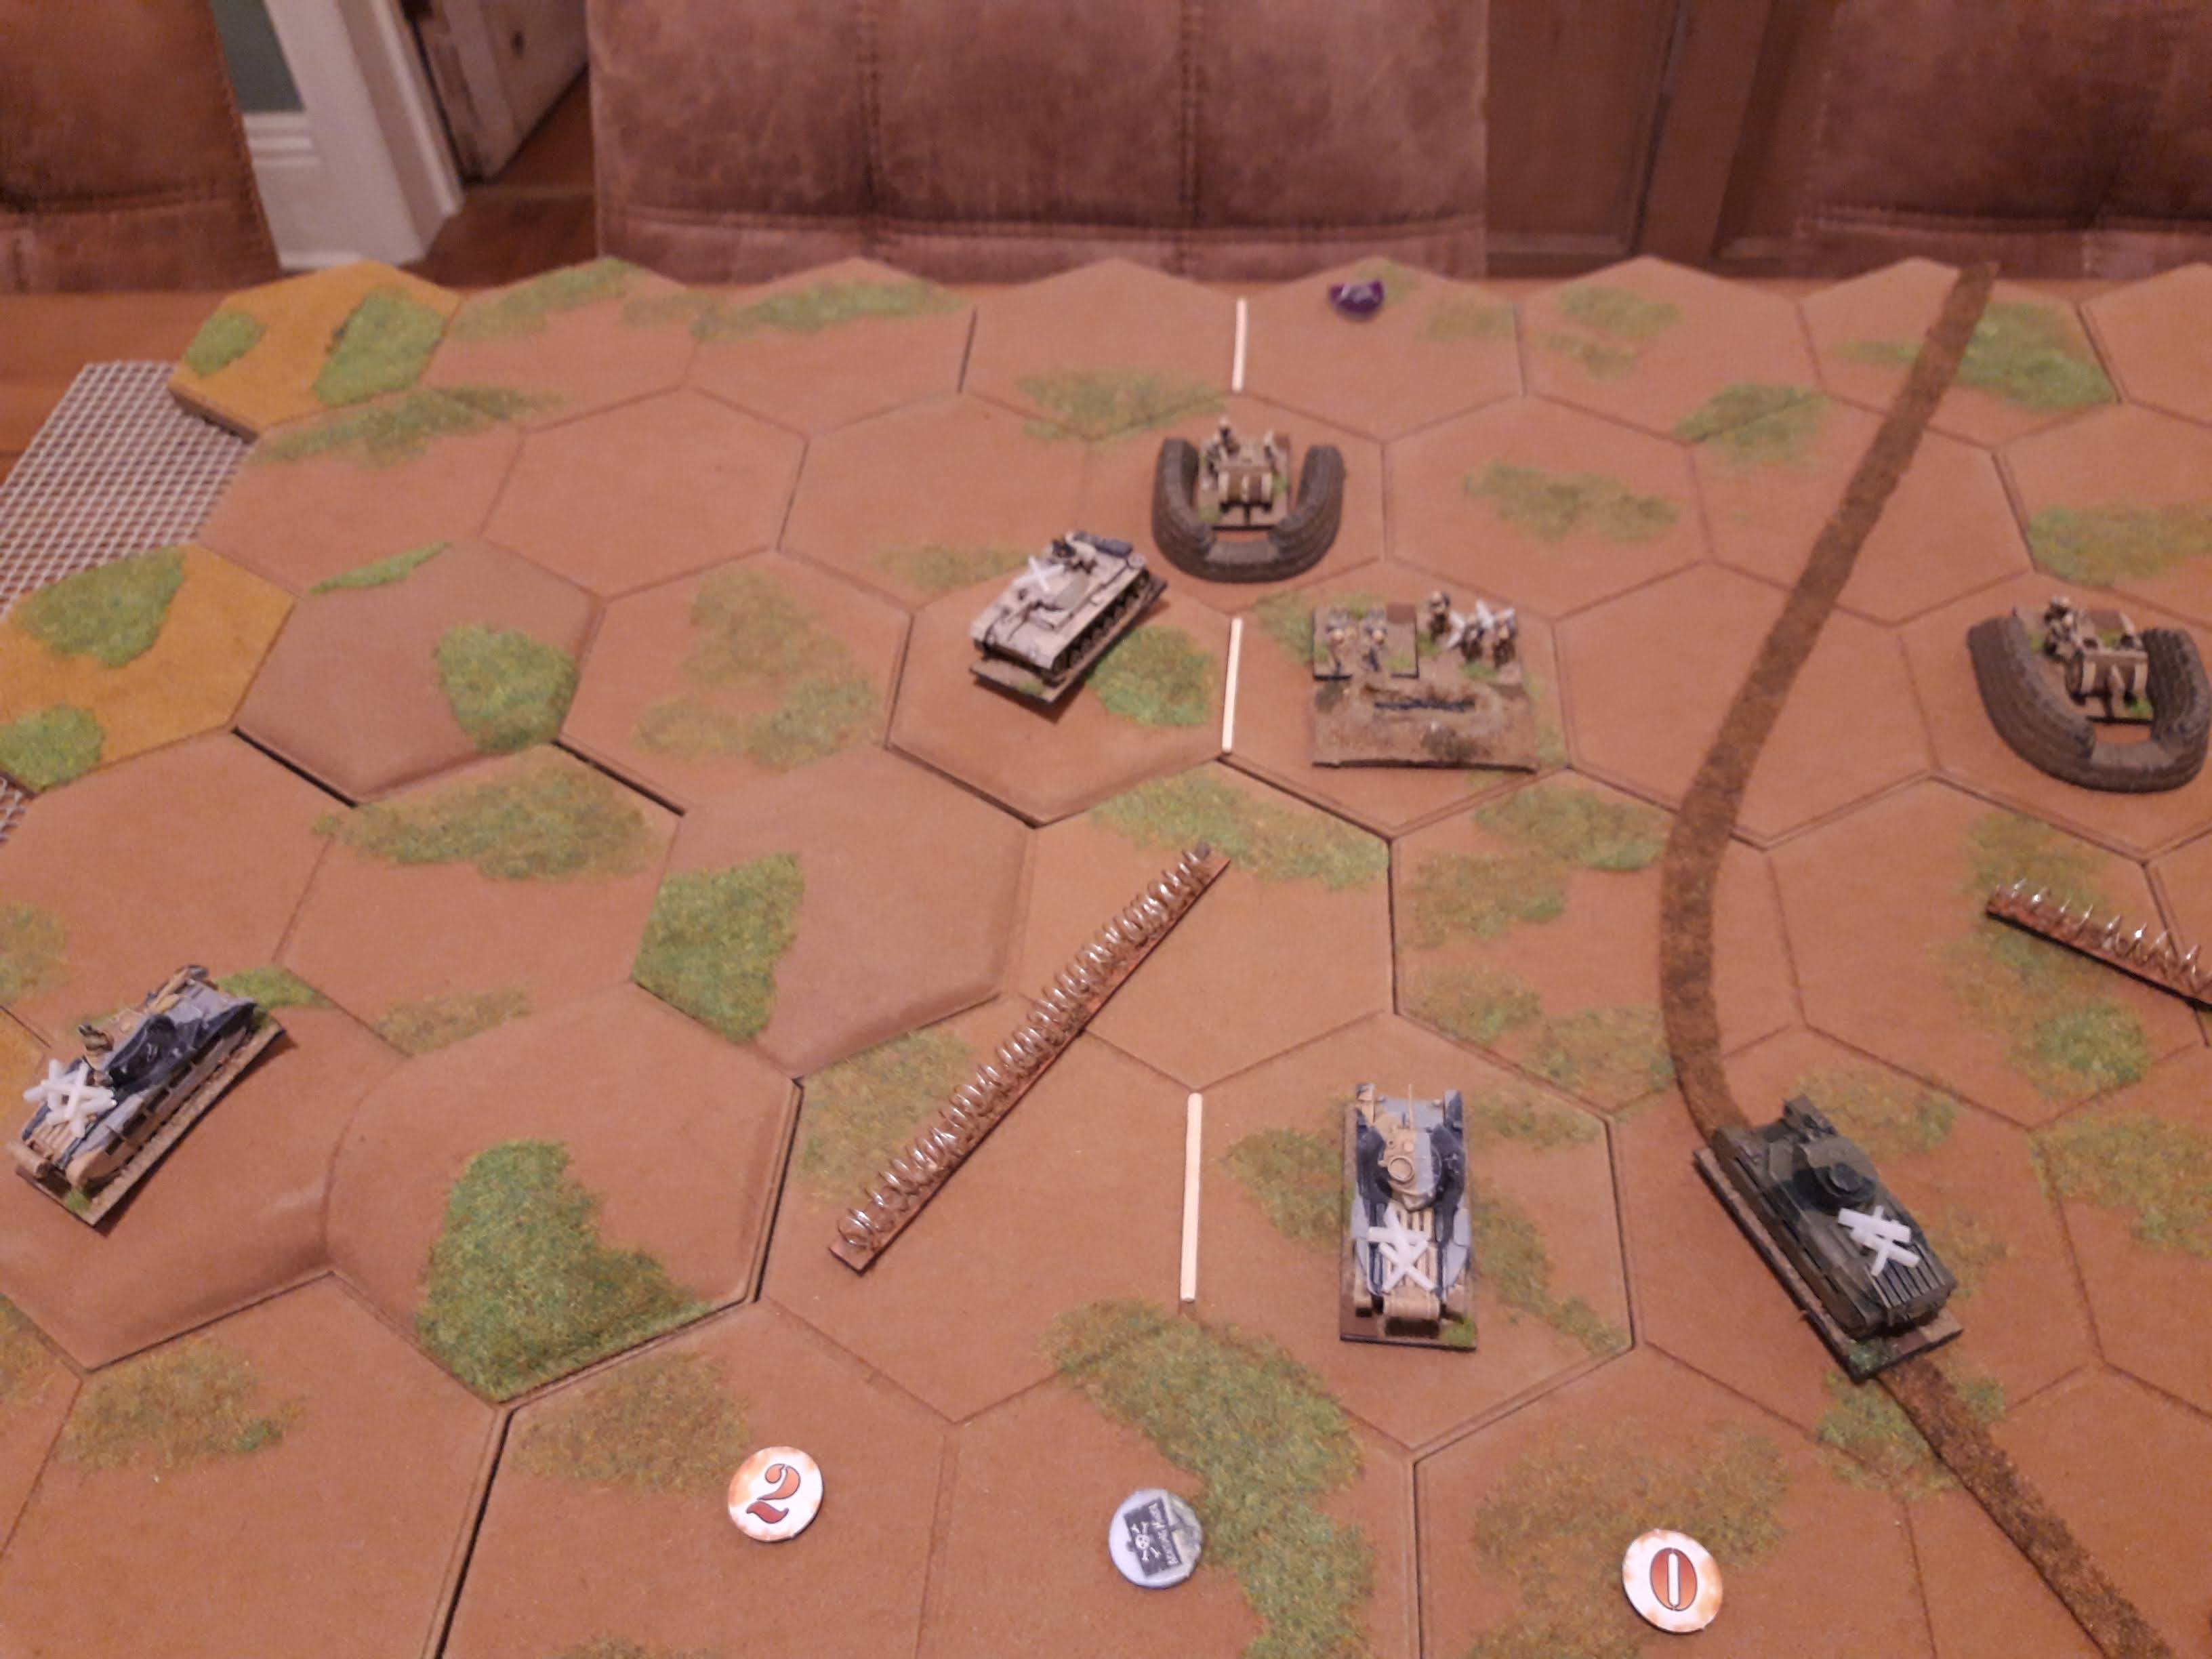
The British tanks just can't get forward though, AT fire from the north, artillery fire and German tanks keep chipping away at them, scoring hits or forcing retreats. Despite knocking out one of the Pz IIIs, the British are suddenly looking vulnerable.

And like a thunderclap, this lone Pz III company, supported by a devasting artillery barrage knocks out not one but two Matildas in close assault (the second kill scored on a breakthrough attack) , while artillery destroys another British infantry, giving the Germans more than enough medals for victory.
What a turnaround! This move wouldn't have been possible if I'd remembered the restrictions about moving on the sandy hills, but it was so heroic.

British losses by the end. Ouch!

The defenders of the pass also look a bit ragged. The Italians have been routed. Most of the minefields have been exposed now, quite a few 0 in there.
That was really good fun, and it was nice to break out the rules again and also to play on a bigger table for a change. I was a bit rusty at first, and looking at various rules online, it reminded just how fiddly the various expansions of M44 have made it. Why on earth are there two different kinds of difficult hill? Or three different kinds of trench?
Hopefully Memoir 45 is a lot more stripped down that that, it certainly rattled along and the fighting see sawed back and forth in a very tense fashion. One rule I did remember to institute was that you can always play a card as 'activate one unit of your choice'. The British only had a four card hand and could easily have been stuck and unable to play anything at all otherwise.
I'm minded to try out one of the non card activation options instead (the 'ramekin' dice approach is appealing) and that might also be better suited for remote play.

That board looks fantastic, Martin! I've never played any of the M44 expansions, only the base set but it gave some very exciting and fun games. Interested to see how you get on with the "ramekin" method. I've been meaning to try for CC Napoleonic but have not gotten to it yet.
ReplyDeleteTbh, I didn't use any of the rules from the expansion, but it has some good scenarios in it, including the much neglected battle of Gazala. Iirc the rules are still available to download, but you have to find the Days of Wonder legacy website as the new DoW website has deleted most of the free stuff and all the user created scenarios! The Ramekin thing is on my to do list, I'm just puzzling over how to replicate the special tactics cards, in spirit anyway.
DeleteVery nice set up there.
ReplyDeleteThanks, the larger table than my usual 6x8 or 9x9 hex grids give more granularity to the setup and terrain.
DeleteSome nice desert action!
ReplyDeleteI'm a bit confused as to whether you were playing standard M44 with some of the expansion rules or your M45 or even a mix of each?
I've always thought M44 doesn't have some of the subtleties of say C & C Ancients.
Neil
I played it with my variant, Memoir 45. They incorporate a lot of the expansion rules, and I've tried to rationalise the endless chrome bolted on the expansions. Ideally M44 would have a complete makeover to align it with CC Ancients or whatever, it is a complete dog's dinner at the moment. I find using one of the custom decks suggested on BGG helps a lot.
Delete