I hope you are all having a great Christmas break. The run up to Xmas is often a busy time with various social engagements, despite Omicron etc, but I had a game slot free in early December so I put on another one of the Command Decision Market Garden scenarios for the gang. This one covered the Polish drop southeast of Driel on 21st September.
In the film it is portrayed as a massacre, but in fact the Polish drop was quite successful and they hunkered down on 'The Island' between the Wall and the Rhine and gave the Germans a terrible fright, even though they were unable to cross the Rhine at the Driel ferry as the site had been captured.
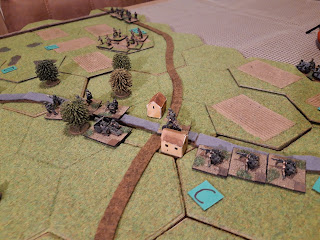
The battlefield from the south. Arnhem is up the main road to the northeast, and Nijmegen to main road in the south. This highway is on an embankment, as is the rail line which runs due north up to the (blown) rail bridge over the Rhine. The Driel ferry site is off to the northwest, and west of the highway is a lot of semi flooded polder, indicated by the various field hexes. The Drop Zones are northwest and southeast of the village in the middle (Elden).
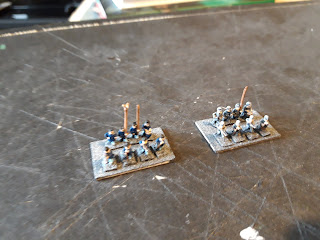
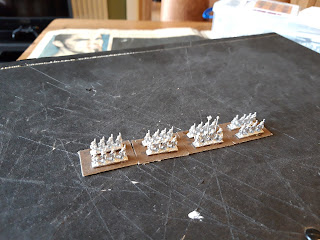
The Elden garrison. 1st Battalion, III SS Landsturm Nederland. These guys aren't very good, but they have various heavy weapons including infantry guns.
A company of IIIrd SS is detached holding the road/rail junction. The Allies had crossed the Waal the day before via the rail bridge, and the German attention was focussed south (Elst, with the bulk of the German blocking force is offtable to the south).
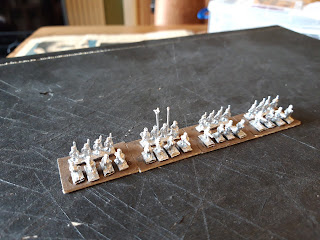
The road leading to Arnhem is held by a battery of Flak Brigade von Svoboda, and the remains of 10th SS Panzer Recce Bn. A battalion of 191st Artillery Regt provides fire support. These SS are quite good, but there is only a company of them in Sdkfz 250/9s. The Germans had captured Arnhem bridge the previous day and were now able to move more equipment south of the Rhine.
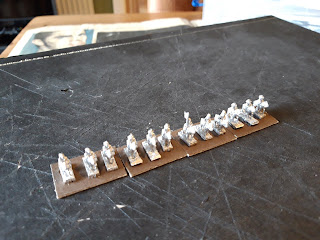
The Polish 1st wave and XXX Corps lined up. 2nd Polish Para Bn plus the brigade HQ and engineer company. A 25pdr Field Regiment and 5.5" howitzer battery which will be available once the air landings have been completed. The Polish 3rd Bn is in the next wave. Historically about a third of planes had to run back due to bad weather but the remaining 75 Dakotas made an accurate drop.
The action opened with three Dakota models (each representing around 15 aircraft) came flying on. Well, I 've painted them, so I'm going to use them. John and Jerry were commanding the Poles, and had pre-determined the loading order. They were heading for the southeast drop zone.
A view from the German side. The Germans have a complete mish mash of units hurriedly rushing to the area in the face of the new airborne attack. One random unit per turn will arrive after the first turn. Pete, Tim, Russell, Diego and Simon commanded the Germans, and I tried to make sure they each had at least one biggish unit to command.
Tim was commanding the Flak, and they opened up of the Dakotas. a few planes went down, but not enough to inflict significant losses on the paras, but enough to impose a scatter penalty.
In the event the Poles made some really good landing rolls and only one company scattered off to the southeast. Fire from the SS infantry in Elden inflicted some losses on the paras as they sorted themselves out.
This was followed up by the 3rd Polish Para Bn who aimed for the other DZ. Due to the card sequence they got the drop on the Flak and came in effectively unopposed by AA fire.
2nd Bn and Brigade HQ moved southwest out of sight of the Germans in Elden, heading for the village at the end of the highway. Meanwhile the detached SS company had moved up to occupy it.
3rd Battalion had a nice clean drop. They scattered a bit but didn't sustain any significant losses on landing. They were a bit further away from Elden so out of sight of the SS at that distance.
Oooh, whats this? At this point, Panzer Ersatz Kompanie Mielke appeared up the side road from Elst. Half a dozen beaten up Pz IIIs which had fought their way all through Arnhem and halfway to Nijmegen. They had some difficulty getting off the elevated highway and the company stalled as they sorted themselves out.
In other developments, 2nd Bn pressed on towards the village, undeterred by the appearance of the tanks. The SS panzer recce rolled up next to Elden and called in artillery fire on the rapidly disappearing paras, but the fire scattered wildly.
At this juncture, the mighty Festung MG Battalion 47 rolled up, preceded by a platoon of infantry on bicycles. These chaps were supposed to be holding the Westwall, but instead found themselves flung into the fray at Arnhem. The battalions three MG companies would no doubt be useful for defending things, but maybe not so good in an assault, particularly given their awful morale.
The 10th SS recce probed south of Elden, taking care not to get too close to the Poles who would no doubt welcome the opportunity to light up the halftracks with PIATs and grenades.
2nd Bn and Sosabowski now called up the XXX Corps artillery and plastered the village in front.
The fire of dozens of guns, including some 5.5s, was devastating. The SS infantry were suppressed and some lucky shots disabled the Pz IIIs. Pz Ko Mielke was no more!
While all this was going on, the SS recce occupied the now vacant DZ. The paras opened up long range MG and mortar fire on them, which didn't do any damage but kept them cautious.
In the northeast MG Bn 47 continued its relentless march to Elden. The recce platoon made contact with the SS defenders. 3rd Polish Para Bn seemed to be content to dig in on their DZ.
At this point, Luftwaffe Battalion Kauer appeared. Luftwaffe ground crews handed rifles and hastily organised into infantry. Their training and morale was as good as you might expect, but they marched along the northern road in fine style.
2nd Bn pushed towards the village behind another massive stonk which finished off the SS. The village was now knocked about but unoccupied.
MG Bn 47 relieved the SS garrison in Elden, who now set off down the highway towards Nijmegen. 3rd Para Bn finished digging in and waiting for Bn Kauer to get closer.
More Germans! This time battalion Koenen of Marine Regiment 642, we met some of their friends in the recent Wolfheze/Oosterbeek. Much like Battalion Kauer, unemployed sailors handed rifles and hastily organised as infantry. Just as good as you'd expect.
Bn Kauer suddenly stumbled onto 3rd Polish Para Bn. The Poles unleashed a hail of small arms fire and also called in all the XXX Corps artillery. The whole lot either missed or was ineffective. The 25pdrs were busy replenishing their immediate ammo stocks and unable to fire. The Luftwaffe soldiers hit the deck and wondered what to do next, but amazingly passed all their morale tests. Perhaps they were made of stern stuff after all.
3rd Polish Para Bn and Brigade HQ occupied the village across the main highway in the nick of time. SS Nederland were marching down from the northeast, and Panzergrenadier Replacement Battalion 60 appeared up the road from Nijmegen. The trainee panzergrenadiers are rather better quality troops than the ropey fortress, naval and Luftwaffe units also in the area. Both sides exchanged some ineffective small arms fire.
Elden was now firmly held by 47 MG Bn who set about fortifiying the buildings and pretending they were back in the Westwall.
The 642 Regt sailors linked up with the SS panzer recce on the old Polish DZ.
We broke for the night there, giving both sides a chance to ponder their next moves. The Poles currently occupy one DZ and one terrain objective, which meets their victory conditions. They now just need to hang on until nightfall! How many more German units are there?
The action immediately opened at the village. The Poles shot up and stonked 60th Panzergrenadiers, who took some losses but passed their morale test.
The Germans followed this up with a withering volley and charged to assault the buildings. This didn't go terribly well as there were more Poles, defending a BUA and who were rather better quality troops. The trainee panzergrenadiers broke and ran, but not before inflicting some losses on Polish 2nd Bn.
III Dutch SS moved a bit closer, as did 10th SS panzer recce. I can't help thinking that a coordinated attack by all three units behind an artillery barrage might have had a greater chance of success, but it is easy to be Captain Hindsight.
Polish 3rd Bn continued to shoot up the Luftwaffe 'soldiers', supported by 5.5" guns. The airmens nerve finally broke and the survivors of the barrage went to ground.
Meanwhile, Schwere Panzer Kompanie Hummel arrived, having finally bulldozed its way across Arnhem bridge. This unit was the fouth company of 506th Tiger Bn, the only Tiger battalion in the whole German army to have four companies. They conducted a road march all the way from the Reichswald under their own steam, losing half their number to breakdowns along the way, but still arriving combat ready. In this case they very wisely stuck to the elevated highway, avoiding the boggy polder.
In the north, the Luftwaffe had had enough and the survivors broke and ran. The Polish hold on the northern drop zone was secure as the Germans had now decided to leave them alone.
The Tigers and sailors from 642 Marine Regt plodded onwards towards the village. Meanwhile Simons Dutch SS battalion had suffered losses and a double morale failure under the weight of Polish infantry fire and British artillery fire and were thoroughly pinned down in the outskirts. The 10th SS recce pushed up to the edge of the village.
The Poles were under artillery fire and direct tank fire by now and being steadily whittled down. Simons troops managed to rally to a degree, but not enough to mount an assault.
The sailors and MG Bn 47 were too far away to influence proceedings, but had a firm hold on the eastern half of the battlefield.
It all came down to a last ditch assault on the last turn as night fell. The Germans drew a bunch of low black cards, which meant the Simon couldn't rally, but the two armoured units could fire and attempt to assault. It isn't ideal putting unsupported armour into a town, but the Poles were down to to three reduced companies now.
The Tigers and armed halftracks duly passed their assault morale tests and waded in and vicious close quarters fighting ensued.
When the smoke cleared, half the Tigers and halftracks had been destroyed and the Poles were still hanging on with a handful of survivors. That will look great in the film.
Night fell at that point, with the Poles firmly holding one of their objectives and the second contested, which was enough to give them a marginal victory. I suspect 2nd Bn would have evacuated after dark to join their pals in the north and reorganise given the preponderance of German forces along the highway, which is pretty much what the Brigade ended up doing in real life.
That was a very hard fought game which went right down to the wire, and I enjoyed putting out all the various bits and pieces. The Polish paras often get overlooked, and it was good to see them getting some representation in a game. With hindsight I think the Germans would have done far better to concentrate on the Polish 3rd Bn in the marsh. There were are lot less of them and they are surrounded virtually from the start. Conversely, John and Jerrys careful attack on the village was a model of infantry and artillery cooperation.
I've only got a couple more Arnhem scenarios I'd like to run, and then we can go off somewhere else. I got two more CD scenario books for my birthday, and one of them includes no less than two mini campaigns. Just my sort of thing.