Showing posts with label QRF. Show all posts

Tuesday, 20 January 2026

Manky Matildas Pt 2

 Along with the second hand Stuart, I picked up a couple of second hand Zvezda Matildas at Partisan. Regular readers will recall my travails as they fell to bits in my hands as I attempted to add stowage etc.


Anyway, here they are after being finally repainted and based.


No more using BEF Matildas in Russia, this is a proper Lend Lease Matilda! Now, I've never seen an actual photo of a Matilda with red stars on the turret (as opposed to modellers fantasy paint schemes), but I've seen stars on plenty of other LL tanks, so this one got a pair, nicely edged in white to stand out. They are from the Zvezda SB2 kit I think.

The other delightful modelling rabbit hole I went down was 'what colour were LL tanks sent to Russa in 1941'. By 1942 they were rocking up in SCC2 brown, but the consensus seems to be that in 41 they were turning up in plain KG3 Khaki Green, as the prevalent 41 camo schemes were usually applied after leaving the factory. Vehicles sent after a refurb may have been sent in disruptive camo.

As I often use camo'd BEF Matildas for Russian tanks, I did this one in plain KG3 - a colour which apparently no-one can agree on and no manufacturer makes, although the MAFVA website helpfully includes mixing guides using several different colours of Revell, Tamiya etc. As it was a brownish mid green (a 'useful colour' according to the War Department paint guide), I just used VJ Russian uniform with a very light wash of dark green and a light highlight of tan.


The Matilda I'd hacked a round a bit was much easier, overall Light Stone. It got one coat of VJ Dark Sand, and overall inkwash with W&N Peat Brown, then a heavy drybrush of VJ Dark Sand again and a light drybrush of VJ Pale Sand.

I hand painted the national recognition stripes and had a disastrous attempt to do squadron markings on the turret which came out so bad I painted them out (although they are still dimly visible and need another coat of paint over the top).

Rather less mud around the running gear than on the Russian one, but I put dirt coming down the mud chutes, which for some odd reason seems to stand out more on the sandy one than on the green Matilda.


The numerous angles come out well with a drybrush, although I thickened up the ink wash in places. The tarpaulin roll was khaki with an ink wash, and it took me a while to figure out that the shapeless blobs moulded on the front track guards were actually spare track links! I did those black with gunmetal highlights.

As the detail on the Zvezda models is so fine to start with, sadly the extra five coats of paint obscured some of it, but they still look OK. The coax MGs I'd replaced with brass also survived all the drybrushing, unlike their plastic equivalents. 


And here is the sandy one with its two QRF pals in Caunter. A pretty good match although the QRF ones are slightly longer, but not noticeably so. That is great, it means I can do Operation Battleaxe properly now and not have to use a Valentine as a stand-in. I've now realised that I need an extra Valentine, as 32nd Armoured Brigade at Gazala had three battalions of Valentines. Mores tanks to paint, what a chore. 


Thursday, 2 January 2025

Desert Shermans and some extra desert crews

 The last bit of desert armour on my painting list were some Shermans for El Alamein and onwards. Some years ago I picked up a very, very cheap PSC 'US Tank Company' boxed set at Triples, which really has been the gift which goes on giving. It is still stuffed with unbuilt Shermans, Stuarts and halftracks, the Shermans helpfully being all varieties except Fireflies.


I just wanted three desert Shermans. PSC supply separate sand shields for their cast hull Shermans, and a range of turrets and mantlets. As ever with PSC they are lovely crisp mouldings with hardly any flash and went together perfectly.


There seem to have been a mix of small and large mantlet Shermans supplied to 8th Army, so I did two wide wide mantlets like this one and one narrow. The sand shields have to be glued on as separate pieces, but mercifully they fit well and there are some tiny locating lugs to help position them.


Lots of stowage is provided so I mixed it up on the different vehicles so they all look similar, but not identical with variations on spare wheels, tracks, tarps, jerry cans etc. I omitted the AAMG on the commanders tank and also did it with a narrow mantlet.


I painted them all in desert pink with three variations on the 'official' disruptive black camo scheme taken from various photographs of vehicles. As with the stowage, they all look similar, but not identical. I finished them off with an ink wash and a light drybrush of pale sand to pick out the highlights.


As I was doing some desert stuff, I did another QRF Grant I had in stock. This one also got the jazzy sand/brown/white camo scheme as I think it looks rather smart. So now I have two plain Grants, and two camouflaged. 


While I was doing some modelling, I also added a few bits and pieces of crew. One of my Vickers Lights got a commander, in this case a PP tank commander in sidecap. I just filed off the top of the cupola and cut the figure down until it was flush. I painted the top of the hatch cover black and just stuck the figure on. I didn't bother to model the open hatches as they would be tiny and vulnerable to being knocked off.

Although the PP figures are on the beefier side, it makes you realise just how tiny the Vickers is. It really is just a Bren Carrier with a turret. Many years ago I converted an Airfix carrier into a Vickers, the chassis is almost identical. 


I also did some drivers for my QRF 15cwt CMP trucks. These are all PP figures, somewhat misleadingly labelled as 'Seated British' when in fact they all have moulded on steering wheels, I'd hoped for some seated figures with rifles. Anyway, the trucks didn't have cast on steering wheels, and after cutting off most of the figures legs and lower bodies I managed to get them into the cabs OK with the wheels positioned behind the dashboard. They look much better with drivers.

I do slightly regret getting these as they are horrible models, but I couldn't quite face building a bunch of PSC 15cwt trucks at the time. They look OK now I guess. 

That is pretty much it for the 15mm Desert stuff now, the 'desert armour' box is completely full. I need to add some drivers to a few more German vehicles, but I'll do that as and when needed and couple more Italian bits. I'm basically back to just doing bits and pieces now, which I much prefer to the big batch paints. I've realised I 'need' a Nashorn and a couple of Hetzers for a scenario and I also need more US transport, some more recovery vehicles and ambulances and maybe some M3 GMC Tank Destroyers, so plenty of other stuff to do yet.


Tuesday, 17 December 2024

Celebrity Bakeoff? Field Kitchen, German personalities and more passengers with added boats

 I have 'needed' a Hitler figure for a while so I eventually took the plunge and ordered the QRF 'German Personalities set. I wish I'd bought the old Roco WW2 Personalities set when I had the chance, as it included Montgomery, Eisenhower etc.

To make up the order I also added in a 15mm WW2 German Field Kitchen and some Assault Boats. 


The Field Kitchen and assembled dignitaries. 


The horse drawn field kitchen is a lovely model, with the kitchen, a limber and four draft horses standing in suitably still poses. It also comes with a pair of cooks. There are a few pieces to assemble - mainly the spoked wheels, the lid of the cooker cauldron and the smokestack, but it goes together cleanly with very little flash although I had to trim a couple of the axle stubs. 


There are two cook figures, one thin man holding a loaf of bread and the other rather rotund! I'm sure I've come across these two in a novel, possibly The Good Soldier Schweik? Anyway, they are rather like Laurel and Hardy. I based the cooks facing away from the kitchen as they are greeting would be punters.


As it is a four horse vehicle the whole thing is quite lengthy once assembled. I painted the limber and kitchen in Field Grey (RAL6006) rather than Panzer Grey, so it has a distinctly greenish tinge and will do for many armies which feature a lot of horse transport. I did the cooks in the pre-1944 fatigue uniform which was a light tan unbleached cotton (you occasionally see photos of soldiers in the Caucasus wearing it as improvised tropical kit). As they ended up looking khaki-ish wearing sidecaps and rather grubby aprons, they will do for a lot of armies.


These guys are the German Personalities, and tbh they are a bit disappointing.


The left hand figure is Rommel I think, 2nd from left is obviously Hitler,  but the other two are just generic officers which are included in other sets and I've already got these figures. Or maybe these 'personalities' were included as officers? I've no idea who they might be, the guy in the greatcoat could be anyone and the figure on far right has wild staring eyes, so Model? Himmler? Goebbels? I'd be amazed if an army group commander would be wielding a pair of binoculars,, but who knows. I did them all in senior officer uniforms with red trouser stripes, gold braid etc. Hitler got his trademark red-brown cap and is moulded with a very obvious Nazi armband. His moustache is actually moulded on rather well. Rommel has a tropical jacket on, although it is hard to make out.


I got a pack of Assault Boats too, although I thought I'd ordered four of them, not two. These will do for now  though.


Very nice solid metal boats with well moulded shapes with little flash and they have very realistic looking grab ropes moulded around the lower hulls. I just painted these a generic dark green with a wash and drybrush and didn't bother to base them so they can be mounted on trucks to serve as engineer assault boats if needed. I can't possibly think of a game which might require those...


The boats also came with huge numbers of crewmen, seated figures which were far too useful to waste sitting in a boat. I cut down their paddles and turned nine of them into more passenger stands for my German trucks. Three figures per base looks more like it I think. I did them in greenish Field Grey, and the cut down paddles look reasonably like rifles.


As  was doing some passengers anyway, I painted up a pack of Peter Pig Russian Tank riders. You get 12 figures in four strips per pack, and very nice they are too. I put them on small bases for stability and they will fit nicely in the back of my Zvezda trucks or balance on the deck of a larger tank. The bases can be wedged under the turret rear for more stability. The strips are too long for the PP Gaz trucks unless you wedge them in diagonally, but I already have passenger stands for those vehicles.


My older Russian passenger stands only had two figures on as I was a bit short of suitable figures at the time, so I painted up three PP seated US figures as Russians and added them to the existing stands too. The PP figures are certainly much better fed than the PSC ones who comprise the existing passengers. I had to cut their feet off to make them look even half sensible, and even then, they seem to have eaten all the pies (first dibs at the Field Kitchen?). As a group they look OK though and they are fine in the back of a truck.


Just a little reflection on '15mm' figure sizes with some stands arranged in height/bulk order The leftmost stand are the QRF Assault Boat crews, then we have PSC and PP passengers, PP Tank Riders, the QRF Rommel and finally the PSC Early war German Infantry, who haven't just eaten all the pies but the entire cook wagon. The variety of sizes is quite remarkable, although it matters less for seated figures and in many ways I prefer vehicle crews to be on the small side as it easier to get them in.

Anyway, I'm pleased with that lot (and delighted with the Field Kitchen). A much easier job than painting all those Persians.


Thursday, 5 December 2024

15mm Grants

 I wanted to get some Grants for the 1942 desert battles. Although they were rapidly replaced with Shermans, they played a key role in 1942, and largely relegated the Stuarts and 2pdr Crusaders to the role of light scouting tanks. Their heavy armour, high firepower and reliability was a nasty shock to the Germans at Gazala, and in numerous engagements they bore the brunt of the tank fighting. 


These three are QRF models. I could have got some Zvezda Lees instead (I already have three in OD) , but the idea of converting the turrets was too much. Maybe if I hadn't been painting so much other stuff at the time.


This is a nice solid metal model. Well cast with lots of detail and sits very well once assembled. The main components are the hull, tracks, 37mm turret, 75mm sponson and (I think?) some stowage boxes. There wasn't much flash, the only bit which needed work was the 75mm sponson which comes with the circular gun traverse cover moulded on as a single piece. It sort of slots into the hull, and a certain amount of cutting and filing was needed to make it fit properly with the mount flush with the hull. 


While it isn't as fine as a plastic model, the cast on detail is nice and deep so great for washes and dry brushing. The 37mm gun is also very sturdy, unlike the spindly 2pdrs on a number of QRF models. Different designer I think. 


I did them all in different colour schemes. This one is just plain light sand, as so many of the Gazala Grants were. 


This is one of the hastily painted ones. The upper structure and outside of the running gear are sand, but the lower hull is still Olive Drab. It is a bit hard to make out the green bits in the photo as they are in shadow. 


The last one is in the inevitable Imperial War Museum blobby disruptive camo, which was more of an Alamein scheme. The base colour is Desert Pink and the disruptive is GW Bestial Brown (a very useful colour) edged in white and lined with a black lining pen. 

I'm very pleased with those and looking forward to getting into action and giving the Hun a good biffing! I've just realised I need another one though, looking at the mix of Squadrons and Regiments. Doh! 


Wednesday, 21 August 2024

15mm Morris Armoured Car

 The Morris was an early desert Armoured Car, and generally mixed in with Rolls Royces as it was equipped with a radio (and the Rolls weren't). 


It is actually a nice looking little vehicle. This one is QRF, and I have no great compunction about using it for the entire desert war as it has a similar "Mad Max" feel as Marmon Herringtons. 


The model came in several bits, turret, wheels, separate Boys ATR. The hull is hollow, which keeps it light, but it was the usual pig of a job sticking the wheels on, helped along by blobs of Blu Tak.  The wheels are cast with those very distinctive fat Morris tyres. 


The hull rear is an interesting arrangement. I can imagine some brave chaps riding the mudguards. The vehicle commander is a PP sitting figure in a service cap, cut about so I can wedge him in the turret. There is also a very spindly cast on gun barrel, which I think is supposed to be a Bren. When it falls off, I'll add an actual Bren from the spares box. 


I did it in Caunter, Dark Grey over Light Green over Light Mud, plus all the usual washes, dry brushing etc. 

That is a very nice model. It looks quite speedy, and also has something of that desert "gypsy caravan" look about it. 


Thursday, 1 August 2024

15mm Marmon Herrington Mk II

 More British Armoured Cars. This time I wanted something a bit more early war-ish.


This is a QRF Marmon Herrington Mk II. I slightly wish I'd gone for one of the Breda or AT gun armed variants, but this is the one I got. 


It went together OK. Hull, four wheels, turret, spare wheel and separate Vickers gun. There was a bit of flash to clean off, and the wheels are mounted on axles already, which is fine, but there wasn't much in the way of metal to fix them too,. I ended up using huge blobs of blu tak and covering them in superglue.


I didn't have a clue where the Vickers gun was meant to go, but I put it in an AA position on the turret. There is quite a lot going on with this vehicle, with all sorts of odd doors, panels and protuberances.


It came out fine in the end. As it was a 1941ish vehicle I did it in late Caunter - Dark Green over Smoke Grey over Sand. I had to slightly make the pattern up, but I've done enough Caunter now that I know how it is supposed to work. I've actually got quite good at painting the hard edges.

Otherwise the vehicle has loads of sharp edges, raised bits etc so my washes and drybrushes took well.

This model had its combat debut as part of the recent Operation Crusader game, serving as recce with 1st South African Div. 


Thursday, 6 June 2024

15mm Vickers Light Tanks

 I wanted to get some Vickers tanks for my WW2 desert British, both for early war actions, but also to use a Divisional Cavalry in operational games. They can also make a cute command tank for Armoured units.


I got one of the 'troop packs' from QRF. £11.50 for three tanks, with an extra 10% off in the sale. Not quite such good value as the Crusader troop packs as you get a lot more lead for your 11.50 in those, but compared to 6 quid for a single Zvezda one, stupidly cheap. 


These are very delicate models as they are so small. Just four pieces - hull, turret and two track pieces. Some of the mouldings are very thin in places, and it easy to accidentally snap the tracks when handling them. There wasn't much flash though, just a few casting threads, and they went together easily enough, aided with Blu Tak and a slathering of super glue.


Like lots of early war tanks, these have nice sharp edges and all sorts of random bits which pick up a wash and a drybrush nicely. I did vaguely think about adding a commander to one of them, but couldn't be bothered to cut the cupola around. I might come back to that in future when I'm a bit less 'painted out'. 


They are absolutely tiny vehicles, rather like a turreted Bren carrier. In fact many years ago I scratch built a 20mm Vickers using an Airfix Bren Carrier chassis.

 I painted them all in Caunter as they are predominantly 1940/41 vehicles. The overall  pattern is the same on all three (based on the model vehicle in the Vickers Armstrong Museum in Bamburgh), but I did three colour variations.

The first is Dark Green over Light Green over Sand, which iirc was the second authorised pattern.


This one is Dark Green over Smoke Grey over Sand. Like the cruisers, they all got a pinwash over the camo sections to refresh the detail and the whole thing got an overall drybrush of Pale Sand which raised the highlights and faded the overall tone.


The last one is Dark Grey over Smoke Grey over Sand. The dark grey is actually Vallejo Panzer Grey, which is so dark it is almost black, but the Pale Sand drybrush lightens it considerably.

They were fun to put to together and paint, if a bit fiddly. At least they won't take up much space in the tank box!


Thursday, 9 May 2024

QRF 15mm Cruiser Mk IV (A13 Mk II)

 The final vehicle of my clunky cruiser collection is the QRF Cruiser Mark IV, aka the A13 Mark II. This one is actually starting the look like a sensible tank.


It is actually very similar to the A13 Mk I, Christie suspension, boxy armour etc, but it has jazzy sloped turret armour on the sides (but not the front? why?). It looks a bit more like its successor, the Crusader. Just like the Crusader, it also has a hilarious shot trap built in on the lower turret sides, but I guess that is the limitation of the turret ring. It took a long time for British tank manufacturers to realise they could extend the hull over the top of the tracks, although in fairness, the Tiger was the first German tank to do this.


I suspect the QRF model is just an A13 Mk I with a different turret. it only has four pieces and goes together very easily. It looks pretty good when assembled however. This one had a very bent gun barrel, bent in transit I guess. I straightened it as best as I could, but I guess it will now be permanently weakened. I may have to replace it at some point.


Somehow the angled turret makes it look much more racy and modern than the Mark I.


Those mudguards don't look quite right to me, too long. The Peter Pig one is much better in that regard, but this is fine for wargaming and looks OK on the table. 

I did this one in a later Caunter pattern: Dark Green over Smoke Grey over Light Mud. The Light mud base layer was Dark Sand over a grey undercoat, inkwash and then another coat of Dark Sand. As with the other cruisers, it got a pinwash on the camo and then a overall drybrush of Pale Sand.

That is a nice addition to the British forces. As I said elsewhere, I prefer my PP A13s (which are painted for 1st Armoured Div in 1940), but these are much cheaper and good enough for gaming. It is fairly obvious what the model is supposed to be anyway.


Wednesday, 1 May 2024

QRF 15mm Cruiser Mark III (A13 Mk I)

 I've always had a soft spot for the A13 (aka Cruisers Mark III & IV), I even had a go at scratch building a 1/35th scale one back when I was a proper modeller. It is actually quite straightforward due to the angular nature of the hull, but all those rivets.... 

Anyway, I digress. Next up in my old clunky cruiser collection is the mighty Cruiser Mark III, or A13.


This is a similar boxy shape as the A9, and equally full of shot traps, vertical plates and rivets. it was however the first cruiser tank to use the Christie suspension, so the running gear is very different to the Cruisers Mark I and II.


This is a very simple model as there aren't any separate MG turrets. Just the hull, turret and two track sections. It went together fine and didn't have much flash. The track sections are extremely thin however, and mine was actually missing a section under the left hand front bogie wheel. I could have made the missing bit up from card, but I just hid it with a big clump of grass!

You can really see the ridiculous drivers box bolted on the front of the flat plate under the turret in this photo. Honestly, these things seem to have been designed to blow up at the first hit.


A very different engine deck to the A9, large and flat. Mercifully the exhaust sections are cast on, unlike the QRF Crusader when you have to stick them on. Like the A9, you can see all the lovely rivets and raised edges, perfect for highlights.
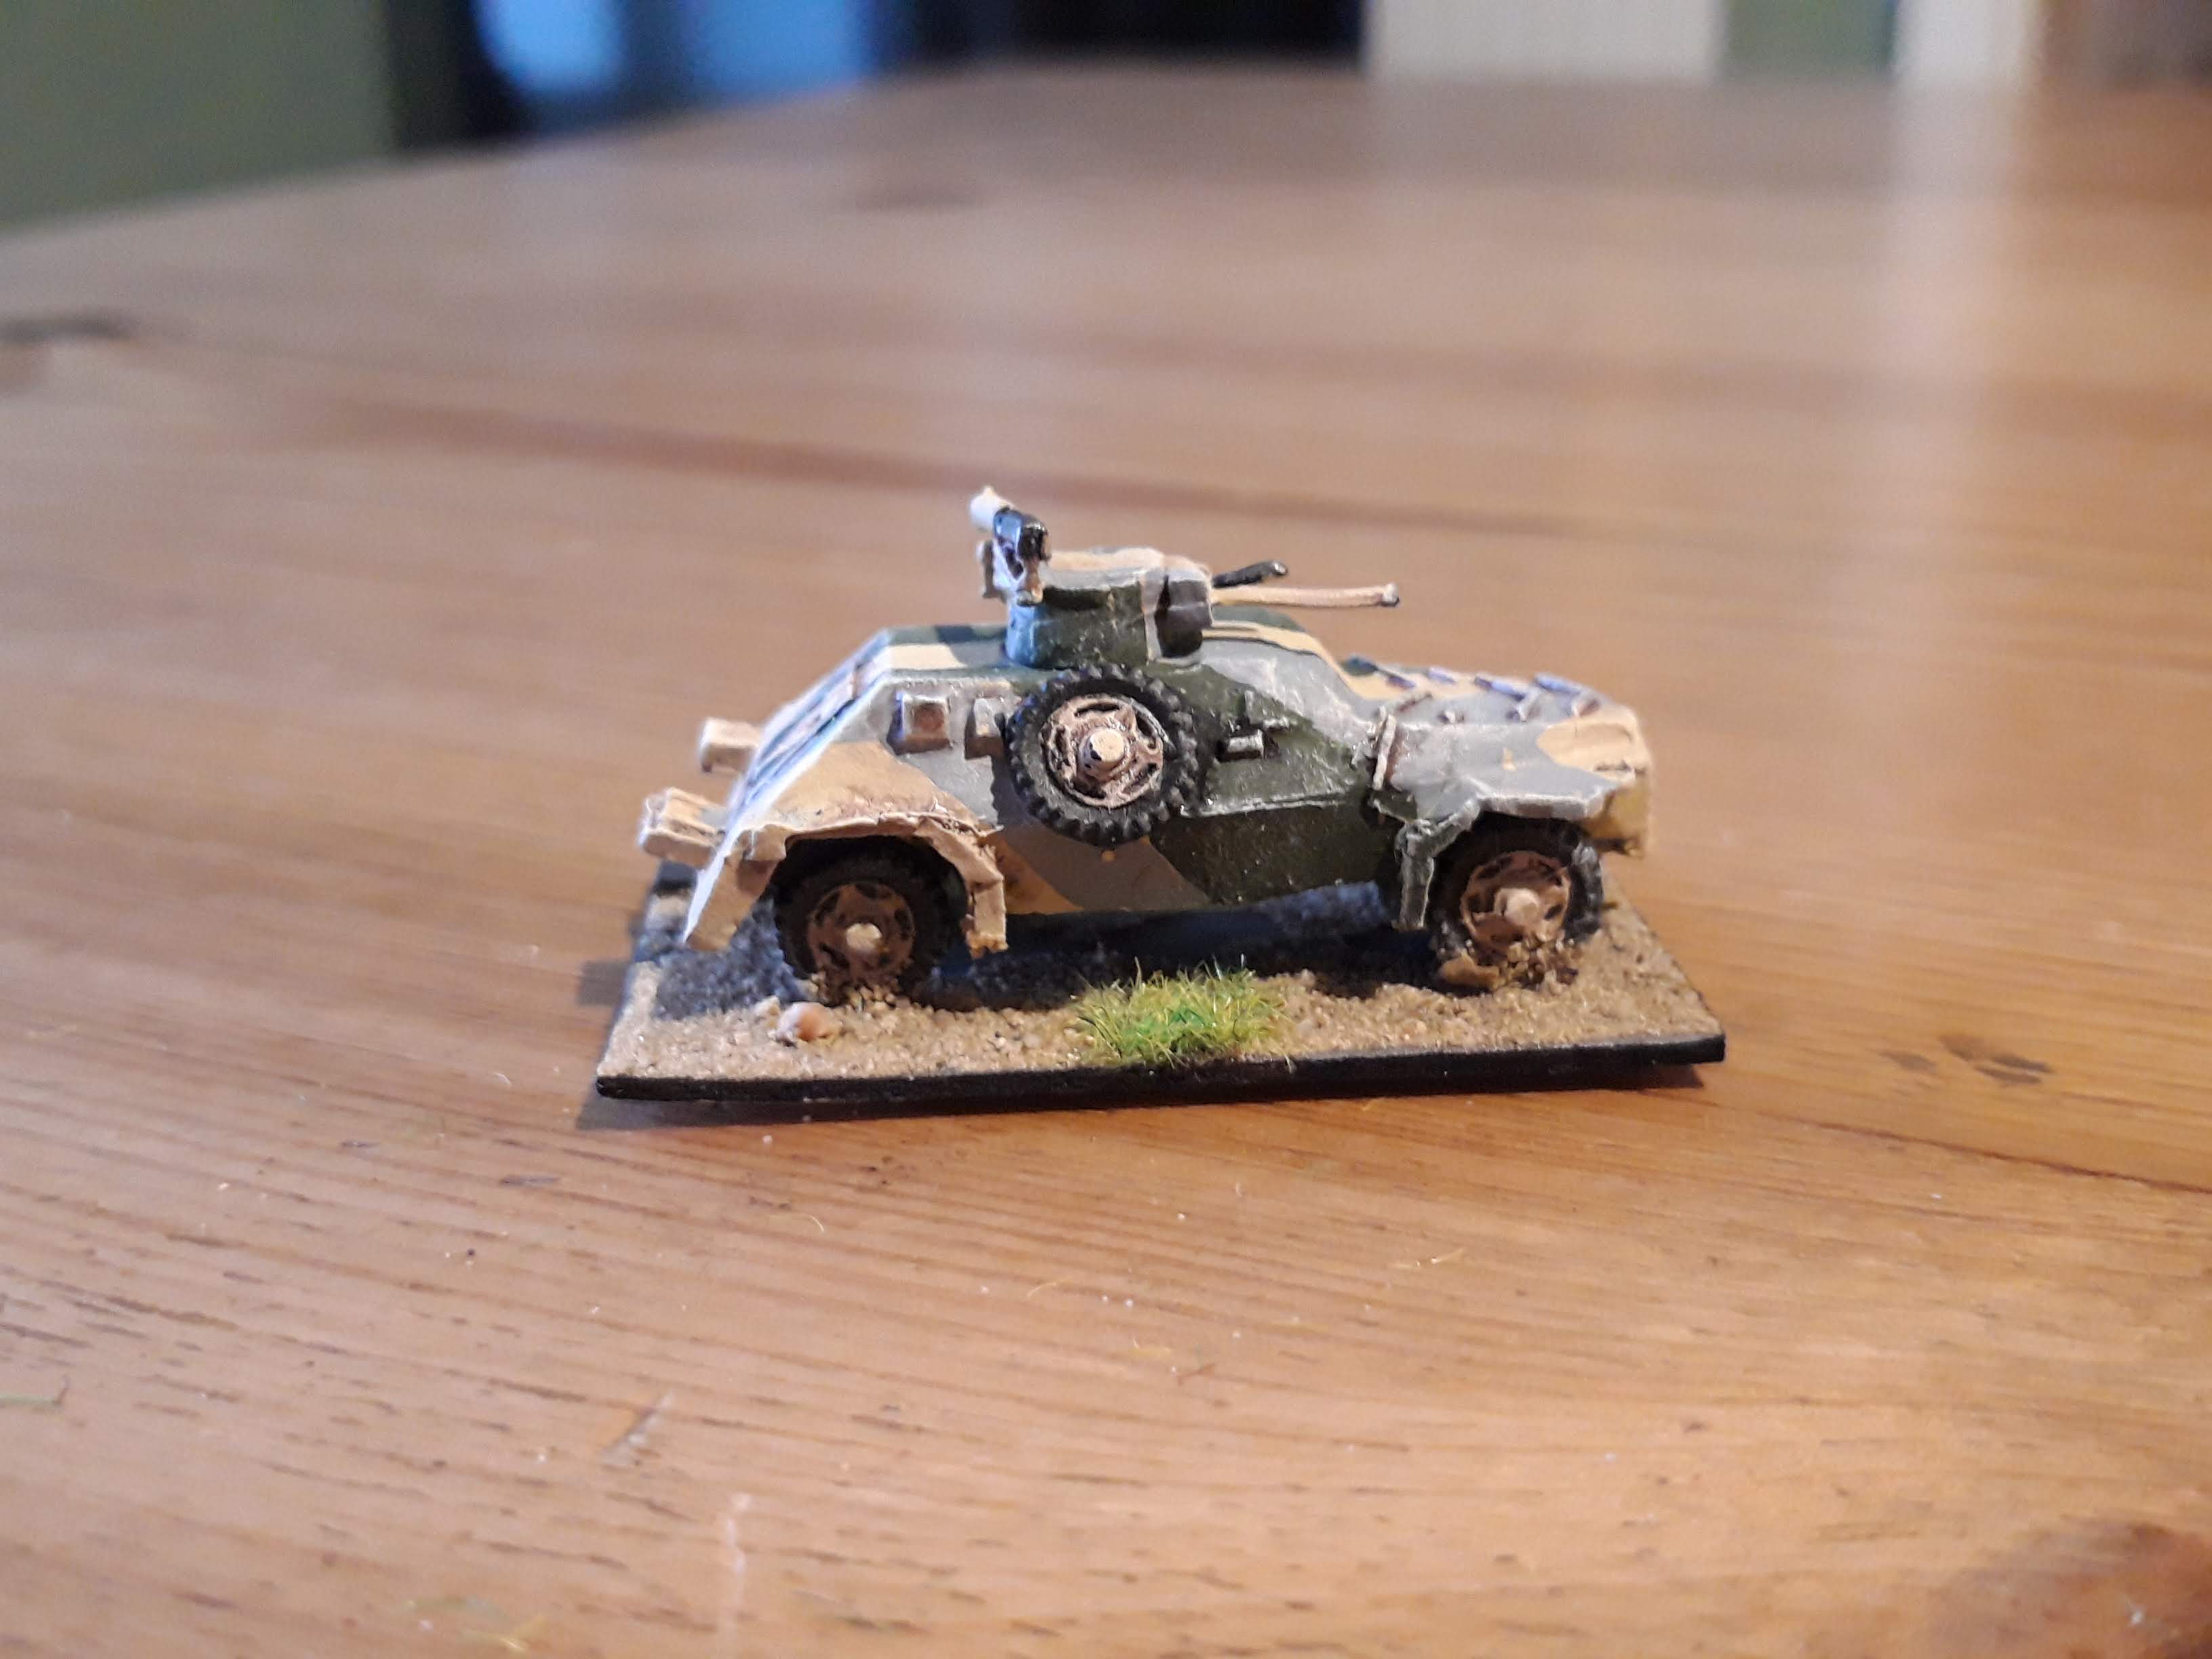

This is an OK model. I like the overall look of it, but the running gear is quite crude. I prefer my Peter Pig A13s, but they are much more expensive. The dimensions seem spot on though, as you'd expect from QRF.

I did this one in another early Caunter variation. Light Mud with Purple Brown over Light Green. The usual Vallejo Desert Sand with an inkwash, then GW Bestial Brown for the Purple Brown and VJ Middlestone for the light green. As on the A9, I did a pinwash on the camouflaged bits and then an overall drybrush of VJ Pale Sand to bring out the highlights.