After my various experiments with NQM at Regimental and Corps scale, I wanted to try something at Front Scale, as really that is where my operational gaming is at for a game in a manageable length of time. My own Sinai 67/Panzergruppe rules are pitched at that scale, and I've run loads of Army level games in an hour or two using them (including the Six Day War, all ten days of Arnhem, Operation Goodwood, Operation Crusader and Gazala).
Anyway, digging aroud for scenarios I was rather inspired by Graham Evans various NQM SCW games, so I dug out my Jarama 1937 scenario. I originally wrote it for Megablitz with battalion sized elements, but I later re-did it for Panzergruppe and my SCW variant of OP14 with regiment/brigade sized elements. I solo played it quite a few times and ran it remotely over Zoom a couple of years ago in the early days of lockdown. With regimental sized elements it was an obvious candidate for NQM FSO treatment.
The battlefield. The real battlefield isn't huge, with a 30km frontage. For my remote Panzergruppe session I used 5km hexes (so a six hex frontage) to keep the amount of real estate manageble, but for this outing I reverted to my OP36 ground of 3km hexes and I ended up with a 9 x 11 battlefield. I added a bit of space on the baselines as I found NQM needs a certain amount of room for all the HQ/LOG stuff.
The front line is in the west (running north to south) , the River Jarama runs down the middle of the board, the River Manzanares is at the top with Madrid offtable and the River Tajuna runs across the southeast corner. The road to Valencia runs off the bottom right, and the road to Toledo runs through Ciempozuelos in the bottom left (currently held by the Republicans). St Martin is the village on the T junction west of the road bridge and Arganda the village on the Madrid-Valencia Road. The Nationalists attacked in Feb 1937 with the aim of reopening the road to Toledo and cutting Madrid off from Valencia.
The Republican supply routes run from Valencia and Madrid along the road network, and the Nationalists run along the road to/from Toledo - a bit of a problem as the road south is cut! They do however have supply dumps at the two villages and a supply line to the north.

The front lines. The Popular Army (PA) had eight mixed brigades in the region under general Posas, organised into four ad-hoc 'divisions' called Agrupacions, although one only had a single brigade. The brigades in theory had four battalions and an artillery battalion, but all were very weak and lacked cohesion so in the main I rated each PA brigade as the equivalent of a regiment. I grouped them into three Agrupacion, and each of these also had HQ/support unit as otherwise there weren't enough units to even cover the front, let along have a reserve. As the PA artillery was so dispersed, I allowed the HQs to fire one hex in support. The entire Corps only got a single field artillery brigade otherwise, located at St Martin. I rated all the divisions as poor morale (2). The Corps has a single LOG unit, located at St Martin. It can only function if it can trace supply to a supplied road. The supply stuff is lifted directly from Panzergruppe. If LOG units can operate without supply sources, the entire real offensive doesn't make any sense.
The Republican objective is to hold the line and keep the roads open.
The river valley and Madrid Valencia Road. There isn't any depth to the PA position, although Miajas rather better equipped Corps is off to the north. Posas Corps has a single engineer battalion, currently located by the Pindoque rail bridge visible in the gap between the hills and the River Manzanares.
It is February so it is wet, cold and the rivers are in spate. The hills and rivers are all 'difficult' so impassable to vehicles unless at a bridge. The only exception is that I allow guns on the hills, as both sides deployed artillery on the heights, but again, moving at the 'difficult' rate.
Each turn (each turn = 1 day) there is a weather roll. If it is heavy rain the rivers become completely impassable and all air is grounded, if overcast/drizzle air is half effect and if clear (unlikely) air operates as normal. This is lifted directly from Panzergruppe.

The Nationalist Army of Africa (hereafter AoA) is the best force Franco has at his disposal, but already the quality of the Moroccan infantry has declined after the heavy losses fighting at Madrid over the winter. The AoA 'brigades' are much stronger and better equipped than the PA ones, generally with two regiments of three battalions each, and a mix of Spanish Foreign Legion (SFL), Regulares (Moroccan) and some normal Nationalist units. I made each AoA brigade up as mini divisions with two regiments and an HQ/support element and to keep things easy, differentiated them between SFL brigades (morale 4) and Regulares (Morale 3). The AoA also had a brigade of heavy (149mm) artillery and support from the Condor Legion - tanks, 88mm guns, German artillery and aircraft.
The brigades were grouped into two 'divisions', which were the equivalent of Corps, East and West, depending on their garrison location in Morrocco. West Division had the southern part of the line, with two Regulares and One SFL brigade, a brigade of Field Artillery and the Condor Legion 88mm AA/Artillery. Their initial objective was to reopen the road to Toledo, then cross the Jarama east of St Martin.
Further north was East Division (commanded by Varela) iirc. This only had two brigades, one SFL and one Regulares, but had the Corps heavy artillery, all the Condor Legion tanks and Col. Barcuelos Cavalry Brigade. The latter I modelled as a single regiment equivalent, morale 3. Their objective was to establish a bridgehead over the Manzanares (and bridge it with their engineers) and to take the Pindoque rail bridge.
In support were the Condor Legion bombers. Yes I know they are the wrong colour, but I wanted to use my 1/144th scale planes, not my 1/300th scale ones. It has three engines so gets 3D6 of medium dice - rating it as 'heavy' would have been too imbalancing. Each Corps also had a motorised LOG column, which like the PA, only functions if it can trace road supply.

Waiting to come to the rescue of Posas is Miajas Corps. Two brigades of Communists and four International Brigades. These guys are considerably better equipped and cohesive than Posas lot, so all morale 3 and with an HQ/support element for each two brigades. The communist have an AT gun as their support (medium vs armour). There is also Pavlovs Tank Brigade with around 6o running T26s and BA-10s. The Nationalist Panzer 1s are treated as light armour when fighting these. All the armour only gets 2SP as they are really battalion sized units, but very scary to infantry without many AT weapons, so the Pz 1s are medium when fighting infantry.
The Republicans had very weak air support to start with, so they just get a single engine (1D6) biplane bomber, but when Miaja rolls up, so do fleets of SB2s, which get 2D6 each. As with the Condor Legion, all planes rated as Medium to avoid things getting silly. Similarly everyones engineers are just treated as infantry, these are blokes with shovels and wheelbarrows, not armoured panzer assault engineers.
The battle opens on the 6th Feb with a heavy bombardment in the north. The weather is overcast but the AoA heavy artillery is still quite effective and the 88s joined in too. Pre-movement bombardment seems to be the way to go here. In fact I ended up doing that a lot in the game as it meant you could shell units before they had a chance to dig in, and was also quite a neat way of differentiating between advance-to-contact and prepared assault. Neither side had any recce assets, so the only way to recce stuff was to stand next to it.
In the south things were more leisurely, just the AoA field artillery vs Ciempuzuleos, which naturally missed but put the defenders under bombardment.
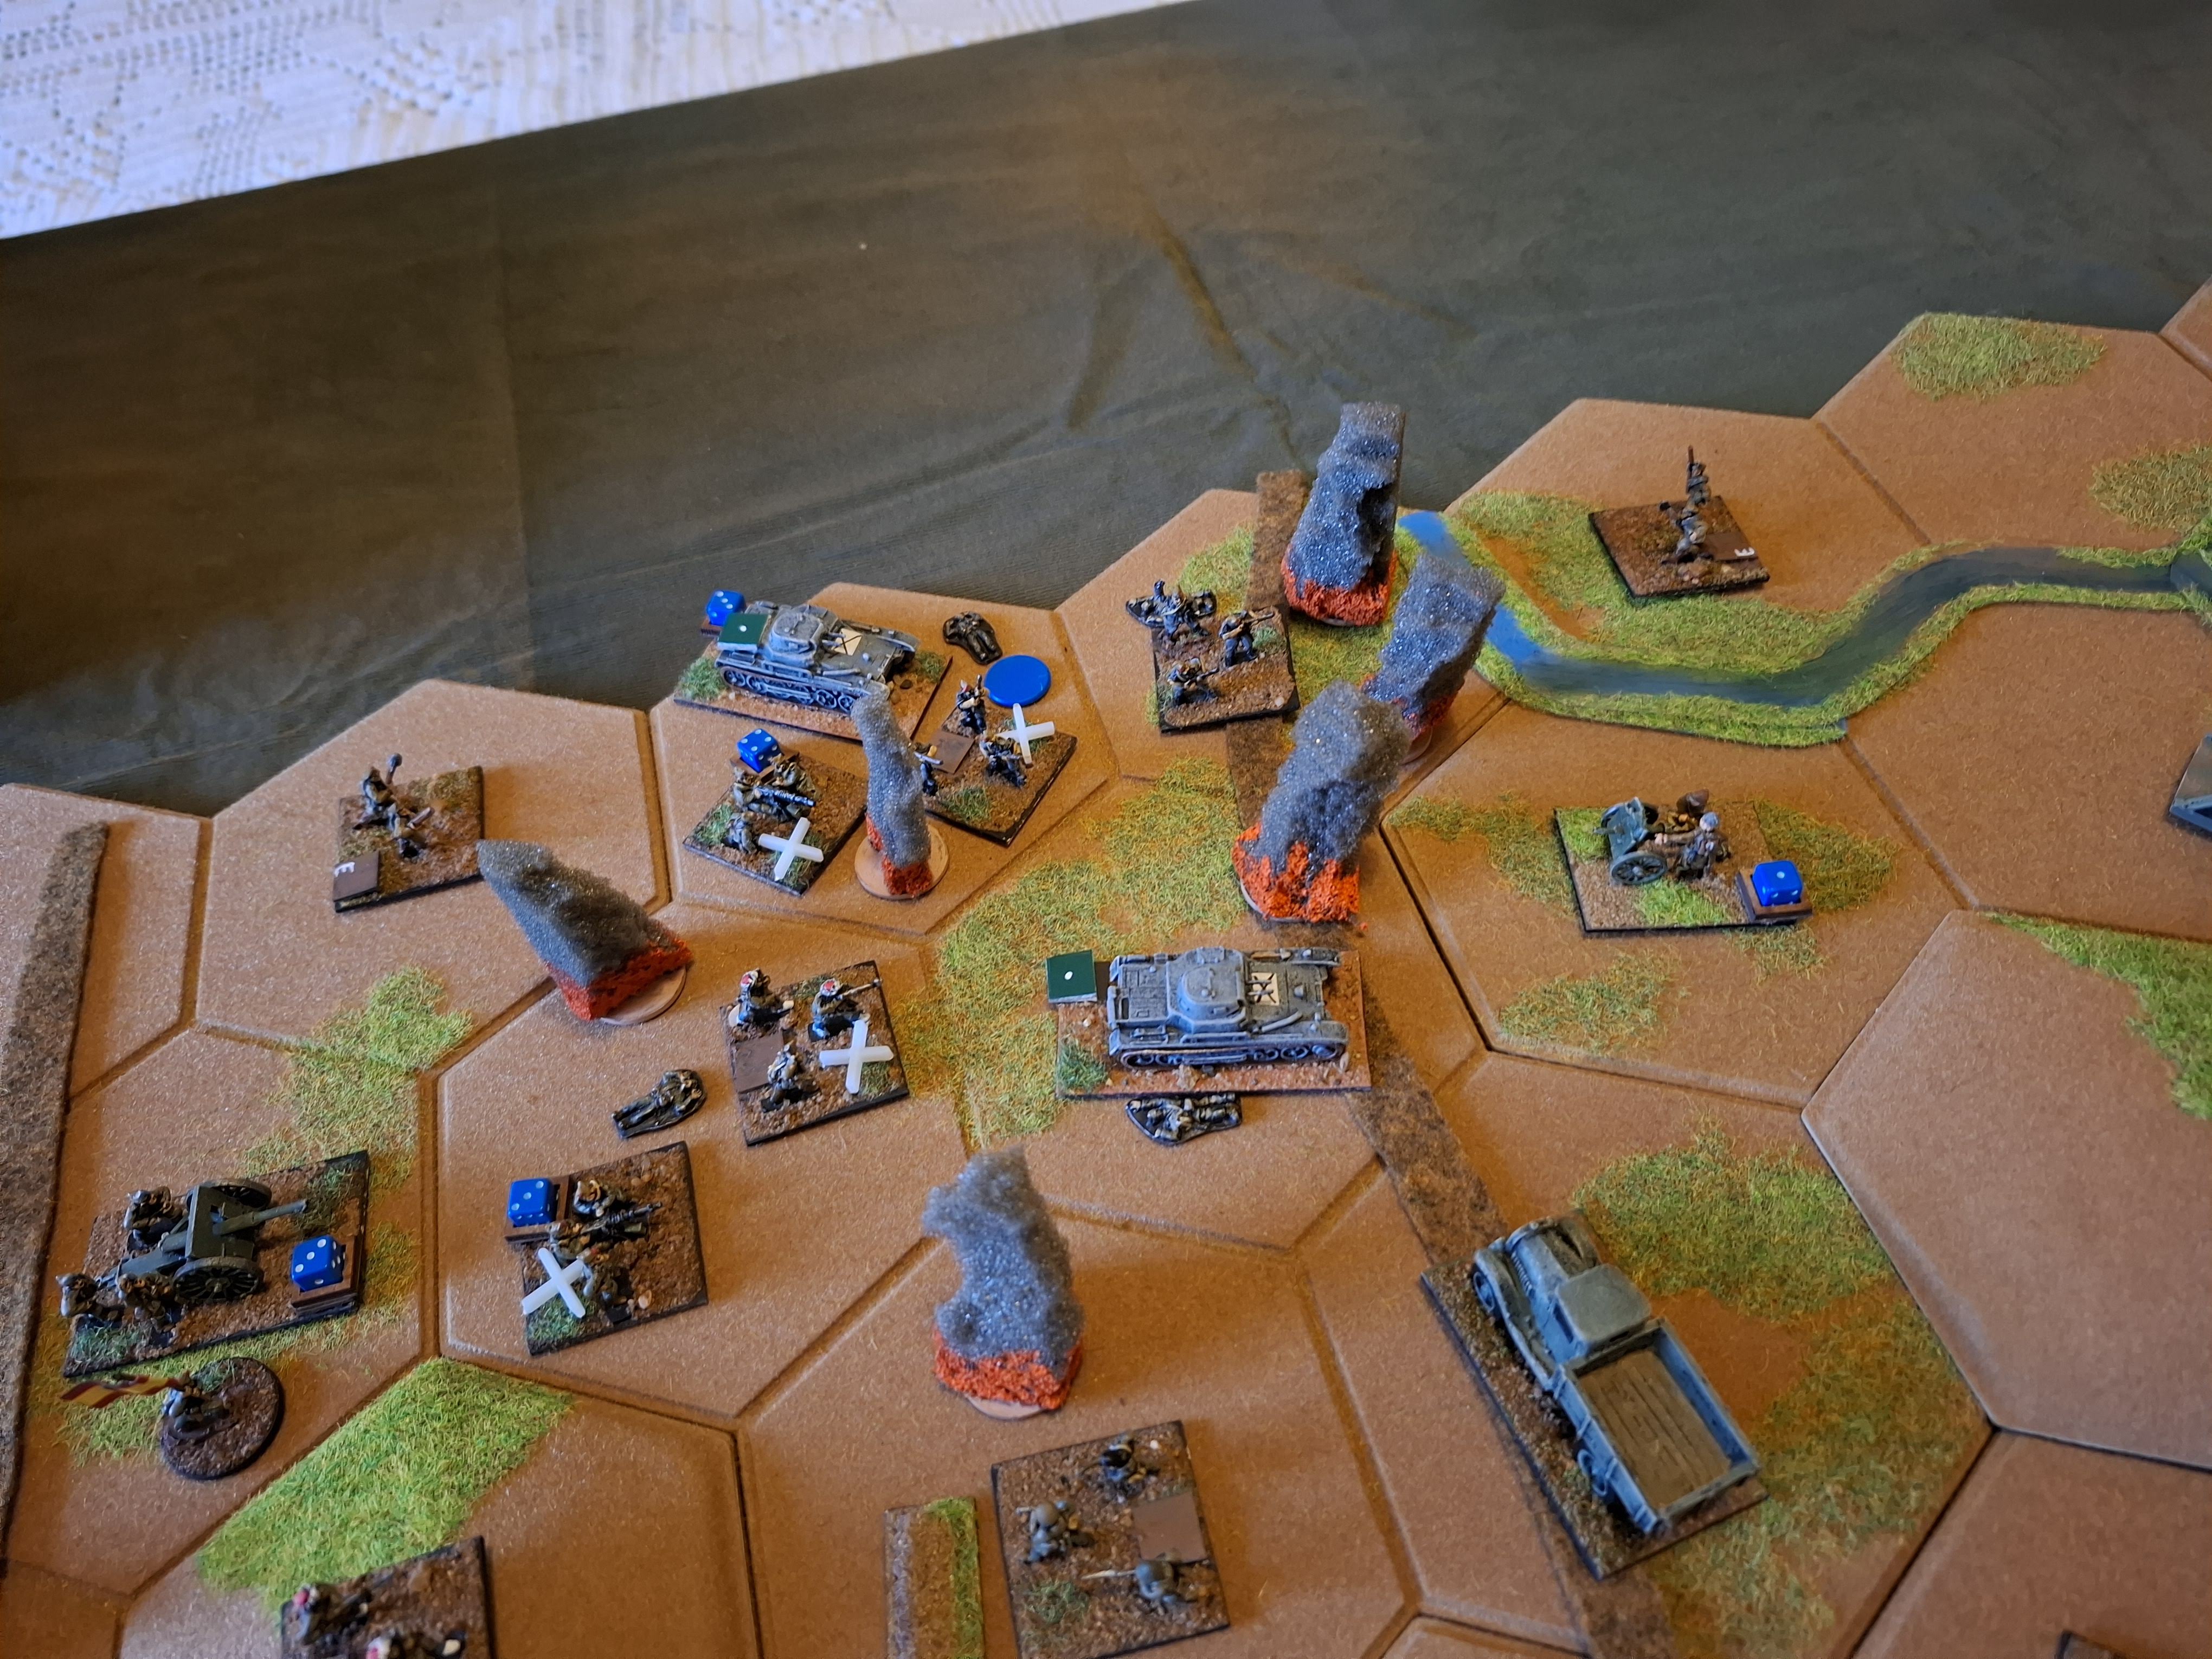
In the north both AoA brigades rolled forwards led by the Panzers. Even though they have 2SP I'm letting the tanks stack as that is what they did. Normally leading with the tanks would be a good move, but not when the defender rolls two sixes! The defenders run out of ammo but the field is littered with blazing panzers. As far as possible I'm trying to keep the HQs back so they can reorg units.
The south sees a similar furious exchange of fire, although this time it is the Regulares rolling 6. The PA artillery fires defensively and hits the SFL. And yes, I am allowing units under an artillery bombardment to attack. In a game with regimental sized units and day long turns, I don't see why not, and otherwise it is far too easy to lock down large areas of the battlefield. It isn't all a free lunch though, as will become apparent.
Outcomes. The Regulares manage to storm the town! If the SFL try this, they will take automatic hits from the artillery, and as they both have a hit each anyway, that would be really bad - so the artillery barrage does have a pinning effect and it is player choice whether to take the hits or not.
For the assault/combat outcome, I am modifying the dice roll by the number of hits on the enemy AND the quality of the assaulting unit. That gives the better quality Nationalists an edge, at least until their losses mount and quality declines. So here the Republicans were at +3 (hits on enemy) AND +2 (morale) while the AoA were on +2 (hits) AND +3 - the morale of the Regulares as I elected them to conduct the assault.
In the north the AoA carries the PA trenches, partly due to their superior quality. There aren't any defensive barrages to worry about here but the attackers will be under their own barrages, while the defenders are back on the road and next to their HQ bases so everyone can reorg except the units under the artillery fire.
The final outcome move here is that the SFL withdraw from the barrage so they can reorg. They only used 1MP to advance into contact so have one left to withdraw again. Another advantage to a formal assault as opposed to attacking after using all your movement up.
In the north both sides LOG units move up to take off all the out of ammo markers. The big red counters are disorganised units (I later started using less obtrusive markers). The panzers attempt to remove their single hits too, and both roll low and each takes a permanent hit. Argh! The PA remove their hits and are left with one permanent casualty.
So at the end of the day, the PA line has been pushed back in the north but it is very much still a dogfight, and but a big Nationalist success in the south.
That account was a bit phase at a time - I'll not do so much detail on future turns.
Up north the torrent of air and artillery fire continued - the Republican planes bombed the damaged panzers, recce'd by the PA unit dug in beside the hill. The PA defensive fire prevented the AoA infantry advancing much as the PA dug in on the road. The Republican line was stretching and the Corps engineers were hurriedly thrown in to hold the line behind the Manzanares.
The big decision in the south was whether the PA would counterttack, but in the end Posas decided they were too weak to do it. Perhaps if all the air and artillery hadn't been in the north. The PA just dug in on the road to St Martin and the AoA nibbled at the next position along, supported by their field guns. The disorganised troops in Ciempozuelos would have to reorg at the end of the turn.
In the north the AoA wiped out the PA units on the road and the panzers advanced through the storm of artillery fire to take the position. The Nationalist infantry was all pinned down by artillery fire and unwilling to take the hits from advancing.
In the south the Regulares stormed the next PA position. The quality difference helped them win the opposed DR. I've started using casualty markers to keep track of disorganised units as they are less obtrusive.
A last big effort by the Nationalists in the north as they attempt to break through.
And one battered panzer battalion makes it across the Pindoque Bridge! Sadly Pavlovs Tank Brigade has just rolled down the road from Madrid. The Republicans managed to slip a brigade into the Pindoque gap as the Nationalist infantry are all pinned down by artillery fire. I rolled to pro-rata the movement - the AoA would have taken a hit to keep the route open due to the artillery barrages.
In the south the Legion assault fails but the Regulares consolidate their grip on the road to Toledo.
Pavlovs tankers destroy the panzers and take control of the bridge again, but the Republican line is crumbling here. The PA lay down a barrage to interdict the Nationalist infantry, but the writing is on the wall in this sector.
In the south, the SFL are reinforced and try again. This time they are successful and advance adjacent to St Martin. various units have run out of ammo (the blue markers). You can just see that the Republican line has retreated and is now anchored on the hills and river. I wasn't quite sure how to handle this from an orders point of view, so I allowed the AoA to follow up, but I guess they should have waited a turn.
In the north the Republicans have largely disappeared now, apart from the engineers being bombed by the Condor Legion. The Republicans artillery is now in the front line! A lot of the Nationalist units have pulled back from the numerous barrages so they can reorganise and resupply though, harrassed by the Republican airforce.
Resuscitated, they advance again, picking their way through the various barrages. Some Regulares make it up onto the (difficult) hills overlooking the river.
And in the south the PA falls back to a ring around the St Martin bridge. The AoA uses pre-movement bombardments to catch them before they can dig in again, but essentially just follows up.
In the north the situation becomes dire. Concentrated air and artillery wipes out one of Pavlovs tanks and the other withdraws. The Nationalists are advancing en masse.
In the south however the Regulares are repulsed (the big yellow counter). The Nationalist artillery is firing a lot of CB fire in an attempt to finish off the Republican artillery, but so far the St Martin bridgehead is holding.
The Republican engineers are wiped out by massed fires. There is nothing to stop the Nationalists now, although many of their units are damaged and morale has been reduced by casevac.
They sieze a large bridgehead over the Jarama, and Barcuelos cavalry exploit in the direction of Arganda. This is the cue for Miaja to arrive. The Communists lock down the Madrid Road at Viacamadrid, while the Internationals and Pavlovs remaining tanks counterattack. I should have taken a couple more photos of this, as the Nationalists are also busy bridging the Manzanares!
The remains of Posas Corps are back over the Jarama now, with Republican troops occupying the heights. More Internationals are marching down the road to support them past the village of Morata. A regiment of SFL rush the St Martin bridge, taking losses from artillery fire but they sieze a bridgehead. It is all very heroic!
The general situation around the 12th February with the Nationalists across the Jarama in the north and south but the Republicans are still occupying the Pingarron heights behind the river.
On the 13th the Republicans manage to get back to the Pindoque bridge, again. The Nationalists are dug in across the Jarama but with the river at their backs they can't be supplied so will have to withdraw. Barcuelos cavalry have already pulled back.
In the south the Nationalist have a serious bridgehead at the St Martin bridge, but the Republicans are dug in around Morata and there is little prospect of the Nationalists getting to the Valencia Road now.
I rather ran out of steam at that point (after 8 turns) although the scenario is supposed to run for 9. I couldn't see any realistic prospect of further advances for the Nationalists and the Republicans would need to significantly re-deploy to push them back in the south. It had taken me three and a half hours of playing to get to this point (excluding setup), which with two Corps on each side is in line with the suggested playing time, but I was knackered.
Reflections
TBH I was actually a little disappointed, both my Panzergruppe and OP14 iterations played twice as fast to get to a similar point and both seemed to have a lot fewer moving parts and more in the way of high level decisions. On reflection though (and in writing this account) it produced a good narrative and a reasonably historical result and pretty much did what it said on the tin. I think it may be a bit slow for remote game sessions with too many bits to think about, but f2f would probably be OK, and obviously playing both sides solo I've go twice as much to think about.
I'm quite happy with the bits of Panzergruppe I grafted on for the weather and logistics elements, and I'm also happy with the way artillery works now (even if it isn't exactly as written in the rules). One thing I'll probably keep for future games is the combination of quality and losses for combat outcome determination, even if it is fractionally more arithmetic. I'd also dispense with the dice rolls for weather and substitute cards instead - cards have memory and dice don't. I didn't roll 'heavy rain' at all!
This scenario is essentially a WW1 battle with more modern tanks and planes, and any high intensity battle will have a prolonged attritional segment before things open up and start moving a bit. One thing I was very pleased with was the way the game settled down into a series of formal assaults with the occasional pursuit and advance to contact and an even more occasional breakthrough and exploitation. I want to try it in a more open environment, probably the desert, for which I'll drag out my well playtested Operation Battleaxe scenario. I think re-running Crusader or Gazala might be a bit much at present. Who knows, if I play it enough I might even feel confident enough to play with other humans.