Saturday 29 January 2022

ACW play testing

 Having painted some toys, I thought it was best to try out some rules. For face-face play I'm inclined to go with the original version of Horse, Foot and Guns (the 1991 version, not the more recent bloatfest). For remote games, I was drawn back to Richard Brooks 'Terrible Swift Rules', but with some revisions to the combat system to make it bit less of a maths exercise. I was also very taken with the unit activation system used in Belle Epoque, and it will make a good substitute for the cards and dice system used in the original. I've played loads of nineteenth century battles using these, but they are getting a bit old now and in need of an update.


I did a battlefield for 1st Bull Run at one hex to 1km. This is based on the Volley and Bayonet scenario. The Bull Run is at the top, Centreville (and the US Army) is off the top edge, while most of the Confederate force is off to the east with just token forces at Stone Bridge and the ford. Henry Hill, the pivot of the battle, is the one in the middle. The only towns are Sudley Springs and Newmarket, both too small to have any tactical significance.


The situation on Turn 7. The Union have just bludgeoned their way onto Henry Hill, but Sherman is in big trouble across Bull Run to the North as Jacksons brigade tears huge chunks out of the Union bridgehead. The routed remnants of the original defenders are reforming in the woods to the east.

As this is such a small battle, the manouvre units are brigades and each element represents around 1500 troops (better units like Jacksons are more like 1:1000). Turns are an hour. 


The Confederate reinforcements have arrived just in time to save the day and lined up for a massive counterattack before the Union get dug in. Jeb Stuarts cavalry can be seen lurking in the foreground, but they are almost useless against infantry in good order. Better to find a flank or some disordered units ot beat up.


The assault goes in with close support from the Confederate guns. Stuart is waiting in reserve to exploit. As both sides have poor command staffs, it takes an age to get units deployed into combat formation and ready to attack.  


A couple of hours of hard pounding ensue, but despite the initial Confederate superiority, the assault is beaten off and the shattered remains fall back. The defensive advantages were too great, and the intervention of a fresh Union brigade was decisive in tipping the balance. It looks like the rebellion is over before it had really got going. 

That all worked pretty well and I finished up in less than two hours. There were a few ropey bits to do with the influence of leaders, and actually pushing the toys around clarified some thoughts about to model the terrain effects (particularly all those creeks and fords). The activation system worked well and introduced a sensible amount of friction, and the revised combat system was a lot less maths heavy, albeit still very bloody unless one side had a big advantage - which at 1st Bull Run, neither did.

I can tidy up the rough bits and I think that is a game. Unfortunately, I don't think it is going to work for remote play, as despite the grids, there is an awful lot of detailed decision making around the allocation of each units movement points to different actions and while it will work fine for f2f, I think it will be too much for remote play for the sorts of big battles I'm interested in. It will be worth a remote playtest session, but I think I'll revisit Belle Epoque or the Portable Wargame. The latter will need a huge re-write though.


Tuesday 25 January 2022

6mm Confederate Artillery and Zouaves

Finally, the last batch of 6mm ACW stuff. As for the Union, I did four Confederate artillery pieces and two units of Zouaves (which used up all the figures in the Zouave pack, although a couple of strips of skirmishers were left) . 


Zouaves and artillery. 


I did three Napoleons and one 3" rifle for the Confederates. I just the gunners in overall cadet grey and picked out some of the kepis in artillery red, which made a nice contrast. Gun carriages in olive green and metalwork in black apart from the brass barrels on the 12pdrs.


I didn't want to go too over the top with the Zouaves uniforms, particularly as the very fancy ones were rare in the field. This unit is based on the Maryland Regiment after they swapped their blue(!) jackets for brown ones. Brown jackets, dark grey pantaloons, white gaiters and yellow cap/fez. 


The other unit I did even more drab so they could blend in more with the rest of the line units. Brown jackets, dark grey trousers and light grey cap/fez. I kept the white gaiters though as they look quite smart. 

With all that lot done, that is sufficient for two starter armies I reckon. I can fill in the gaps next year as there is plenty more stuff in the box. Now  I need to pick some rules! For remote play I will probably rework Rifle and Kepi, but for face to face, I think Horse, Foot and Guns is the way to go. Something to play around with anyway. None of the Neil Thomas rules for this period grab me, and I haven't got anything like enough stuff for Fire and Fury. I went through similar iterations when I first became interested in the Austro Prussian War, but unlike 1866, there aren't the same extreme asymmetries of weaponry and doctrine in the ACW. 


Sunday 23 January 2022

Xmas club games day

 Over the holiday break we normally have an extended club meeting to play games and get out of the house(!). Last year was curtailed by Covid, but this year the government has decreed we can meet face to face, despite case rates being almost 200,000 a day. Oh well, I guess we are all vaccinated.

So with a certain degree of trepidation, and after almost two years of playing online, we actually met up face to face to play. 


It was all rather jolly and had the feel of a small wargames show. We were in the Conference Room rather than our normal one at the workings mens club, and this was big and well ventilated. 


An extensive Bring and Buy added to the show feel. Tim, John and I all had a load of crap, high quality merchandise, to sell. In fact my  old AK47 Army was a pretty good deal, I priced it to sell and got a buyer. John had already bought all my 15mm Colonial stuff, which was also priced to sell. As a rule I don't like to sell things, but I'd had all the use out of these two armies I was ever going to have so it was time for them to go and free up some shelf space.


Some of the regulars had taken the opportunity of extended play to run a big 15mm Napoleonic game.


Napoleonic naval.


And good old Quartermaster General! (the WW2 version).

We spent so much time on the Bring and Buy that we didn't have much time for playing, but we did get a couple of games in.


We were having another run through of Johns Portable Cold War game. Terrain from the north. This was based on Exercise Chinese Eye conducted by BAOR in the mid 1970s and documented in Rowlands 'The Stress of Battle'.


The exercise was monitored by a helicopter. Here it is flying around.


The attackers, 'Orange'. irl this was based on a reinforced T62 battalion, but Chieftans and FV432s were substituted for the T62s and BTs. The vehicles were all equipped to laser SIMFIRE, as the purpose of the exercises was to analyse the behaviour of units in combat more scientifically than umpire decisions. We got to play with proper models of T62s and BT50s, GHQ no less. The BTR command vehicle was an ancient resin Scotia model.


Blue force had a couple of troops of Chieftans, a platoon  of Mechanised Infantry in  FV432s and a section each of Swingfire and Milan. They were defending those villages in the distance. Each hex is 500m, so a distinctly unpromising piece of ground to attack!

We set off with the tank companies in line abreast, the infantry just behind, as per the diagrams in 'Spearhead of the Attack: The Soviet conduct of tactical manouvre'.

Blue held their fire until we were somewhat closer. There was no air or artillery in the original exercise, just a notional artillery fireplan, so we didn't get any fire support either. I suspect Blue would have deployed a bit differently if faced with a barrage of 152mm guns and BM21s.


We got really very close indeed before Blue opened fire. Not sure I'd have put the Strikers right out in front.


A barrage of 120mm gun fire and missiles tore into our ranks. Two platoons (SP) of T62s went up in flames and the survivors were pinned. Our return fire was ineffective.


We pulled ourselves together and launched a mechanised infantry assault behind a barrage from the remaining tanks. We managed ged to pin one of the Chieftans and one of our companies rallied. The infantry just charged into the town, dismounted and assaulted the Strikers. A couple of SPAT vehicles vs an entire infantry company in a BUA wasn't much of a contest.


The infantry kept on going and did exactly the same thing to a troop of Chieftans on the right. Not sure a BUA is the best place for unsupported armour.


The Milan team from the other village was plinking away and removed the remains of the two damaged tank companies. Meanwhile our third company managed to knock out the last troop of Chieftans despite being pinned. The infantry overran the Combat Team HQ in its Sultans, parked near the village church.


The last objective was the second village, now held by a Milan team and a dismounted infantry platoon. We thought it was worth running the assault to see how the revised rules worked. While Orange sorted himself out for the attack, Blue consolidated the infantry and Milan team on the hill SW of the church.  


We had decided to go for a wide outflanking manouvre by the last T62 company to shoot in an assault from the south by the dismounted infantry. There wasn't any point mounting up in the face of the enemy AT missiles. Off we went, the tanks keeping out of range of the Milans.


The tanks and infantry were now in position for the assault.


In we went. Our infantry were out of small arms range, but the T62s were now well within range of the Milan team.


Blue duly managed to get two turns in a row and blew the tanks to bits. Oops. Their sacrifice allowed the infantry close in.


In they went, and bloody street fighting ensued.


Oops, our infantry become pinned. This wasn't enough to stop them though, and they finally managed to overcome the defenders.

So, I think the main lesson for Orange there is to leave the T62s at home and just attack with infantry! In the real exercise, one of the defending Chieftans opened fire too soon and gave the game away. The entire Orange force then infiltrated forward via the tree line and overran the position.

That all seemed to work OK, and it was nice to play with actual toys instead of remotely.


We finished off playing this re-print of a vintage 1950s game, 'Test Pilot'. Presumably published during the high point of Britains post-war jet aircraft boom.


It mainly involved flying early versions of some very familiar aircraft, like this super sexy prototype Vulcan in black. Other aircraft were somewhat less attractive, like the Fairey Airodyne and the Comet.

It was an amusing way to pass the time and drool over pictures of old planes.


Finally the whole thing was topped off with an immense buffet. The club chair (Tim) addresses the masses before they all tuck in.

That was a great day out, many thanks to everyone who organised it.


Wednesday 19 January 2022

6mm Confederate Infantry, Cavalry and Leaders

 The Confederates next.


Four infantry units of four bases. (Or sixteen divisions for the original 1991 edition of Horse, Foot and Guns!).


Most of the infantry are in brimmed hats. I was really nervous about painting these as I hate doing irregular uniforms, but in the end it was really easy. I did the lot cadet grey then just went along picking out three or four figures on each base with various shades of butternut or dark grey. I was really pleased with the effect in the end, and I found Humbrol Dark Earth made an excellent grey/brown butternut colour, not too garish. I did the hats  in a similar way, mixing up the colours a bit.  There was a useful bit of research I came across which had analysed ACW photos and worked out the proportions of different shades of hat colours, which helped with the ratios. 


One unit is just in kepis. I did these in rather more 'regular' colours than the others, just the odd bit of butternut and variations in grey. The flags are Baccus. 


It is easier to see the colour variation from the rear. I also picked out some haversacks in white which added to the non uniform appearance. 


As with the Union, I just did half a dozen leaders. Mostly single based with one double based. There are tons more of these figures in the bag but this will do for now. 


I just did a couple of cavalry units, like the Union, one unit in kepis, the other in hats. I picked out a few kepis in yellow but didn't attempt facings on any of the jackets. The flags were hand painted.  All the units are based on artists mounting board and flocked with Woodland Scenics Blended Turf. 

I was generally pleased with how they turned out, and I'm more confident about finishing the rest of the stuff in the box now. 


Friday 14 January 2022

Race Against Time

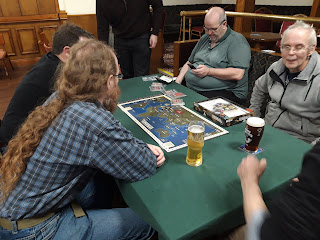
 As everyone seemed to enjoy the Polish Drop a couple of weeks ago I thought I'd put on the follow on scenario from the CD Market Garden campaign book. This covers the XXX Corps breakout from Nijmegen the following day by 43rd Wessex Div to link up with the Poles and open the road to Arnhem.

As usual I converted this to play with NATO Brigade Commander. Tim, Russell and Mark took the Germans and John and the Jerry the British.


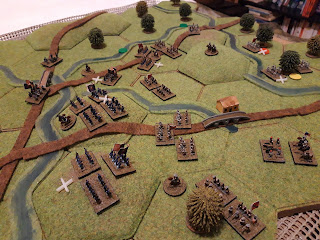
Battlefield from the south, with bends in the Waal visible. The main Nijmegen-Arnhem road runs parallel to to the rail line via Elst. Oosterhaut is off the dirt road to the left and various other villages (Bemmel, Aam etc) scattered across the polder to the right. All offroad movement is bad going for vehicles and the areas of polder are impassable, which will make the Allied advance a bit challenging.


KG Knaust (Russell and Mark) were defending the western side and main road. KG Hartung is on the road junction, KG Knaust itself is in Oosterhaut with the guns of SS Artillery Training Regt Schwepper covering the elevated highway. Pz Ko Mielke with its Pz IIIs is in reserve in Vallenburg. Driel is off to the northwest. 


KG Frundsberg (10th SS Panzer Div) is holding the east. There was in fact rather more of the division in the area at the time but to make more of a game of it I put a lot of it offtable.  I/22nd SS PGR is in Aam to the right.


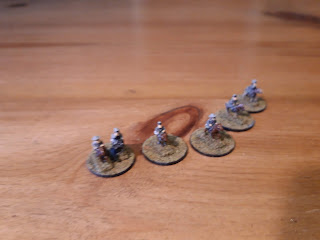
KG Brinkmann (10th SS Panzer Recce Bn) is in Elst. Just a platoon each of Sdkfz 250/9s and panzergrenadiers in Sdkfz 250s.


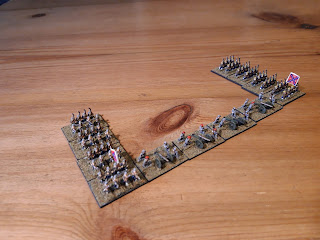
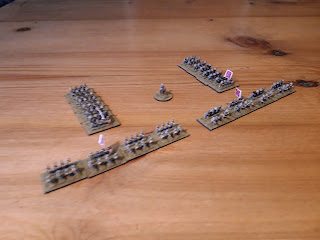
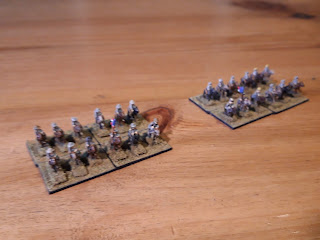
The Allied juggernaut lines up! In theory, two infantry brigades, in practice, just a single battalion from each due to the constricted terrain.


On the right, 4th Wiltshires from 129 Brigade run by Jerry. They were reinforced by a squadron of 4/7 Dragoon Guards and a dedicated battery of Sextons. 


On the left, 7th Somersets from 214 Brigade under John. Reinforced with another squadron of 4/7 Dragoon Guards, an MMG company from the Middlesex Regiment, a battery of towed 17pdrs from 59th Gloucesters and a dedicated battery of 25pdrs. There was also 179 Field Regt of 25pdrs in general support.


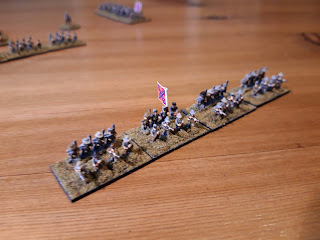
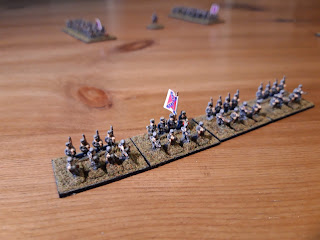
German reinforcements waiting to arrive. II/22nd SS PGR, Brigadefuhrer Harmels HQ, and  both 'battalions' of 10th SS Panzer Regiment now equipped with some tanks. We last met these boys fighting as infantry outside Nijmegen. Knausts remaining Tigers (iirc three Tiger Is and a pair of Tiger IIs) were reinforced by half a dozen SS Panthers, hastily repaired by the 10th SS workshops. The Panzer IVs were brand new, sixteen of them were issued to 10th SS and shipped across the Rhine at Pannerden. 


The attacked kicked off at 0800 on the 22nd. The Wiltshires pushed up the main road to Arnhem and bumped into KG Hartung. Ineffective shots were exchanged, but the guns in Oosterhaut brought the elevated road under fire.


The Somersets closed in on Oosterhaut, hampered by the very boggy terrain adjacent to the Waal. The leading elements called down artillery fire on the town, but return fire from German mortars inflicted some losses on the British infantry supporting the tanks.


Mielke and Brinkmann held their positions awaiting developments, but the SS Panzergrenadiers double timed down the road towards Elst.


Things were hotting up at the crossroads. Hartungs AT guns managed to knock out some Shermans, but heavy return fire from the British including a devastating artillery barrage inflicted casualties and disorganised the defenders.


John formed up the leading companies of his battalion adjacent to Oosterhaut behind an artillery barrage and shot in by the battalions support company and the Middlesex MG company. German return fire was heavy and knocked out some of the Shermans as well as inflicting more infantry casualties.


Sensing the time was right, the Wiltshires charged the disorganised Germans behind an artillery barrage. Vehicles up the road and infantry either side of the embankment.


Disordered and outnumbered 4:1, the Germans disintegrated and surrendered. In the meantime, SS Brinkmann and I/22nd SS PGR had moved up to line the railway embankment across the British line of advance.


At Oosterhaut the British began to gain fire superiority. The German guns were knocked out. Pz Ko Mielke moved up to the edge of the woods to observe proceedings.


By now the British artillery had largely run out of ammunition and the 25pdrs fell silent. Supplies were very short due to congestion and disruption back along Hells Highway. 


Back east of Elst, II/22nd SS PGR was busily marching to the front, and Harmel had set up a temporary HQ in Aam.


The Wiltshires now had a violent firefight with the SS troops lining the embankment across the main road. Brinkmanns halftracks were destroyed and both sides infantry suffered heavy losses.


The Somersets had meanwhile overrun Oosterhaut and the remaining defenders surrendered. Mielke took some long range shots and retired back to Vallenburg.


As the Somersets pressed on out of Oosterhaut, there was much excitement as Knausts Tigers rolled straight down the main road from Elst! We last met these tanks in the Polish drop. They faced off against the remains of the Wiltshires. Personally I'd have parked them a bit further back to take advantage of their superior range. 


Unfortunately for the Germans, the elevated road was in sight and range of the Somersets towed 17pdrs who duly set about engaging the shooting gallery in front of them. Half the Tigers were knocked out, and I replaced them with a Panther (to represent the other half of the company). Irl Knaust lost a few Tigers to an anti-tank ambush and a couple bogged up to their turrets in the marshy ground, so that seemed fair enough. 


East of the highway, II/22nd SS PGR was lined up on the Wiltshires flank and the Panzer IVs of II/10th SS Panzer Regiment had joined Harmel on the outskirts of Elst. I/22nd SSPGR was down to just one weak company by now.


We stopped for the evening at that point. The Wiltshires position isn't looking great, but the Somersets don't have much in front of them now. If they can capture Vallenburg and the road exit north of there, that will be enough for a British victory.


Next turn the Allies got the drop on the Germans and the 17pdrs polished off the SS Panthers. Those elevated roads are just murder for armour as they are forced into march column and hideously vulnerable.


The Dragoon Guards followed up this success by overrunning the remains of I/22 SS PGR  behind the railway embankment. 


The few surviving Germans fled in terror. The way to Elst was open! 


Apart from II/10th SS Panzer Regiment of course. The Panzer IVs on the outskirts of Elst blew the Shermans apart at point blank range while Harmel directed proceedings. The II/22 SSGR poured fire into the flank of the Wiltshire support company. 


The Somersets approached Vallenburg cautiously. Mielke snapped off a few shots but missed.


Next turn the Somersets got to fire first, and the Shermans duly knocked out the elderly Panzer IIIs, then gingerly entered the village with infantry closely escorting the tanks.


Back at Elst the Wiltshires withdrew, allowing II/22 SSPGR to occupy a blocking position across the main road supported by the Pz IVs. XXX Corps wasn't going this way today.


Back at Vallenburg, there wasn't any remaining opposition so the road to Driel was clear and an imminent link up with the Poles. 


The remains of the Wiltshires withdrew to Oosterhaut to reorganise.


I think it is safe to say that Vallenburg is the British hands!

We called it a day there as the British had achieved one of their objectives and the Germans weren't in a position to counterattack. That was a plausible historical result, although irl the DCLI passed through the Somersets to link up with the Poles. Held up on the main road the Somersets and Wiltshires launched a two battalion attack on Elst after reorganising. I've gamed that action a couple of times already using the scenario Bob Mackenzie did and I'm not proposing to repeat it.

Once again, that all went OK. I really must try and do something different at some point!