Wednesday 28 April 2021

Zvezda Matador

 I've already got some of these  but as someone very clever said "you can never have too many lorries", so I thought I'd get another one to join my ever growing pool of 1/100th scale Allied softskins.


For such a simple shape, this one actually has a fair number of parts but isn't too bad to put together. Trucks always seem to have more bits than tracked AFVs.


It goes together very cleanly with a good fit, although I added dabs of glue rather than relying on the notional 'push fit' of Zvezda kits.


It sits very high, like the original and has nicely moulded panel lines which a drybrush picks up very well.


I did this in late war khaki green - Vallejo Russian uniform with a wash of VJ Bronze Green. The Bronze Green also runs into the panel lines etc so provides a bit of shading. Finished the whole thing off with a bit of light mud around the suspension, an overall drybrush of dust and did the windows in my usual blue/white dodgy glass effect.


Peter Pig 15mm Fallschirmjager

 Hot off the painting blocks is a 15mm Fallschirmjager battalion (at one stand = one platoon). It will also do as an FJ Regiment for one stand = one company games, and a full division for Megablitz etc.

This is the one of my new season painting projects, and one I've been meaning to do for a while. I already have far too many 15mm Germans wearing different uniforms (early war and late war infantry, panzergrenadiers, SS etc) but FJ turned up all over the place and I've a couple of scenarios in mind where it would be nice to use the right toys. 


Here is the whole battalion. Three rifle companies, plus a heavy weapons company with a couple of tripod MG34s and 81mm mortars, battalion HQ with two stands and a couple of engineer platoons.


1 Company. These are all Peter Pig, the newer sculpts which are rather slender but still with a pleasing heft to them. As I wanted these to be good for the whole war, I've done them as 'Green Devils', mainly in olive green smocks and helmet covers, and the figures are in early pattern step-in smocks. 1 Company is entirely in olive green, apart from a few helmets in plain blue-grey. Having consulted a few painting guides, VJ 'Russian Uniform' is a pretty good match for the green smocks, although far too dark for 15mm so it needed some lightening. 


I do know something about FJ uniform colours as it is one of my dressing up interests. I can't think who this is on the Feldferrnsprecher, but you can see how the base pale grey shows up on the Splinter B smock.


2 Company. These guys have green smocks but Splinter B helmet covers (the one with the light grey base as in the colour photo above). One thing I miss on the these newer sculpts is they no longer have the distinctive Peter Pig faces with open mouths, but they are nice little figures with good deep mouldings which take a wash and a drybrush well. They've even got the helmet straps nicely moulded on if you have the patience to pick out that sort of detail (it turns out I don't).


And finally 3 Company. These guys are in Splinter B smocks and helmet covers. I had exactly the same problem with these as my 20mm FJ, the ink wash stains the light grey base colour and makes them too dark do I had to touch up the camo after the wash. I used Russian camo green for the green element as it gave a nice contrast and you sometimes need to exaggerate camo colours in smaller scales.

The rifle armed figures mainly have cast on bandoleers, which come up very nicely with a wash and a drybrush, and it saved me painting fiddly ammo pouches. I didn't bother with any LMG figures as I'm unlikely to use these for tactical games where I have to worry about LMG groups.


Heavy weapons, a pair of tripod MG34s and a pair of 81mm mortars. I did them in RAL 6006, again so they are good for the whole war. Field grey equipment was still common in 1945. Spare crew were appropriated for re-allocation as command staff and engineers (the mortar crew had a nice standing officer figure and the MG crews had a couple of spare figures with boxes).


HQs, a mix of figures from one of the command packs and one of the mortar commanders. The other officers have been allocated to the command stands in the rifle companies. If I need singly based officers, I have loads of those already and I didn't want to invest heavily in all sorts of odds and ends.

I did all the leather webbing black. Yes, it was actually brown, but for much of the war it was such a dark brown that is looks black from a distance. The para figures are also festooned in cloth equipment like their bandoleers, breadbags, cloth para gas mask bags etc, which all have cloth straps too and by and large I just did in a mid green.


Engineers, bodged up from various kneeling figures. One of them is a radio operator with his radio converted into an engineer assault pack. It is always useful to have some engineer stands. I did these in overall Splinter B as well, because the are engineers. Ideally I'd have done three stands, but in the end I plumped for an extra HQ.

So there we go, a nice bunch of figures and highly recommended. Perhaps not the cheapest in the world compared to e.g. PSC plastic ones, but I only wanted enough figures for a battalion, not an entire regiment. I managed this lot out of just six packs of figures, which was pleasingly economical and only takes up a relatively small amount of storage space too.


Friday 23 April 2021

Bussaco - twice

 Ah, Bussaco, one of my favourite Napoleonic battles and one of my test scenarios for any new set of Napoleonic rules as it is a nicely self contained Army level action. As we've not been to the Peninsular for a while, John put this on using his squared, online version of Brown Bess.

Tim C was Massena, while I got Reyniers IInd Corps and Simon took Neys VIIIth Corps. The wicked British had Tim G as Wellington, with Mark and Jerry ably assisting as ADCs.

The French are on a bit of a sticky wicket with this one, more numerous than the British, but the Bussaco ridge is a formidable obstacle. The only saving grace is that the position is 9 miles long, so Wellington has to spread out somewhat.


The assembled multitude. John and I had found our bicornes. If you've got the stuff, might as well wear it. Given the lengthy position, Massena decided to attack on an extended front, rather than keep piling our Army up the road to he convent on the right (which is what he did in the real battle, being rather ignorant of the British strength).  


A closer look at the Bussaco position. A huge long ridge with rough slopes either side and Wellingtons lot occupying the reverse slope. We have ten infantry units (roughly divisions) to the British seven, but they have superior musketry. My chaps are the three units on the left.


Off we go. Ney and Massena marched forwards, while I did some choreography around the squares to get my reserve unit into line. I thought I'd better maximise the strength I had at first impact.


My chaps marched forwards and deployed into line before getting shot to bits by the British. irl the French attempted this manouvre under fire, with poor results. Massena also brought up his reserve units to form a single line. Ney however went piling straight up the hill in the middle in column, handing the British a piecemeal attack and a juicy target. 


Unsurprisingly Neys Corps was shot to bits and largely routed in short order. Massena and I plodded forward in line and made contact. If only we'd all done this simulataneously.


Faced with a rather greater concentration of force, losses were exchanged on both sides, roughly equally. I got the upper hand over the Portuguese, while Massena hammered the Light Division in the convent.


Massena kept  slogging away, which prompted Wellington to move into the convent. Neys reserve division moved up and formed line. Unfortunately the British 2nd Div routed one of my units, but not before I'd put some hits on. Another one of my units assaulted the wavering Portuguese.


The British around the convent started to win the firefight and Massenas divisions were routed. The British were getting a bit anxious about their left and 5th Div wheeled to move across. This was a painfully slow manouvre in the broken ground. I continued to batter the Portuguese in close combat.


The Portuguese finally broke and ran but not before my other division had finally had enough of the British musketry and legged it. The downside of advancing in line was that I didn't have the manouverability to work around their flank, and I really didn't fancy forming column under fire.

Meanwhile Neys last division fell apart under the British musketry and we called it a day at that point.

We'd managed to inflict some damage on the British, even to rout one unit, but almost the entire French Army was also routed so in serious need of reorganisation. The broad front attack was surprisingly effective though, if only we'd coordinated the attacks a bit better. As the whole thing was over in a few turns, we set it up and did the whole thing again the next night...


For the second try we set up as one huge phalanx, aiming to jam the most French units possible simultaneously against a smaller number of British units. 


The entire Army tramped forward and formed line at the base of the hill. This is about as un-Napoloenic as you can get, but desperate times call for desperate measure.


Up the hill we go. Wellingtons boys nervously prime their muskets.


Oooh, a cunning plan. Junots Corps holds back while REynier and Ney smash into the British line. This gives seven units (for 28 dice worth) in contact with five British units (25 dice worth). The British get the first fire, which evens things out. In the ensuring exchange we inflict five hits for the loss of sixteen. Not bad at all, although two of our units are routed.


After some back and forth, Ney manages to rout one of the British units. Our line is looking increasingly ragged but the Brits suddenly look quite thin on the ground. The Portuguese press forward aggressively.


After a few more turns of pounding, it is all over the for the French once more, although Junots Corps is in decent shape.

The general consensus was that the French did a bit better this time than before, but I'm still not convinced a big phalanx is the way to go. Massenas historical approach of concentrating on the right and centre didn't work out too well either though, so maybe this one is just really tough for the French.

It was good fun being able to run the battle twice and it prompted a lot of interesting discussion. 


Tuesday 20 April 2021

Zvezda Ju 88

I've always had a soft spot for the Ju 88, what a fabulous plane and so versatile it served throughout the war in a wide range of roles. As I was getting some planes to paint anyway, I ordered one of the Zvezda Ju 88s to add to my collection. As it is a bomber, it is in the delightfully bonkers 1/200th scale, but at least it means it takes up less space in the box. 


Here is the finished thing. It is a fair bit bigger than 1/300th, but even so, it was a bit fiddly painting the canopy frame, but I did my best. It was a nice clean kit with very few parts, and went together without a hitch despite their attempts to make these things 'snap fit'. Unusually I didn't even have any problem with the tail place which went in cleanly although I managed to knock the tiny tail wheel off in the process.


It looks very business like in flight, some thing to do with the proportions of the engines I think. The top canopy had an odd arrangement where it clicked over the MGs (which were on a seperate assembly), but I managed it without breaking anything despite my big fat fingers.


A somewhat blurry shot while it pretends it is flying over London in the Battle of Britain. There was very little flash on it, and the joins on the fuselage were easily smoothed down as they'd be very obvious in the highly matt paint finish.


It comes with four pleasing big bombs to sling under the wings, thye look rather menacing from the front. I modelled it wheels up and minus the the prop blades as I like my planes to be 'flying'. The blades came off OK but and the big spinners made it easy to clean up any resulting irregularities.

 Unusually this model only came with a wheels down option, Zvezda normally provide both, so I just left the undercart off. There are a couple of holes left which I suppose I should fill but I couldn't be bothered.


I painted it in standard green/dark green splinter with a sky blue underside as it is a nice scheme and good for the whole war. Humbrol Army Green 5102 for the base colour and VJ German Camo Green for the splinter pattern. The yellow spinners tone well with the overall green scheme and emphasise their aggressive look. 

Markings are as supplied, although the black fuselage numbers don't show up well against the green background. Zvezda don't supply swastika tail markings so I drew them on freehand with a Micron lining pen. Again, they are completely invisible in this photo.

So, overall a very nice little model and lots of fun to assemble and paint. It is just possible I might have a game in mind where this will see some use. Watch this space.

Tuesday 13 April 2021

1/87th Jagdtiger

 Hot off the painting stocks is this delightful old clunker, and old Roco Tiger II converted into a Jagdtiger. I claim no bragging rights on the conversion as I picked it up on a Bring & Buy years ago, and I suspect it used to belong to Graham Evans. I have few 1/87th scale vehicles I use with my 15mm stuff, and I'm not too bothered by the slight size difference.

Re-painting this has been on my to-do list for ages to go in my 'Stupid big late war German Tank Destroyers' box along with the Elefants, Jagdpanthers etc. I think it has a certain quaint charm, and I'd much rather have a vehicle someone has worked on than simply buying one of the many plastic, resin or metal Jagdtigers that are available now.


I'm sure that will give the Amis a fright. Two entire battalions of these things were raised, and bizarrely Hitler decided the Western Front was the ideal place to use them, and they made their combat debut in November 1944 in the fighting for the Westwall.

This model has the hallmarks of multiple paint layers, not helped by me giving it three more coats, but it has left it with a pleasing rough finish with a certain Zimmeritt feel to it, or at least a vehicle which has seen some rough handling. I'm not quite sure why the gun barrel is stuck on at 60 degrees off true, but I didn't fancy prising it off and sticking it back on. It just adds to its charm.


Despite the many coats of paint, the deep engraving on the engine deck has stood the test of time, and there is enough definition left on the rest of the detail for ink to run into the grooves and and a drybrush to pick out the highlights. I even managed to pick out the towing cables, which gave the hull sides a bit more definition.


The running gear has also survived well as like the engine, it has deep mouldings.

So, the final conundrum is what colour to paint it. Reams of pixels have been spilled on the interweb about the 'right' colour to paint Jagdtigers, even though only 70 of them were built. My pal Nick at school used to paint all German vehicles panzer grey, generally with SS lighting flashes on the turret. This one also rocked up in a grey scheme, but no SS flashes.

Sadly for excitable modellers the world over, the grey late war tanks seems to be a  myth, although a dark green base coat is plausible, particularly for Panthers. The dull reality is that Jagdtigers were painted in the factory in either Dunkelgelb or left in red oxide primer and then occasionally camo'd up by their units generally using only one colour (red brown or green for dunkelgelb ones, dunkelgelb or green for the red oxide ones). The Tank Museum has repainted their Jagdtiger in plain dunkelgelb, as that was how it was when it was captured, which is a shame as the older scheme was rather jazzy.

So, I did mine in boring old yellow, with large soft edged green patches (which seems to have been a fairly common arrangement).  Balkan crosses right in the middle of each side to make a handy aiming point (why did they do that?) and as they were organised the same as Tiger battalions, standard three digit number scheme, but avoiding higher numbers. Other than that, it had the usual dirtying up of mud all over the tracks and running gear, and ink wash and then a dusty drybrush.

That was a fun re-introduction to painting for this year. I've no idea when I might use it in a game so into the box it goes.


Saturday 10 April 2021

One Hour Cannae

 Inspired by Marks 'Clash of Spears' and Simons 'Hydaspes' games, I thought I'd take another look at the One Hour Ancients rules and backport some of the elements from my well tested WW2 variant onto them. I was also keen to persevere with the use of grids, as my favourite Ancients rules (Lost Battles and CnC Ancients) both use a grid to good effect and restrict some of the very silly wargamerish moves people like to pull with Ancient armies as if they were tank formations all under gps controlled command.

The easiest thing was retrofitting the 1/2/3 dice and six hit combat system as it maps onto the standard D6 plus or minus two system precisely. The harder bit was geometry as I didn't want a 9x9 or, heaven forfend, a 12x12 playing area. 6x6 requires some careful handling to replicate some of the subtlety of the ruler based rules in terms of the relative mobility of the various unit types. I got something workabe in the end, mainly by borrowing very heavily from the troop types and move restrictions. Good luck trying to get your heavy infantry to turn on a sixpence now! 

I wanted an asymmetrical playtest scenario, and funnily the next one of my list of CnC Ancients games was Cannae, as asymmetrical as you can get with a nice range of troop types but nothing silly like elephants or flaming pigs. It wasn't too hard to convert the Lost Battles OB and deployment into something vaguely approaching a OHW scenario, and I borrowed the CnC Ancients 'victory banner' concept to avoid it being just a boring battle of annihilation.

After a couple of run throughs with both sides achieving victory (as Hannibal was heavily outnumbered Cannae was always a slightly dicey proposition for him), it was time to try it out on the long suffering members of Sheffield Wargames Society!


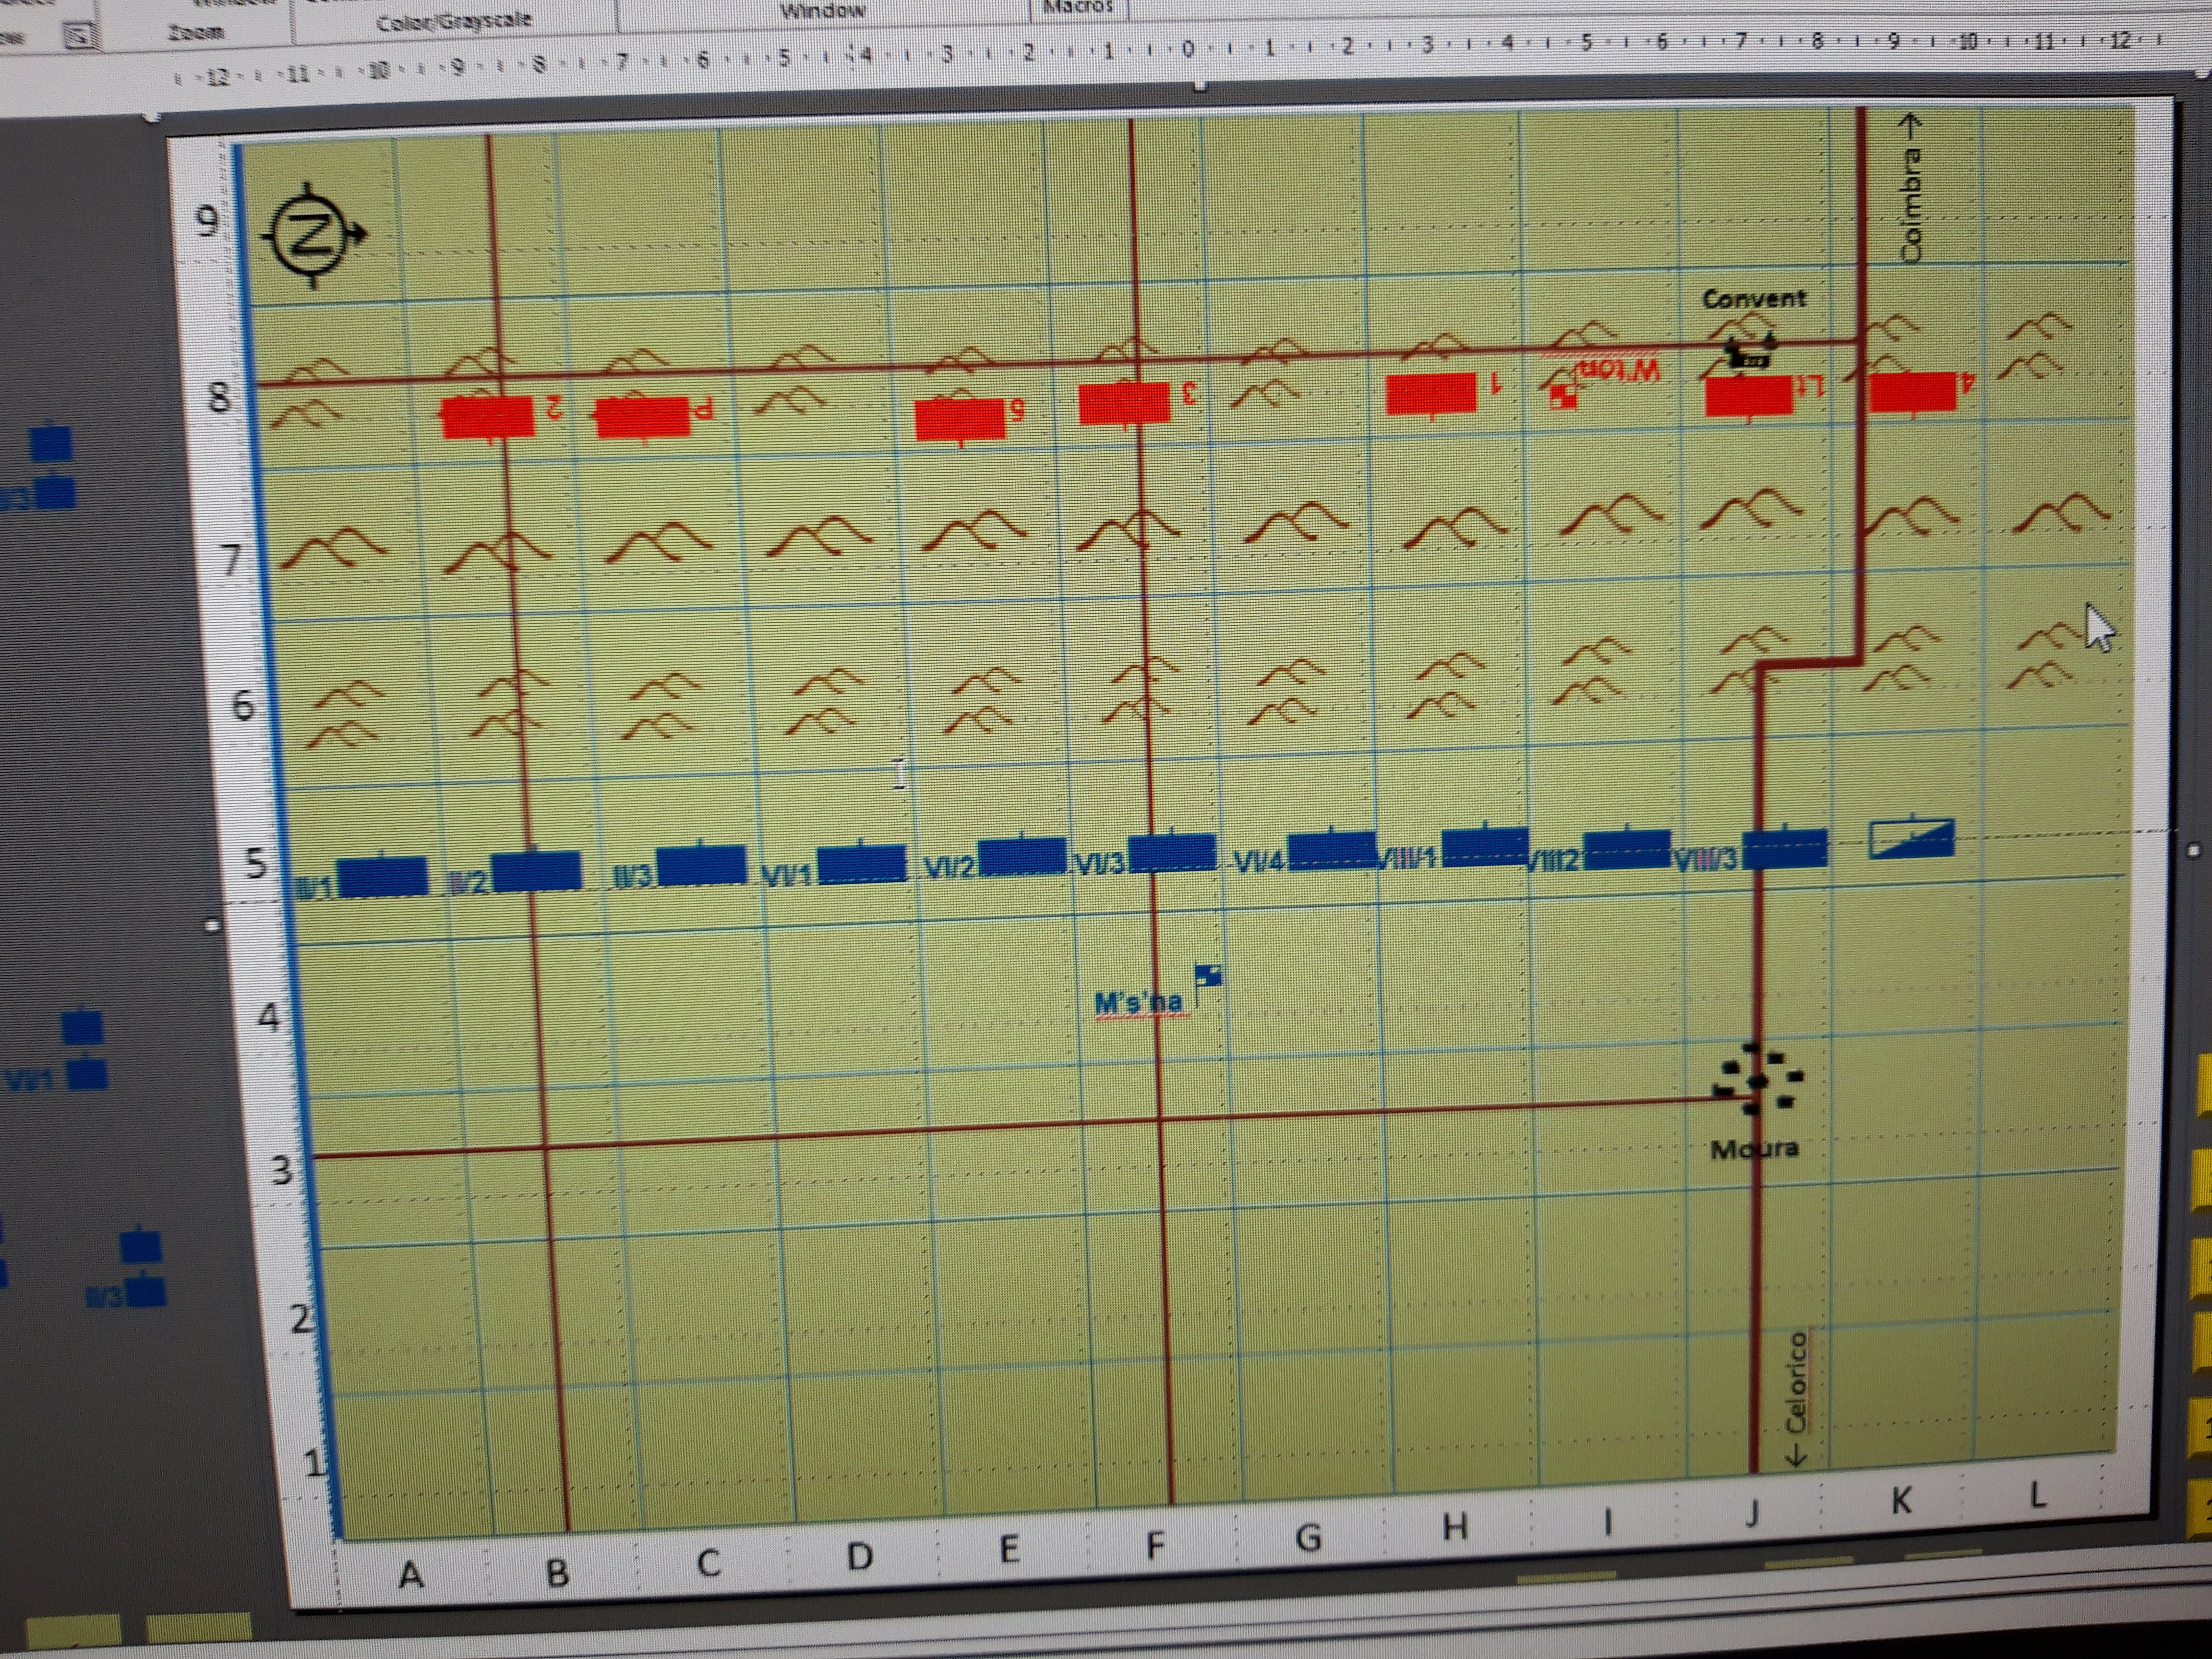
The battlefield. The River Aufidius in the foreground and the mountains in the background. I used the terrain layout from the Lost Battles scenario. The rocks, trees etc make the grid a bit more obvious.


This was a rare outing for my 20mm goats (Irregular Miniatures). They joined the rocks and trees in marking out the corners of squares.


The mighty Romans. Tim, Pete and John were the Romans and their eight(!) Legions. Tim and Pete were Varrus and Pallaus respectively, while John had the cavalry and Velites. These are all my quad size 20mm DBA armies, mounted on my big 5"x3" movement trays. Mostly HaT plastics.

The eight Legions were represented by four units of Legionaries, each of twenty figures (eight Hastati, eight Princeps and four Triarii each). The Velites were as many Velite figures as I could cram on each base (eight in each case), and half a dozen Roman cavalry completed the mounted contingent. Each unit represented approx 12,000 infantry or 6,000 cavalry (fewer for better quality units, more for worse quality ones).


The Romans from an angle. Varrus and Pallaus are leading Legions on foot. They look rather Featherstone-esque I think. The Romans didn't have much option but to adopt their historical formation, a big block of Legions in the middle, Velites out front and the cavalry on the flank. That was how the Republican Army was trained to fight, line up and chop forwards. A big mass of Legions together is a very scary prospect, lots of combat dice and armoured as well. Imagine an entire division of Tiger tanks...


Simon, Mark, Jerry and Tim C were the polyglot Carthaginians. Simon was Hannibal with the Balearic Slingers, Tim got the Gauls, Mark the Carthaginian Heavies, while Jerry was Hasdrubal and got all the veteran cavalry.

The Carthaginian Army was a bit harder to model, as I was keen to allow them to adopt their historical deployment so I was very generous with the veteran Libyan infantry and gave them two units of heavies (only representing a few thousand troops each). I just put four bases of Libyan infantry (16 figures) on each. The light infantry were easy, I just gave them a unit of Balearic Slingers.

The Gallic Allies were the hardest. Lost Battles just has them as average heavy infantry, CnC as a mixture of Warband and Auxilia. In the end I plumped for two units of Warband as it would allow the Carthos to set the pace of combat in the centre, but I should have probably have gone with one or possibly two units of Auxilia instead.


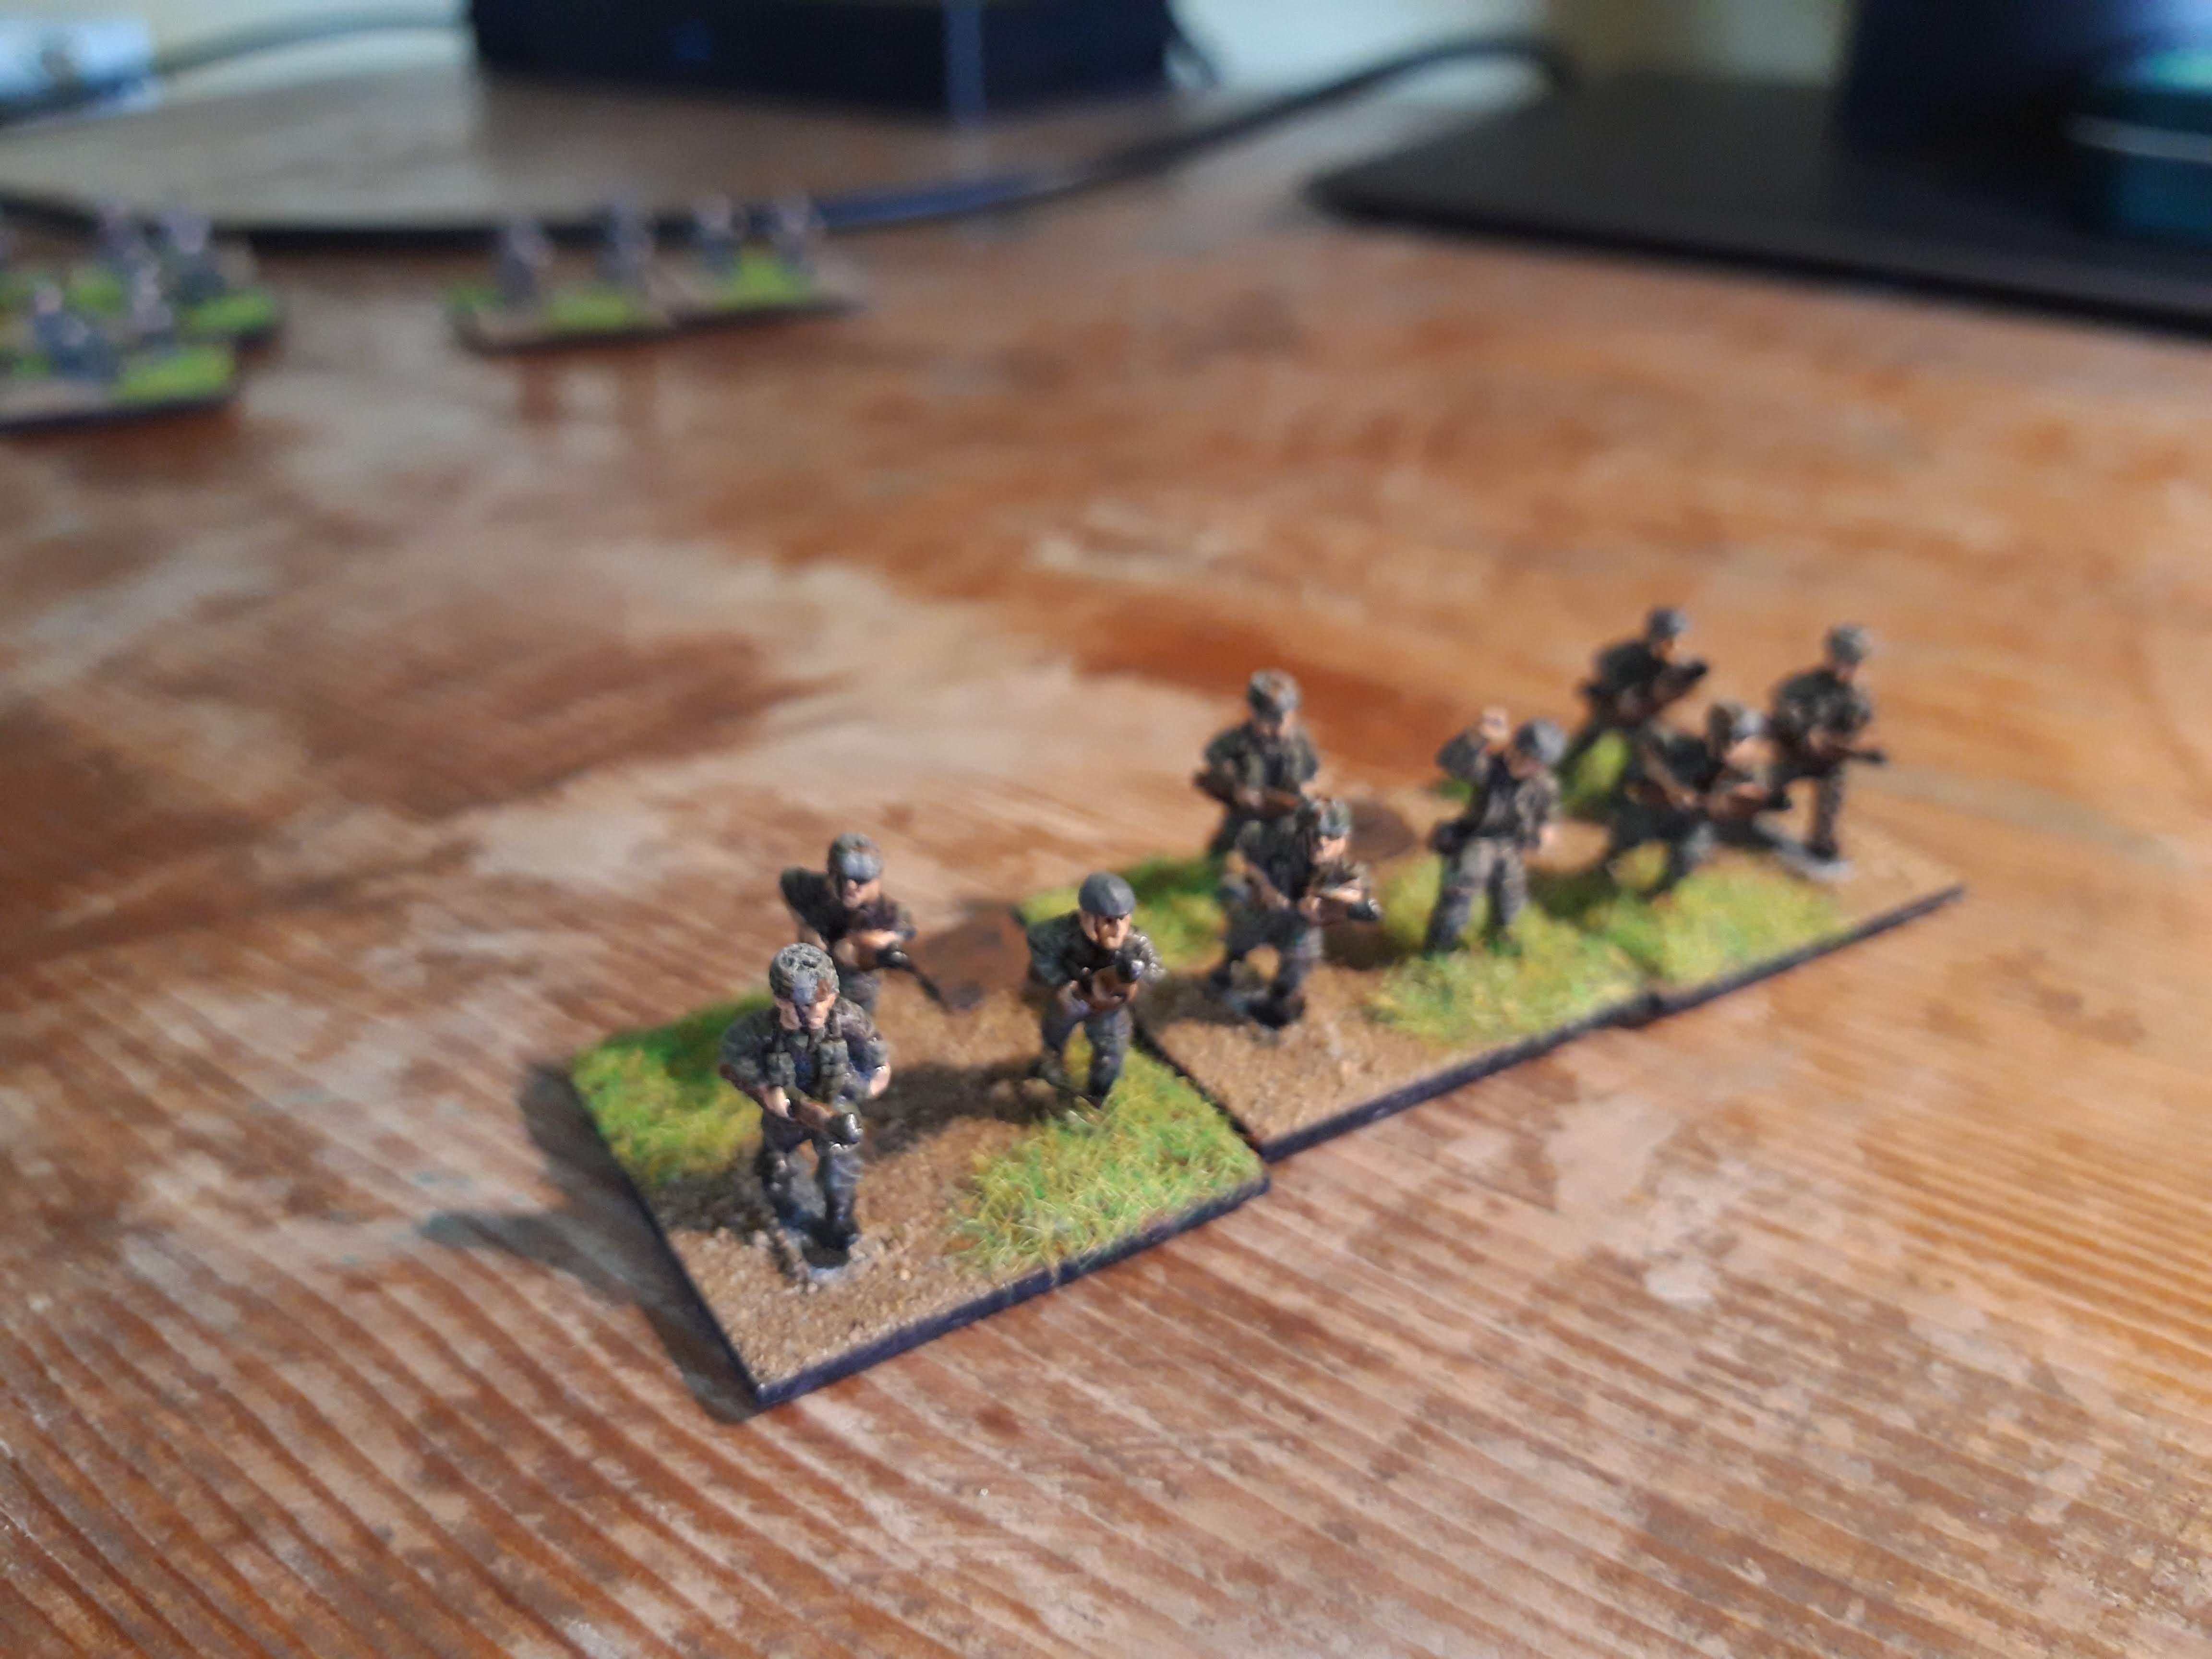
The Numidians on the Cartho right. In standard OHW there is just 'cavalry' but there is such a tactical difference between the employment of light and heavy cavalry  that I added a new Light Cavalry type. These are essentially fast skirmishers with a longer range and in the playtests could hold their own very well against normal cavalry through a combination of shooting and running away. I might try out a Carrhae game and see how it goes.


Hasdrubal on the left, just a couple of bases of Carthaginian Cavalry. These are all plastic 20mm figures apart from Hannibal and Hasdrubal, who are Newlines metal figure. The plastics are predominantly HaT but the Gauls include Italieri and Airfix.


The Carthaginians looking rather grand. The Romans had more combat dice and more armoured troops but I rated Hannibal and Hasdrubal as better leaders so they had the option to add an extra dice in combat. Hannibal was also rated as 'brilliant' so once per game he could switch the turn order. Thanks for that idea Lost Battles. Unlike LB or CnC, I couldn't really reflect the C3 advantage the Carthos had, so this was the best I could do within the limitations of the OHW format. 


Hannibal opted for the historical deployment. So a weak centre (Gauls), Libyan heavies flanking them and cavalry on the flanks with the heavy cavalry down by the river. The original plan was to pull the Romans into the weak centre, then envelop and smash them. Lets see how that works out.


Hasdrubal and the slingers meet some goats out on the left flank.


First blood to the Romans! The Roman cavalry manage to get a charge in on Hasdrubal and inflict two hits. The Legions are pushing forward aggressively.


In the centre the Gauls close in on the Velites. The packed bases look rather imposing, but fortunately the blurry camera prevents a close inspection of the chaps with no trousers.


A bit of skirmishing on the right as the Cartho lights hurl missiles at the Romans (the massive shooting ranges assume the light troops are dashing forward then falling back to their supports, what a clever idea of Mr Thomas).


The Gauls pile into the Velites and one of the Legions, taking advantage of their ability to double time into combat (ie move two squares).


Amazingly the lightly armoured Gauls inflict two hits on the Romans while only suffering one in return. The big blue blob is the Romans objective square (counts as an extra unit destroyed if they take it), the red one is the Carthos. Another clever idea from Lost Battles.


The lines are looking a  bit ragged as the heavies close in.


The Libyan veterans and the Legionaires finally make contact. Meanwhile the Velites and Gauls continue to trade blows, despite the 3:1 combat advantage the Gauls have.


While the Gauls hang on in the centre, Hannibal leads the other Libyan heavies towards Pallaus. 


In the centre, the Velites finally break and Varrus finds himself face to face with a load of angry Gauls! At this point, Hannibal unleashed his 'brilliant general' ploy and the Carthos get two turns in a row.


The turn flip flop allowed Hasdrubal to finally break the Roman cavalry. Hasdrubal had consistently led from the front, at some considerable personal risk and it paid off, although the cavalry was left a bit ragged with four hits.


In a shock development, the Gauls also managed to rout the Romans holding the Carthaginian objective square. This really was unexpected, and the Romans really were appallingly unlucky here,  but suddenly the Roman centre is looking very vulnerable. Not much you can do against a triple six.


Hannibal engages Pallaus frontally while the slingers slip around their flank. They are pinned by the Velites however.


The Numidians fall back into reserve, ready to dash to whatever sector is needed.


With their flanks exposed Varrus and half the Roman army is now enveloped on both sides. Things aren't looking too good for the Romans.


Varrus sends the Gauls to his front packing.


But it is too little too late, and as more legions break and run, Varrus is left isolated and surrounded by Carthaginian units.


The Roman left wing is in slightly better shape, but still pinned in combat by no less than Hannibal himself, so its prospects of escape are poor.

We called it a day at that point as there was very little the Romans could do to stave off annihiliation. I've generally found the OHW Ancients to be one of the faster rules variants as once the units are engaged, it is basically one huge close combat which goes on until one side runs for it. We wrapped the whole thing up in about an hour, which with seven players wasn't bad going.


Man of the match was Hasdrubal whose personal bravery unhinged the Roman right flank.

That all went pretty well. There was a bit of confusion about the double time and break off rules, and I need to have a think about how better to express my intentions within the constraints of two sides of A4. Unlike the playtests, Hannibal managed  not to get killed this time, and used his double turn 'special power' to good effect. I know the combat system works as we've tested it so extensively with the WW2 variant, but I was pleased with the square based movement. Light troops had a definite mobility advantage without it being overwhelming, and heavy troops were restricted but not rendered completely inert.

I think the main problem is that which dogs all combat heavy Ancients sets - once battle battle is joined, there is very little for the players to actually do except roll dice. Lost Battles and CnC at least give the players some options each turn, but OHW doesn't have a sophisticated activation system so for the Romans at least, once they were engaged in combat, all they could do was hope for the best. The Carthos had more options as they had a more mobile army and could dictate the pace of the action. For what it was though, it worked fine and I was pleased with it. We also achieved a vaguely plausible result in a reasonable amount of time, which is always good.