Showing posts with label Italian. Show all posts

Tuesday, 10 February 2026

Devils in the Dark

 In a change from the Normandy hedgerows, our plucky US Paras are now in sunny Sicily in 1943, although perhaps not very sunny as it is night time. This is another Fireball Forward scenario converted to Tigers at Minsk, and originally it was published in one of the Skirmish Campaigns book. The map in FF seems to have been lifted straight from the original scenario book.

As part of the Allied invasion of Sicily, the 82nd Airborne dropped at night prior to the main landings, tasked with taking various key objectives inland. One of them was a fortified winery, held by Italian coastal defence troops.


Battlefield from the south, the winery is the three hexes of tall buildings in the middle. There are a few orchards and some low scrub around, the latter only gives cover to stationary units and doesn't block LOS.

The winery is heavily fortified with no less than five pillboxes, connecting trenches and lengths of barbed wire all around. Fortunately it is night and most of the defenders are in the buildings asleep! The pillboxes have a 180 degree arc of fire only, indicated by the position of the firing slit. 


A slightly more atmospheric view from ground level. The winner is the last side to have sole control of the winery. I made the bunkers ages ago and have used them in one or two games but it is nice to get them out again.

The game lasts 60 minutes and the sun comes up after 45 minutes, until then visibility is one hex.


The defenders, there seem to be an awful lot of them.

Two Italian defence platoons each of two rifle squads and an MG squad, plus an MG platoon with two fiurther MG teams. I've used Breda 20mm AA for the latter as I'm a bit short of Italian tripod MGs.

There is also an attached German liaison team, done as a German rifle section. The Italians are poor quality and the Germans average, force morale is 3 chips.


The mighty 82nd All American. The drop was complete chaos and only around 45 paras assembled for the attack. Here they are done as five rifle squads in two platoons, plus a .30 cal MG and a 60mm mortar team. These guys are all superior troops and have a force morale of four.


The Italians all set up in either the winery or pillboxes. The must put at least one MG team up in a pillbox, but tbh I cant see why you'd bother setting up anywhere except in the main building. So for this run I did the hedgehog defence, three MGs and four squads in the main building, a fourth squad and an MG in the bottom right pillbox. I plan to run it back to safety once the fighting starts. 

I guess the alternative would be to garrison four of the pillboxes with an MG and a squad each leaving one in reserve, and occupy the interval trenches once the shooting starts. That alternative plan looks like a really good way of losing the winery to me. Against a day attack, it would work fine, but not a sneaky night attack. 


The US troops can come on anywhere, but if they enter from the east or south there is a 15 minute delay, so they simply rushed the first line of fortifications using a double move as they are out of sight. Historically they overran an MG position here, captured the gun and used it against the defenders.

That is a scenario option (the US can capture MGs) , but the Italians have hidden all their MGs well out of harms way. 


The Italians know where the US are now, so redeploy, occupying the lower building with a squad and MG too. The pillbox garrison come running back to home.

The US don't have time to waste so drop 60mm mortar smoke in the scrub next to the winery and simply charge into the cover of the smoke. The Italian MG guns down one squad but another takes its place,


The Americans rush the northwest corner of the winery covered by the .30 cal.


And after a brutal fight, take it. Another US squad goes down in the fighting, but the Italians are pushed back. They have a number of pinned squads but none lost so far. The Italians are having problems with stacking limits, which is why two MG teams have ended up with the DAK guys in the bottom building hex.

In real life the entire garrison surrendered at this point, but that wouldn't be much of a game would it?


The garrison pours point blank fire into the Americans. Even though some Italian squads are pinned, the fire is devastating as the US are so bunched up,


Another US squad goes down. Only two left and just one morale chip!


The Paras keep going (view from the north to see better) - they conduct another assault covered by the .30 cal and drive the Italians out of another hex, routing no less than two entire sections. The Italian morale drops to one chip.


There is nothing for it but to counterattack, the DAK assault the Paras covered by all the Italian MGs.


And overrun the Paras! The US force breaks and the .30 cal and 60mm fall back into the scrub. The last Para squad is still hanging on though.....


Using the cover of the buildings, the last Para squad takes on the Italian MG teams. MGs don't do well in close combat...


And the Italians are driven back to the outhouse.


In an astonishing feat of arms, the Paras then drive the Germans out of the northeast corner! The defenders are in disarray with numerous units pinned and/or out of command. It is nearly dawn now.


As the sun comes up the Italians reoccupy the southern part of the winery and launch a desperate counterattack on the Paras.


Supported by the 60mm and .30 cal, the Paras managed to throw the assault back although all the defenders are pinned in combat.

As the clock ticks over 60 minutes, the US were the last side with sole occupation of the winery so they win! Gosh that was a glorious fight, the Paras won with 80% casualties and the Italian morale never actually broke, they just kept losing close combats.

Well that was a really tough battle, when we played the Skirmish Campaigns version the US were roundly defeated and I'm not surprised as it is very difficult proposition for the attackers. I'm glad quality triumphed over quantity and position in the end, but it was a very tough fight for the Paras unlike the real battle where the Italians basically just gave up after losing one MG team. As I said in the commentary, it wouldn't be much of a game if they did though. Well done to the 82nd for pulling that off.

That was so tense I didn't have any particular inclination to fight it again, partly because I dont think it is tactically interesting. I suppose at some point I might try a perimeter defence and see how that pans out, but the Axis were pretty unlucky to lose and I think the hedgehog defence is the optimum one given the victory conditions.


Saturday, 1 November 2025

Beneath the Med revisited. A new sub!

 After the great success of our last outing beneath the waves in the Italian Navy, we were raring to go again. Tim put on another remote session of 'Beneath the Waves', the solo game if Italian WW2 submarine warfare. 


There was much excitement as this time, we were allocated to the Gugliemo Marconi,  the name ship of the Marconi class of ocean going subs and a considerable step up from our previous ride which was stuck pottering around the Med.

Ship data card above. This particular beast has an impressive range of over 10,000 nautical miles and is slightly heavier armed than our previous boat with four torpedo tubes both fore and aft, with reloads for each. It packs a bit more punch than the smaller boat but still carries far fewer torps than a Kriegsmarine U Boat. Otherwise it has a 100mm deck gun with about 120 rounds of ammo and a pair of 13.2mm AA guns which hopefully we won't have to use.


The fairly standard torpedo, gunnery and enemy attack charts.

Unlike our previous run which was restricted to the Med, this boats operated quite a lot in the Atlantic so we had potential missions as far afield as the Caribbean and the coast of West Africa. Once France had fallen we would generally be operating out of the submarine base at Bordeaux.


Once again the merry band of pirates assembled. Mark was the Captain, John the 2iC, Jim took on guns and torpedoes while Jerry was the medic and I was the engineer.

I could only play on Tuesday, but Russell was joining us on Wednesday, so that worked out OK as he took over my position. 


A chart I'd not seen before covered the progress of various types of attack, but tbh the combat chart was pretty clear about all this stuff.

As with many toyless and mapless games, there isn't a great deal to see going on, it was all in our heads, but here is the log as far as it goes. Most operations took two months due to their extended nature.

July 1939 to February 1940. Boat launched and commissioned.
June/July 1940, operating along the Spanish Coast. Sank three merchantmen (12,800 tons) and escort, damaged another freighter. No damage sustained, all ammunition expended. Captain awarded the Bronze Medal. Crew no longer rated Green.
August 1940, refit.
September 1940, Weather duty in the Atlantic. Suffered an irreperable engine failure in one diesel engine and had to abort mission. While limping back to France sank one 8,000 ton freighter with four torpedoes. Evaded air attack.
October 1940. Refit and engine repaired.
November/December 1940, Atlantic patrol. Sank three merchantmen (17,600 tons) and expended twelve torpedoes. Captain awarded Silver Medal for 25,000 tons sunk in total.
January 1941, refit.
February/March 1941, West Africa patrol. Engaged  a 1,400 ton freighter with an escort and missed. Engaged by escort by escaped without a damage. A trap.... Crew awarded Submarine Badge for three completed patrols.
April 1941, refit.
May/June 1941, Weather duty in the Atlantic (again). On return trip engaged enemy convoy and sank one large freighter (9,200 tons) and expended eight torpedoes. Attacked by enemy escort and sustained damage to hydrophones, tubes 6 and 8 and to the pressure hull. Evaded enemy and returned to port.
July/August 1941, Refit and damage repairs.

And there we ended it with no less than 48,200 tons of shipping to our credit (just shy of the 50k required for another medal for the Captain). The real Gugliemo Marconi went down in October 1941 with just 17,000 tons to her credit, so we are already doing better than our historical counterparts.

As with all these 'solo' game played as teams, that was really good fun and very engaging. The repeated attacks by aircraft and escorts were very tense and felt quite relentless at times. I didn't particularly distinguish myself as a submarine engineer as I failed to repair any damaged systems at all, but at least we made it back to port each time.


Friday, 19 September 2025

Beneath the Med

 Our latest remote mid-week outing was another trip to a GMT solo game, this time covering Italian submarine operations in WW2 and entitled 'Beneath the Med', published by GMT. 


Tim provides a promotional shot of the box art. 

There are a whole series of these covering submarine operations in various theatres. We've already played 'The Hunters' about U Boats in the North Atlantic.


Each type of sub has its own data chart covering stuff like system damage, how many torpedoes are left etc. We were assigned to a fairly short range sub called the Maccale, so Med operations only. It was somewhat less well equipped with torpedoes than its Germans equivalent with six tubes and only six reloads, but had a hefty 100mm deck gun.

 Irl it had the distinction of being the first submarine of its class to be lost in the war, being sunk when it ran aground on 5th June 1940! Well, as long as we can do better than that.....


Although  it is designed as a solo game, we played it as a team with each of us assigned to a particular role. This generally involved rolling the dice appropriate to that position. Tim had done a lovely crew chart with all the correct Italian ranks etc. The general roles were as follows.

Micheal - Commander
John B - 2iC and operations officer
Me - Guns (and third officer)
John A - Torps
Russell - Engineer
Pete - Medic
Mark - Lavatory orderly

In the U Boat game I'd been Torps, so running Guns made a change.

The general sequence of play was the same as the U-Boat one, we were assigned a sector and mission for a given month. Then moved through various sea areas to the mission zone, rolling dice for encounters. After a mission the sub refitted for between one and several months depending on the degree of damage sustained.


The individual actions were covered by the QRS which included gun and torpedo attacks, escort actions, air attacks and damage location resolution.

We rapidly discovered that the Med was a very different beast to the North Atlantic. Enemy aircraft and escorts seemed to be everywhere! The Second Officer recorded the log:

June 1940

Central Med patrol.  While transiting from La Spezia, officer of the watch spotted enemy aircraft.  Excellently executed crash dive.

Enemy tanker Barthon 9,800t, sunk in close night torpedo attack.  Some damage from escort.

Small enemy freighter Tuva, 4,700t, sunk in night torpedo attack.  Some damage from escorts.

Night encounter with enemy submarine Triton.  Honours even.  Some damage.

Returned safely to La Spezia.  14,500t sunk.

July 1940

Comandante Beraducci awarded Bronze War Cross.  Crew awarded Submarine Badge.

Run ashore.

August 1940

Extended repairs in dock.

Another run ashore.

Sept 1940

Western Med supply run.  Attacked by enemy aircraft.  Heroic defence by officer of the watch.  Some damage taken.

Supply mission successfully completed.

Enemy tanker Viva Borthn, 7,000 t, sank.  Some damage from escort.

Returned safely to La Spezia.  Total 21,500t sunk.

Oct 1940

Run ashore

Nov 1940

Further extensive repairs in dock.

Another run ashore.

Dec 1940

Central Med mine-laying.

Enemy freighter Empire Centaur, 7,000t, sighted but mine warfare mission has priority.

Enemy aircraft - another superb crash dive.

Mine-laying mission successfully completed.  Enemy tanker Barbo, 6,300t, sunk.

Returned safely to La Spezia.  Total 27,800t sunk.

Jan 1941

Run ashore.

Feb 1941

Central Med patrol.  Enemy tanker Casanare, 5,400t, blown out of the water.

Returned safely to La Spezia.  Total 33, 200t sunk.

March 1941

Comandante Beraducci awarded Silver Cross.

Run ashore.

The rather dry 'some damage' taken somewhat underestates the relentless air and depth charge attacks which caused serious hull damage, flooding and knocked out key systems including our aft torpedo tubes, half our engine capacity and our AA guns! The Med seemed to be far more tenaciously defended than the Atlantic, and one very persistent escort managed no less than five depth charge runs before we broke off. We were very lucky to escape with our lives from that one.

I missed the Wednesday session, but the mission log was very exciting indeed! Just look at the August 1941 entry....

Excerpts from the Log of the Royal Italian Submarine Macalle
April 1941 to March 1942


April 1941

Central Med - minelaying

Sighted enemy freighter Neptunium, 5,200t, with escort.  Continued on mission.

Mines laid successfully.

Sighted enemy freighter Anna Vore, 3,300t, and escort.  Continued back to base.

Mines sank tanker Horn Shell, 8,300t, and freighter Pisarro, 1,400t.

Total sunk now 42,900t.


May 1941

Run ashore.


June 1941

Eastern Med patrol. 

Sank freighter Empress of Canada, 21,500t.

Returned safely to La Spezia.  Total sunk now 64,400t


July 1941

Comandante Beraducci awarded Gold Cross.  All officers receive War Merit Cross.

Secondo Bassetti and Torpedo Chief Silurio recognised as experts in their field.

Run ashore to celebrate.


August 1941

Eastern Med - intercept enemy convoy HALBERD.

Sighted enemy lt cruiser Calypso.  Dived to avoid contact.

Engaged and sank enemy battleship Nelson, 34,000t.

Evaded enemy destroyer Havock, 1,300t.

Returned safely to La Spezia.  Total sunk now 98,400t.


Sept 1941

Comandante Beraducci receives bar for Gold Cross.  Also Iron Cross (2nd class) from Berlin.

Run ashore for further celebration.


Oct 1941

Central Med patrol.

Enemy freighters Orao, 5,100t, and Longworth Hill, 7,600t sunk.  Evaded enemy cruiser Sydney.

Returned safe to La Spezia.  Total sunk now 111,100t.


Nov 1941

Comandante Beraducci receives Kinght's Cross of the Iron Cross from Berlin.  

Comandante Beraducci promoted to Capitano Di Corvetta.

Chief Engineer Fachetti promoted to Capo Di Prima Classe.

Run ashore.  Great celebration.


Dec 1941

Eastern Med - launch three SLC against enemy fleet in Alexandria.  Two maiali penetrated harbour defences.  Enemy destroyer Hotspur sunk.  One SLC crew lost, two captured.

Exited Alexandria harbour successfully.  Enemy destroyer Hyperion, 2,100t, engaged and sunk.

Attacked by enemy destroyer Legion.  Some damage.  Successfully evaded by going deep.

Returned safely to La Spezia.  Total sunk now 114,500t.


Jan 1942

Comandante Beraducci 
awarded second bar for Gold Cross.

Further great celebration.


Feb 1942

Extensive repairs.

Another run ashore.

Hangovers.


March 1942

Eastern Med patrol.

Sank enemy freighter Moldanger, 6,800t.

Engaged and sank enemy destroyer Latona, 2,700t.

Returned safe to La Spezia.  Total sunk now 124,000t.

It was an absolutely brilliant game, and it seemed to work even better as we were remote, so each crew position was in its own 'compartment'. The attacks were very tense and I even got to fire my guns at a surface ship on one occasion, sending it to the bottom. The 2nd Officer heroically engaged an enemy aircraft with the AA when we were caught on the surface too.

A very good game, highly recommended, and I hope we play it or its cousins again soon.  


Friday, 18 April 2025

Operation Compass - Beda Fomm, 6th February 1941

 This is the third and final battle  in my mini campaign covering Operation Compass. If I hadn't been away I would have run it in February 2025, but as it was I ended up putting it on in March, so still around 84 years after the original battle.

After the destruction of their fortification line and the double outflanking of their fallback position at Derna and Mechili, the Italian 10th Army was in full retreat along the coast road via Benghazi, aiming to get back to Tripolitania. 

7th Armoured Division drove hard across the desert from Mechili, losing many vehicles to breakdowns on route, but eventually cutting the coast road just north of Agedabia. The Italians became aware of the blockage rapidly, and moved one or their last armoured units up, the VI Medium Tank battalion to escort the leading truck convoy down the road. Italian recce declared the road clear for 20 miles, but unknown to the Italians, 4th Armoured Brigade had pushed north and established an ambush position at Beda Fomm, right across the road.


Battlefield from the south. The Italian convoy will be coming down the coast road from the north. The area is remarkable for being very undulating, so there are rises and hills all over the place. The rough ground on the left are actually the sand dunes behind the beach along the coast.

The Italians need to get one of their convoy units off the southern edge via the road. As usual I'll be using my One Hour WW2 variant for this, and the scenario is based on the Beda Fomm one in Frank Chadwicks "Benghazi Handicap" . 


The critical feature is the big hill (F), christened 'The Pimple' during the battle, located just east of Sidi Ageili and the Bottega Araba. The Italians also need to capture this.

This is an ambush scenario, so the Italians have to just keep moving down the road until they spot the British. Ambushes are very hard to game, so I hope this works out.


In the way are the ragged remains of 2nd RTR with a mixed bag of Cruisers. Each element represents a weak squadron, and the entire Regiment was very under strength. Simon is commanding these. For game purposes they will be hidden until the Italians move adjacent or they choose to move or fire.


The rest of 4th Armoured Brigade, commanded by John. Again, not very much stuff!

7th Hussars has a single consolidated squadron of Vickers Lights, and 11th Hussars a single consolidated squadron of Morris Armoured Cars. Normally these units would all be veteran, but they are so weak I'm just rating them as average for this scenario.

They are supported by F Battery, 4 RHA, who are deployed off table. 7th and 11th Hussars will turn up on turn 4. Russell and Pete will take these over on Wednesday, but for now John commands them.


Despite being light in teeth arms, the Brigade has all its LOG support. Dorchester ACV, Austin K2, a 15cwt supply truck and Brigadier Scott-Coburn in his Dingo.


And coming down the road is this mighty host! Raggrupamenti Pasquali.


In the lead we have a company of VI Medium Tank Bn (Micheal commands the tank battalion as Major Ornano), then II Grupo, 10th Artillery and 60th MG Battalion plus a heavy baggage column. Tim commands the whole force as Major Pasquali and directly commands the artillery and 60th MG Bn. Another company of the tank battalion is behind 60th MG Bn.


Behind them are 1st Parachute Battalion (Terry), also accompanying a load of baggage lorries. Terry can only play on Tuesday, so John B will take over on Wednesday. The paratroops and artillery are decent troops, so rated as average, the rest are poor. The units with baggage lorries cannot leave the road, and also block the road up with all their transport.


Bringing up the rear is the last tank company and a couple of supply lorries. The Italians are actually well supplied for a change, as they have all their supplies with them! I'll also chuck in a few planes for fun, but they are just there for eye candy as the Italians are busy evacuating their airbases and the British are busy bombing the retreating columns further north.


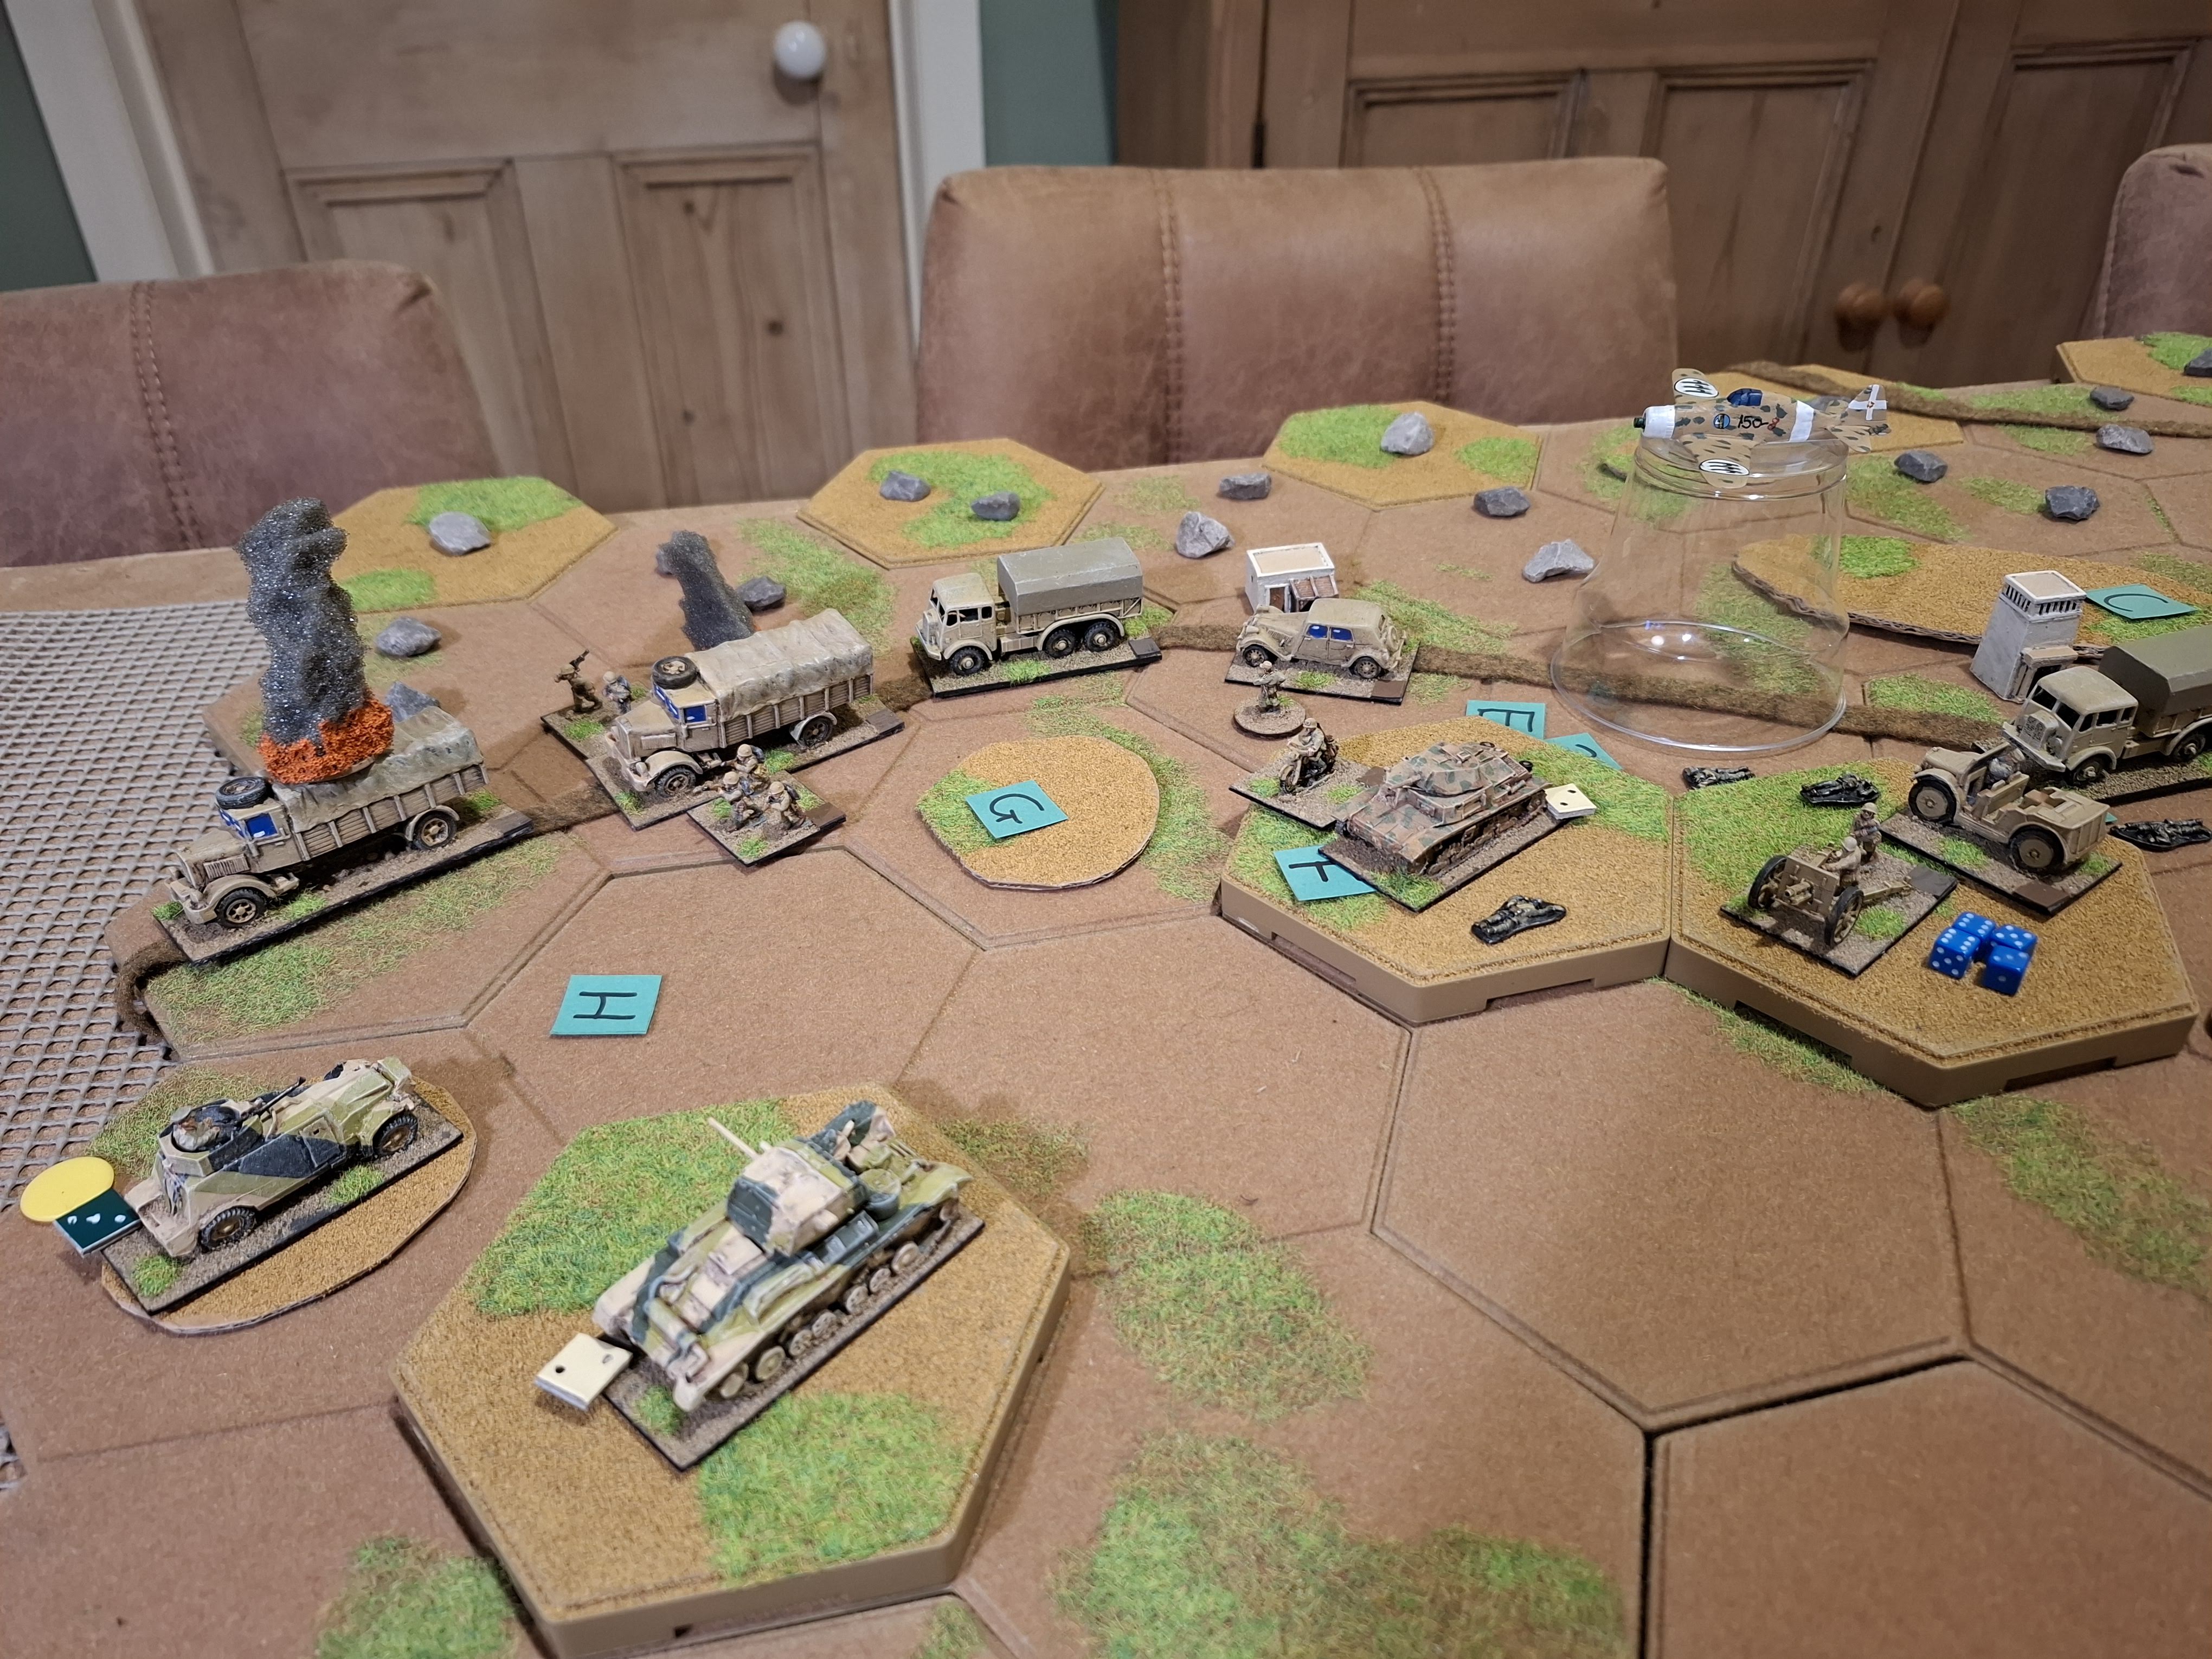
Turn 1 passes speedily as the first Italian units come trundling down the road. A flight of SM79s flies overhead, en route for new bases near Tripoli.


The Italians keep trundling down the road. This time the Desert Air Force puts in an appearance, off to bomb Italian columns further north. I wonder why they aren't bombing here...


And the ambush is sprung! 2nd RTR and the 25 pdrs concentrate their fire on the leading company of M13s, and the point blank range ambush fire soon reduces the Italian tankers to smouldering wrecks. Fox killed in the open. 


Undeterred the Italians press on bravely. The 75s unlimber and start shelling the A9s over open sights, while 60th MG battalion piles on down the road, supported by another company of M13s who scale the rise fronting the 2nd RTR A13s.

Further back down the road the 1st Parachute Bn motors on. The British fire is a bit more split and although 60th MG Bn is left disorganised, the Italian tankers largely shrug the British fire off.


By turn 4 things are getting serious. Both units of 2nd RTR are being engaged at close range by M13s, 60th MG Bn continues to advance slowly down the road despite being disorganised (they are hampered by the British ZOCs) and the first unit of 1st Para Bn is now in contact.

Some respite for the British as 7th and 11th Hussars now appear. The Vickers Lights of 7th Hussars are heading for The Pimple, and 11th Hussars have a fine old time shooting up the leading Italian trucks. The 2nd RTR A13s are sufficiently battered that the Ambulances move up to help reorganise them.


In another round of heavy fighting 2nd RTR have had enough. One squadron withdraws west and the other southeast, hoping to reorganise in relative peace next turn. 60th MG Bn is reorganised (contributing to the terrible traffic jams), and good job too as 11th Hussars and 4th RHA promptly disorganise them again. 7th Hussars occupy the reverse slope of the Pimple. 


Here are the 2nd RTR A9s, thoroughly shot up but in a nice hull down position away from the fighting.


Hard pounding in the pass. 60th MG Bn once again rally and one company of M13s pushes forwards to engage 7th Hussars. The remaining 2 RTR A13s are knocked out, they hadn't got far enough away from the Italians.


More Wellingtons en route for the north. Major Pasquali engages them with his pistol.


7th and 11th Hussars finally have their revenge and 60th MG Bn is destroyed, leaving the road blocked with blazing transport. This will take the Italians a move to clear.


The 2nd RTR A9s are reorganised, and now look fairly chipper again. 4th RHA is also out of immediate use ammo so time for more supplies of shells to move up.


The Italian Paras clear the wrecks off the road and a company of M13s occupies the hex to hold it. 7th Hussars take enough damage to become disorganised, but in turn the British tankers manage to knock out another company of M13s.

11th Hussars don't fancy tackling a company of medium tanks so fall back the rise at the southern end of the Pimple. 


Desperate times call for desperate measures - the remaining M13s assault 7th Hussars, who are vulnerable as they are disorganised. 


And the Italians tankers are victorious! (they needed to score three hits on three dice). 1st Para Bn is now firmly into the pass, and the Italians have taken The Pimple. 


The British respond by screening the road south. The A9s are in a good spot there.

We broke for the evening at that point as the situation has suddenly become very interesting.


When we resumed the next day there was a bit of a lull in the fighting at this point. Having taken The Pimple the Italians consolidated their position by moving the guns up onto the ridge, but otherwise both sides reorganised the units which needed it. British shelling disorganised the last Italian tanks. We had a change of personnel with John B taking over the Italian paras, and Russell and Pete joining the British.


The Italian paras then set off down the road again into hail of fire, even though they were covered by the Italian tanks and artillery. The A9s were sufficiently shot up that they had to reorganise (again) - this was to be their fate for much of the rest of the game.

11th Hussars shot and scooted up to the rise adjacent to the road, and the first Para unit took enough losses to disorganise it.


The Paras went on going and the Italians switched their fire to the British armoured cars who became disorganised. This was probably a mistake as the now reorganised A9s supported by 25pdrs put enough fire on the Paras to destroy their lead unit. This also blocked the road with burning lorries who would need to be cleared. The Italian gunners had run out of ammo and had to be resupplied.


The remaining Italian paras cleared the road, and despite being reorganised, the 11th Hussars finally succumbed to some hot shooting from the Italian tankers and gunners. 2nd RTR had to shift position to avoid the Italians simply driving off down the road, so they moved over to the rise to put a ZOC across it.


The Italians concentrated their fire on the A9s while the Paras moved into the ZOC. The British fire in turn managed to disorganise them but not destroy them.


The Italian paras were able to slip off south down the road, and as there was no point now in staying in position, 2nd RTR retreated east out into the desert. The Italians had (just) managed to win on the very last turn! Fittingly it was the Paras as irl they were the only unit to break out before 10th Army surrendered.

That was an excellent game and many thanks to the players for taking part in an appropriate spirit. I was rather dubious about an 'ambush' type scenario, but in fact it worked fine and was a tribute to Frank Chadwicks original design. That is it for the desert for now, we are all yearning for some greenery, so next time it is back to northwest Europe I think.