Wednesday 29 April 2020

QRF 1/100th scale US 155mm howitzer

Along with the US 105s, I also wanted some 155s. I actually meant to order two of them, but a slip of the mouse meant I only got one. In the back of my mind I thought they could also stand in for Soviet ML-10 152mm howitzers. Cheap? Me? Never.


Unlike the 105s, this came in two parts with a separate barrel. I still didn't have to stick the wheels on, so that was good. As with the 105s, there was minimal flash, just some where the wheels and shield met.


It looks fairly business like from this end. While similar in configuration to a 105, it is a much bigger artillery piece in every dimension. The supplied crew figures were from the same range as the 105mm crews, so I mixed them up a bit make them a bit more homogenous.


Breech detail. The gun barrel was a bit fiddly to put on as you need to bend the supporting arms moulded parallel to the barrel and fit them onto the supports above the breech. It ends up looking quite good, but with my big fat fingers there was a certain degree of cursing involved. Blu tak and slathers of gel superglue helped a lot.


These models can look a bit ropey close up, but at normal gaming distances, it is a nice wargaming piece and looks good. I just wish QRF also did a towed Long Tom instead of the SP version, but you can't have everything.


Saturday 25 April 2020

US Paras in Sicily

Tim put on another 54mm skirmish in his occasional series of Fistful of Lead games. This scenario was the 82nd (?) Airborne in Sicily, which came out of the relevant Skirmish Campaigns book (but which I've also seen reproduced virtually word for word in another set of rules which shall remain nameless).

Anyway, the plucky US Paras landed at night with the objective of taking out a fortified farmhouse complex near the Allied landing sites.

I can;t really remember who played. I think Jerry, John and Tim C took the US and me and Simon (and maybe Diego?) took the Axis. All played with Tim Gs terrain and 54mm toys. This was pretty much the last f2f game we played at the club before the lockdown kicked in, and it seems like a different world now.


And mightily fortified it was too! with trenches, bunkers etc. Good  job it was dark.


Here are the US paras, a very grand collection of 54mm figures from various sources.


And the rather ragged assortment of Italian defenders. We met some of these already attacking the Western Desert Force in Egypt. They are quite heavily armed, with a couple of full rifle sections, two MMG teams and even some Germans along for the ride.


These scary looking Germans occupied this bunker. They had a flare pistol, which none of us had quite figured out the significance of.


MMG team on the roof of the farmhouse. The setup at start had various MG teams in the bunkers, but most of the Italians were inside the main farm building.


These bunkers were garrisoned with an LMG and a couple of riflemen,


As the alarm was raised, the chaps started to slly forth. Not being sure where the enemy were coming from, they just headed in all directions to the perimeter. The garrison commander can be seem on top  of the smaller tower, peering into the darkness.


This LMG team peered into the murk, wondering what was happening as naughty paras crept closer.


Over here, more US troops appeared, but were concealed by the dark woods.


Over here though, the US forces stumbled over a trip flare, lighting them up like day. The LMG team now had some targets! 


These US troops also stumbled over a trip flare, which was a bit unfortunate, as the bunker contained an MMG. Suddenly the Germans having a flare pistol made, sense. If only we'd put them over here. 


The Americans over here were mown down by MG fire, althugh not before they'd inflicted a few losses on the defenders. There were quite a lot of active defenders now, alerted by the sounds of firing. 


Things were getting a bit sticky over here, despite pinning some of the Americans, the managed to close with the wire and started posting grenades into the bunker.


Some riflemen fired from a flank in support, to little effect, although they did pin one of the US wire cutters down.


The Italians and Germans massed for a counterattack over on the other flank.


The Germans did a heroic 'running over the back of a chap lying on the wire' thing to try and stop this rather threatening US para attacking the bunker.


A desperate hand-hand battle ensued and down went the Yank.


Unfortunately his pals now had a clear shot at the plucky Gefrieter, and down he went. We still held the bunker though.


Over on the other side the last survivor of the MG team was eliminated , but more Italian riflemen has made it the defences by now.


The Americans pushed the Italians back, even though the commander urged them on from the tower. Spotting the US commander standing by the left hand bunker, the Italian Sergeant took aim with his Beretta SMG and managed to take him down (the figure lying on his back by the bunker).


We called it a day there. A panaorama of the defences. Looking at bit ragged but still just keeping the Americans out.

One again, that was a load of fun, and probably the biggest FFoL game we've played. Tim had to work to keep things moving along, but for such a large skirmish game we got through a lot of action in a couple of hours, and it looked lovely in 54mm.


Wednesday 22 April 2020

QRF 1/100th scale US 105mm howitzers

Along with the M8s for some recce, I thought I should get some artillery as well. For the Twin Villages game I had to borrow some US guns, but I much prefer to be able to provide my own toys.

I did a fair bit of research on which guns to get, really I'd have liked some Roco ones for the Charles Grant nostalgia and in the end it was a toss up between PP and QRF. I'd inspected Tims PP 105mm and it was a nice model but on the end my inherent stinginess got the better of me and I went with QRF as they are both cheaper than the PP offerings and also include crew figures.


Here they all are, lined up to stonk the Germans.  Three guns, enough for representative amounts of artillery at various levels of game.


Much to my delight, I discovered that these were one piece casting. Result! Like the M8s, there was hardly anhy flash and just a few mould lines. The worst flash was where the wheels attached to the gunshield and it took a degree of carving and filing to remove it. I'd still rather do that than stick the wheels on though.


You can't see where the flash was. The gun sits nicely but I had to bend the trails a bit so it sat level and also to get a bit of elevation. 


The breech and elevating mechanism detail is basic but perfectly functional. I really like the crew figure in shirtsleeves, I wish more manufacturers would make gunners in partial dress rather than full BD and webbing. What I'd really like are some bareheaded gunners, but iirc only SHQ make those and only in 20mm.

I did the crew in plain khaki as I has it in mind that they could perhaps fill in for Sovier 122mm howitzers, and as US troops, maybe they are just in their wool trousers and undershirts. Annoydingly some of the figures are in what is clearly Vietnam era garb (the bare armed gunner is wearing a flak jacket and some of them are in Castro caps). I filed down the caps a bit so they look more like jeep caps, but they won't really do for Russians. Ah well, you get what you pay for. I suppose I could have used some spare US or Russian crew in helmets but I couldn't be bothered.

I just did these in plain OD, a bit of a wash to pick out some depth and then a light drybrush of dust. Job done.

Friday 17 April 2020

One HourTrafalgar

Well, if you are going to a Napoleonic naval battle, you may as well do a big one. After the success of Actium, John produced a Napoleonic naval version of his one hour naval rules and put on the Battle of Trafalger at 1:3. We did this a few weeks ago, pre lock down.


The Franco-Spanish fleet in a ragged crescent. I took the French and Diego the Spanish. We were heading for Cadiz, somewhat handicapped by sailing close hauled into the wind with a lee shore to starboard. Ideal conditions for a fleet action!


My flagship, the Beaucantare. Vive la France. The ships are all 1/3000th Lammng from Johns collection and dating from the early 1980s.


Perfidious Albion. Collingwoods column is on the left (commanded by Tim), and Nelsons column on the right, commanded by Simon. I'm sure his RN experience will come in handy. This lot had the weather gauge, with the wind over their port quarter. Oh dear.


Rather strangely, the English fleet veered off to port. Perhaps they are heading for Cadiz too?


Well that's OK. It gave a chance for the Allies to sort themselves into separate French and Spanish squadrons. Much more tidy.


Collingwoods squadron enagages. The Royal Sovereign takes a pasting, but RN gunnery is devastating, boosted by the superior speed of the upwind ships which lets them loose off rolling broadsides as they sail past. One of the French ships has already struck her colours.


Well, things could be going better. Two more crippled French ships.


Oooer, half of Collingwods squadron breaks the French line. Poor old Beaucantare gets shot to bits after being raked from the bow.


And promptly vanishes from the tabletop, having been reduced to matchwood.


However.... the English have now moved downwind of the rest of the French fleet, so my tail end charlies put on sail and break the British line as well, scattering raking fire in all directions. At this point, I should have boarded the crippled RN ships with my fresh French ones, but I completely forgot in all the excitement. Sacre bleu!


The RN don't seem too phased by being crippled and promptly proceeded to blast my ships to pieces at point blank range. The lone survivor is Achille in the top left.


Nelson finally turns back south and engages the Spanish vanguard. The Spanish are duly shot to pieces too while Nelson sails on unharmed. The Spanish did eventually land some hits on Victory, but to little avail as superior RN gunnery and the wind gauge made short work of them.


I have a cunning plan! Achille tacks and sails off close hauled to the southwest. If I can make the far corner, I can then tear into Cadiz with the wind behind me. The RN can only follow at 2" per turn.


One ship is able to catch me, but I managed to damage it, which allowed me to outsail it.


Sadly, I didn't sail quite far enough away to get out of range of its guns and we ended up in a messy boarding action. With both ships crippled, it was evens, except the French were on -1 and the British were on +1 and the RN inevitably triumphed. It was a glorious interlude however, and the captured French captain was wined and dined in honour by the gracious British.

That all went jolly well. The sailing rules worked very well indeed, although we did struggle a bit with some of the acute angles (close hauled was between 22.5 and 90 degrees to the wind) and a square grid would probably have helped. The combat was fine, if a bit lethal, but that is the One Hour Wargames way. Not a game for ditherers, that is for sure.


Wednesday 15 April 2020

QRF 1/100th scale M8 Greyhounds

Having been slowly building up my 15mm US forces, I thought it was time to top and tail them with some support arms. I've already got jeeps and Stuarts for my cavalry troops, but they were missing the iconic M8 armored car. As part of a bigger order I picked up three QRF M8s.


And here they are advancing across the dining table in blazing sunshine which has washed the pictures out a bit. Sorry.


These are nice simple models, and very inexpensive. I was aniticpating having to stick and awful lot of wheels on, and was pleasantly surprised to find the hulls were single piece castings. Woohoo! Yes, you lose a bit of definition, but anything is better than trying to stick on a load of metal wheels and mud skirts.


For one piece castings the hulls are pretty good I think. The turret is also a single piece casting with the crew cast in place, but a separate .50 cal which fitted its locating hole perfectly. There was hardly any flash on the model at all, and just a few faint mould lines.


There is some nice raised detail on the panels and engine deck, as well as some nice deep lines. I did these in overall OD, but as they looked a bit flat, I also gave them a wash of dark brown ink which ran into the lines well but unfortunately dried rather shiny. I waited 24 hours before doing some matt varnish as otherwise there is a risk it'll just wash the ink out of the crevices. One thing to watch is how to position the .50 cals, as at some angles it is very hard to paint the second crewman with the gun in the way. Good job I have some very thin brushes.

The slight painting issue apart, I'm pleased with how they came out and very pleased indeed with how easy to put together they were. Recommended.

Friday 10 April 2020

Hill 241. 10th July 1943

After the Bulge game using my adaptation of One Hour Wargames, I added a few tweaks around the treatment of artillery and put on another game using a wider range of unit types. I fancied a tank battle to introduce armoured units, and a bit of digging around revealed an interesting action during the Battle of Kursk when 1st SS LAH took on the Soviet 183rd Rifle Division and 2nd Tank Corps en route to Prochorovoka.

The real battle almost exactly mirrored the OHW 'Take the Hill' scenario, and I just had to take the OBs and turn them into OHW format. I went with a slightly more grandiose scale than last time, so the Russian units each represented Tank Brigades or reduced Rifle Regiments, while the Germans stuck with battalion sized elements.


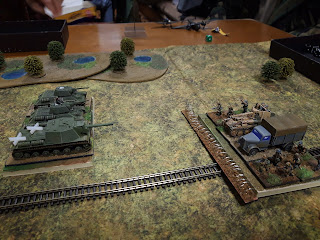
Battlefield from the west, 183 RD is entrenched on Hill 241 (down to two regiments, one of which is reinforced with extra AT guns). The Germans have just captured the State Farm to the south, largely destroying 10th Tank Corps in the process, but one of the SS panzer grenadier regiments needed to reorganise as a result.

This is my Deepcut Studios 'Prarie' mat. You can see why the Germans painted their tanks dunkelgelb, and compared to real arid grassland I've seen in California and Australia, it is actually still too green.


The Russian armoured horde. Three Tank Brigades, a Motorised Rifle Regiment and a motorised Artillery Brigade. Essentially an entire Tank Corps, reinforced with a regiment of SU-152s. These chaps were coming to the rescue from the northeast.
Jerry, Simon, Diego and Tim C took the Russians.


The Russian airforce! One of my Zvezda Lagg-5s. The real battle was a maximum air effort by the Luftwaffe, so I modelled most of the German offboard artillery as airstikes, but having got the models, I brought along this fighter to oppose them. A quad maxim AA truck (Peter Pig) can also be seen on the table below.


The thick end of 1st SS LAH. 1st SS Panzergrenadier Regiment with two motorised and one mechanised infantry battalions, reinforced with Marders from the divisional AT battalion. 1st SS Panzer Regiment is represented as two stands even though the real one only had a single (very big) battalion including Wittmans Tiger Company.
John, Graham and Tim G took the Germans.


The action opened with a massive artillery bombardment on Hill 241, followed up by a bombing raid by Dorniers as the German infantry and tanks rolled forwards.


One of the regiments on the hill was thoroughly smashed up by the prep fire. The big explosions indicate they are under effective artillery fire, which automatically disorders them (new addition, thank you NQM). The Germans aimed to pin the defenders frontally and flank them with the panzer battalions. The battalion with the Marders covered the right flank along the railway line.


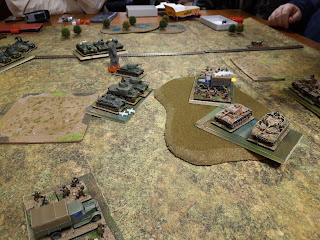
2nd Tank Corps rolled on, the Katyushas found a spot to deploy, but the tanks came on essentially lone abreast. A bit of a problem finding enough room to deploy them, especially given the swampy woods on the far edge.


183 RD chewed up one of the SS battalions but the armoured infantry and Tigers rolled in to assault.


One of the Russian regiments disintegrated as the grenadiers were shot in by their SP 75mm guns.


The German HQ was established in the State Farm. Tim was very pleased to point out the beautiful Roco Opel radio truck.


One of the Tank Brigades headed for the hill, a curious choice as it had all the worst tanks, including some 'Graves for Seven Brothers' aka my Zvezda M3 Lee. The SU-152s were occupied elsewhere.


Amazingly, 183 RD was still holding out. It seems that tanks aren't the best tool to destroy entrenched infantry. They'd even inflicted some hits on the Germans armour in the close fighting.


As the panzergrenadiers occupied one end of the hill, the final Russian resistance collapsed. Hill 241 was German! Now they had to hold it...


The Russian artillery deployed, with the HQ elements on attendance (my AA truck and HQ M3 Scout Car). Tim C was the heroic artillery commander.


The Russian armoured wedge approached Hill 241 with the motor rifle troops lurking in the rear. The SU-152s were still over near the woods.


They made a very attractive target for the HS-129s who proceeded to shoot them up, called in by the entrenched panzergrenadiers (who had been busy with their shovels). The German Marders weren't having much luck against the heavy Soviet armour though.


The Russians shot the panzergrenadiers off the hill, and the panzers took up hull down positions along the ridges. There are around 200 tanks engaged here, all very unpleasant. 


The dug in Germans continued to hold off the third Russian tank brigade.


And called in another airstrike which inflicted more losses on the Soviet armour.


The Russians had enough and fell back out of observation range, so the Dorniers turned their attention to the rest of the massed armour.


The planes inflicted some losses, but worryingly for the Germans, the massed Russian armour and devastating Katyusha fire was inflicting heavy damage on the panzers, despite their good tactical position.


While all this was going on, the motor rifle regiment worked its way around the Germans left flank.


The last Luftwaffe mission was ineffective.


But the Marders and panzer grenadiers decided to pursue the retreating Russian tanks! They weren't close enough for an assault, but they advanced to within a few hundred metres.


The Russians fell back again, and the grenadiers turned their attention to the other Russian tanks. Combined with fire from the panzers, one of the Russian brigades became exhausted. Wittmans battalion had suffered enough losses to make it disordered though.


The Germans moved up their tired panzergrenadier battalions to stop the Russian flankers, but both German units were close to exhaustion.


The Russians easily sent the first German battalion packing.


Wittmans battered panzers pulled back to reorganise and the defenders on the hill sorted  themselves out.


The Russians destroyed the second tired battalion and fell back.


As the sun hung low in the sky, all the surviving Russian manouvre units attacked the hill, supported by the Katyushas and the last panzergrenadier battalion fell back exhausted.


While the Russians closed in, the last panzers drove into the fight.


Another Russian Tank Brigade was destroyed, but the remaining Russians charged up the hill. This really was heroic as the Tank Brigade with the SU-152s was both disorganised and one hit away from exhaustion.


And.... The Tigers are Burning! Wittmans battalion finally collapses in a close range duel with the T34s and SU-152s. The other battalion holds out though, infantry being somewhat ineffective assaulting tanks in the open. The panzers inflicted enough casualties in return to disorganise them.


As night fell, there was a scene of devastation around the hill, scores (hundreds?) or damaged and burning tanks littered the battle accompanied by the wreckage of over a dozen infantry battalions. Both sides claimed to have 'won' as they each had a handful of survivors clinging to the slopes, but in the end they all seemed happy with it being declared to be a contested result.

That went well, and the feedback from the players was very positive. There was a bit of confusion around artillery spotting and turn sequencing (many thanks for the post-game suggestions from the players) but the new artillery and air rules seemed to work well.

I'm not very happy with the way rallying works, in one sense it works very well as players are more than happy to pull back from a losing fight, or to stop after a winning one, in order to sort their guys out. The maths is the wrong way around though, although better quality units are more resiliant, they takes ages longer to rally than worse quality ones, and that produces  some odd results. I've come up with a new approach, somewhat based on NQM, which addresses that but hopefully isn't game breaking.

I'm not going to fiddle with it too much now, apart from tightening up the spotting rules and modifying the rallying. I also need to run the games in a manner which discourages micromanagement (so pre-allocation of combat, democratic casualties etc) which will also speed things up. 

The system as it stands works well for standard One Hour Wargames scenarios, but for historical games, I need to treat air and artillery differently. The firepower equivalent of each game artillery base is around two battalions of field artillery (say 30 or so 105mm) which doesn't correspond to any known real world artillery organisation. Effectively it is one dice per artillery battalion or squadron of ground attack planes (plus or minus for heavier or lighter calibres) so for historical games I'll use something along those lines, and just differentiate between battalions in direct support and general support and figure out the levels of attachment based on historical doctrine.If I'm streamlining some areas, I can have a bit more complexity in this.