Saturday 29 June 2013

Crimissos River

We needed something to play at the club at short notice this week so I quickly sorted out the stuff for a Command and Colours Ancients game. I am vaguely intending to play through the Punic Wars scenarios in order and although we'd already done Crimissos using Lost Battles it was also the next one in line for CnC.

Our usual approach to CnC is to play on hexon terrain with toys rather than using the supplied boards and blocks. In this case it was my desert boards and 20mm plastic stuff rather than Tims rather grand 25mm toys. New arrivals this time were my freshly flocked hexon single desert hexes and a couple of stands of Gallic slingers. John took the Carthaginians and Tim the Syracusians.

Historically Crimissos involved the Cathaginians invading Syracuse (again), and this time taking their newly formed Sacred Band with them.  Hasdrubal led the Carthos and one somewhat foggy morning they straggled across the River Crimissos only for Timoleon leading the Syracusians to spot his chance at attack  while the Carthos were disorganised. This is a quick scenario, five command cards each and five banners needed for victory. Scores in the commentary are Carthage:Syracuse.


Carthaginian Sacred Band and heavy infantry suported by chariots and light troops with Hasdrubal lurking at the back. In the rush to put he game together I forgot my sector indicators and had to use tile spacers.

Carthagian Auxilia on one side of the river, the rest of the army on the other side. In the rush I also forget my single hex river sections. The four hexes of dodgy looking river bits are fordable.

Syracusian phalanx supported by peltasts and medium cavalry. Timoleon is the leader with the white shield.

The Syracusians are neatly formed up, unlike the Carthos.

Syracusian medium cavalry who bear a striking resemblance to Alexanders Companions. Ahem.

Carthaginian four horse chariot. Well, there are four horses aren't there? Airfix with replacement wheels.

After ineffective missile fire, the Carthos try to cross the river. Medium infantry, light troops and warbands. The single hexes can be seen in the distance, they don't quite match. Freshly  painted Airfix Gallic slingers next to the Libyan infantry.

Syracusian light troops inflict a few hits on the auxilia and the phalanx rolls forwards.

Carthaginians engage the phalanx with auxilia and mediums and suffer some losses.

The phalanx rolls forwards.

And suddenly there are fewer Carthaginians. The phalanx is heavy infantry, five dice apiece. Ouch! 0:1

The Sacred Band and Hasdrubal get stuck in and wipe out the opposing peltasts. Timoleon and Hasdrubal go head to head. 1:1

The Syracusians continue to kill off Carthaginian units, an element of Auxilia and both Libyan infantry in this case. The victorious hoplites follow up. 1:4

Hasdrubal is driven back by Timoleons men, but the chariots move up.

The Sacred Band wipe out a Timoleons men, Timoleon has to flee. 2:4

On the other flank a Warband takes out more Syracusian peltasts, Timoleon has to flee again!. The Syracusians are now well poised to snatch defeat from the jaws of victory. 3:4

In a desperate move the medium cavalry move to engage the chariots.

But on the other flank a phalanx unit takes out the impudent warband. 3:5 and Victory to Syracuse!

At game end the Sacred Band are left isolated in the middle of the Syracusians. Historically they were isolated and destroyed.

As usual, a close fought game. We ran the cavalry attack on the chariot for fun and the cavalry were destroyed so if the attack on the warband had failed it would have left the score at 4:4 with the Sacred Band poised to take out another phalanx unit. Although I was a bit dubious about CnC Ancients when we first started playing it, as time has gone on I have become more impressed with it as a simulation and more comfortable with the abstractions. We actually know how to play it now and how to set things up to take advantage of the cards, particularly the various group activation cards. Most importantly it is fun, looks great with the toys and is fast to play. The latter being something I value more as I get older. We'd finished this game before some people had finished setting up, so time for a chat about COW and then home for tea and buns:)

Hasdrubal can go home to lick his wounds but he won't have long to wait for more action as the next battle in the series is Bagradas which we've done several times before but everyone loves Elephants don't they.


Wednesday 26 June 2013

Grossenfartz (Part 3)

I bring you the concluding part of the struggle from the Vulgrian pov. The Anglophobians have been admirably catered for over on Tims blog. As you recall, we left things with the Vulgrian  left wing locked in battle with the enemy trenches.


The Vulgarian CO looks on somewhat blankly. He might be dim but he has a big moustache,

Anglophobian reserves and armoured train form up as the Vulgarian train approaches the buffers.

Over on the right, the Anglophobians unwisely leave their trenches just as the Vulgarian heavy cavalry and reserve infantry battalion put in an appearance. I discovered that firing at a thin line of infantry with matchsticks is really hard, even at point blank range!

Heavy cavalry advance.

The struggle for the trench finally ends with the Vulgarians victorious. The intention had been to shoot this attack in with the guns, but they were masked by the train. Ooops...

The victorious Vulgarians push on to the next line of resistance. The advanatage of their deep formation becomes apparent.

The cavalry charge the Anglophobian infantry who are already weakened by artillery fire.

And wipe them out....

Enemy artillery tears huge gaps in the Vulgarian formation but they press on.

Vulgarians leap from the train and surprise the enemy HQ!

The surviving Vulgarians close with the Anglophobian reserves.

Over on the right the cavalry approach the brewery.

To everyones astonishment, the HQ drives off its assailants.

Sadly things don't go quite so well for the Anglos in the centre and Vulgarian infantry overrun their opponents.
At this point all three Anglophobian battalions had been destroyed and they had lost two guns, so the Anglophobians decided to pack up and head for home.

An interesting and enjoyable battle, I was particularly pleased with the success of the 'wave attack', perhaps those C19 drill manual writers knew what they were talking about. Another interesting feature was the effectiveness of a single rank open order line against artillery fire, I blazed away at the right hand Anglo battalion for several turns and only managed to hit a couple of figures. In contrast, once the armoured train got the range it blew huge holes in the deep Vulgarian waves. A realistic effect from the simple mechanism of actually firing projectiles.

Despite being compoletely set up for it, both sides managed to avoid blowing up the brewery, which was a bonus.

Righto, time to pursue the Anglophobians back to their ships I think. Lets hope there aren't any nasty surprises on the way....


Friday 21 June 2013

Grossenfartz (Part 2)

We last left the action with the Lancers about to overrun the Anglophibian heavy artillery and the surprise appearance of the Vulgarian steam train.

The train roars past the infantry at top speed, unfortunately runnng over a few individuals who strayed too close to the track. Vulgarian infantry brigade HQs follow the assault waves closely.

The enemy artillery knocks out the lead wagon of the train, scattering the occupants across the tracks.

The Lancers meanwhile make short work of the gunners, only to be faced with a Anglophibian motorised infantry debussing.

The train crashes through the enemy trenches as the survivors from the lead wagon assault the gun in desperate hand-hand combat. The train is going at top speed at this point and needs to start thinking about slowing down.

The Lancers charge the motorised infantry.

The battle for the gun rages, both sides down to one figure each...

The Lancers suffer badly at the hands of the infantry.

Despite the gaps torn in their formation by enemy fire, the leading waves of Vulgarians reach the trench.

The divisional commander and staff move on (rather blurrily)

View from behind the Anglophobian trench line.

The fighting for the trench was vicious with heaps of casualties on both sides, but for every Vulgarian who fell, another stepped up to fill his place from the following waves.

And there we leave it with the Lancers bloodied, the train steaming at full pelt for the buffers at the end of the line and fighting for the first trench in progress. Another instalment soon to come!

Tuesday 18 June 2013

Grossenfartz (Part 1)

This battle was run at the Sheffield Wargames Society in June 2013 and was a follow up to the entirely unprovoked Anglophobian invasion of Vulgaria. Tim organised the game, I provided the Vulgarian hordes and Mark Hides commanded the perfidious Anglophobians. We ran it using the successful 'half scale' game version ,substituting cm for inches and using half size units. This meant we could run it on a tabletop and save our poor suffering knees and backs.

Having played a few games of FLW now, I have been pondering how on earth you are supposed to attack stationary defenders who get to blaze away happily while their plodding opponents obligingly march into rifle range. For this game I had sufficient forces to employ an appropriate tactical response, straight out of late nineteenth century drill manuals. Concentration of effort (naturally), but also accepting that casualties would be appalling so:

i) open order to minimise losses, regardless of the reduction in effect for melee
ii) form up in successive waves to maintain the momentum of the attack a.k.a. step over the  bodies in front. A bit like the Russian charge in 'Enemy at the Gates'
iii) keep going, don't stop to fire or change formation, it just increases the time spent in the beaten zone

So essentially just line up and charge, but with the chaps sufficiently spread out that hopefully they could advance faster than the enemy could kill them. My own artillery would try to shoot them in as much as possible.


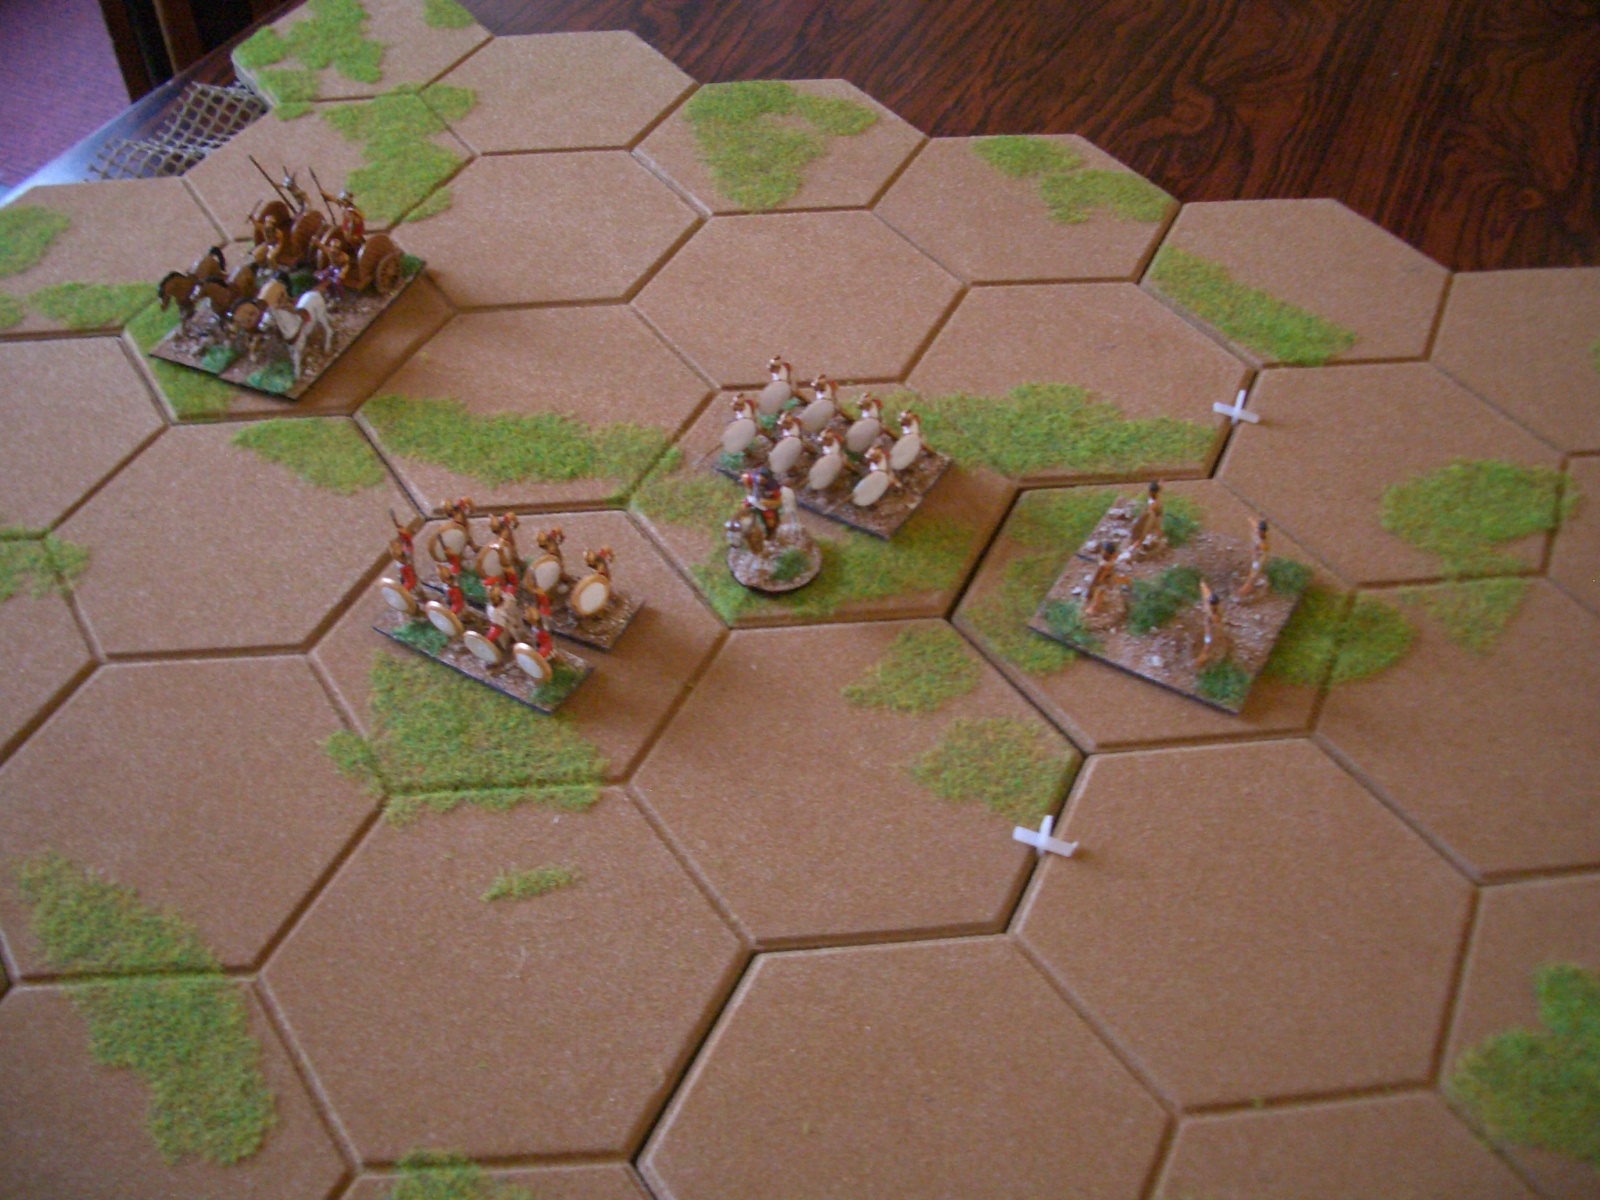
The Vulgarians assemble, the largest force used to date (albeit at half scale), six infantry battalions, two cavalry regiments, three artillery batteries plus various HQ types.

The Anglophobians deploy to defend the vital rail junction and brewery. They have dug trenches, what a rotten trick!

The brewery containing the very gassy (and highly volatile) Vulgarian beer.

Leading Vulgarian waves march on left of the railway line. Four battalions in open order supported lines and deployed in echelon, four waves in all. The Jagers are getting a bit ahead of themselves.

Field artillery dragged ponderously into position. Lack of table space meant I didn't use the limbers. The plan was to fire diagonally in support of the infantry, covered from fire to the front by the wood.


Anglophobian hordes smugly in their trenches.

Worms eye view of the Vulgarians.

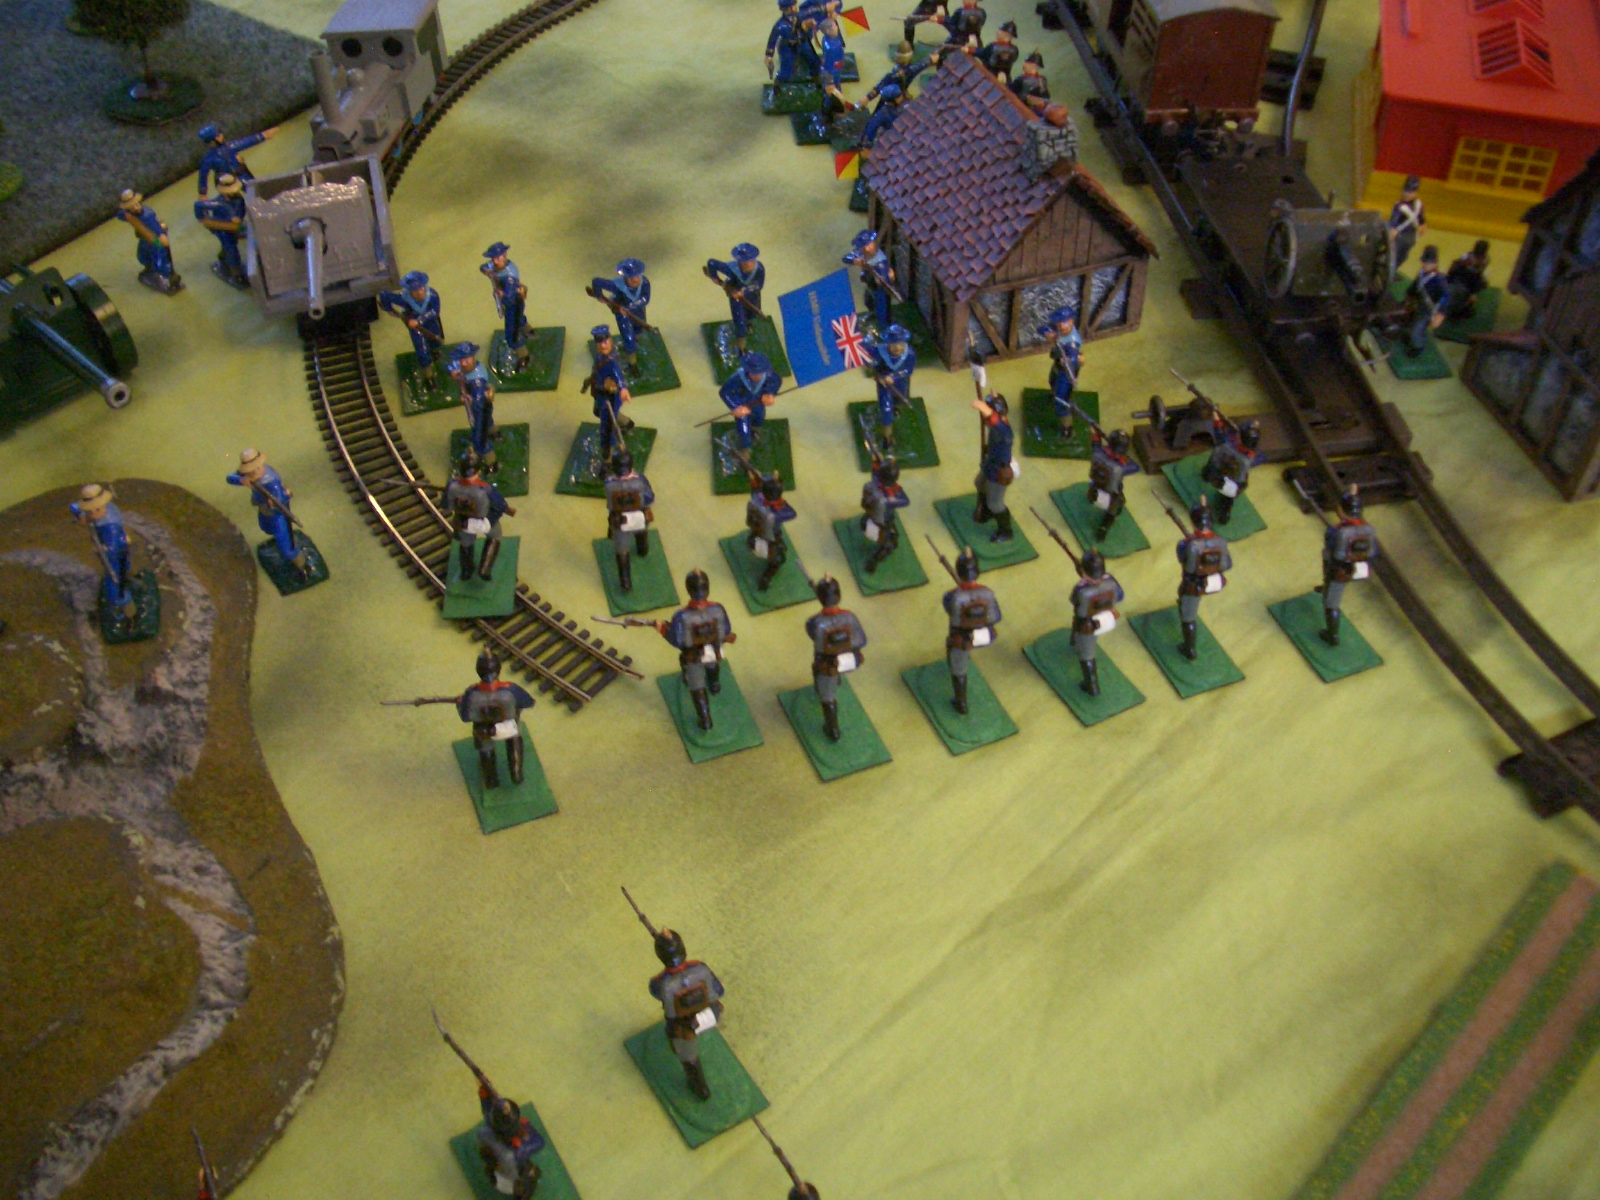
The Vulgarian secret weapon! A steam train loaded with infantry and carrying and artillery battery. The plan was for it to crash through the Anglophobian lines once they had been softened up, sadly the train entered a little prematurely...

Another surprise! The Lancer regiment successfully flank marches and emerges behind the Anglophobian heavy gun.

At the same time, an Anglophibian armoured train makes an appearance, oh dear! The Anglophobian HQ signals frantically.
So, there we leave it for now. The opening moves have been made, and already there are some unexpected developments.