Showing posts with label ECW. Show all posts

Monday, 14 April 2025

Dominion of Pike and Shot

 Hot on the heels of 'Dominion of the Spear' now comes 'Dominion of Pike and Shot' with added artillery bombardments! There seem to have been a flurry of blog posts on both sets recently, but mine have been languishing in my blog post backlog as I usually stack up a couple of months worth. Anyway, here is my contribution. 

Unsurprisingly this set covers Renaissance warfare from the late 1400s to late 1600s. This is a period I have repeatedly tried to get into, and I've been through a few iterations of published rules and some homegrown stuff but never really got anything which satisfied although I'd really like to fight some more of the major battles of the English Civil War and Thirty Years War. 

Anyway, the whole left flank/centre/right flank/reserve approach of DoS worked great for Ancients and is equally applicable to this period, and mirrors the approach in my favourite rules for the period 'Marston Less' which uses a three column grid.


The rules are very similar to their Ancient cousins, with a brief description of the mechanics, a longer description of the design decisions and dozens upon dozens of Army Lists for various theatres and periods, plus a QRS.

Again like their ancient cousins, units are differentiated as fire or melee and with extra characteristics to make them more (or less) formidable. It is all about the matchups, like DBA, but without all the geometry. There is a scenario book in the offing, but I was impatient and just bought the rules as between Cassells 'Battles in Britain' and 'Europes Tragedy' about the Thirty Years War, I have zillions of scenarios to try out.  

Anyway, having had a brief look at Edge Hill (again) , I decided to just try out a generic early ECW engagement. 1642 Royalists vs Parliamentarians as I wanted to get some toys on the table and roll dice. I'll do this blow-by-blow as there are some new unit types and mechanisms.


The respective armies. The toys are my generic 2mm pike and shot/horse and musket units albeit originally painted up for the WSS and Twilight of the Sun King in the main, with the pikes, tercios, Gendarmes etc added later.

Royalists (top) have 2 x pike units (with some muskets) and 1 x musket unit (with some pikes) plus 2 x elite cavaliers (melee cavalry). They are the attackers and deployed with the cavalry on the wings and their musket brigade in the centre with the pike heavy units in reserve.

The Roundheads have got 3 x musket units (with some pikes), 2 x melee cavalry (pistols) and 1 x artillery unit. These are all average units so the Royalists have an advantage in melee cavalry as theirs are elite. The artillery is a new unit type and most effective against armoured infantry, which neither side has. I put this in reserve, which may have been an error, so the Roundhead front line was also cavalry on the wings and infantry in the centre. Melee cavalry have an advantage over musket heavy infantry. Artillery benefit from flanking fire if there are gaps in the enemy line, which was why I put them in reserve.


First round. This edition of the rules adopts the method of each side choosing one sector to fight for activation, (my least favourite) although the other two methods can be used. The very first thing which happens is each side fires an artillery bombardment on one enemy sector, needs a 5+ to hit and in this case both sides missed.

The Royalists then attack with their right hand cavalry, but the melee is inconclusive (despite needing 3+ and 4+ to hit respectively). In the centre the Roundhead muskets blow away the Royalist musketeers and a pike unit moves up into the gap. 


Round 2. The Royalist cavalry rout their opposite numbers and the Roundheads put their artillery onto the left flank. If I can thin out the Royalist lines, I may get a +1 bonus for flanking artillery fire. No such luck however as the Roundhead musketeers miss (needing a 5+) and are routed by the Royalist pikemen (who hit on 4+ vs musket infantry, but attack second). 


Once per game each side can attempt to rally one of their destroyed units. The Roundheads manage to rally their cavalry and put it back in reserve.


Round 3. The Royalist cavalry dodge the artillery barrage and ride down the Roundhead guns. Well that went well. The infantry fight in the centre is inconclusive.


Round 4. The Royalists rout the newly rallied cavalry (again) and there is no hope of recovery now. The Roundheads put their infantry in reserve up against Ruperts cavalry. 


Round 5. In a flurry of musketry one of the Royalist pikes is routed and with no reserves left, the Royalist centre is now open. The cavalry battle is inconclusive.

The Royalist try and rally one of their units to plug the gap and fail.


Round 6.The Royalist cavalry once again fail to rout their opposite numbers, and the Roundhead musketeers with their open centre advantage rout the remaining Royalist infantry. Reduced to one unit, the Royalists lose.

Even though I need to get my head around the new unit types a bit more (and some of the changes to combat resolution), that was really good fun and well with 5 US dollars! When I 've got a bit more time I'll set up some more scenarios to try. Alan on The Stronghold Revisited has done a bit more with this version and has a few suggestions on the treatment of mixed pike and shot units, as at the moment the match ups don't seem quite right, so I'll probably adopt the idea of 'mixed' units. Alan's ideas here: https://hordesofthethings.blogspot.com/2025/04/dominion-of-pike-shot-ecw.html

I need to play around with the some scenarios and the rules a bit more before making any big changes though. I'm quite drawn to using ng some variant of Populous, Rich and Rebellious to do a TYW or ECW mini campaign and using DotS as the battle engine. 

My main focus has been on Dominion of the Spear as I'm working on a mini campaign participation game covering Alexander the Great using DotS as the engine, so expect a flurry of posts on that at some point in the next few weeks. 


Monday, 23 September 2024

I have been to.... Sheffield Castle

 The Friends of Sheffield Castle recently organised some tours of the castle as part of the Castlegate Festival in Sheffield. I managed to get one of the tickets, which get snapped up in seconds. The castle is notable for being one of the largest in England (as the curtain wall was vast, bigger than the adjacent town) and it was the prison of Mary Queen of Scots for 14 years. It was slighted after the Civil War and then the site was built over as Sheffield became an industrial city.


A digital model of the castle keep produced by the University of Sheffield and based on the features described in the 1637 castle survey. Sadly no contemporary pictures of it survive, but the complete dogs dinner of different tower styles etc is apparently correct. The Keep is built on Castle Hill, which is the remains of the original Norman Motte. 


It doesn't look like the image now! It is just a huge building site. The walls in the foreground are early Victorian buildings which date from when there was a steel works here. The Medieval moat and bottom structures of the gatehouse are in the middle distance, and the far boundary of the moat is where the row of buildings with tower are in the far distance. 


A brief timeline of the castle from the blurb outside the site. The first known castle on the site was Norman, and it was built at the confluence of the Rivers Don and Sheaf, supposedly the southern border of the ancient kingdom of Northumbria, but an important communications node in any case.


This hill is the original Norman Motte. The lighter tone is the original sandstone, the dark layer is shale and earth laid down to raise the height of the Motte. The structure on the top right is a concrete shell built  around remains of the northeast tower in the 1920s. There is a (locked) door giving access to the original tower wall.ls inside. The white wall is the foundations of the Castle Market building built in the 1920s right over the site and demolished some years ago.


The site of the original gate house and moat. The concrete square was also built in the 1920s and is protecting the base of one of the gatehouse towers, and the masonry on the foreground is the site of the drawbridge. The moat is quite deep, around 6m, but only 2m or so has been excavated. Sections of the original Norman ditch run behind it, but have been filled in.


Another view of the site of the gatehouse and drawbridge, you can see more clearly the layer of extra shale and earth used to build up the Motte.


There are still some quite nice bits of dressed stone left, but most of the wall facing was sold off for building in the rest of the city after the castle was slighted in the seventeeth century. Most of the walls which remain are just the rubble cores, and the rest of the castle stone has been incorporated in various buildings around the city. 


This is up on Castle Hill. The white wall is part of the 1920s market building, but the stones of the old castle walls can be seen behind. Some of these are interior walls for towers. The old castle well is at the far end of the ridge, and one of the walls of the old steel works went right over it. 


The wall interiors from the other side. The walls on the near right are early eighteenth century. The hill was squared off then, houses built around the perimeter and a large bowling green constructed in the middle of what had been the courtyard.


The River Sheaf joins the Don here (the Don is off to the left) , both used to be floating cesspits choked with human and industrial waste. This section of the Sheaf was covered over in 1917, but is now being exposed again down to the Don. Those arches are the original 1917 ones. I've done the underground river tour almost as far as here, it stops at the 'Megatron' culvert underground on the right off picture, which is huge and hosts nesting bats.


A very fanciful illustration of the 'Norman Castle'. Of course it looked nothing like that, and Sheffield is apparently a flat rolling plain.


This painting was made in the 1950s, and bears a slightly greater resemblance to the original, at least the layout of some of the walls and towers and rivers, although the structure is far too big. In this image, Sheffield has apparently been transported to the Scottish Highlands, and the city itself has ben replaced with some woodland and fields.

Anyway, that was loads of fun and very interesting. The site has been worked on for years now, but hopefully the exposed (and conserved) sections will be open for general public access as the key features of a new park in Spring 2026. 


Wednesday, 16 August 2023

Marston Less

 I could only attend one night of gaming this week so I offered to put on a quick session of Tony Cullens 'Marston Less' ECW rules. We played a few games of these at the club before lockdown, and I'd modified them to incorporate the Thirty Years War and adjusted the combat system to use 2D6 instead of a D20. We'd done a couple of hypothetical battles as well as Edge Hill and Fleurus (an early TYW battle).

Early in lockdown I'd been playing around with the Portable Morschauserscope and hacked the code to update the unit types, maps etc and I'd done a Marston Less scenario for First Newbury in 1643 intending it for remote play.  

As we only had about an hour and a quarter of game time and a lot of players, I just went with the historical setup. 


The game is played on a grid three zones wide (left flank, centre, right flank) and seven zones deep. There is a extra column at each end for dragoons. Once individual units are deployed in a zone, they form a part of an indissoluble unit - this models dividing the army up into brigades. It is those larger elements that then manouvre, essentially straight forwards or backwards! Although there is scope for victorious cavalry to turn in on the infantry centre.

The Kings Army was covering a siege east of Newbury and Essex marched to lift it. Charles/Rupert inexplicably gave up a critical terrain feature (Round Hill) which was immediately occupied by the Parliamentarians who emplaced artillery on it which threatened to dominate the battlefield.

Both sides had 12-14,000 men, the Royalists had superior numbers and quality of cavalry, while Parliament was superior in Infantry. The terrain to the north (left) was very broken, so poor ground for cavalry. The main cavalry action was fought on Wash Common to the south, but ultimately Charles had to take the guns on Round Hill or be forced to retire so the onus of attack was on the Royalists.

John A was Essex, Russell had the Parliamentarian Horse and John B the Foot and Guns.
Tim was Charles, Pete had the Royalist Horse and Prince Rupert, Micheal the Royalist Foot.


After a relatively ineffective cannonade, the Parliamentarian Horse charged on the right and was successful in moving up both lines of cavalry. You get one activation for free, any subsequent moves have to be diced for, and any failure ends the turn. I like that for this period where armies are relatively cumbersome. 

The initial cavalry melee was indecisive, both sides had supported lines and Essex's Dragoons on the flank counteracted the superior quality of the Ruperts cavalry.


After a bloody struggle however, eventually Rupert was victorious, albeit suffering three hits (lines rout on four hits). The Royalist guns had cunningly focussed on the second line of Essex's cavalry, inflicting two hits and firing so enthusiastically that one battery ran out of ammunition. 


Rupert managed to restrain his victorious troopers from pursuit, but Essex's guns on Round Hill managed to rout them anyway. The last Royalist battery exhausted its ammunition firing on the remaining Parliamentarian cavalry.


Rupert went to join the Royalist infantry in the centre, while his second line swept away the remains of the enemy horse, and set off for the rear to loot the baggage. They did actually manage to rally before disappearing, and turned in on the rear line of Parliamentarian infantry. (I forgot to take a photo of that). Sadly, cavalry are really bad in rough ground, and there were an awful lot of Pikemen in there.

Anyway, it was attack or lose for Rupert, so the cavalry attacked and the first line of infantry attacked, the second line lagged behind somewhat. 


The Royalist cavalry were repulsed however, albeit not without loss, and in the absence of any meaningful artillery preparation, the first line of infantry were also routed. Essex's first line was in some disarray (three hits) but the chances of the last line of Royalist infantry carrying the hill was slim, so we called it a day at that point.

It was interesting to get the rules out again, although I was a bit rusty. I do like the clumsy movement, although they suffer a bit from lots of fiddly things to remember in terms of dice modifiers - I think some tables would help with the presentation. The main issue I have is with the combat system, once formed each 'line' has a morale/SP value of four, regardless of of how many or few units there are, whereas line firepower is based on how many units there are. This is fine until you get two sets of weak lines engaging each other, in which case the combat never ends (as on the left flank here). It would be better to compare the relative strengths to determine combat outcomes, not the absolute strengths.

I am sure it is fixable quite easily, but I'm not sure I can be bothered at the moment. 


Friday, 30 June 2023

Marston Moor

 We've done Marston Moor before, but Russell missed out so John A put it on again. Russell is fairly familiar with the battlefield as he used to walk his dog over it!

The scenario is using Johns Pike and Shot Squared rules, run remotely over Zoom using Powerpoint to display and manipulate the toys.

I honestly can't remember who was who, I'll hazard a guess that me, Pete and Russell were Parliament and Tim G and John B were the Royalists. Something like that anyway. I do recall that I had Cromwells contingent as a subordinate commander, as I've played this one a couple of times before.


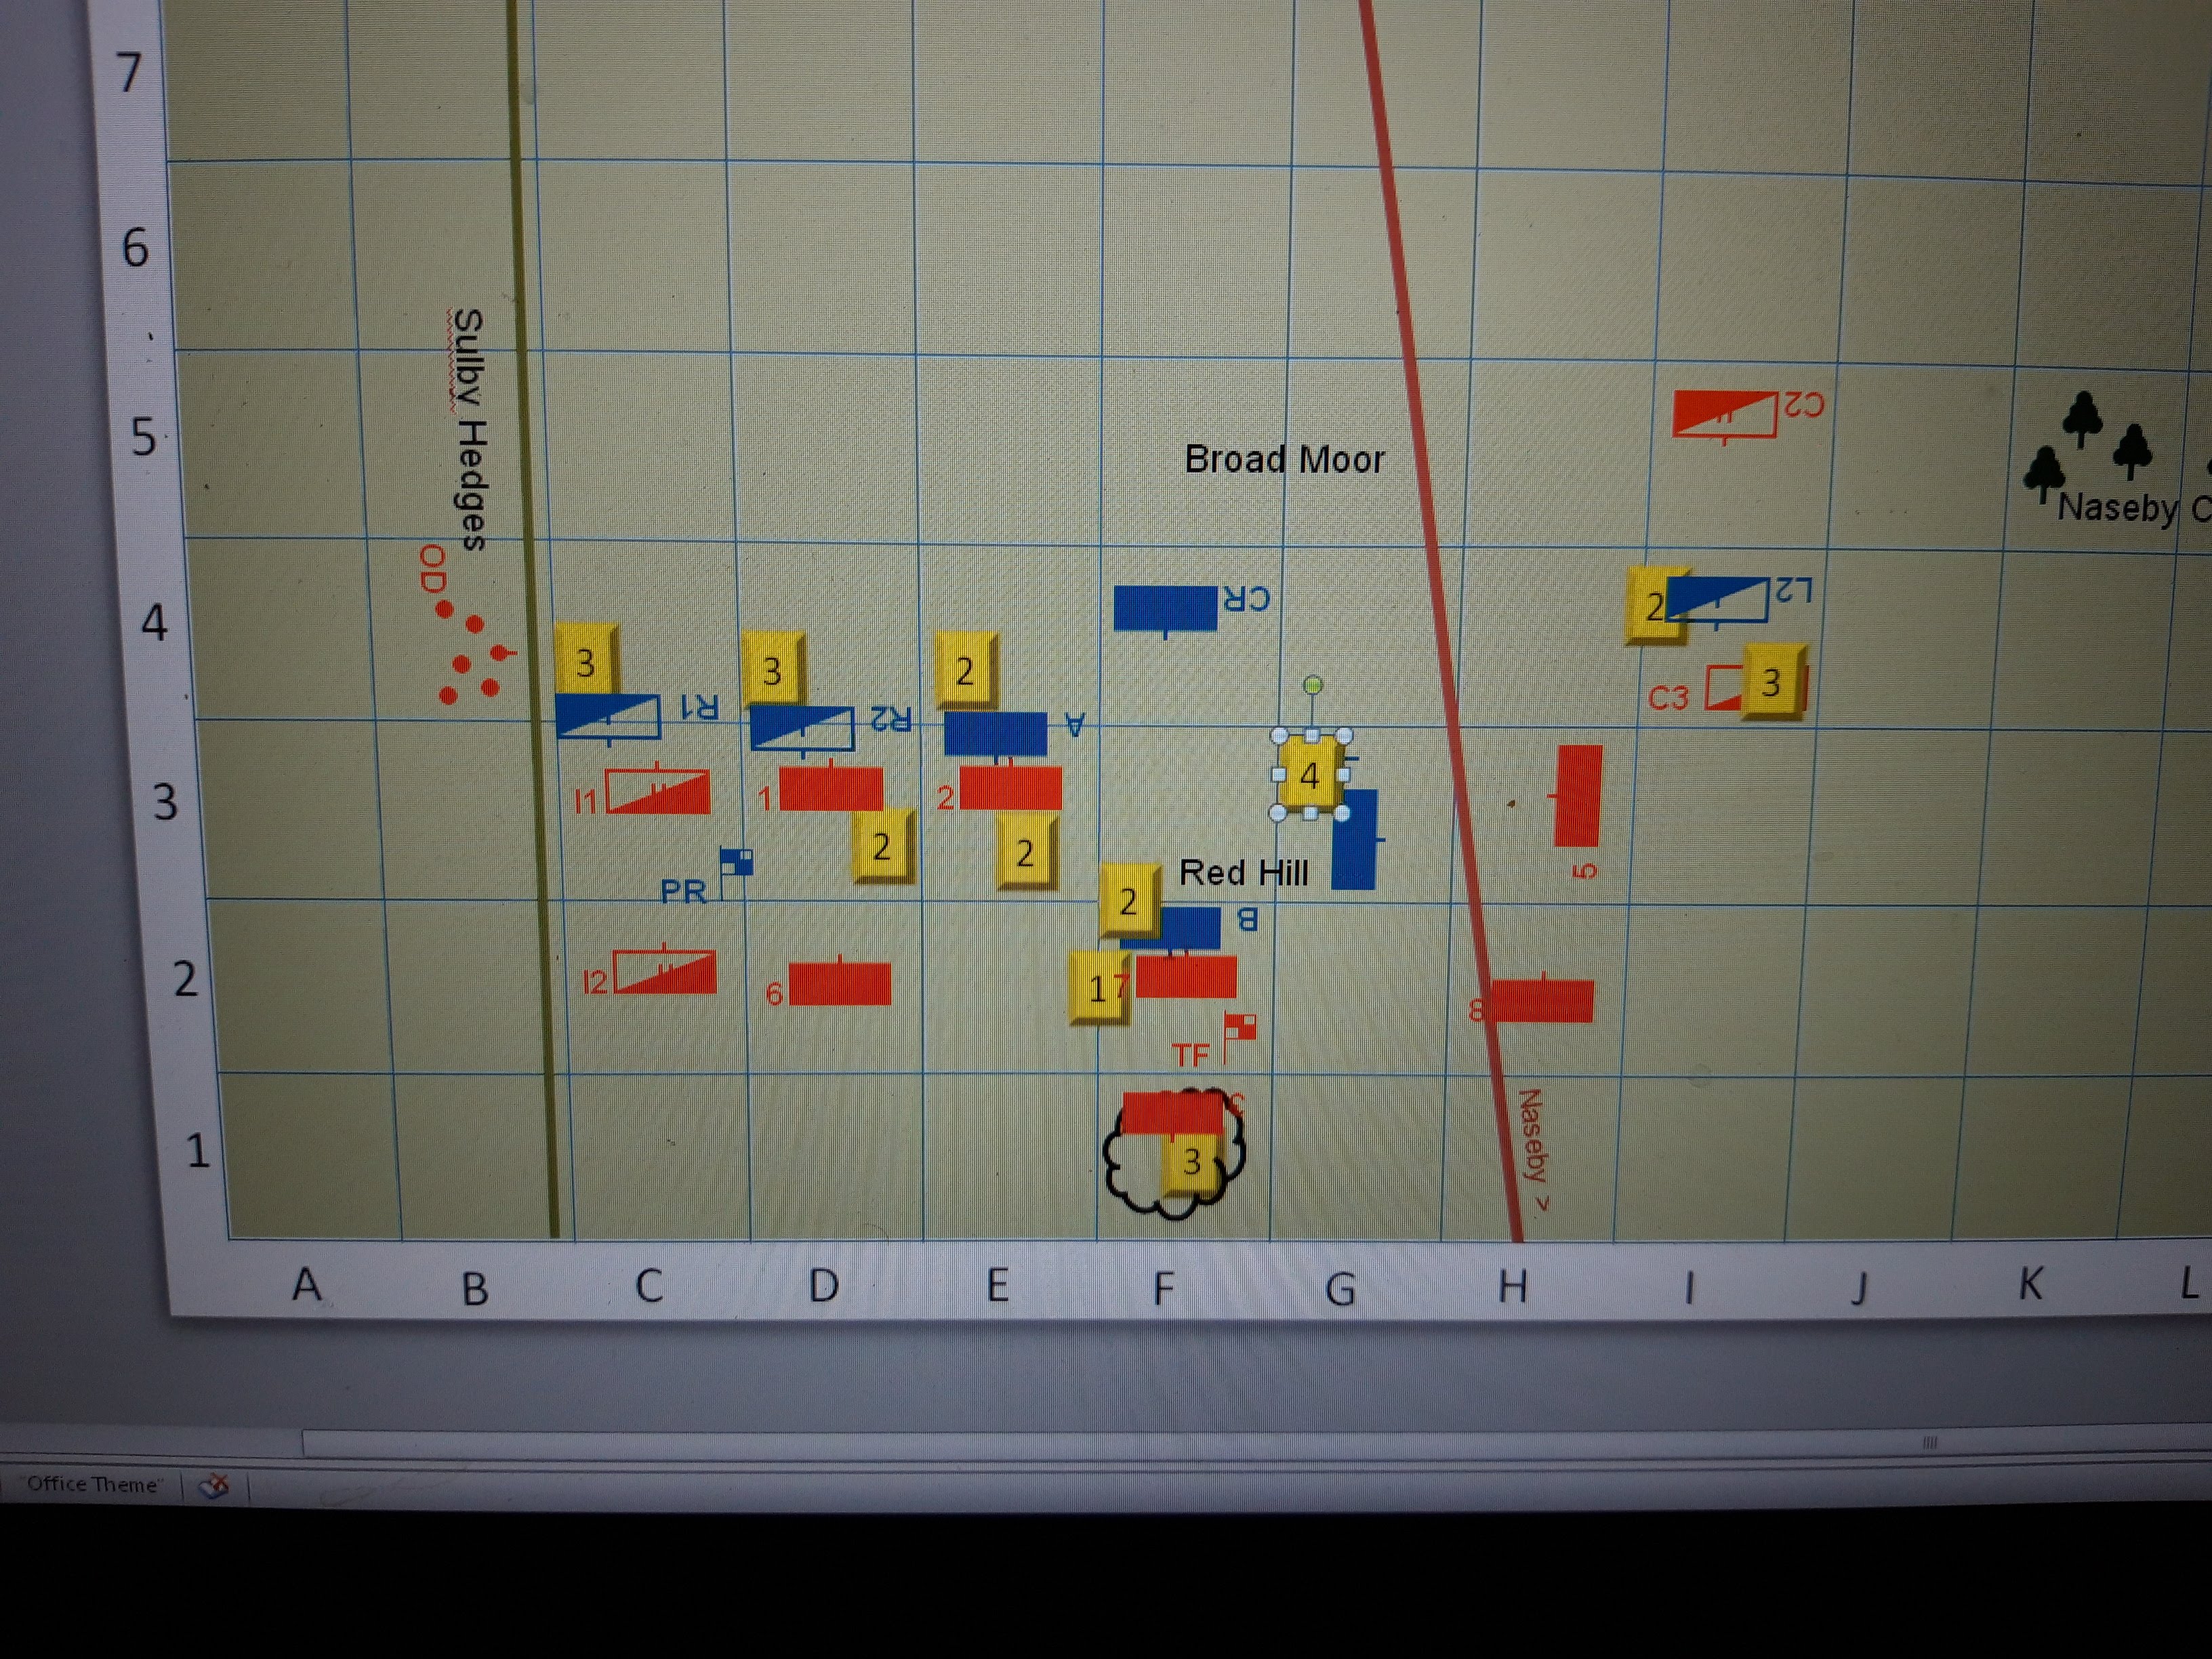
Prince Rupert is commanding the Royalist forces (blue) at the top, Parliament is in red at the bottom. My boys are the two lead cavalry on the left and the two infantry units on the left in the front rank. They are rather better than the raggedy Covenanters who are tagging along.

Rupert has a forlorn hope lining the hedge in front of us. The Royalists are outnumbered, but their troops are rather better.


First thing was to get out superior cavalry numbers into action. They moved up and shook out into line on each flank. The Parliamentarian infantry moved up, although a couple seemed to get left behind. Not sure what happened to them.


Ruperts infantry advanced over their Forlorn Hope, reabsorbing them and the infantry exchanged astonishingly ineffective musketry while the cavalry action got underway.


The first Royalist horse on the right break, but one of our chaps is routed too. Over on the left it is honours even. Our infantry are starting to win the firefight, although the second line has adopted a very exciting echelon sort of formation. 

The Royalist rear line isn't quite sure which way to go, and Rupert has got his reserve cavalry tangled up in an inconvenient enclosure.


Rupert had to take a break and John took the opportunity to show off his new Russian churches. Very nice indeed!


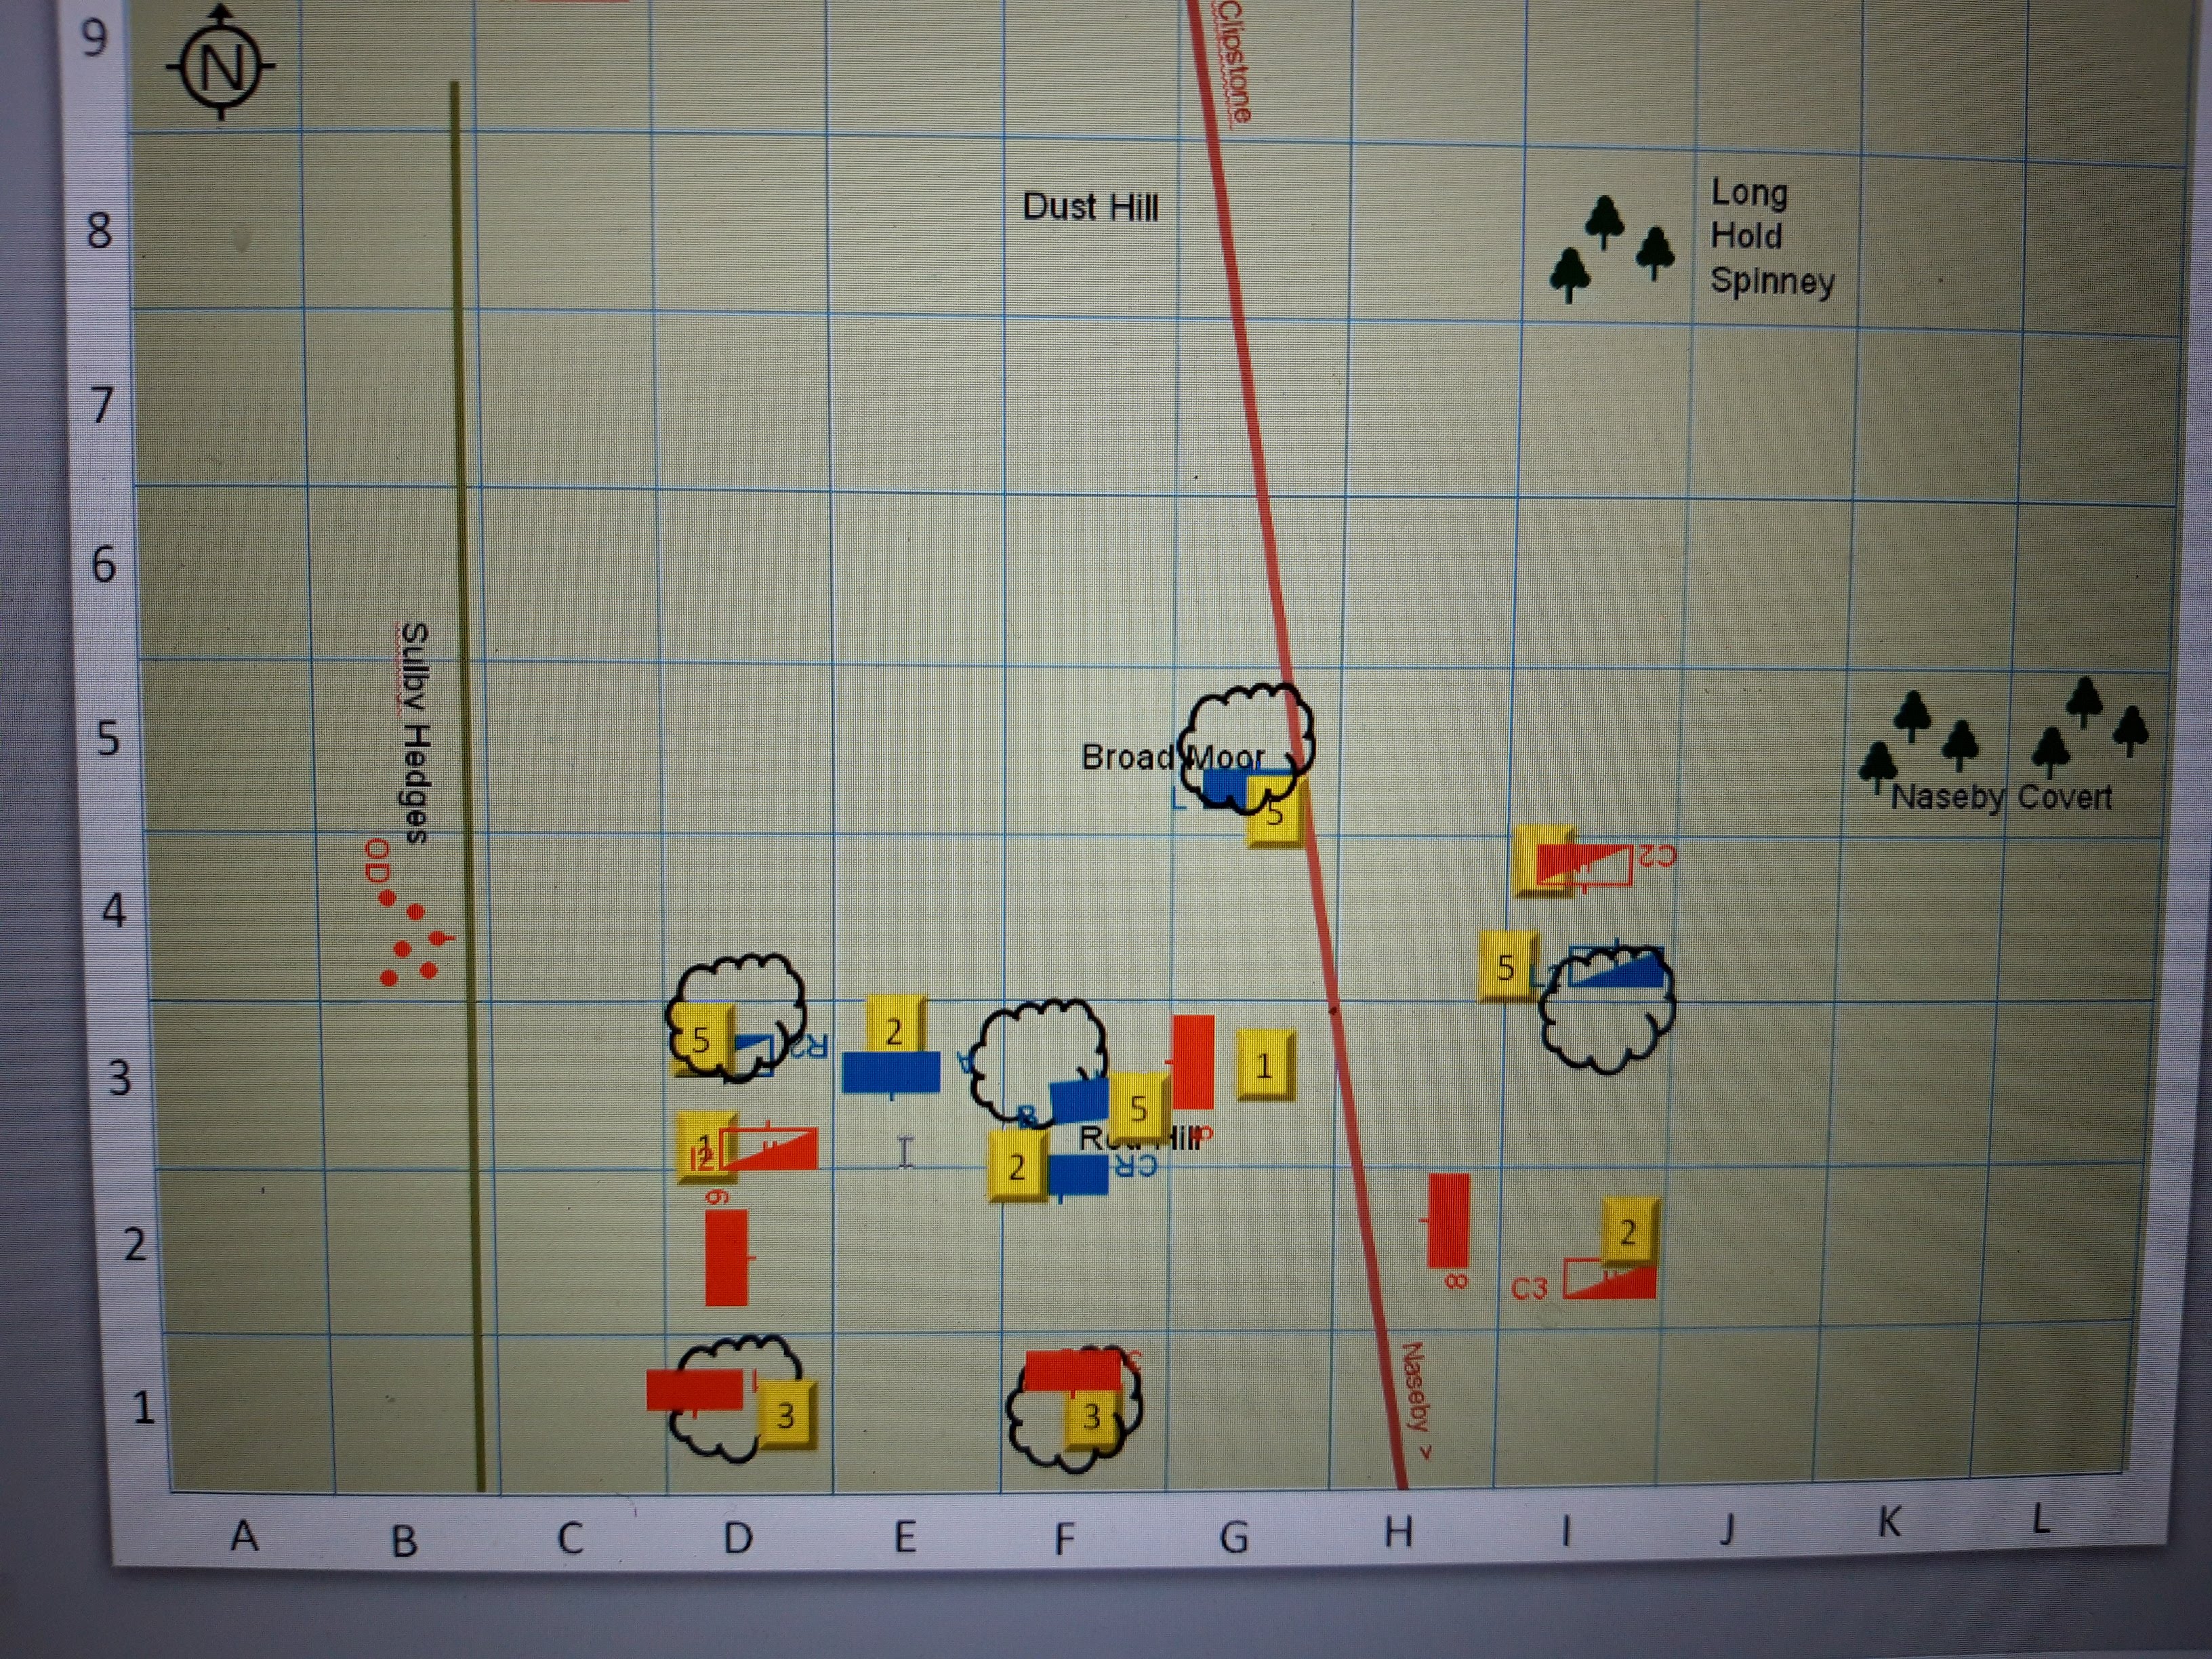
Back on the moor, Parliament is getting the upper hand. The Royalist cavalry is largely broken, and their infantry is looking very shaky.


The Royalists begin to collapse.


As the last of their cavalry routs, the few remaining Royalist infantry are looking distinctly isolated. Time to march back where they came from.

This is a tough scenario for the Royalists, but I do think they can win it, even if the odds are long. In this game they would have been better waiting for the Parliamentarian infantry to charge them, but there isn't much they can do about the cavalry imbalance apart from try and gain local superiority and beat them in detail.

Anyway, having unwisely offered this opinion, we swapped sides and did it again! This time Russell was Rupert and I commanded the Royalist infantry.

This time we let them come to us.


The Parliamentarian infantry took some losses from the Forlorn Hope as they advanced, while the enemy cavalry formed up on each wing.


Our infantry just held their ground, shooting away, although I re-aligned one of the second rank units to better cover the left flank. As we had local cavalry equality on both flanks, we charged. What else is Royalist cavalry going to do?


The cavalry battle began to go our way as they tardy Parliamentarian reserves moved up the far left. Their infantry overran the Forlorn Hope and ran straight into our infantry line. Personally I'd have rallied before advancing. 


We broke both the Parliamentarian cavalry on the right, and even Cromwells cavalry were forced to withdraw on the left. Most of the first line of Parliamentarian infantry were also broken now, and their second line was far too back to support.

Unfortunately the enemy reserve cavalry on the left managed to flank charge our victorious horse, breaking one of them. Still, this was looking much better than the same stage in the previous battle. 


Our infantry busily set about rallying while our cavalry re-focussed on the left flank. Cromwells cavalry were slowly reorganising.


The reserve line of enemy infantry now moved up.


And another firefight erupted.


At end game it was looking awfully like a draw. We still had our original five infantry left, plus three cavalry. Fairfax was down to four infantry and five cavalry, and Rupert was still in the field. Not exactly a shattering Royalist victory, but certainly much better than the previous three times we've done.

We were trying out some rules revisions in this game, particularly around interpenetration and cavalry pursuit, and I think the changes worked very well indeed. This felt much more 'in period' than some of the previous outings, which were still a bit Napoleonic for my taste. So much so, that I was inspired to have a think about retrofitting them to the Thirty Years War. Main challenge is how to model a Tercio and other large infantry formations, but I have some ideas.


Saturday, 27 May 2023

Naseby - twice!

 For our latest Tuesday/Wednesday Zoom session, John had produced a Naseby scenario for his Matchlock Squared grid rules.

Naseby was a showdown between the Kings Army and the shiny new New Model Army, although the latter still had a lot of bugs to shake out. For the game, Rupert was actually in command of the Royalists while the King looked serenely on from the rear. Fairfax commanded the Roundheads, while Cromwell galloped around with his cavalry.

Me, Pete and Russell took the Roundheads, Tim and Simon the Royalists. I commanded the infantry in the centre.


The Royalists are heavily outnumbered but their entire Army is rated as 'elite'(!). The Roundheads are more of a mixed bag. Iretons cavalry on the left are average, Cromwells boys on the right are also 'elite' whereas my numerous infantry are 'poor'. Oh, well, at least there are a lot of them. We also have some dragoons lurking in the enclosures to the left. Rupert is leading the cavalry on the Royalist right.


The Royalists shake out into line and march towards us. There isn't much else they can do, and it is what the Kings army did irl. Cromwells cavalry march out to meet them on the right. There isn't any particular benefit to multiple lines in these rules, but our deployment area is quite constrained, so we just have to grin and bear it.


The cavalry engage in melee on the right, which includes some slightly iffy diagonal moves. I'm increasingly unconvinced by 'in square' combat in these sorts of games as it produces some very strange positioning results. The rest of the Parliamentarians step forwards a square, including our Dragoons who are now nicely lined up.


Battle is joined. The Royalists just charge into contact along the whole line, relying on on their troop superiority. It is a bit scary as their infantry get five dice in combat while ours are only on  three. Our defensive fire doesn't make much of a dent.


The Parliamentarian infantry vanish like mist in the sun, while our cavalry on the left are doing surprisingly well, and Cromwell manages a flank attack on the right, routing one Royalist cavalry unit.


Although the Royalists have destroyed lots of Parliamentarian infantry, suddenly their flanks are looking very vulnerable and Ireton and Cromwell start to mop them up.


Suddenly it is all over, the cumulative Royalist losses means their army just collapses as the Cavalry rout, the infantry are just overwhelmed and Rupert is carried wounded from the field. It turned out to be a mini Cannae, just like the real battle.

As that was fairly short and sharp, we set it up again the next night with the sides reversed. I was the King this time, and Pete took the cavalry. Tim was Fairfax and Russell was Cromwell.


The Royalists went for another headlong charge, but this time shook their whole force out into line so they would all get engaged.


Cromwell got stuck in, but otherwise the Parliamentarians stood their ground. This time Rupert was on the extreme flank, which was perhaps a bit risky considering the lurking Dragoons.


The Parliamentarian defensive fire was less than impressive! Most of the Royalists units made contact with no or minor losses.


And soon there was a gruelling melee going on between the infantry, in which the superior quality of the Royalists told. The cavalry battle was all the wrong way round, Ruperts wing was losing heavily to Ireton, while Cromwells boys were taking a right kicking. As the Royalists were so heavily outnumbered I pushed the King and his escort forwards rapidly. 


The Parliamentarian centre collapsed and the victorious Royalist infantry pressed on the confront Fairfax himself. Perhaps the cavalry melee would prove to be irrelevant?


Ruperts wing collapsed and he withdrew wounded from the field, pursued by Iretons cavalry!


It was a real dog fight in the centre. The Kings Guard now engaged Fairfax, but the Royalist flanks were collapsing. Broken Parliamentarian infantry fled to the rear.


Fairfax was wounded and retired, but suddenly the Royalist Army fell apart, assailed from both flanks, with only the Kings Guard in any semblance of good order. Charles decided discretion was the better part of valour and withdrew from the field to join Rupert in the rear.

Those were both really close run battles, can the superior quality of the Royalists beat the more numerous Parliamentarians? , although in both cases it turned into a version of Cannae as the Parliamentarian infantry was driven back, exposing the Royalist infantry to being outflanked.

There are still some aspects of these rules I'm unhappy about, it is mainly the way the squares work, they are simultaneously far too restrictive but also allow far too much freedom of movement. I prefer the approach taken in 'Marston Less' where regiments are grouped into blocks  in either the centre or one of the flanks. The combat system in those rules leaves something to be desired, but in terms of the manouvre of formations, it is spot on. Having said that, Matchlock Squared produces a fast and decisive game, with plenty of dramatic moments, which is all you can really ask for isn't it.