Thursday 30 March 2023

Truck Trio Part 2

 Avid readers will recall that Tim donated some 15mm metal trucks to my collection.


They didn't need any renovations apart from a bit of cleaning up, so I just re painted and based them. The only repair work was on the LWB Bedford as one of the sides fell off, I stuck it back on again with some very strong glue as there isn't much support to keep in place and fat fingered wargamers are bound to pick it up by the thin metal sides. if it happens again I'll add a tailgate to give it some rigidity.

I did think about doing some camo on these, but my Allied trucks are almost all in plain green to keep them generic, so I just did these in late war khaki drab (Vallejo Russian Uniform with a wash of Bronze Green).


They go some mud around the undersides and a drybrush of dust to pick out the highlights. I also did the windows mid blue with white 'highlights'. I didn't bother with any markings.


What colour to paint the tail beds? I'm sure irl they are painted the same colour as everything else (but could I find any colour photos of truck insides? no, apart from portee guns) , but they will obviously suffer some wear and tear, so I did them in khaki brown.

They got the usual bases with builders sand and grass, and a couple of magnetic strips. The LOG labels are for use as supply trucks in Megablitz type games.

I've now got quite a few Allied lorries, which got me thinking I've now got enough to put on a short compaign I've run many times before, but never in 15mm. I've already mentally planned the required OBs, and I just need a couple more bits and pieces and we'd be good to go on one of the Friday games. Watch this space.


Tuesday 28 March 2023

VCOW 2023

 An unanticipated benefit of lockdown has been the continuance of the Virtual Conference of Wargamers, which complements the face to face conference in summer. This time it ran in early February.

The conference adopted its usual format of a number of open sessions available to all participants, and some bookable ones. 

I mainly attended the open sessions, and particularly enjoyed the discussion session on Wargaming from Omdurman to Sarajevo where we broke out into discussions groups to examine particular aspects of the period. I came away with some very useful recommendations for books and games.

I didn't go to the bookable sessions as I've actually played most of the before - as we have an active and regular online gaming group, we got to playtest an awful lot of the games before they were run at the conference. See various other blog posts for details (Origins of WW1, Take that Hill, Doodlebuggers, Putins Heirs etc).

As an online conference, no particular eye candy to put up here. There will be full session writeups in the Wargames Developments Journal of course.


Saturday 25 March 2023

Napoleons Battles, Quatre Bras again

 After my recent experiment with Napoleons Last Battles I thought I'd give it another go now I understand the mechanisms better. Quatre Bras is the smallest scenario so I broke that out again. 


Reille and Kellermans Corps pile up the road to Quatre Bras, defended by Perponchers Dutch. I left D'Erlons Corps and all the leader counters off for this as I wanted to see if I could put up a better defence. I've also oriented to North-South.

As before I'm using the optional combined arms rules, but not leaders, cavalry withdrawal before combat etc.


Just as in the last game, the French pile forwards in an all out assault on Perponcher, and get almost all their units into contact on Turn 1. As before, I'm going to try and work the massively superior French cavalry around the flanks, while bludgeoning forwards with the infantry and using the two artillery units to make two combined arms attacks per turn if possible.


These attacks go slightly differently to last time. Bijland is routed but the other Dutch infantry are just forced back (at 6:1!). The French follow up, which pins the Dutch 5-4 in combat so they will have to attack next turn.


Pictons 5th Division and the Brunswickers turn up. The Brunswick cavalry move to block the French 4-7 cavalry. The Dutch are forced to counterattack. Unlike last game, the Dutch gunners bravely hang on, which blocks the route to Quatre Bras with a ZOC.


And manage to roll a DR (at 1:2), so the French 6-4 is pushed back. Medals all around! 


The French pile in with everyone along the whole front, but with the cavalry favouring their right. The Dutch 5-4 is surrounded by ZOC so is going to be destroyed whatever happens.


The 5-4 is duly routed and removed, and the artillery (1-4) and Brunswick Cavalry (2-7) are also destroyed in high odds attacks. There are just too many French and I've just managed to lose the best Allied cavalry unit, again.


It did take a French cavalry unit with it in an EX result. I was forced to commit the Brunswickers as otherwise there was nothing to stop the French cavaly simply riding into Quatre Bras! 12 Allied SP lost to 4 French.


Picton and the Brunswickers move up and try and form a semblance of a line. Their real problem is the possibility of being outflanked and caught in a 'buttocks of death' unable to retreat. One of Pictons brigades stacked with the Dutch (1-7) cavalry and supported by Brunswick artillery conducts a counterattack in the woods west of QB. Combined arms gives it a column shift.  


The attack succeeds and pushes back the 5-4. There is now quite a solid line around Quatre Bras, although the Allied left looks a bit exposed.


The French get stuck in. The difficult terrain and ZOC preclude any big flanking manouvres, so the French concentrate their efforts on the flanks, with diversionary attacks elsewhere. I'm trying to end up with a stack next to QB, forcing the allies to attack out of the town. 


The attacks everywhere are a stunning success. The Allies are pushed back along the line, even the 1:2 attack on QB works and the defenders are pushed out. The unfortunate KGL and guns next to QB are surrounded and then eliminated as they are forced to retreat.

The French are just too strong. Good job D'Erlon isn't here as well! 


Not so great for the Allies. 4 French down to 17 Allied,


Most of the Allied units were pinned by advances so forced to counterattack, which they duly do. The only unengaged units (British infantry plus Dutch Cavalry) get stuck into a diversionary attack to support the Brunswick attack on QB.


Amazingly all the counterattacks work and the French are pushed back along the line, no significant losses though. Quatre Bras is recaptured. Maybe this is a more even fight than I thought.


The French pile in again. Unfortunately the Allied units on the right have a wide open flank and are enveloped by cavalry. The French concentrate on QB with a soakoff against the units in the woods.


The French retake Quatre Bras and annihilate the exposed Allied units on the right.


Cooks Division is now getting close by and Altens Guards are marching on from Hal. The Allied units around QB are pinned in ZOC and forced to attack at 1:1.


The attack fails and the units fall back. This is starting to look like a more coherent  Allied line running SW to NE, although that Brunswick 3-4 looks very exposed.


The Allies are nearly at their demoralisation level (25).


The French make an all out assault again, reordering their units so infantry and cavalry are combined, and the II Corps artillery provides fire support from Quatre Bras. As usual, the focus is on worrying away at the flanks, with diversionary attacks elsewhere.


The exposed Brunswickers are destroyed and the rest of the Allies force back. Advancing French units pin the survivors in ZOCs. 


The Allies have hit their demoralisation level now.


But as the Guards arrive, they bravely counterattack and try to anchor a line on the woods on each flank. Being demoralised means the Allies can't advance after combat. 


The Allied counterattacks fail, but after retreating there is now a nice concave Allied line anchored on the woods. Try attacking that Ney!


Which the French duly do, focussing on the flanks again. The terrain restricts how many units can be deployed, and the French concentrate on the extreme flanks, with soakoffs in support.


The Allies are pushed back, and once more French advance and pin them.


The Allies counterattacks fail and their line falls back further. Their left is now anchored on that stream, but their right is now hanging in the air (and anyone who can count hexes can see that 4-7 just itching to outflank those 6-4 Guards Brigades).


I call it a day at that point as the Allies have no hope of salvaging a win now.

That played better, I'm getting the hang of it, but I do think this scenario is hideously unbalanced. The Allies actually have more stuff than the French, but it gets chewed up in  bite sized chunks as it all arrives piecemeal. 

I had a look on BGG for some suggestions and the consensus seems to be that you have to use the (campaign) leader rules or the French can just attack everywhere with everyone and pull wildly unrealistic flanking manouvres. So I guess that will be the next trip to Quatre Bras, I can see that will be much tougher for the French, with Neys command limit of one facing off against Wellingtons four.

That apart, I'm getting some ideas to put in my own rules. I really, really dislike the bloodless retreats although I do like the back and forth of the heavily AR/DR focussed CRT. I'm now thinking DBA type modified opposed dice rolls for combat but with successes and failures generating retreats and a variable number of hits as well. Similar to the method I use in Panzergruppe. Units are only removed once their maximum hits are exceeded, and before then they can be rallied off. Food for thought anyway, which is the whole point of these experiments. 


Wednesday 22 March 2023

Renault R35 turrets

 While I was sorting out the Fowler tractor, I came across some old resin R35 turrets. I recall they were donated by Tim, and I had some vague idea about using them as substitute turrets for my H39s so they could pretend to be H35s. 


I rapidly realised that wasn't going to work as they seem to be 1/76th. I think they'd been carved off some resin bunkers, so I thought I may as well do them as fortress turrets. We do go to Normandy sometimes for games and they may be useful.


I just did them in standard three colour camo. There were actually three turrets but the cupola had fallen off one and it wasn't worth trying to bodge it up so I just painted two.


They got an inkwash (more obvious here around the turrets) and a light drybrush to pick out the details. Job done, and into the fortifications box they go.


Saturday 18 March 2023

One Hour WW2 Bulge

 Another tryout of the new hex based OHW rules. I thought I'd give it a go with my old Battle of the Bulge scenario, the German attack on Rocherath, originally reported here: https://tgamesweplay.blogspot.com/2020/02/the-twin-villages.html

The revisions from the Leshnow game were to restrict the effect of artillery bombardments on movement to just knocking one hex off, and if an assault failed, the attacker took a hit as well as retreating.


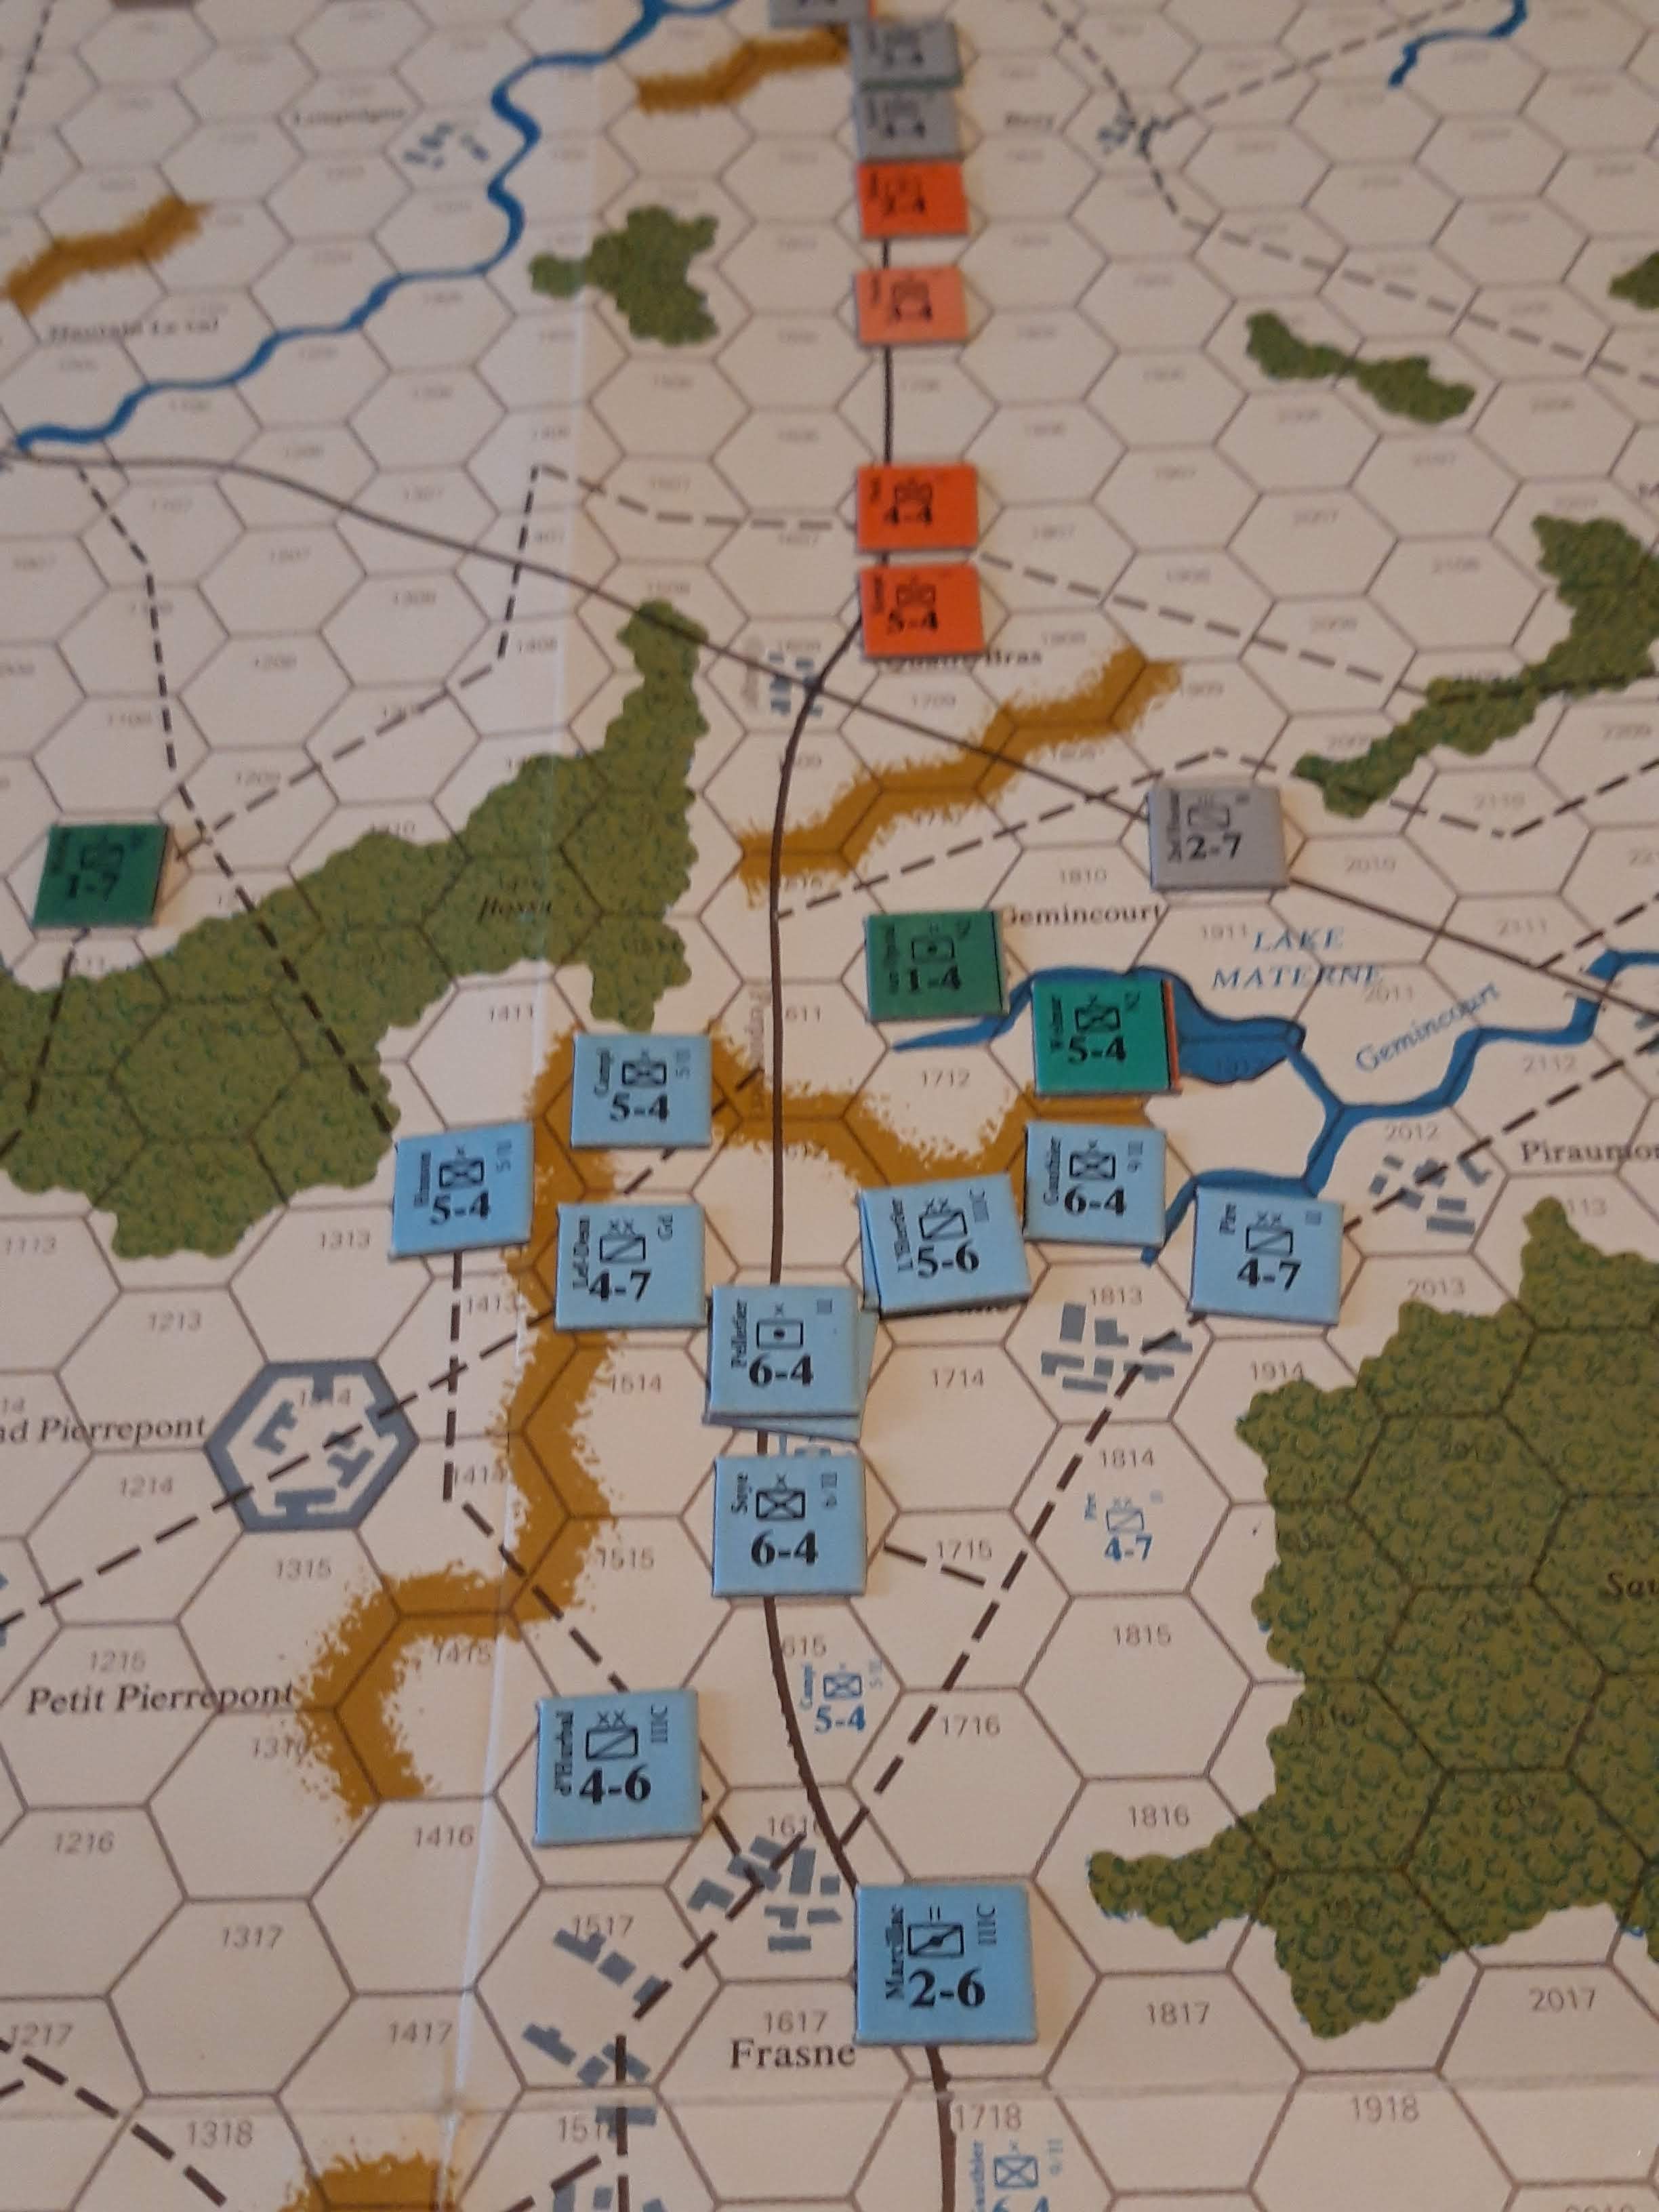
I set up an approximation of the terrain on my Winter Memoir 44 boards and the Bulge expansion set. Rocherath and the vital crossroads are off to the left. Densely wooded hills to the north and south of the road leading from the Reichswald in the east. The sole victory objective is possession of the crossroads at game end.


The gap is held by two Green battalions of 99th Div, dug in beside the road. I have oriented the hexes so the units face east. Reinforcements from 99 Div and the veteran 2nd Div are en route. Using my 6mm Northwest Europe stuff for this, a generous two bases per unit this time. 


277 Volksgrenadier Div poised to attack. Two Green infantry regiments of two battalions each, and the Divisional Fusilier battalion with the divisional Hetzer company (so rated as Heavy Infantry). In the rear is a battalion of 12th SS Panzer Div, motorised infantry supported by a company of Pz IV (so alse Heavy Infantry). 


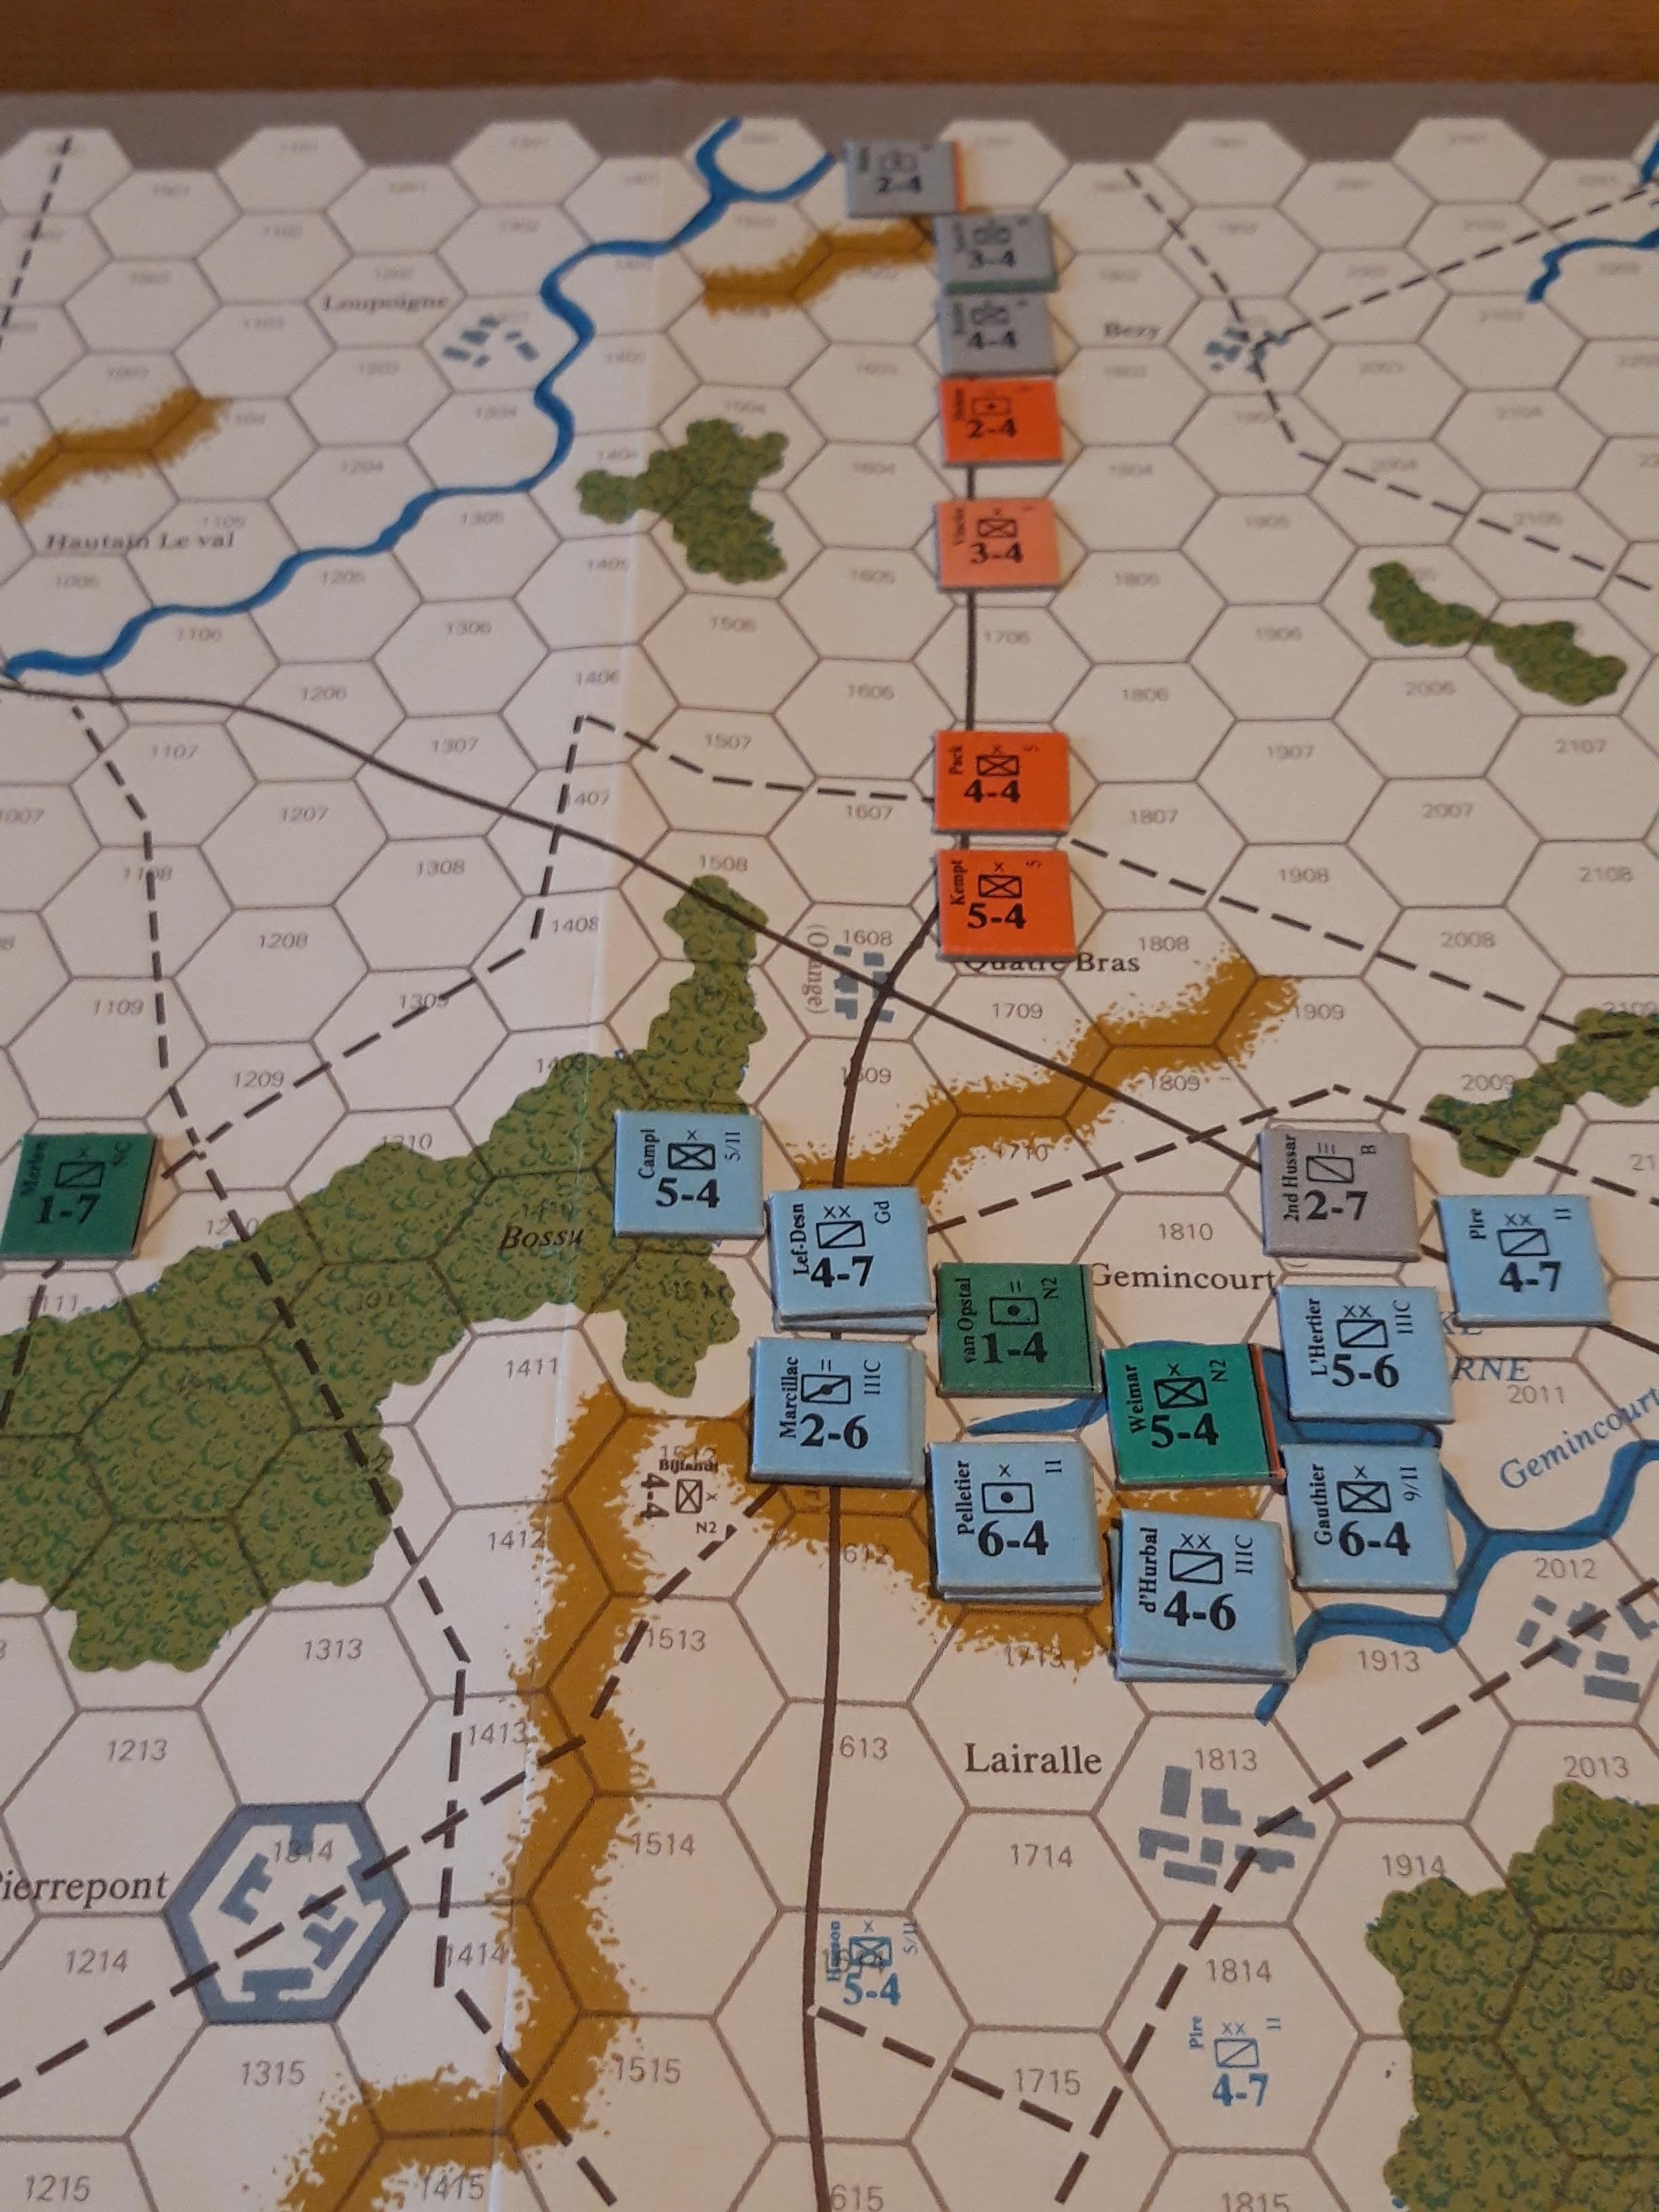
The Germans have to enter along the road, the VG Regiments leading, then the Fusilier battalion and finally the SS. Historically the SS battlegroup turned up when the original infantry assault failed and the 12th SS commander got impatient at the holdup. These were the tanks which overran Charles Macdonalds rifle company as described in 'Company Commander'. 

The restricted entry area is a bit of a problem for the Germans as they need to avoid getting in a huge traffic jam which will hold up their reinforcements. I got in a bit of a mess working out the pro rata movement for the road column, so might need to think about that.


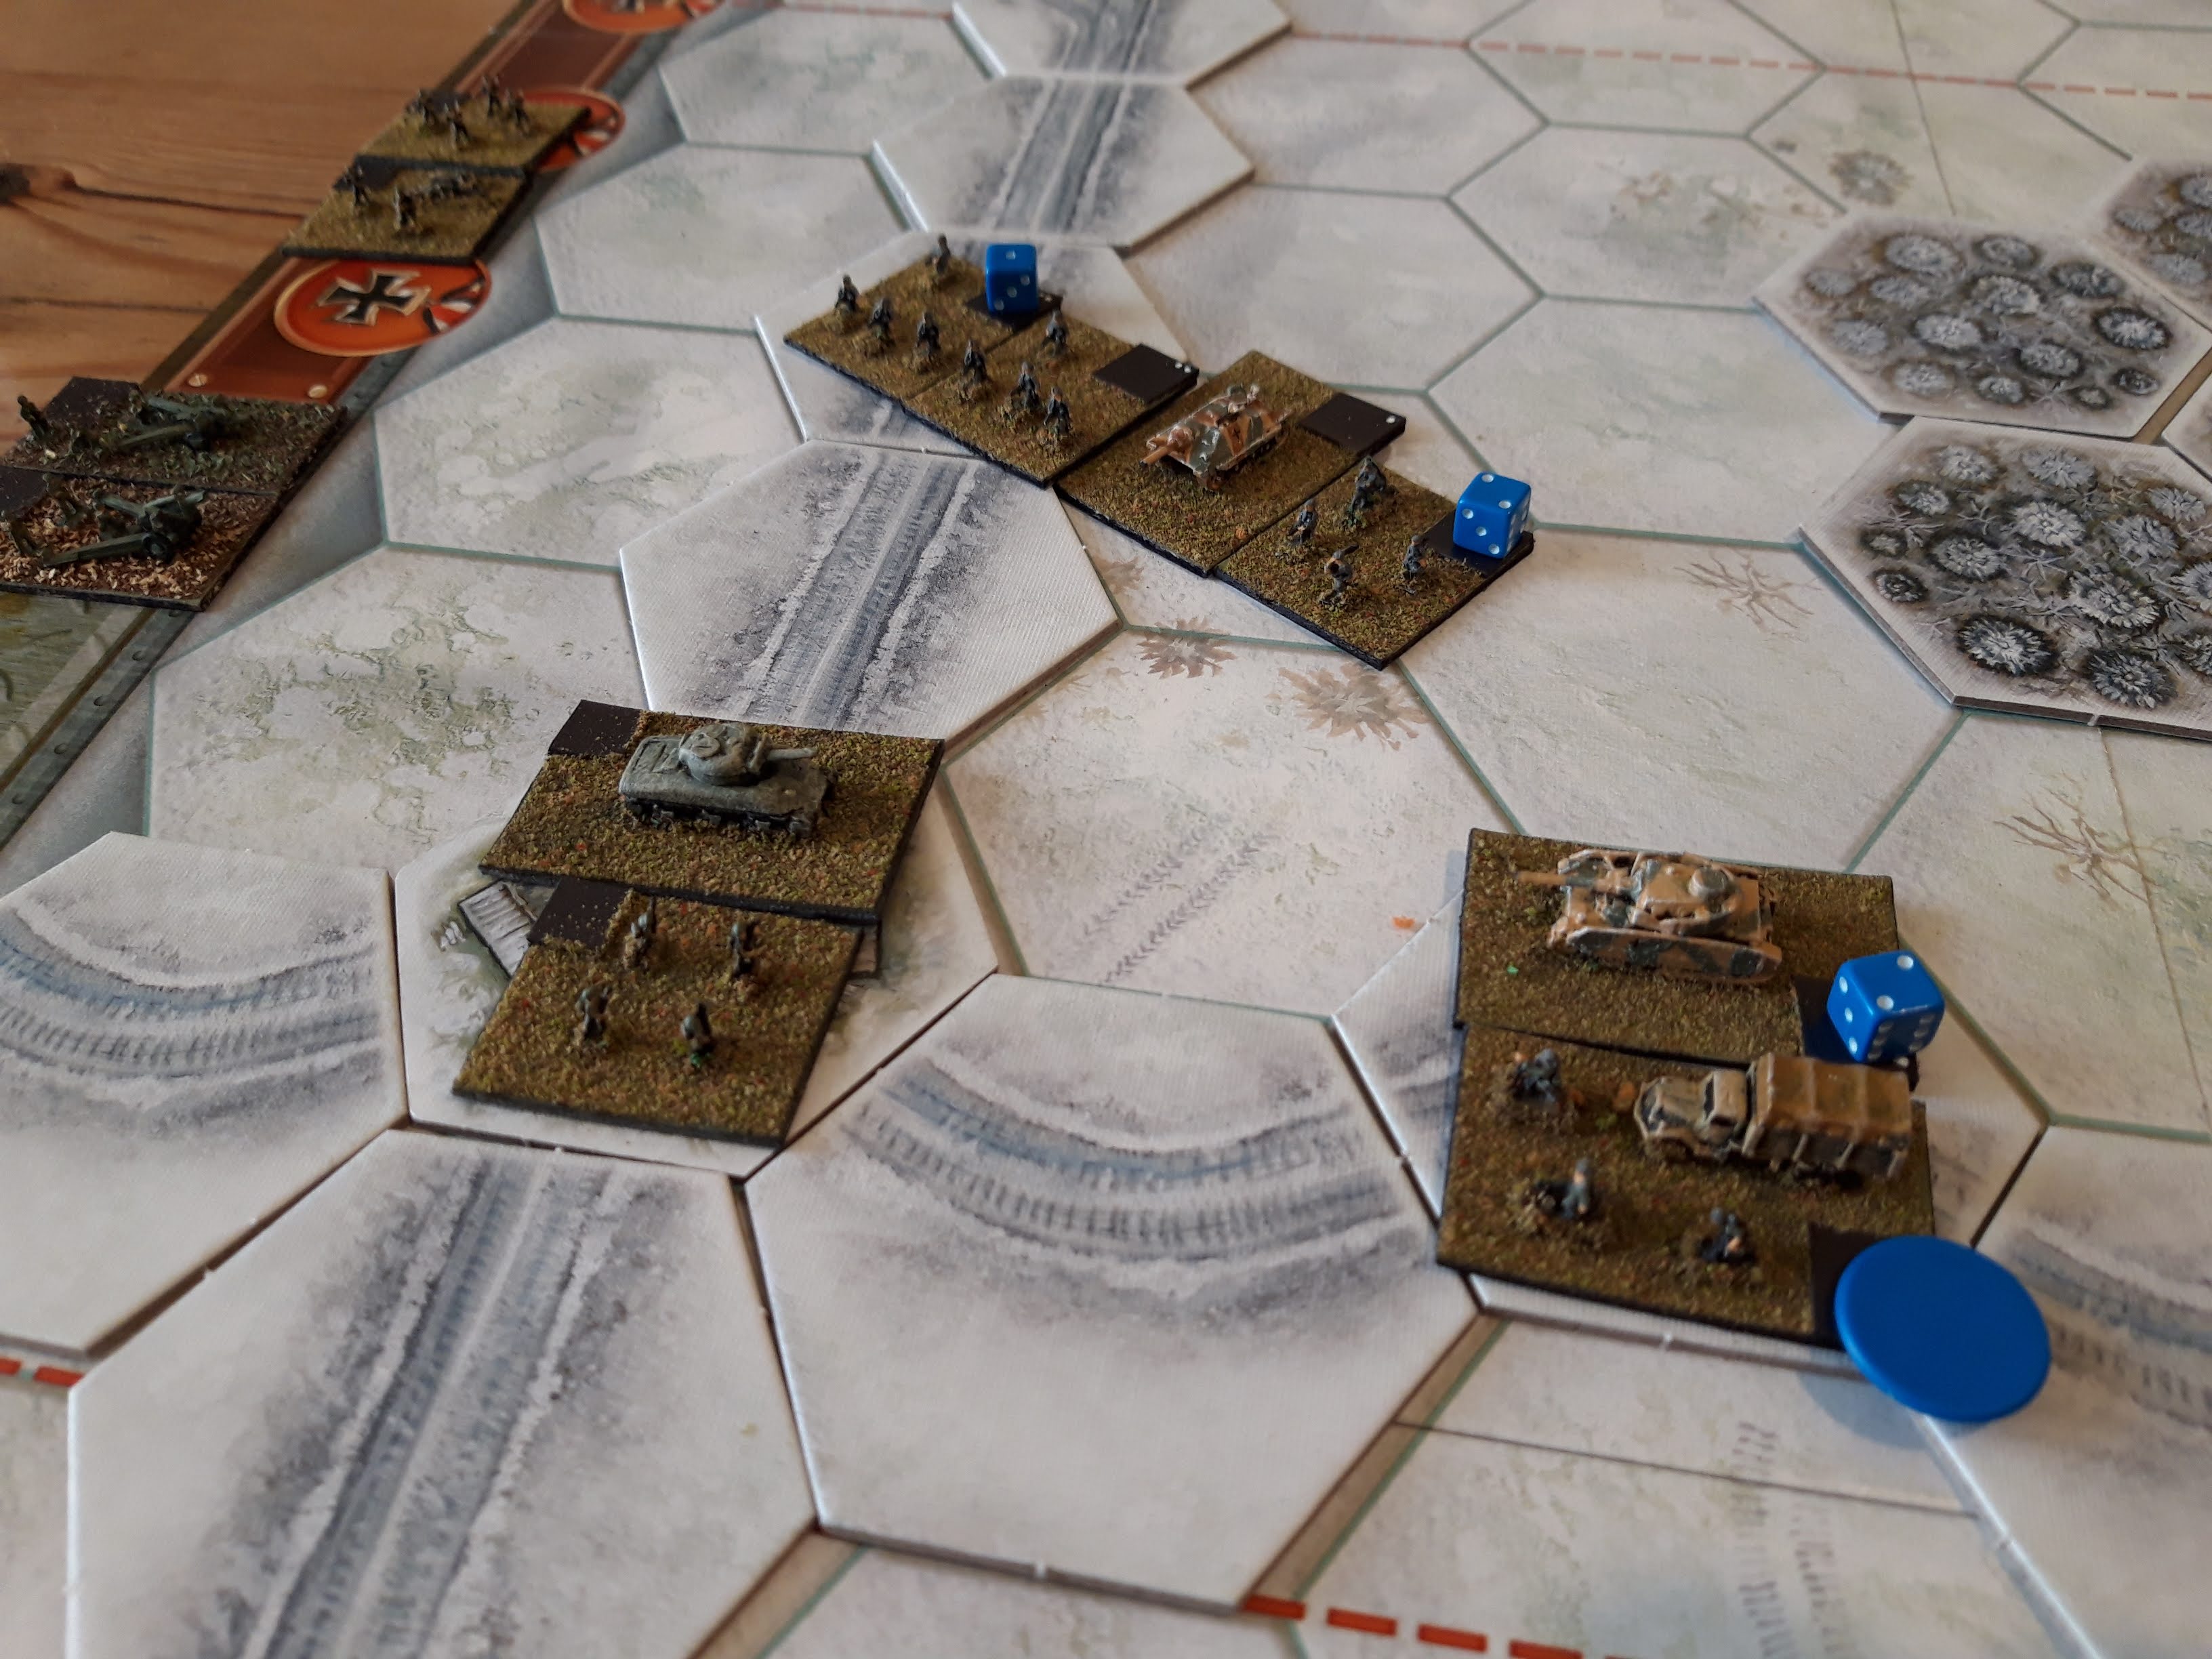
The preparatory bombardment knocked one SP off the bottom US battalion but was otherwise ineffective (as it was historically). To make room the Germans somewhat unwisely put one battalion in range of the defences (visibility and hence fire, is two hexes in this version). This promptly attracted the fire of the thoroughly unsuppressed US, took 60% casualties and became disorganised. Ouch!


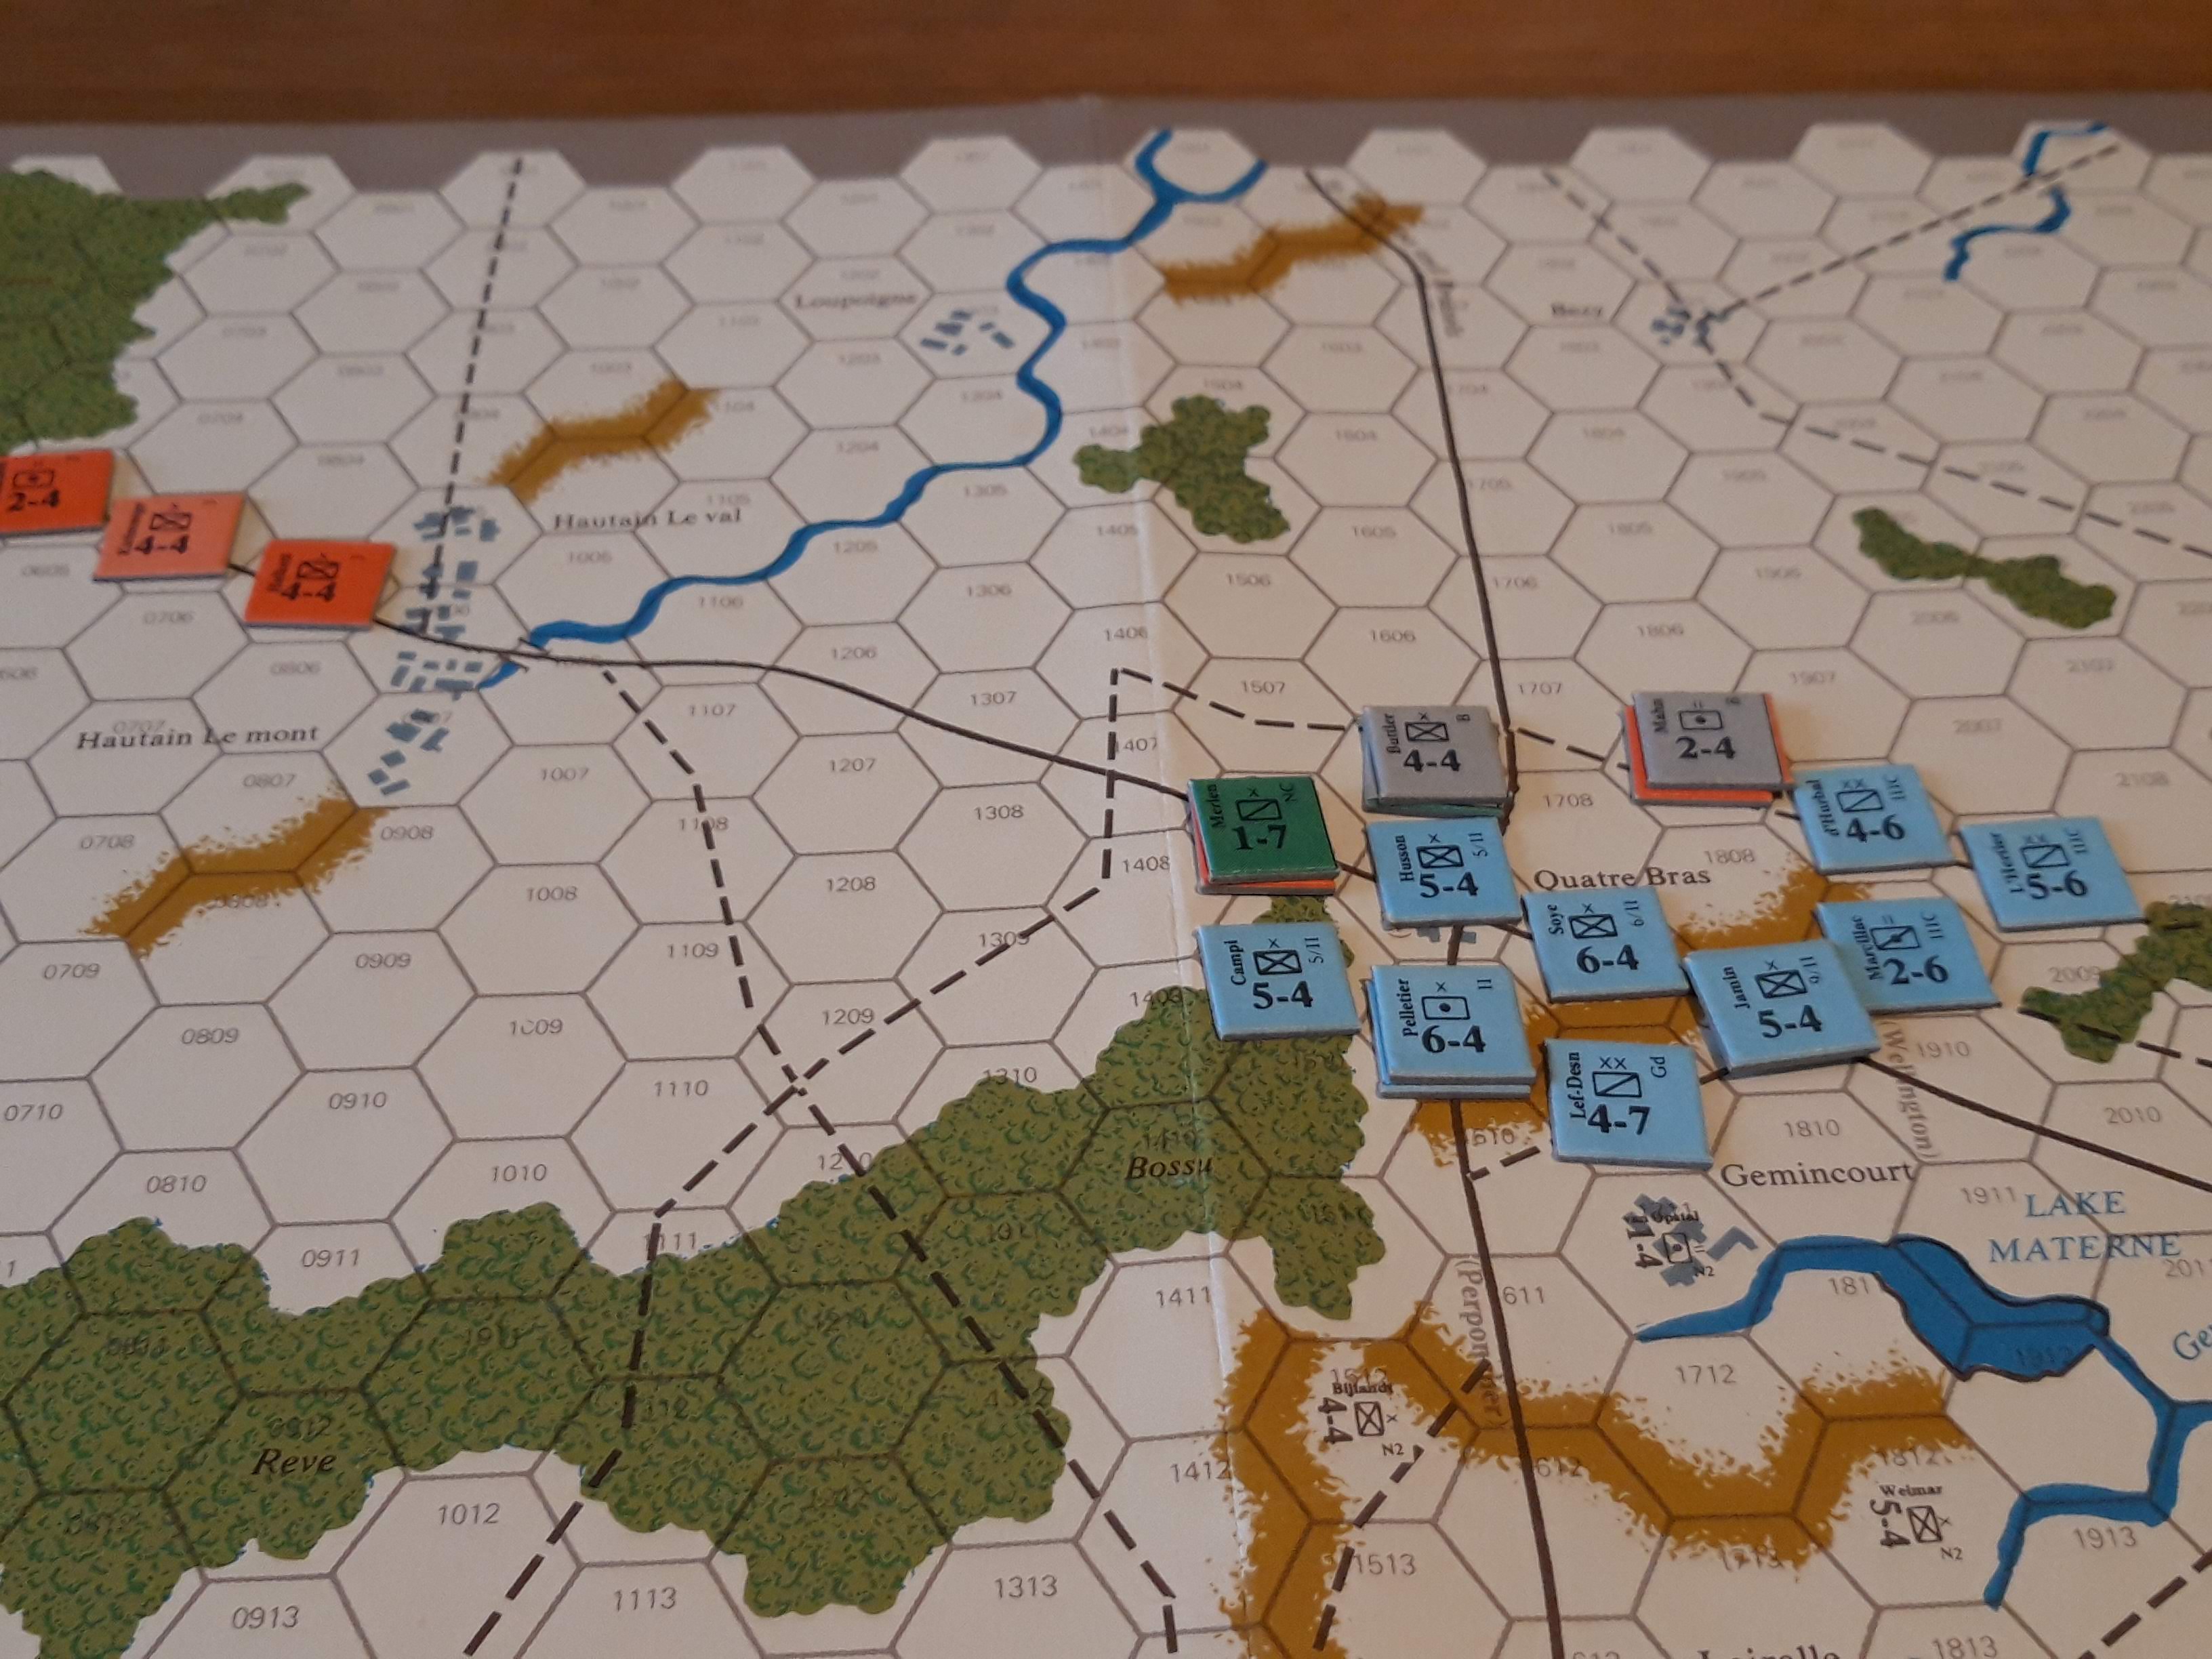
The Germans rallied some of the hits off, but concentrated US fire routed the battalion anyway. The Germans took the opportunity to bring more of their stuff on and try for a more concentrated assault. One VG Regiment plus the Fusiliers went left flanking, while the remains of the other VG Regiment went right to 'keep the Americans busy'. The motorised SS meanwhile hoped to slip around the woods at the top.


The Germans get closer. Covering fire from the Fusiliers chipped another hit off the southern US battalion. The ZOC don't stop units entirely, they can still move one hex, which means the Germans can infiltrate through the woods on each side, very slowly. The SS end run is going quite well.


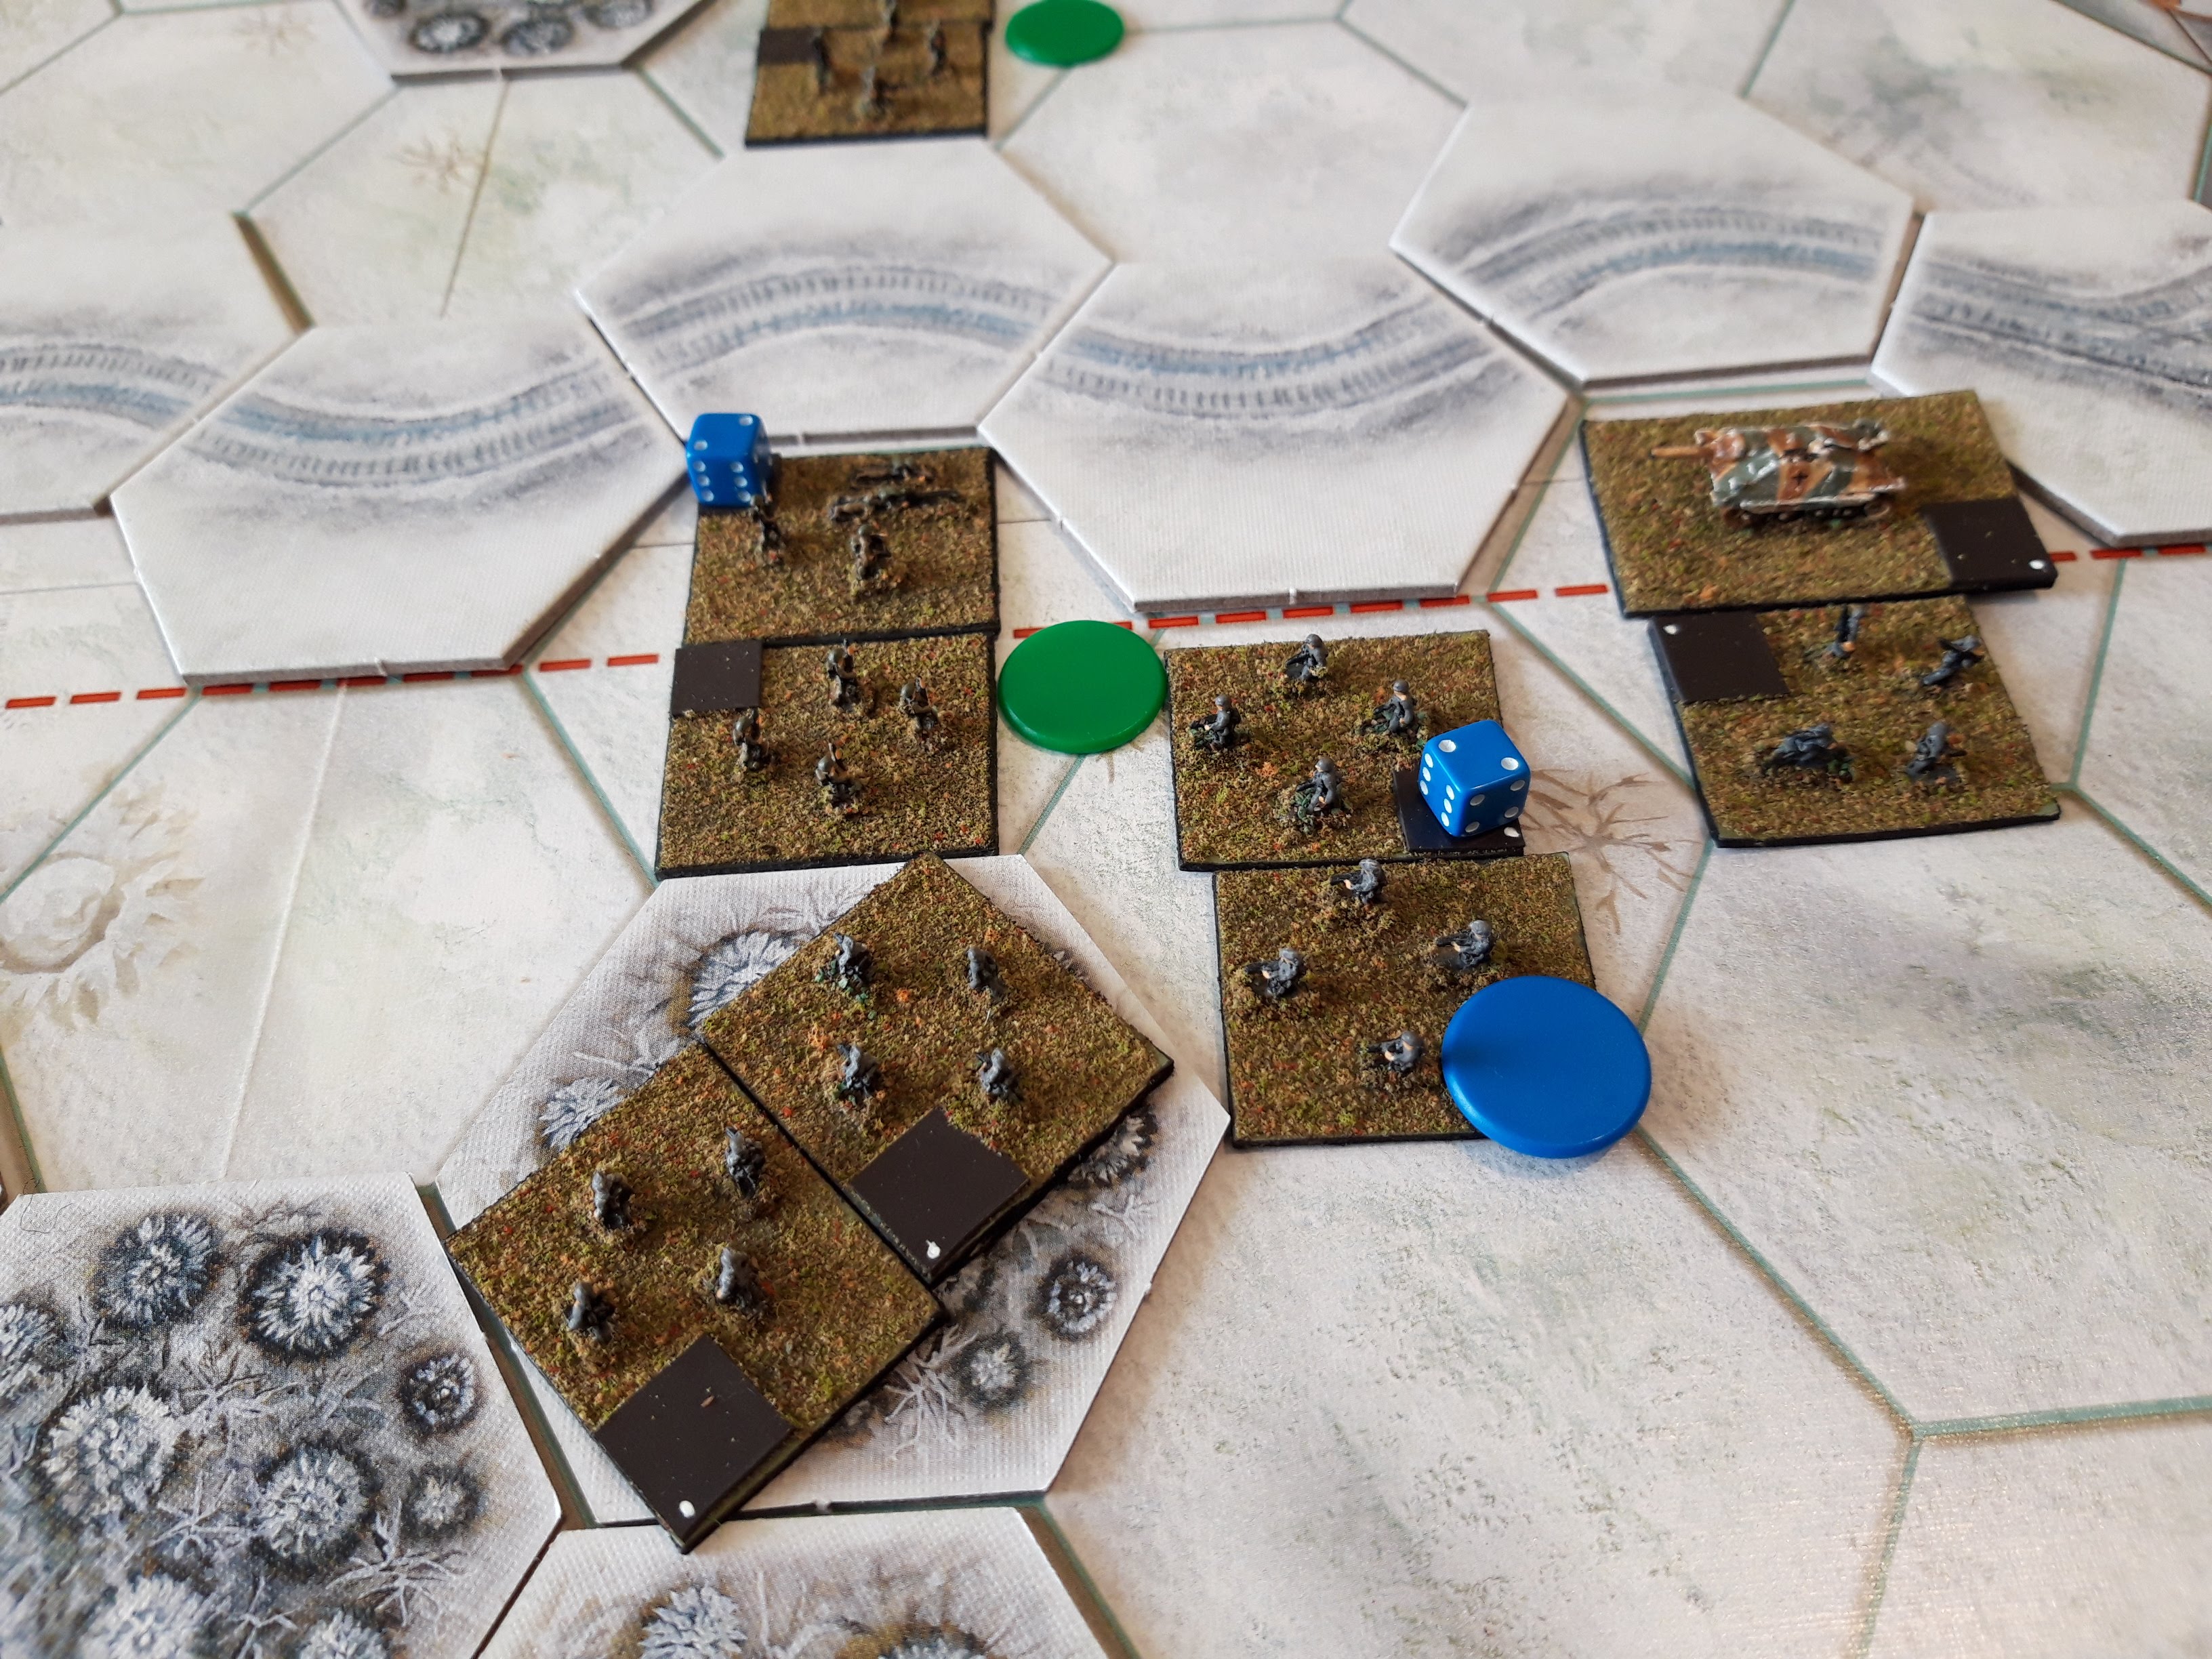
At this point reinforcements turn up. A Combat Team from 2nd Div (infantry supported by Shermans) and an artillery battalion. The artillery pose a huge threat to the German force composed almost entirely of infantry, four regiments of which are Green.


The US artillery duly strips 2 hits off one of the Germans and suppresses them (the blue counter). The US infantry rallied off a hit while covered by the artillery, only to lose it again as the Fusiliers covered the other VG battalion inflitrating the wood to the south. The US now had an unenviable choice, stay put in their foxholes and face a flank attack, or pivot to counter the threat and lose the benefit of their hasty entrenchments?


The German infantry in the north pulled the same trick, but the odds were much more even here and defensive fire chipped a hit off the attackers as they moved. The SS moved up just out of range of the US infantry near the town. US defensive fire coupled with artillery could obliterate them, so they needed more support. 


In the south US defensive and artillery fire destroyed one of the VG battalions. 


And as the Germans were hanging back, the US started digging in outside Rocherath (the green counter). Two turns to dig in.


The US stayed in their trenches (overall the long term benefit of cover exceeded the threat of a single flank attack). In the south the Germans assaulted and scored a whopping three hits! Coupled with the two hits already suffered, the Green US infantry broke and the Germans occupied the position.

The main road is clear, the SS move down to the road and await reinforcements from the Volksgrenadiers.


In the north the Germans assaulted and chipped a hit off the defenders but were repulsed with a loss themselves (the new rule after Leshnow) and had to fall back. The penalty of a forced retreat and a step loss for a failed assault felt a bit better. The Germans now need a full turn to move up, and given they also have two hits, they should really spend a turn rallying beforehand or their is a real risk US defensive fire will disorder them before they can attack.


Faced with this new development, the 2nd Div infantry abandon their half dug foxholes and move back into Rocherath. Artillery and defensive fire tear into the SS infantry, four hits no less, which is enough to make even veterans go disorganised, plus they are suppressed by the artillery fire. Veterans can take seven hits before they rout (unlike five for Green troops), so they can do this for quite a while if they keep rallying. 


A VG battalion moves up to support the SS who rally two hits off but take another devastating round of fire whcih takes them to six hits. The Fusiliers get a bit distracting 'masking' the remaining road defenders. I think I had in mind another flank attack. The VG in the woods rally.


At this juncture, more US troops arrive from the south. Another battalion of 99th Div and another Combat Team from 2nd Div. 2nd Div leads, this battalion is reinforced with the Regimental Cannon Company. The US now have equal numbers of battalions and artillery support. Oh dear. 


The Germans mass their forces before the reinforcements can make an impact. The SS rally again (removing three hits this time!) and the errant VG and Fusiliers move up as well. The latter are cunningly placed to mask the SS from any unpleasant fire from the US infantry still holding the front line.


The US artillery pounds the SS again, disordering them, and the US ground forces instead concentrate on the southern VG battalion, which is routed in a single round of firing (admittedly from the equivalent of an entire Regiment, support by tanks and 105mm howitzers).


The Fusiliers take a couple of hits from the dug in US infantry.


The remaining Germans mass around Rocherath.


The static US units in Rocherath and on the front line pour in defensive fire, as does the US artillery, as the reinforcements move up. The 99th Div infantry  occupy the dense woods to the south, but 2nd Div moves right up to the SS intending an assault next turn. The SS are suppressed by artillery fire, and the Fusiliers are now down to two hits left and also become disordered, 


The German response is fairly pathetic as they have so few good order units left. The Rocherath defenders are left completely unscathed, and the 2nd Div infantry outside the town just take one hit. In turn, US artillery fire, small arms and direct gunfire routs both the Fusiliers and the SS, at which point the Germans throw in the towel. Rocherath is saved!

I've played this scenario a lot as a  playest one for various rules, and this is a tough one for the Germans. They need to either be methodical and mass against each US unit in turn OR, pick a flank and dash for Rocherath. I flipping between the two and ended up feeding the Germans piecemeal to the defenders.  

As a playtest of the mechanisms though, it worked pretty well. I like the revised assault mechanism, it certainly works with hexes in a way the old 'move into contact' system wouldn't. Is it too easy to attack a flank? Well, it will take at least two turns to get into position to mount a flank attack, giving the defenders plenty of time to shoot or decide whether to pivot or evacuate, and the dynamics work the same as the ruler based version.

The only thing which is different is that my old 5" wide units could block an area 9" across each by positioning themselves 4" apart, whereas with the 4" hex/unit size, they can only block 4". Hopefully the sticky ZOC compensates for this to an extent.

I'll try this with some players at some point, but it feels like it is done now. I'm mainly thinking of some of the smaller (or bigger!) CD/RF scenarios which won't really work with NBC. OHW isn't anything like as granular as NBC, but is good enough and gives a decent game and tbh I prefer it to the Portable Wargame, it just gels more in my head.