Showing posts with label Skytrex. Show all posts

Wednesday, 27 May 2026

More Leaders pt3 - French

 As I noted in my post on substitute figures, I don't actually have any dedicated WW2 French figures although I have boxfuls of WW1 French. I tend to use Adrian helmeted SCW figures instead as they look much the same and many of them were originally French figures anyway. Well, after the now numerous appearances of my General de Gaulle figure, I realised I 'needed' some French officer figures in Kepis for an upcoming game as they are so distinctive.


Another bunch of Skytrex figures, this time from the French command pack, which contained no less than 11 figures, which I think must have been an error. Slightly disappointingly, only three of them were in kepis, although it did have the inevitable pigeon team, like the Airfix WW1 set. Most of them were NCOS in greatcoats with helmets and rifles. Never mind, a cunning plan presented itself.


I just based up six of the figures as an extra pair of infantry stands. Five of these are Skytrex NCOs and the tall guy in the middle of the second base is Essex I think. He came out of my bag of spare gunners in Adrian helmets.

These will be useful supplements for my other SCW figures in Adrians, although they are very obviously wearing French style greatcoats too. My regular group seem to enjoy 1940 games, so it will be nice to have a few more proper French troops.


The three actual figures in kepis are these. Two of them with pistols and one with binoculars, they are all wearing greatcoats. I did the guy with binos in a kepi with a khaki cover (the most common configuration), a second in an uncovered kepi, so dark blue with a red top and finally one in an FFL kepi blanc. Yes I know only ORs were supposed to wear white kepi covers, but it is such an iconic piece of headgear.

Like the British and Russians, these were basecoated in Vallejo English Uniform, and then various details and highlights picked out with a pinwash around the equipment, inkwash on the flesh and a light drybrush.


Painting these finally finished my pot of Vallejo English Uniform! I've had this for years and it has painted hundreds of figures and provided mud on scores of vehicles. It was one of the first Vallejo paints I bought once my last pot of Humbrol Khaki ran out. I still absolutely hate dropper bottles as I prefer to dip my brush in the paint and not waste it on a palette, but this was great paint with lovely coverage and consistent colour right to the end. I could probably unscrew the top with a pair of pliers to get the last out, but I already had a replacement in stock as it is such a useful colour.

As a postscript, I've subsequently discovered that if I store the bottle upside down, there is still tons of usable paint in it. So a few more months life in it. Maybe you are supposed to store them upside down? Search me. 


Thursday, 14 May 2026

More leaders pt 2 - Russian

 In my WW2 leadership drive the Russians were the ones in the worst situation. My 15mm Russians are mainly from the PSC Russian infantry and heavy weapons sets, and actual officers are few and far between. I had enough for a few HQ stands, a couple of individual leaders (I converted one into 'Megaphone Guy' from Enemy at the Gates) and the rest are kneeling gunners in various pointing poses.


These are some of the existing 'leaders', just kneeling gunners in various poses. I have better uses for these.


So, the Russians got an extra HQ and no less than five extra individual officers. Like the British, these are all from a Skytrex 15mm Command Decision pack. Excellent value and lovely figures, all in different poses again. They are a lot more intersting than the PSC officers as they are wearing a variety of clothing, not just gymnastorkia and breeches.


I did an extra battalion (2 figure) HQ. The guy on the left is in a side cap and holding a map while pointing with his plash-palatka wrapped around him, while the guy on the right is a very serious looking chap in greatcoat and field cap. No doubt keeping an eye on the intellectual.


These three are all in lighter weight dress in a range of sidecaps and service caps. Two of them are waving pistols around while a third has a PPsH and one has his plash-palatka wrapped around his chest The guy on the right is clearly modelled on the extremely famous photo of a commissar urging his troops on, and which graced the cover of the 'Cross of Iron' Squad Leader expansion.


These two are in winter gear, both have leather overcoats of different styles and the one on the left is in a helmet. The guy on the left is straight out 'Stalins Army' so I matched the colour plate with a light tan shuba sheepskin jacket and fur cuffs. The one on the right is toting a PPsH too and seems to be wearing a sort of large waistcoat a bit like the British Army ones. It has a lot of folds so may be a representation of a plash worn as a raincape, but it doesn't hang right or have a hood if that is the case. Anyway, I did in natural leather with an inkwash.

They are a really smart set of figures, highly recommended. I did the uniforms a base brown colour as my years of WW2 Russian re-enacting shows a lot more brown uniforms than the wierd green ones many people like to paint, but I accept that the uniforms were a vast range of colours from light tan to dark green, depending what they were made of. Officers winter weight jackets were pretty green (like the one Jude Law is handed in Enemy at the Gates). So having started with brown I added some variety by lightening some of the browns up, added some greens and did a few of the breeches as dark blue walking out trousers.

I was very pleased with those indeed and they will no doubt be appearing in future Eastern Front games. The only disappointment was when I went to put them in the box, I realised I'd miscounted - the Russians need two more battalion HQs, not one!


I still had plenty of spare officers, so I knocked up another Battalion HQ base with this pair of likely lads. I wouldn't normally put two figures waving their arms on one base, but the other figures were all pointing pistols, which didn't seem very appropriate for a higher HQ.


They are both very nice, figures. One is in a cap with a rolled plash palatka, while the other is in a sidecap and a very well modelled greatcoat. He's also got one of the those drawstring rucksacks the Russians occasionally used. I just did them both in khaki as they were a bit of an afterthought.


Thursday, 30 April 2026

More leaders pt 1 - British

 After painting the Roco personalities I had a bit of a leader review of my various 15mm forces, the earlier ones were done with much more tactical games in mind so have quite a selection of individual junior leaders for WRG/Crossfire type things, platoon HQs and so-on. The later ones were much more on the Command Decision/Spearhead model with platoon bases and battalion and regimental HQs, always with the option of stepping down a level or two (and in both cases stepping up for Megablitz/NQM type games).  In our various remote games I also like to field individual figures as the various players personality figures, and some armies are distinctly lacking in this regard.


After a bit of head scratching I ended up painting this lot! They fill in various missing gaps in the command structure for different armies, and add some variety to the individual leader figures.


First up are some British. My original  15mm Brits were done over 25 years ago and mainly aimed at WRG/Crossfire, so I have lots of individual figures and various platoon HQs. What I was missing was a higher level (3 figure) HQ, which in Command Decision would be a Brigade HQ and in Megablitz a Corps HQ. 

The original individual leaders were largely (Peter Pig) NCOs so many of then are toting SMGs and I wanted some more individual officer types instead. 

I was buying some stuff from Skytrex anyway, so I [picked up a pack of their British officers from the 15mm Command Decision Range. They work out rather cheaper per figure than their Peter Pig colleagues.


They are a really lovely set of 10 figures, each in a different pose! The Brigade HQ base has a Brigadier in a Service Cap, an ADC in a helmet and a beautifully moulded signaller sitting on an ammo box operating a field telephone (which makes a nice change from the usual radio sets).


These three are more junior officers waving pistols around. As someone once remarked, pistols main role in combat is to provide souvenirs for the enemy, and these guys have plenty. I did a couple of the figures in helmets and one in a cap, the figure on the left is obviously modelled on the famous photo of an Eighth Army Lt advancing crouched with his pistol held low, although he is cast with battledress trousers.

I didn't paint all of the figures in the pack as it is always wise to have a few officers in hand. These are all done in Vallejo English Uniform over a grey base with tan webbing, a pinwash around the equipment etc and then lightly drybrushed with Iraqi Sand.


Thursday, 26 February 2026

Shonky Stuart Pt 2

 Regular readers will recall I picked up three second hand tanks at Partisan last year, one of which was this M5 Stuart.


After a re-paint and re-basing it looks OK I think. I'm pretty sure this is a Skytrex model.


Even with my usual two layers of undercoat and two layers of top coat, the extra paint hasn't obscured any of the detail to a great degree. One of the advantages of metal models which generally have more definition than plastic. 

I did this with my usual OD mix of VJ Russian uniform over a grey undercoat then a heavy wash of VJ Bronze Green which stains it and runs onto the cracks. Perhaps foolishly I used some flow extender this time, and it seemed to make the wash pool instead of flow! It came out OK in the end though.


The wash didn't highlight it quite as much as I wanted so I did a pinwash around some parts including the tools, air intake etc. Then with mud all over the running gear and a light overall drybrush of VJ Iraqi Sand it ended up with a reasonable amount of contrast.

I added some Allied stars so it would match the M8 Scott, and they look quite smart. I've still no idea what the metal things on the turret are, my guess is track grousers. I did them black with a light drybrush of gunmetal anyway.


The spray black base coat I did has nicely darkened the hull interior. At some point I'll make a 'Jalopy' insert with a .50 cal and a couple of crew to go in the hole.


Here it is with the B3D M8 Scott, and a very nice match they are too.


Alongside my very elderly QRF M3s, the latter are still a bit on the small side. 


And next alongside the massive PSC M5 which has clearly eaten all the pies.

In fact I've started to find the PSC M5s so offensive in their bloated horribleness, I'm minded to replace them with something neater. This of course opens up a whole new can of worms as I've got many older models which are pretty rubbish by modern standards, so I could replace them with new ones and get rid of the old. I could paint model tanks forever and yet not require any more storage space....

Ooh, maybe it is time to get rid of those horrible old Peter Pig Pz II and Pz III. I can feel a new tank modelling project coming on! 

That would be quite good as my painting mojo tends to flag over the winter, and it will give me some motivoover the summer. 


Wednesday, 24 December 2025

Merry Christmas! Plus, a shonky Stuart and manky Matildas Pt1

Merry Christmas everyone! I hope you all enjoy this time of year and get some fun stuff to play with in your xmas stockings. Many thanks to my readers for their support through the year. 

The relentless post backlog stops for no-one and nothing however, and regular readers may recall I picked up a handful of second hand tanks at the Other Partisan back in October.


And here they are again... Two Zvezda Matildas IIs and a metal M5 Stuart which I'm pretty sure is a Skytrex one. They have all been hastily spray painted green, the gun barrels painted gunmetal and some black blobbed on the tracks. They haven't even been undercoated, and bits of bare metal or plastic show through in the undercuts.

Still, for the price, I'm not complaining. 


The Stuart is a nice little model. It is the same size as my B3D M8 Scott, a bit bigger than my QRF M3s and a lot smaller than the oversized PSC M5s. An added bonus is that the turret pops off to reveal a nice internal cavity, so it will easily convert to a recce turretless 'jalopy' Stuart. 

It just needs a bit of cleaning up and a repaint. 


The Matildas are both pretty plain. I needed another desert one for my planned Operation Battleaxe game, so I thought I may as well clutter one up. I had originally planned to (rather reluctantly) repaint one of my BEF Matildas, but doing another desert one seems more sensible. 

The metal fuel tank is from a QRF Valentine (I think) but the mounting lugs on the tank fit perfectly in the fuel locator slots on the rear engine deck. Maybe they were a standard size?

The tarpaulin stowage roll on the turret is a filed down PSC plastic Russian fuel tank (!) and the rack of water cans on the left lower track guard is converted from a spare low profile Sherman turret bin. 


My attempts to build a smoke discharger array on the right hand side of the turret largely failed thanks to my fat fingers, but I trimmed down a bit of sprue and stick that on so there is at least 'something' there. 

I left the other Matilda plain, I'm going to do it as a Russian Lend Lease Matilda. 


I did notice unsightly join lines along the top of the track guards and I was just fiddling around to work out how to fill it and they both fell to bits! They'd obviously just been pushed together, and not very well. In theory all the Zvezda models are push fit, but my experience of assembling dozens of them is that you need to glue them.


So, lots of glue later, I wrapped them in tape to hold them together while they set. I expect I'll still have to fill, but hopefully not as much. I remembered the gap was a problem with the other Zvezda Matildas I'd built, but I'd forgotten. 


While I was fiddling around, I also re mounted the turret Vickers MG on my Marmon Harrington Mk II. It now points the same way as on my Mark III! I'll just need to touch up the paint where I detached it. The bare patch looks pretty obvious in the photo.


And while I was at it, I replaced the Matilda coax MGs with 0.5mm brass rod. They were falling off anyway (something else I remember from building some of these before).

Righto, next up is painting.


Tuesday, 25 March 2025

15mm British passengers. Finally!

Regular readers may recall me bemoaning the lack of seated 15mm British infantry figures. Drivers and tank crew, no problem, but infantry? You are out of luck. Anyway, while browsing the Skytrex website after scoring my shiny new Italian 75mm howitzers, I came across.... 'British Halftrack Crews' but looking at the photos they were clearly what I was after. 


And what a bargain they are. Over 80 figures for 19 quid. That is well under half the price of Peter Pig. They come cast in groups of 2,3 or 5 figures, with a range of weaponry (mostly rifles) and all wearing tin hats with varying degrees of scrimmage on top. They are also nice crisp castings, deeply engraved with very little flash, so I guess the moulds don't get a lot of use.

This heap of lead is what was left over after I'd painted some. I needed six truck loads, three for the desert/Med and three for Europe.


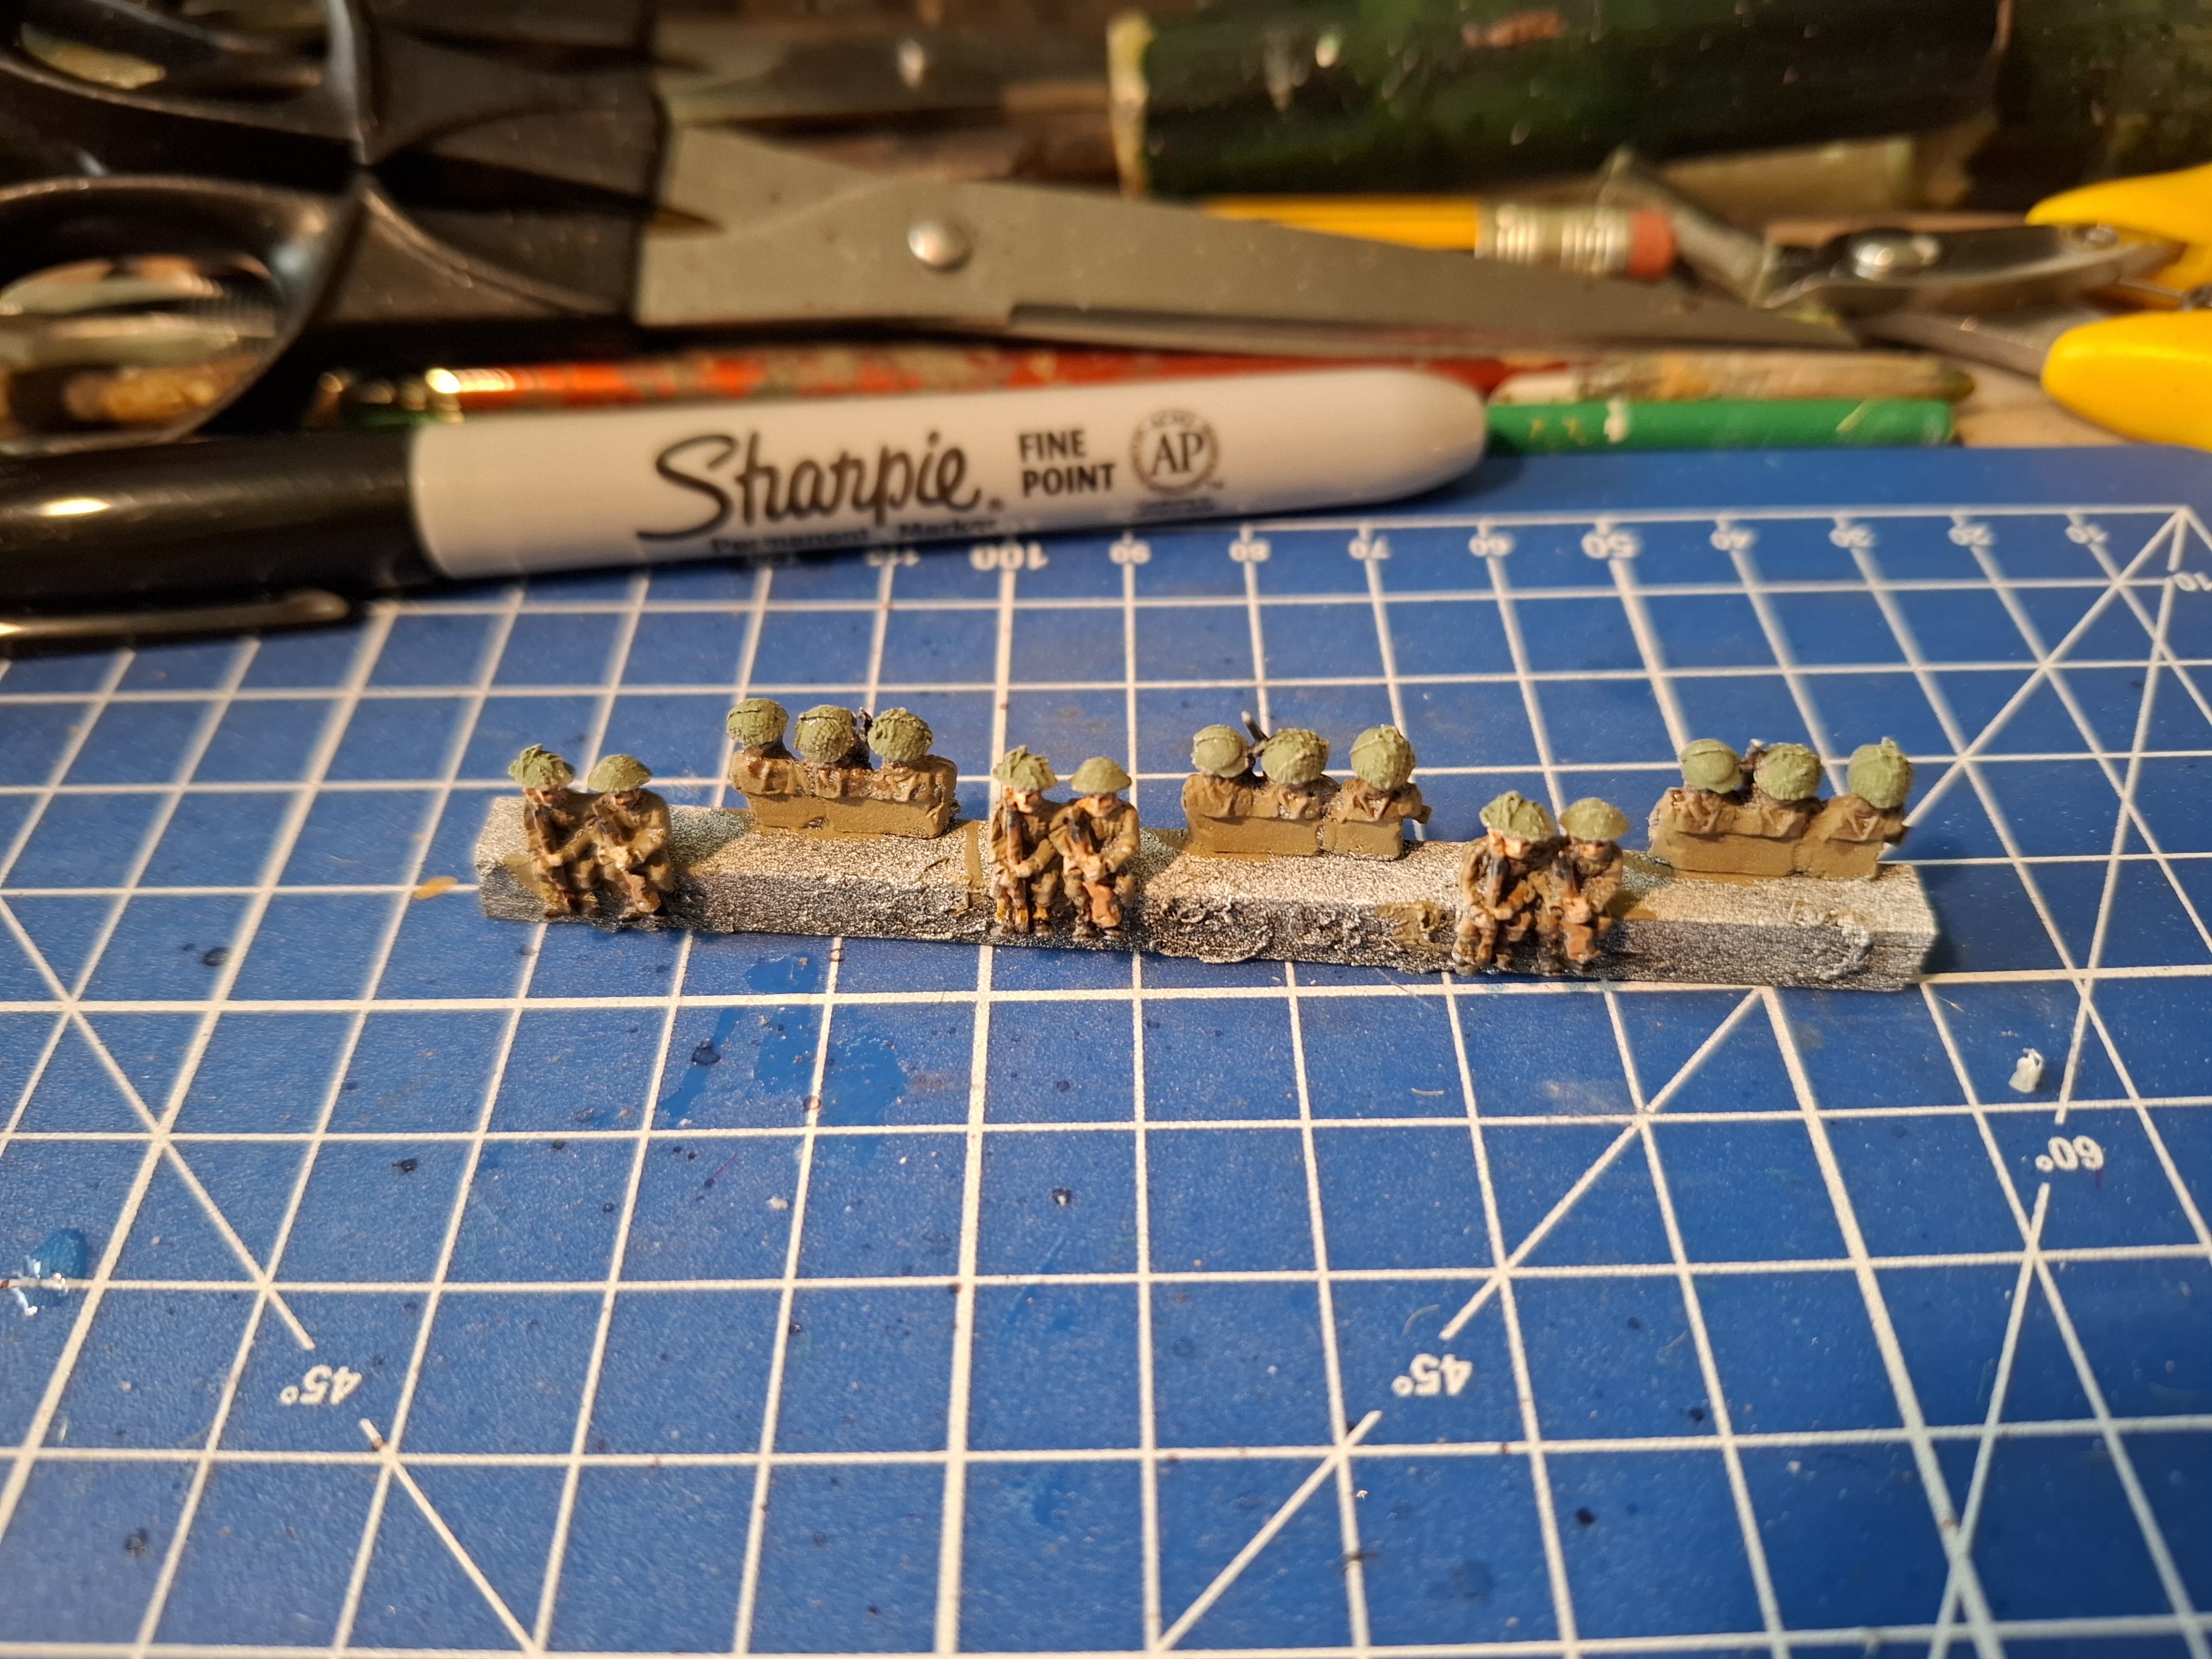
Here are the desert chappies. Three sets of three figures and three sets of two. They are cast in long trousers but I did them in Khaki Drill uniforms and filed a lot of scrim off the helmets. I did some with hessian covers and some with tin lids painted sand.


And the NWE troops. These are the groups of two. These are in khaki serge with green lids and scrim. All the figures got an inkwash and a drybrush which really helped emphasise the details.


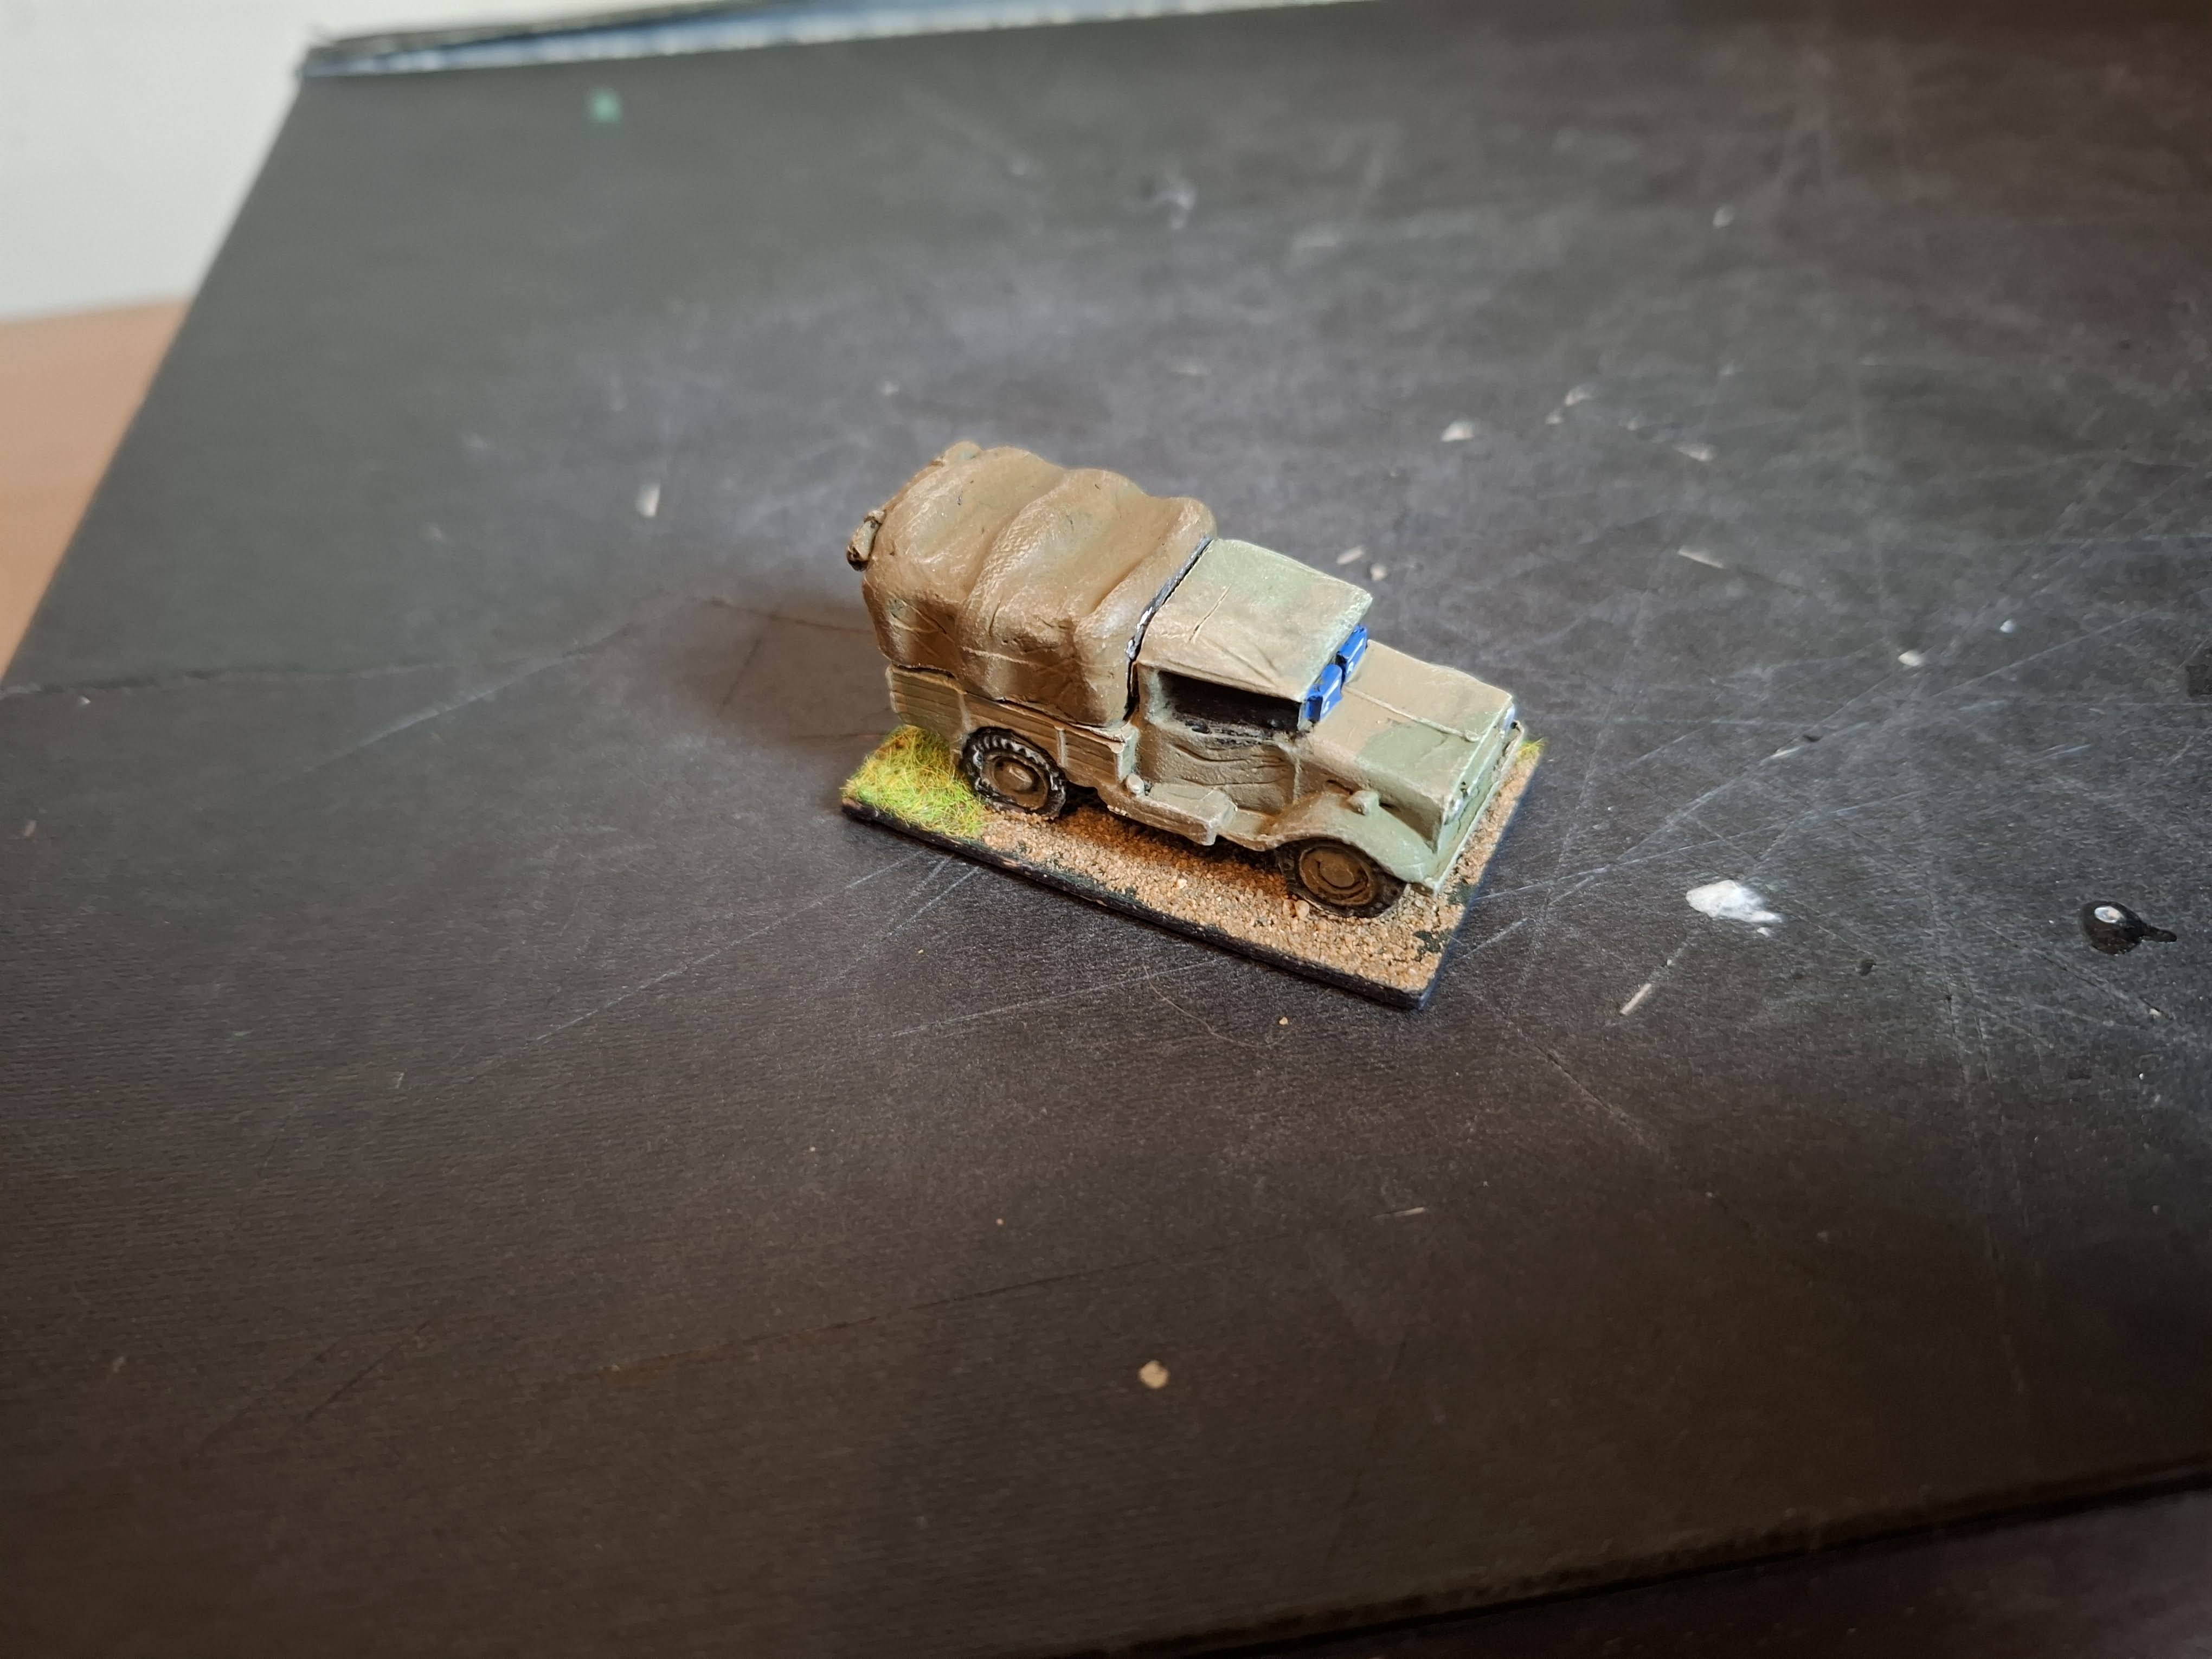
Now, one slight complication was that my chosen transport for NWE were these very, very old Peter Pig Morris 15cwt trucks. They will do nicely for Motor Rifle troops, but I also have the option to use them in some larger lorries too. All well and good, however....


The 'slight complication' is that they have the tilts firmly glued on! I bought all of these second hand at various bring 'n buys, so I've no idea what they are glued on with. Please God, don't let it be two part epoxy...

I tried levering them off with a screwdriver, but nothing doing.


So it very carefully ran a razor saw along the join where the tilt meets the body and down the back of the cab. Once I'd made a bit of an impression I was finally able to lever them off. Thank goodness for the lousy adhesive qualities of superglue! Then I just had to touch up the paint on the bits of bare metal.


Next job was to make up the inserts and seats. Although the back of the truck looks quite big, in fact it is tiny thanks to those two annoying ridges cast on the inner edges. Eventually I found that only a 15mm x 14mm insert would work.


And even that fits quite snugly. Having got it in I had to use a screwdriver to get it out again.


Anyway, into production line mode. The inserts on the right are for the 15cwt and the ones on the left are for my desert 30 cwts which are more roomy. The benches are made out of the box sprue from Zvezda kits, which are the perfect height for sitting 15mm figures if you want their feet on the floor. Matchsticks are too narrow.

Once the glue had dried I just painted them a neutral khaki.


And here are the desert chaps in their steeds.


And the European ones, although at a pinch they'd do for desert/Med too.


And I also have a pile of separate tilts I can use as required. I've actually got a big heap of spare tilts now, and tbh I'm struggling to think when I'd actually use them as I seem to prefer open truck bodies these days.

Anyway, I'm very pleased to have finally got some of those, and it means my Brits can now ride around in pride like the Russians and Germans.


Tuesday, 11 March 2025

Italian 75mm howitzers and some other Italian bits

 When I was doing my 15mm desert project I bemoaned the apparent lack of Italian 75mm guns and ended making do with 100mm howitzers instead. Nigel Drury very helpfully pointed out the Italian artillery range that Skytrex do. Now, I haven't bought any Skytrex stuff since the original owner sold up and it was briefly taken over by someone else. There are more new owners now but I'd always thought Skhtrex stuff was massively overpriced (a tenner for a Hetzer?). 

I had a chat with them at Partisan though and they seemed to be sensible and well organised people so I put in an order. Although their vehicles remain very expensive, I discovered their guns and figures are good value.


And here they are, two 75mm howitzers.


And lovely models they are too. Very crisp castings with nice sharp detail. Unfortunately assembly is required, and regular readers will recall how much I hate sticking metal guns together, especially when there are no locating pins for the trails, just smooth metal such as these had. Eventually small blobs of blu tak slathered in superglue saved the day and they went together fine. At least the wheels and trunnions fitted well.


Regular readers will also recall I am short of gunners, but Skytrex also do very reasonably priced packs of gunners, rather more reasonably priced than certain other 15mm metal figure manufacturers, so I bought a pack of Italian gunners. And what lovely figures they are, slim and well proportioned with finely moulded details


I did the guns in Desert Ochre and the crews in Dark Sand with ochre helmets, grey puttees and brown boots. Various photos showed that generally these guns had rubber tyres, despite the spoked wheels, so I did the wheel rims dark grey. As these are quite small pieces I just allocated two gunners each.

Very pleased to have got those, which brings the Italian artillery total up to eight towed guns and five self propelled. 


While I was doing some artillery, I added a couple of gunners to my 105mm Autocannone insert piece as it looked a bit bare without them. I took the opportunity to improve the gun fixing too as it had come loose during the Crusader game, but I managed to break one of the elevation wheels off in the process although it stuck back on OK. Brittle resin I guess.


I also bought an extra Shariana artillery tractor from BPM as they make useful light wheeled transport. The extra one was resin not APL and the new one is on the left, you can just see that the bonnet is smooth as opposed to the visible striations on the one on the right. 


I'd planned to add drivers to all three as well and converted three seated PP British drivers into Italians by filing down their headgear. When it came to it though, it was an utter pig to get them in as the space was so small (and the figures are so big). I had to cut this figure off at the waist and remove his arms from the elbows to get him in, then buld some 'legs' out of filler. It just wasn't worth it, so I only did one as I'd already cut out the moulded steering wheel. The other two drivers will come in useful for something else.


Lastly I picked up a couple more German motorcycle combinations. These are also Skytrex and similarly priced to the Peter Pig ones. I re-deployed the existing 'Italian' PP motorcycle combo to the Afrika Korps, repainted the crew in DAK uniforms and the bike in German desert sand.

For these 'Italian' ones I left off the MGs (which are supplied seperately) to distinguish them from the DAK ones.


These models also have separate storage bags so I stuck those in different positions to the German ones. The bikes were done in Desert Ochre which is noticeable different to the German sand colour and the crews are in Italian coloured uniforms.

 I toyed with the idea of adding Bersaglieri feathers to their helmets made out of filler but didn't do it. I shall think on that. I know there are a few people who make actual Bersaglieri motorcyclists, but I'm not too bothered about using substitutes.