Tuesday, 22 April 2025

Marathon and Platea with Dominion of the Spear

 I recently picked up the Ancient Battles supplement to Dominion of the Spear (along with the Pike and Shot version) . It has 36 historical battles in the DotS format, along with historical notes, deployment suggestions and variant army lists depending on whose sources you believe. Tucked away at the back are also some designers notes on how terrain was handled in the scenarios and some ideas for alternate activation systems.

I wanted to try the latter out, so set up a couple of battles from the scenario book. First up, Marathon in 490 BC. I realised later that I'd already done a version of Marathon when I first purchased DotS, but this one is the scenario from the supplement. 


The general setup is this. The Greeks are at the top with four armoured hoplite units, three in line and one in reserve. They are attacking, as they did historically. The Persians have five units of archers, one of whom (the Immortals) are elite. They have the Immortals in the centre, flanked by normal archers and two more in reserve.

Historically the Immortals did OK in the centre, but the charging hoplites collapsed the Persian flanks and routed them.

An optional rule is that if one or both sides only starts with four units or less, then both sides get an extra basic unit of infantry in reserve. It introduces a bit more decision making and a bit more depth to the armies, but I didn't use that option for a first run.


For the first iteration I used the standard activation system. Each zone activates from the left (attackers right). Missile troops fire first then melees are resolved sector by sector.

The great mass of Persian archers get to fire first, but if they miss, the Greek hoplites get a bonus in melee against missile troops. The Greeks are armoured so the Persians need a 6 to hit them (5+ for the Immortals) but the Greeks hit in melee on a 4+.

Things go badly from the start and the Immortals are routed. 


And even though the Persians do rout one of the Greek units they are rapidly reduced to two units.


And then annihilated. Greek win. 


Next I tried activation option 'B'. This involves the attacker picking one sector to activate and then the defender, rather than the automatic combats in the standard version. This involves more decision making and is a bit slower to resolve as only two sectors fight each turn. It better represents commanders choosing where and when to attack though. 

The Persians here are doing better than before, two hoplites routed and only one Persian. That unopposed central position for the Immortals is a killer, as they can now conduct flank attacks against the hoplites on the right and left which gives them an extra bonus on top of their +1 for being elite. 


And the Persians duly wipe the floor as the Greek centre collapses, rapidly followed by both flanks. 

I'm not 100% convinced about that activation method as both sides just picked the most favourable matchups each time. Obviously the vagaries of the dice had something to do with it, but I'm not sure. If you want a slightly longer pure match up game, then that is one to pick, and it better represents active and quiet sections of the battlefield. 


The final activation method is a mix of both. The attacker and defender each pick a sector to activate, and then the third sector fights automatically. This is a compromise of the previous two in that you can do some minmax, but still get to resolve all three sectors so I is faster to resolve overall and throw in some unexpected outcomes. 

This one ended with a Persian defeat, but I think I prefer that mistakes in the initial deployment are punished, rather than players constantly picking the best battles to fight. In a solo game you are both sides of course! They both good suggestions as alternatives to the quite mechanical standard activation sequence, particularly depends how much you much control vs chaos you want. 

I thought I'd try a different mix of troop types, and the next chronological scenario is Platea in 479 BC which has rather different forces.
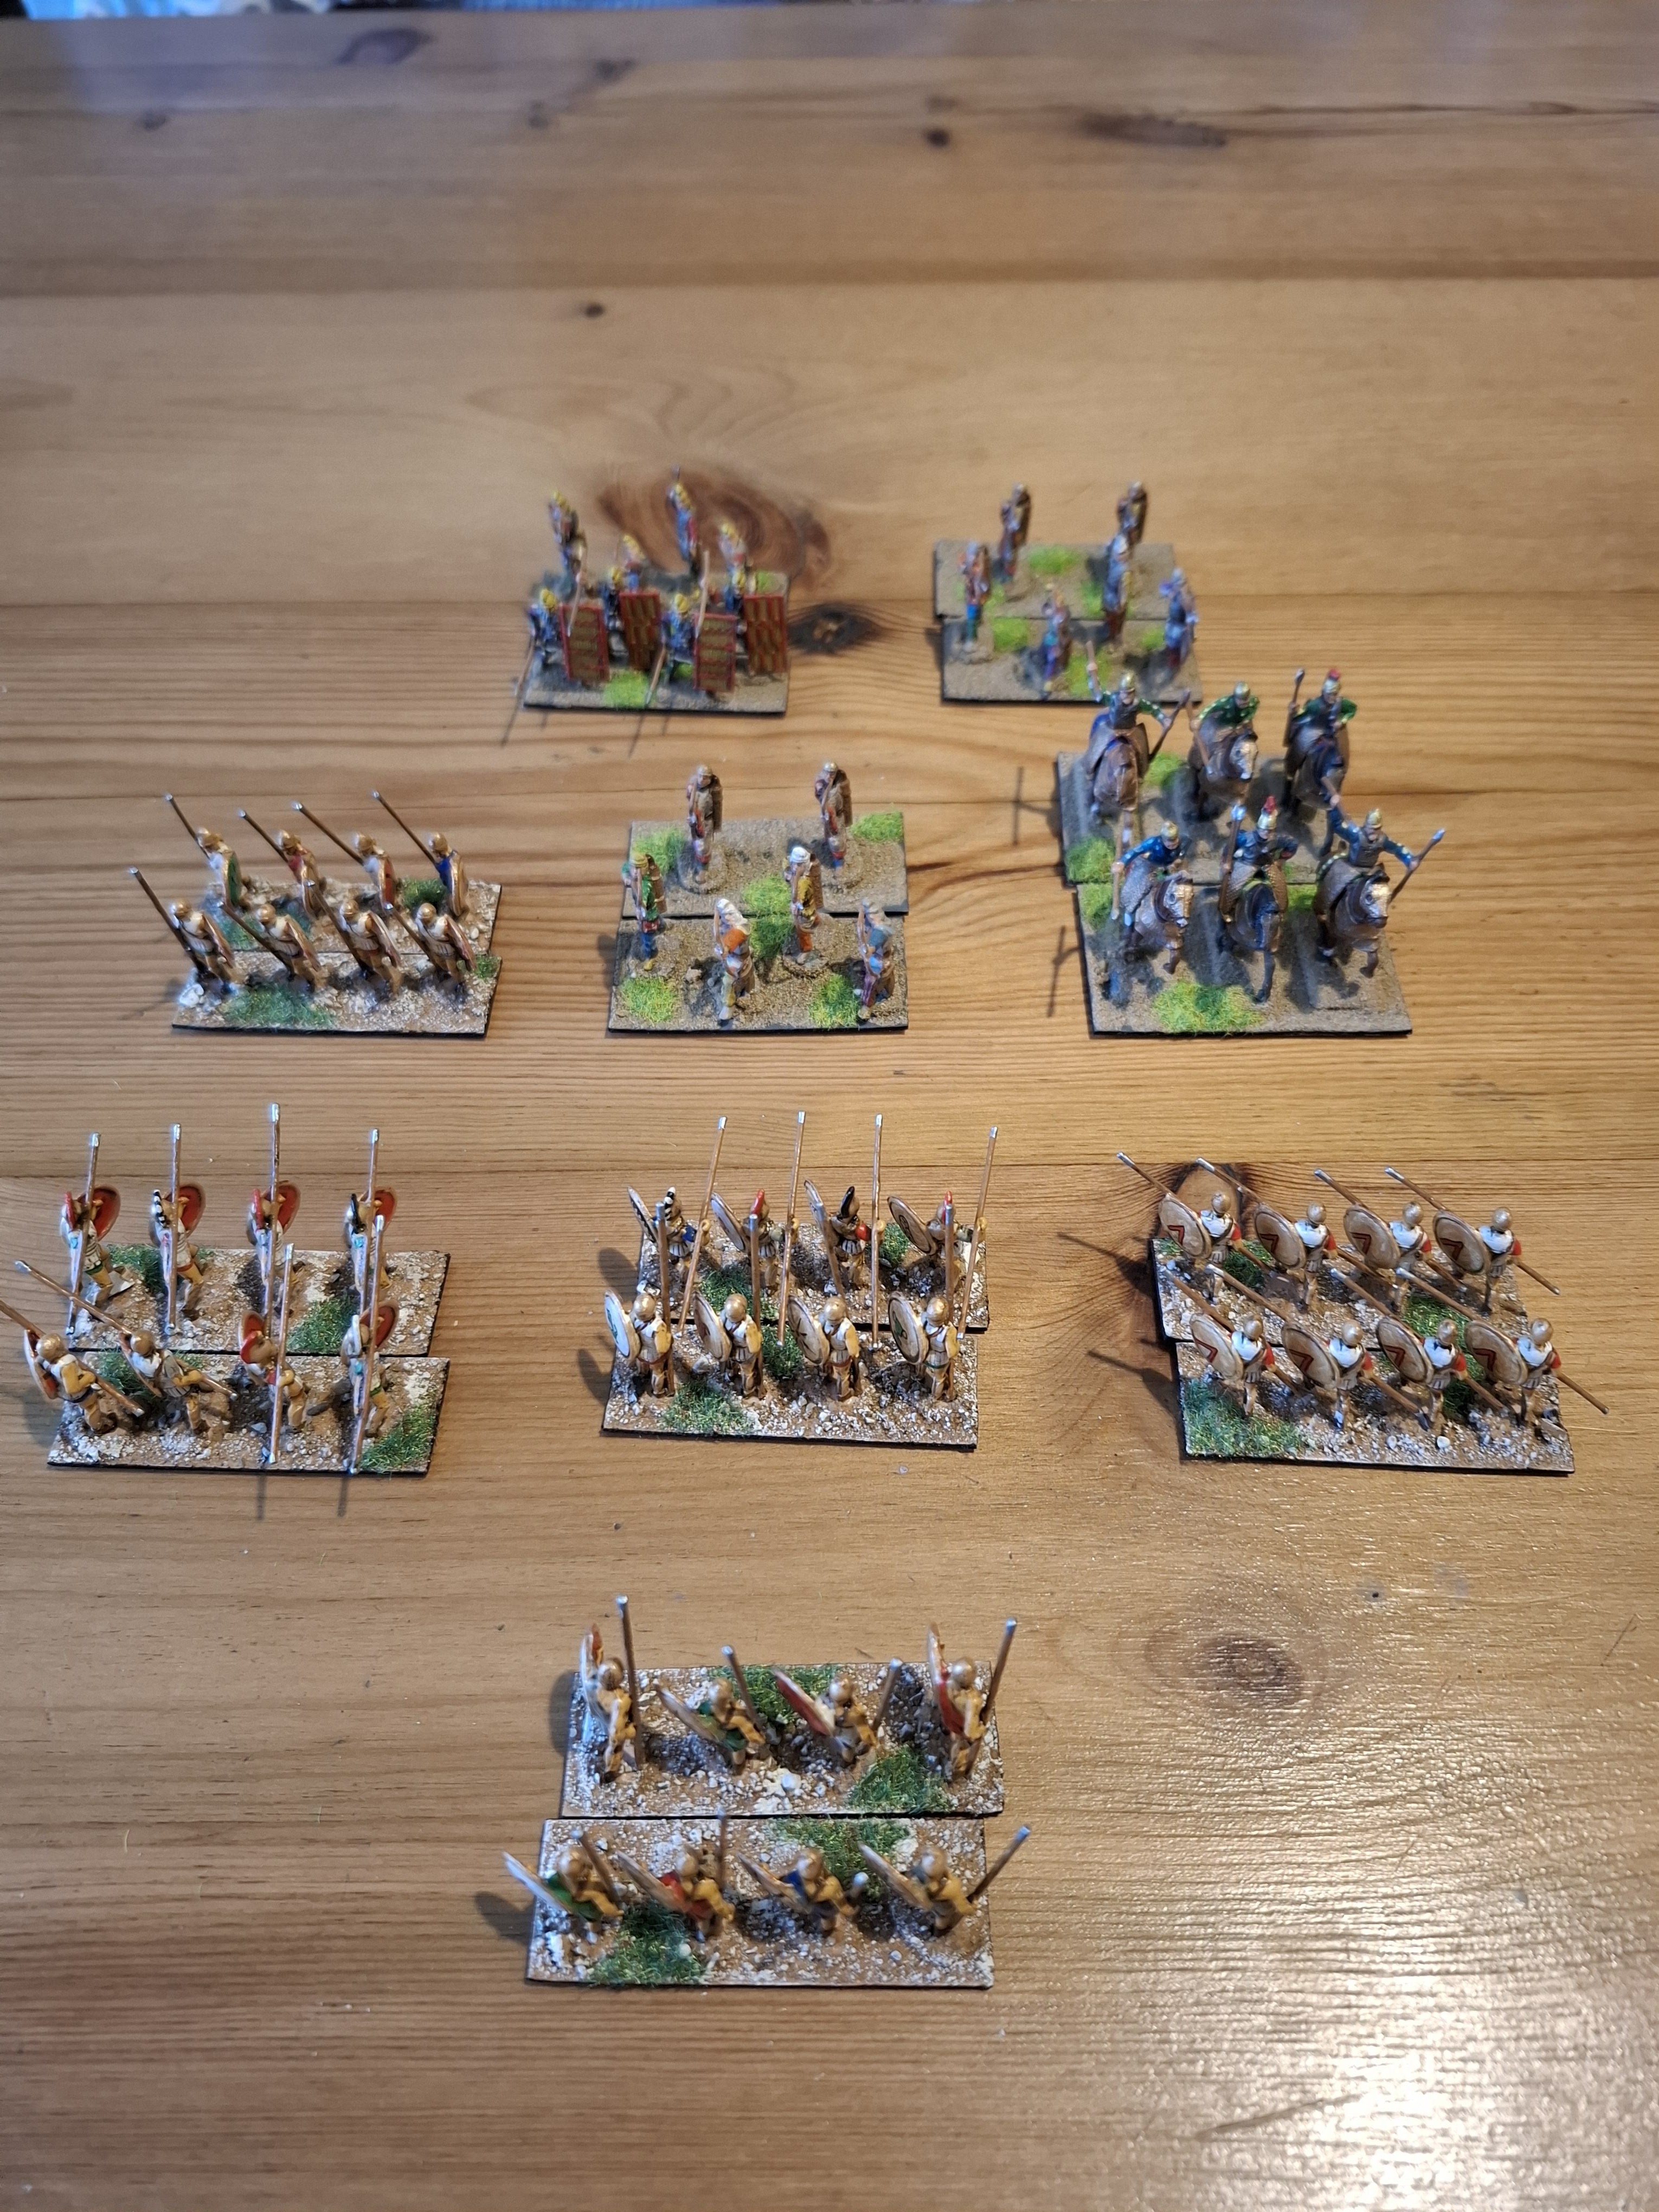

The setup for Platea, the Persians are attacking this time. The Greeks have got two armoured hoplites in the left and centre, and on the right is the Spartan contingent, rated as armoured elite (ouch!). The reserve is a unit of unarmoured hoplites, just rated as standard foot.

The Persians are more a mix this time. On their right are mercenary hoplites (armoured spear), in the centre are the inevitable massed archers and on the right, a big blob of cavalry. Two more archers in reserve, including one elite unit (the Immortals).

This is roughly the historical deployment, but a very viable alternative would be to put all the archers in the front line and keep the mercenaries and cavalry in reserve. Something for another day perhaps.


For the first run through, I went with option 3 for activation - each side picks one activation and the third is automatic. The dice weren't playing ball and although the Greeks routed both the mercenaries and an archer early on, the Spartans and Persian cavalry kept bashing each other but both steadfastly held on.


Eventually the Persian centre collapsed and then it was all over with a complete Persian rout. Unlike real life however, the cavalry and Spartans were still battling it out on the right.


I tried it again with the normal activation system (three automatic activations left to right) and although the Greeks routed both the Persian mercenaries and cavalry, the Persian archers struck a string of 6s and just shot the Greeks right off the field.


For the final matchup I reverted to option 2, each side picks one sector to activate. The Greeks managed to rout one Persian archer early on,  but once again the Spartans failed repeatedly against the Persian cavalry.


The Immortals didn't last long either, and soon there was a gaping hole in the Persian centre.


And finally a very one sided rout.

That was certainly a bit more deliberate, and it adds more decision making to the game. If you are au fait with the various combat modifiers and matchups then  it makes some of the decisions easier. I guess if you wanted to spend even more time just doing one battle you could let the units take two hits befor routing (like the two hit version of the Portable Wargame). I've also had a few thoughts about reserves, and I know Shaun has made some suggestions about making them less flexible. I do like the look of the armies deployed in multiple lines, so much better than the wargame standard 'one line of troops from side of the table to the other'. 

All the games were fun and fast to play and I think they are ideal for trying out different deployments etc or for games in a campaign setting. It is very refreshing to be able to fight six engagements in under an hour, and I certainly want to try some of the battles outside the 'classic' Ancient period. The speed of play pretty much allows you to conduct Monte Carlo simulations of the various battles, as although in theory the points values are matched, the matchups between troop types are quite asymmetrical and it lends itself to experimentation of optimal deployments.


Friday, 18 April 2025

Operation Compass - Beda Fomm, 6th February 1941

 This is the third and final battle  in my mini campaign covering Operation Compass. If I hadn't been away I would have run it in February 2025, but as it was I ended up putting it on in March, so still around 84 years after the original battle.

After the destruction of their fortification line and the double outflanking of their fallback position at Derna and Mechili, the Italian 10th Army was in full retreat along the coast road via Benghazi, aiming to get back to Tripolitania. 

7th Armoured Division drove hard across the desert from Mechili, losing many vehicles to breakdowns on route, but eventually cutting the coast road just north of Agedabia. The Italians became aware of the blockage rapidly, and moved one or their last armoured units up, the VI Medium Tank battalion to escort the leading truck convoy down the road. Italian recce declared the road clear for 20 miles, but unknown to the Italians, 4th Armoured Brigade had pushed north and established an ambush position at Beda Fomm, right across the road.


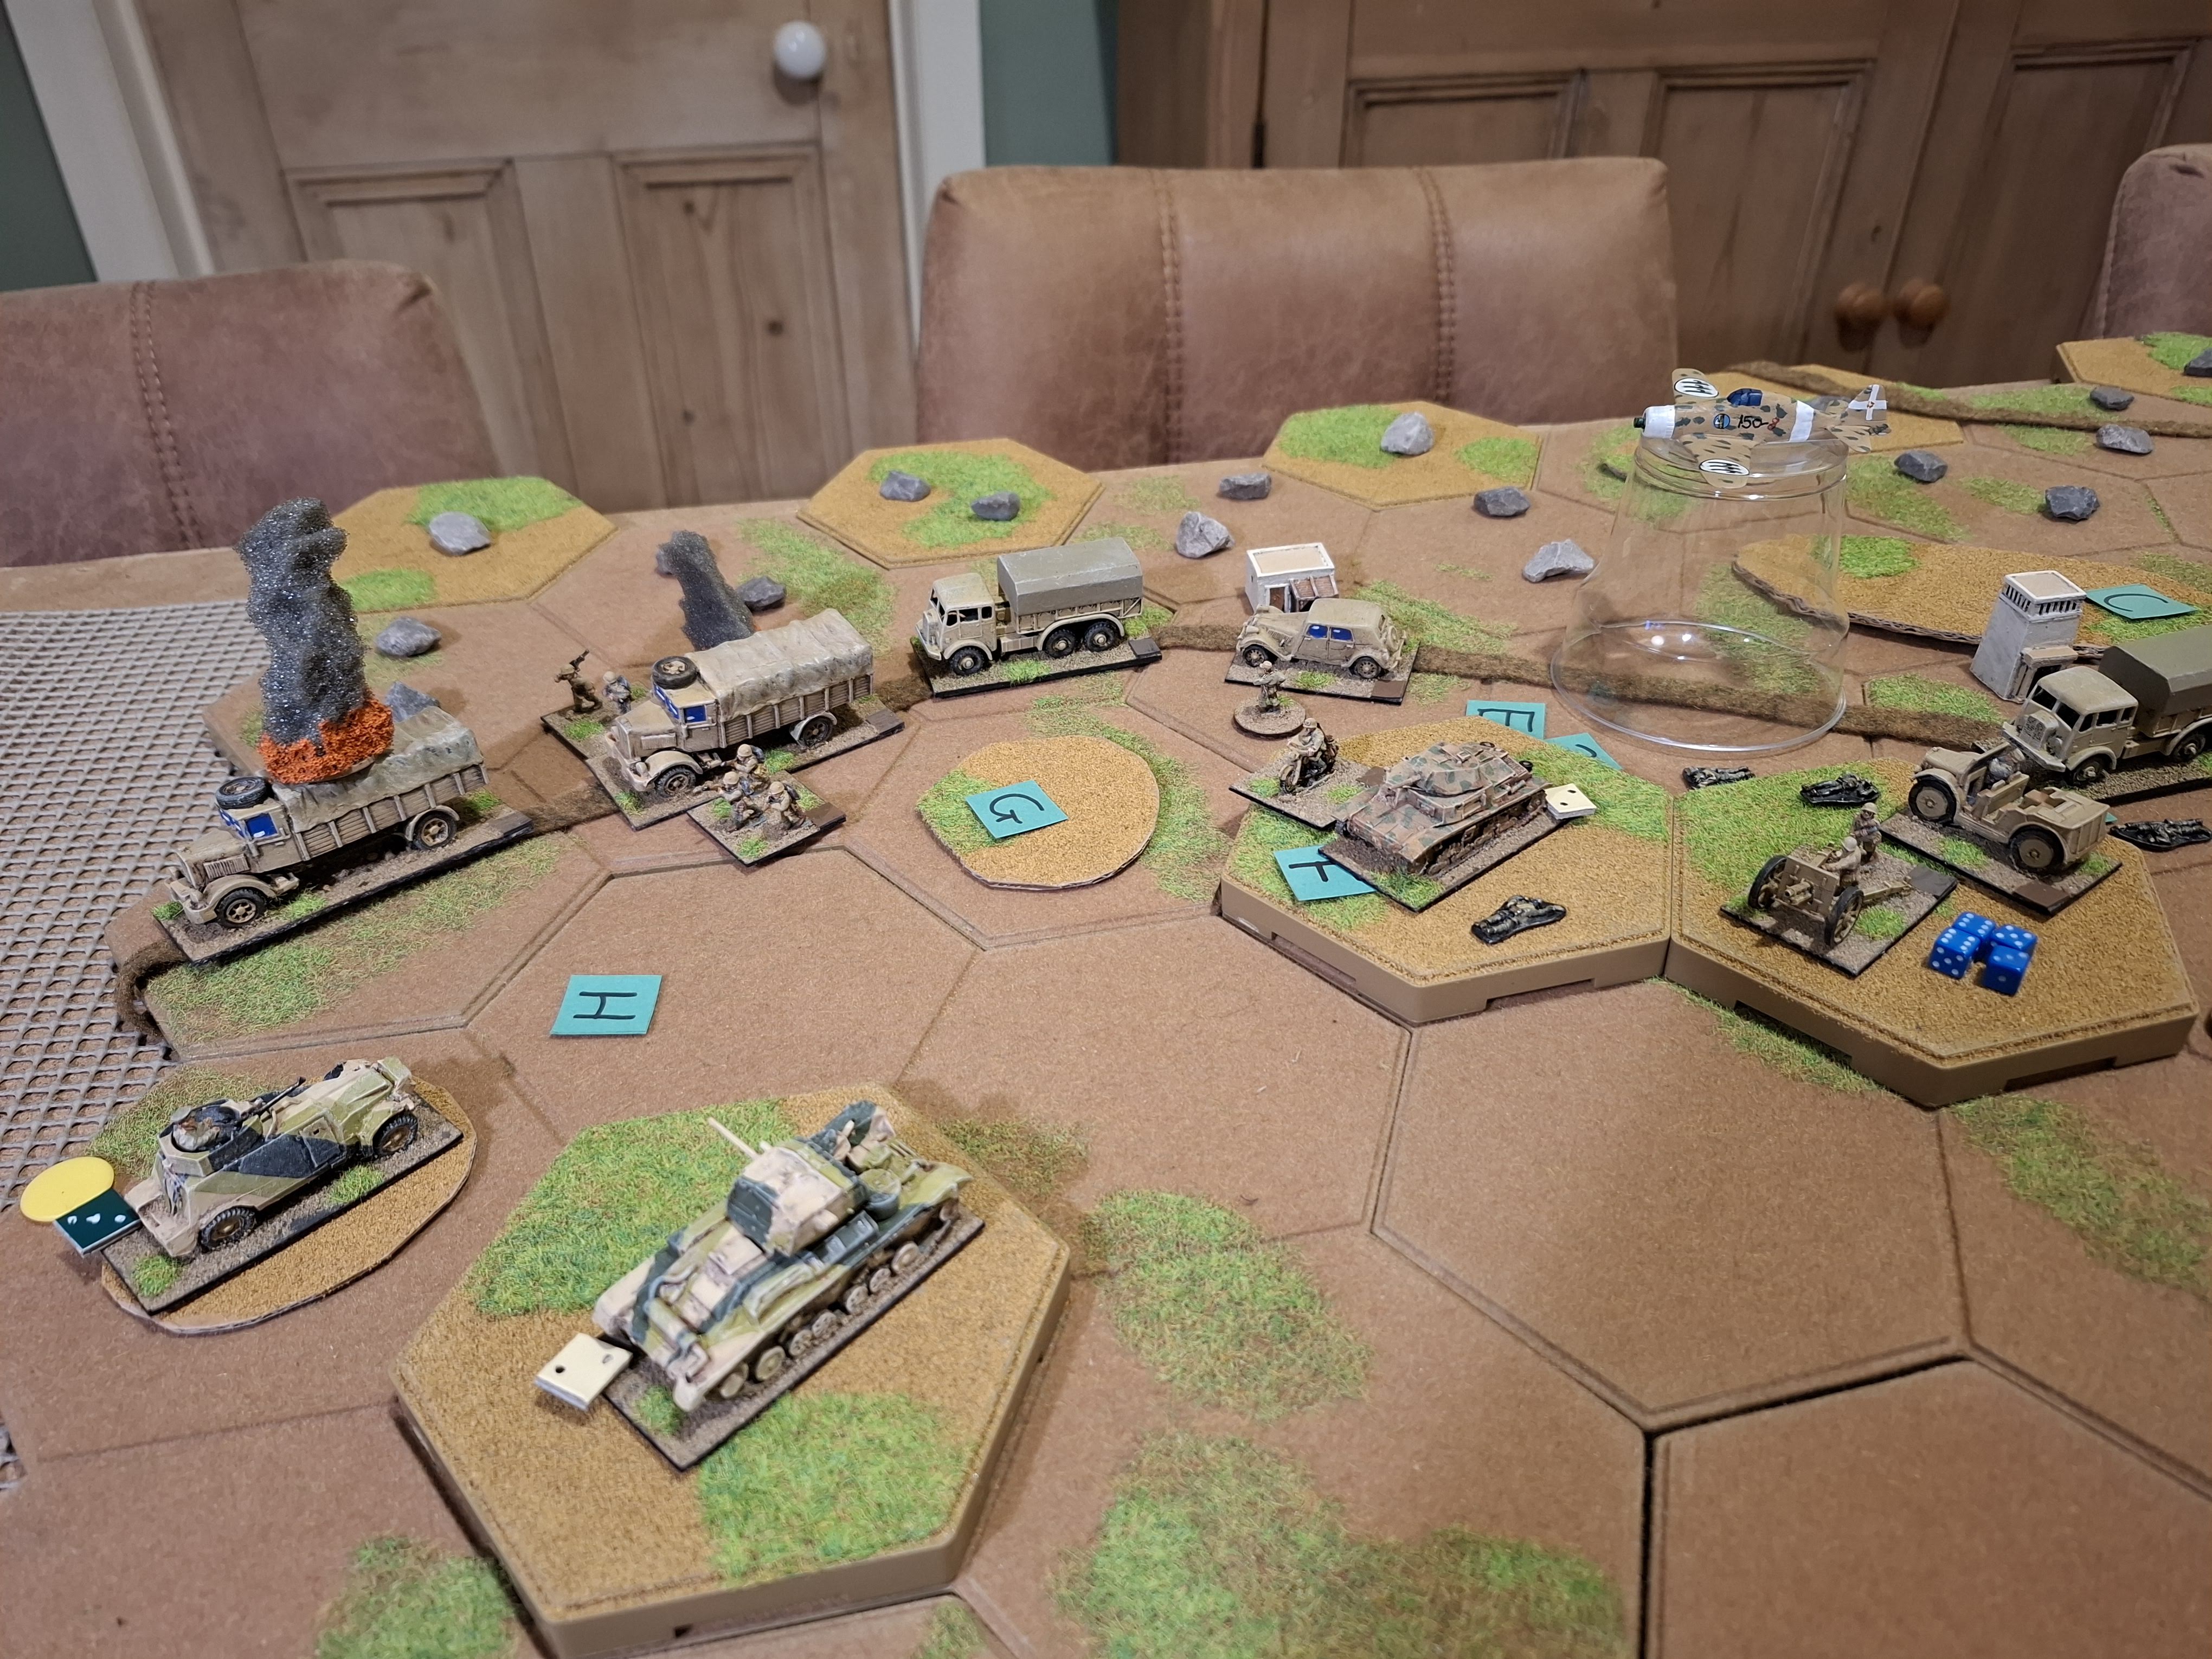
Battlefield from the south. The Italian convoy will be coming down the coast road from the north. The area is remarkable for being very undulating, so there are rises and hills all over the place. The rough ground on the left are actually the sand dunes behind the beach along the coast.

The Italians need to get one of their convoy units off the southern edge via the road. As usual I'll be using my One Hour WW2 variant for this, and the scenario is based on the Beda Fomm one in Frank Chadwicks "Benghazi Handicap" . 


The critical feature is the big hill (F), christened 'The Pimple' during the battle, located just east of Sidi Ageili and the Bottega Araba. The Italians also need to capture this.

This is an ambush scenario, so the Italians have to just keep moving down the road until they spot the British. Ambushes are very hard to game, so I hope this works out.


In the way are the ragged remains of 2nd RTR with a mixed bag of Cruisers. Each element represents a weak squadron, and the entire Regiment was very under strength. Simon is commanding these. For game purposes they will be hidden until the Italians move adjacent or they choose to move or fire.


The rest of 4th Armoured Brigade, commanded by John. Again, not very much stuff!

7th Hussars has a single consolidated squadron of Vickers Lights, and 11th Hussars a single consolidated squadron of Morris Armoured Cars. Normally these units would all be veteran, but they are so weak I'm just rating them as average for this scenario.

They are supported by F Battery, 4 RHA, who are deployed off table. 7th and 11th Hussars will turn up on turn 4. Russell and Pete will take these over on Wednesday, but for now John commands them.


Despite being light in teeth arms, the Brigade has all its LOG support. Dorchester ACV, Austin K2, a 15cwt supply truck and Brigadier Scott-Coburn in his Dingo.


And coming down the road is this mighty host! Raggrupamenti Pasquali.


In the lead we have a company of VI Medium Tank Bn (Micheal commands the tank battalion as Major Ornano), then II Grupo, 10th Artillery and 60th MG Battalion plus a heavy baggage column. Tim commands the whole force as Major Pasquali and directly commands the artillery and 60th MG Bn. Another company of the tank battalion is behind 60th MG Bn.


Behind them are 1st Parachute Battalion (Terry), also accompanying a load of baggage lorries. Terry can only play on Tuesday, so John B will take over on Wednesday. The paratroops and artillery are decent troops, so rated as average, the rest are poor. The units with baggage lorries cannot leave the road, and also block the road up with all their transport.


Bringing up the rear is the last tank company and a couple of supply lorries. The Italians are actually well supplied for a change, as they have all their supplies with them! I'll also chuck in a few planes for fun, but they are just there for eye candy as the Italians are busy evacuating their airbases and the British are busy bombing the retreating columns further north.


Turn 1 passes speedily as the first Italian units come trundling down the road. A flight of SM79s flies overhead, en route for new bases near Tripoli.


The Italians keep trundling down the road. This time the Desert Air Force puts in an appearance, off to bomb Italian columns further north. I wonder why they aren't bombing here...


And the ambush is sprung! 2nd RTR and the 25 pdrs concentrate their fire on the leading company of M13s, and the point blank range ambush fire soon reduces the Italian tankers to smouldering wrecks. Fox killed in the open. 


Undeterred the Italians press on bravely. The 75s unlimber and start shelling the A9s over open sights, while 60th MG battalion piles on down the road, supported by another company of M13s who scale the rise fronting the 2nd RTR A13s.

Further back down the road the 1st Parachute Bn motors on. The British fire is a bit more split and although 60th MG Bn is left disorganised, the Italian tankers largely shrug the British fire off.


By turn 4 things are getting serious. Both units of 2nd RTR are being engaged at close range by M13s, 60th MG Bn continues to advance slowly down the road despite being disorganised (they are hampered by the British ZOCs) and the first unit of 1st Para Bn is now in contact.

Some respite for the British as 7th and 11th Hussars now appear. The Vickers Lights of 7th Hussars are heading for The Pimple, and 11th Hussars have a fine old time shooting up the leading Italian trucks. The 2nd RTR A13s are sufficiently battered that the Ambulances move up to help reorganise them.


In another round of heavy fighting 2nd RTR have had enough. One squadron withdraws west and the other southeast, hoping to reorganise in relative peace next turn. 60th MG Bn is reorganised (contributing to the terrible traffic jams), and good job too as 11th Hussars and 4th RHA promptly disorganise them again. 7th Hussars occupy the reverse slope of the Pimple. 


Here are the 2nd RTR A9s, thoroughly shot up but in a nice hull down position away from the fighting.


Hard pounding in the pass. 60th MG Bn once again rally and one company of M13s pushes forwards to engage 7th Hussars. The remaining 2 RTR A13s are knocked out, they hadn't got far enough away from the Italians.


More Wellingtons en route for the north. Major Pasquali engages them with his pistol.


7th and 11th Hussars finally have their revenge and 60th MG Bn is destroyed, leaving the road blocked with blazing transport. This will take the Italians a move to clear.


The 2nd RTR A9s are reorganised, and now look fairly chipper again. 4th RHA is also out of immediate use ammo so time for more supplies of shells to move up.


The Italian Paras clear the wrecks off the road and a company of M13s occupies the hex to hold it. 7th Hussars take enough damage to become disorganised, but in turn the British tankers manage to knock out another company of M13s.

11th Hussars don't fancy tackling a company of medium tanks so fall back the rise at the southern end of the Pimple. 


Desperate times call for desperate measures - the remaining M13s assault 7th Hussars, who are vulnerable as they are disorganised. 


And the Italians tankers are victorious! (they needed to score three hits on three dice). 1st Para Bn is now firmly into the pass, and the Italians have taken The Pimple. 


The British respond by screening the road south. The A9s are in a good spot there.

We broke for the evening at that point as the situation has suddenly become very interesting.


When we resumed the next day there was a bit of a lull in the fighting at this point. Having taken The Pimple the Italians consolidated their position by moving the guns up onto the ridge, but otherwise both sides reorganised the units which needed it. British shelling disorganised the last Italian tanks. We had a change of personnel with John B taking over the Italian paras, and Russell and Pete joining the British.


The Italian paras then set off down the road again into hail of fire, even though they were covered by the Italian tanks and artillery. The A9s were sufficiently shot up that they had to reorganise (again) - this was to be their fate for much of the rest of the game.

11th Hussars shot and scooted up to the rise adjacent to the road, and the first Para unit took enough losses to disorganise it.


The Paras went on going and the Italians switched their fire to the British armoured cars who became disorganised. This was probably a mistake as the now reorganised A9s supported by 25pdrs put enough fire on the Paras to destroy their lead unit. This also blocked the road with burning lorries who would need to be cleared. The Italian gunners had run out of ammo and had to be resupplied.


The remaining Italian paras cleared the road, and despite being reorganised, the 11th Hussars finally succumbed to some hot shooting from the Italian tankers and gunners. 2nd RTR had to shift position to avoid the Italians simply driving off down the road, so they moved over to the rise to put a ZOC across it.


The Italians concentrated their fire on the A9s while the Paras moved into the ZOC. The British fire in turn managed to disorganise them but not destroy them.


The Italian paras were able to slip off south down the road, and as there was no point now in staying in position, 2nd RTR retreated east out into the desert. The Italians had (just) managed to win on the very last turn! Fittingly it was the Paras as irl they were the only unit to break out before 10th Army surrendered.

That was an excellent game and many thanks to the players for taking part in an appropriate spirit. I was rather dubious about an 'ambush' type scenario, but in fact it worked fine and was a tribute to Frank Chadwicks original design. That is it for the desert for now, we are all yearning for some greenery, so next time it is back to northwest Europe I think.


Wednesday, 16 April 2025

Sherman turret conversions (3) Sherman Kangeroos

 I've wanted some Kangeroos for ages as they were used quite extensively in the latter part of the Italian and European campaigns, but I can't justify the storage space for some dedicated models of defrocked Priests or whatever, even though a few manufacturers make them now. Instead I thought I'd do some Sherman Kangeroos, and just make up a replacement 'turret' of infantry being transported. 


I had a couple of options for the hull. On the right is a PSC plastic Sherman with a traditional turret location hole. I'd need to make a replacement turret as a false aperture with the infantry on/in it for this one. On the left is one of my metal Peter Pig Shermans which has this interesting arrangement below...


An enormous hole and a completely hollow hull! I guess this is to keep the weight down although like all Peter Pig offerings, these are hefty models. This seemed like a no-brainier for a Kangeroo as it is already hollow, but then I thought long and hard about the practicalities of trying to build a removeable insert plug, recessed into the hull and just the right depth to hold the infantry sensibly, but also located so it didn't just slide away inside. It all just seemed like a lot of bother for something which is only likely to get used two or three times.  


So I went with the bodge turret option. I guess I can always revisit the Peter Pig insert option later as I enjoy doing these conversions. First job was to make up some disks out of thin plasticard which would accommodate some figures and fit inside the splash guard around the turret. The locator pins were made out of sprue to fit the holes in the hull.
 

That fits nicely. The card was marked up with a pair of compasses and then I cut the disk out (carefully) with scissors.


Next up was to add some passengers. These are Skytrex/Old Glory Bren Carrier crews, I've had a bag of 50 of these for years, picked up cheaply on a Bring and Buy. They have proved to be exceedingly useful as they are in a range of poses and fairly easy to carve up, many of them have ended up in carriers, but others have become vehicle crews and even 2pdr seated AT gunners with various bits chopped off. 

Each 'team' had a Bren gunner and two riflemen. I filed their bases as flat as possible and stuck them in a blob on the plastic disks. I vaguely thought about making sandbag edging out of Milliput, but in the end I just couldn't be bothered. Something else I can do later. 

I mounted them temporarily between two bits of dowel to undercoat and paint them, as the turret locator pins are quite long.


And here they are all mounted up and ready to biff the Hun. The infantry are done in standard wool Khaki uniforms, green helmets etc. I painted the base black to represent the aperture, and they don't look bad at all as the splash guard is raised around it so gives an impression of depth. 


They look slightly more obviously painted on from the rear. If it bothers me I can do the fancy painters trick of edging them in a lighter colour than the hulls which produces a 3D illusion of depth - I did that on the Crusader turret hatches I did last year, but I'm not convinced it is necessary, or that it would work in this case.


I'm sure the Germans will find them fairly terrifying anyway. Great, glad those are done, I've been meaning to do them for years. I've already got a couple of scenarios which use them, so we will play those at some point.