Thursday, 10 September 2020

Gitschin 1866, Portable Wargame with no toys

 John put on a PW game covering Nachod (also in 1866) a couple of months ago, and I was keen to give it another go as the original rules were aimed specifically at the nineteenth century. John had used a pre-publication version and I wanted to try it with the rules from the original book which had some importance differences.

The other thing I wanted to try was a different set up. The Skype+Camera thing is fine as far as it goes, but there are often comms issues through the sessions and the biggest problem is player orientation. My APW stuff is all in 6mm and making any sense of what was going on at all would have been quite hard remotely without doing big bases, labels etc. I was interested in trying something a bit different.

 Early in lockdown, Simon helpfully pointed out a site with some game assist software specifically aimed at the Portable Wargame : https://www.cottonreeltank.org/cafelunar/gamecabinet/gridgame/

There are a series of packages covering various iterations and periods of PW, and very kindly, the source code is also available for download. The main thing it offers is the ability to manouvre graphical objects across a background in a rather easier manner than e.g. using my mapping software or Powerpoint Slides or whatever. My programming skills are rather antedelivian, ending somewhere around C and SQL with a smattering of Java, although I did spend a moderate amount of time doing HTML database applications.

This is all written in javascript, the hackers delight (whoever thought allowing browsers to execute code was a good idea?), but it is fairly easy to pick up. Back in April I spent a lot of time playing around with it with a view to doing double blind operational games and I became reasonably competent at editing the unit database, replace the tile based terrain system with maps and fiddling around with the functionality. I made a lot of progress setting up a WW2 map based divisional level operation, but for whatever reason I never quite got around to running a game with it though.

Anyway, fast forward to August, and I thought I may as well try and run a PW game on it, what it was originally designed for. I did do some customisation, I modified the unit database to remove all the tricornes from the figures an instead have Prussians in picklehaubes, Austrians and Saxons in shakos with re right uniform colours and facings etc. I also replaced the terrain tiles with my own map, scaled to fit the virtual figure bases and added some extra markers (explosions, activation markers etc).

I picked Gitschin as a scenario, as it is an interesting battle and made a change from Prussians trying to cross mountain passes into Bohemia. The scenario was based on the Wyre Forest Gamers one for Fire & Fury Francesa, plus some mods from Wavros account of the battle. 


Here is the basic setup. The Austrians have to hang on to Gitschin until the end of the game while also linkng up with the Saxons (en route from the south) and then withdrawing the Austrian army intact! The whole position is one of those surveyed by the Austrians in the eighteenth century. The big hill in the middle has cliffs on its north and west edge, which makes this an outstanding defensive position. 

Meanwhile two entire Prussian armies are en route via the north and west roads, each with a division as a vanguard.

A Prussian division. Four infantry regiments, artillery battalion and HQ. I was pleased with how the Prussian flag came out, and if you look very carefully they have all got the right cuff and shoulder colours etc. The gun carriage is also Prussian Blue.

The hardest thing was modelling the infantry as the standard PW doesn't really model the tactical gulf between the Austrians and the Prussians. Regiment for Regiment the Prussians were at least twice as combat effective as the Austrians, if not four times as effective based on the relative loss ratios as the Prussians had breechloading rifles and were dispersed, whereas the Austrians had muzzle loaders they hadn't been trained to fire and also deployed in dense assault columns which made them into dense targets. 

In the end I just went with combat equivalence, so one Prussian regiment was the equivalent of an Austrian brigade. As Prussians were spread out in skirmish columns, and the Austrians jammed together into storm columns that explained the difference in real estate occupied.

That worked quite well as the detached Austrian Corps holding Gitschin was a big one, with five brigades (aka 'Divisions') plus an attached cavalry division, so it kept the unit count down. The Saxons I gave the same ratio as the Prussian, one unit per regiment, as they knew how to fight in supported skirmish lines and could both actually fire their rifles and all speak the same language.


The Austrian Corps, five 'divisions' (representing a brigade of two regiments), a full artillery regiment with three battalions and its attached cavalry division, which should have three brigades but I modelled it as two because cavalry were hideously vulnerable to rifles in 1866.

As the Prussians have two divisions with five units apiece, and the Austrians also have ten, that doesn't seem unreasonable. Due to the notorious command problems facing the ployglot Austrian army, I also reduced their activation level by one, so their median activation is five units to the Prussians eight, lets see if that is enough for the Prussians to overcome that nasty defensive position!

Numbers were low for this one and Simon and Tim C drew the Prussians, John and Jerry the Austrians and Saxons.


There is the opening setup, based on the historical one. The Austrians set up as series of interlocked flanking positions covering the routes around the forested mountain, with the guns ready to blast anyone foolish to try and walk through the gaps and the cavalry in reserve. This setup actually works quite well in PW given the move restrictions. The Austrian 2nd Div had been chewed up at Munchengratz and was held in reserve near Gitschin.


Simon helpfully pointed out that screenshots would be much clearer images, so here are a few of those. Tims Prussians came up the road in a column, which if course precluded nay possibility of retreat, so it was a good job the Austrian gunners were rotten shots. The explosions are there to record grids fired on.

Simons Prussians very bravely decided to try and storm the almost impassable mountain! Their guns also came under Austrian CB fire. I was expecting a broad outflanking move astride the stream, which was what the Prussians did irl, but that is why wargames are fun.


After a few turns the Prussians had shaken out into lines, and had even managed to get up onto the mountains. The fearsome Austrian guns had eliminated the Prussian artillery (oh the shame) and now worked over the Prussian infantry. By now the Saxons were marching on from the south (the blue figures in row 8) and the Prussian cavalry brigade had turned up.


By the end of turn 5 the Prussians had cleared the wooded hill, while the Austrians had locked down their right flank. Over in the west the Austrian and Prussian lines faced off, but the Saxons were moving up rapidly now.

We broke for the night after turn 5 and resumed the following day.


As the action resumed the following day the Austrians were starting to look a bit ragged in the west, but the Austrian artillery had manage to push back one of the Prussian regiments, and also wounded the Prussian divisional commander! (I was using the commander rules from the Napoleonic PW). Not good news for the Prussian exhaustion level.


The Prussians pushed hard and the Austrian brigades in the west finally broke and ran, the Austrian artillery and infantry were also pushed back in the centre. (I wasn't sure if artillery which had fired could retreat, but this is clarified in the Napoleonic PW). This was enough to push the Austrians over their exhaustion point, but by now the Saxons were well forward and had even pulled a sneaky flanker on the Prussians in B7.

The Prussians pressed home their advantage, including a glorious cavalry charge against the Austrian guns north of Gitschin. Sadly this was repulsed, and the Saxons put up a stiff fight in the cauldron battle in the west. The Austrian artillery also managed to wound one of the Prussian divisional commanders again, and the weight of losses was sufficient to exhaust the Prussans.

We called it a day at that point. The Austrians had held Gitschin and were in a good position to get their army off the southern edge of the table, but sadly they had been exhausted in the process. The Saxons were still a few hits from their exhaustion point and the Prussians had been fought to a stand-still and lost all their guns! So a tactical victory to the Austrians.


The game software working fine over Zoom, ad the players said it was much clearer than our more usual Webcam/Skype setup. A screenshot of the player experience is above.

The game itself went fine, more smoothly than last time. There were still a couple of geometric confusions and I'm glad we went with Napleonic version of the leader risk rules. I think rating the units on the basis of combat equivalence worked fine, as the Prussians would have really struggled against fourteen Austrian and Saxons regiments(!) instead of five Austrian brigades and four Saxon regiments. The Prussians didn't get to make much use of the superior troop quality until later in the game as they didn't leave themselves enough space to be able to retreat. Still, it all rattled along nicely and we were done in less than two hours of play.


One of my blogging pals has posed this little challenge re simple rules: https://soundofficerscall.blogspot.com/2020/08/the-allure-of-simple-wargaming.html

As the Portable Wargame is listed as one of the sets, here are my answers to his questions:

Basic Questions:
How long did the game take to play?

a. One hour and 45 minutes.

What was the scenario?

a. The Battle of Gitschin in June 1866. This is also modelled as one of the One Hour Wargame Scenarios. I used the historical version of the battle I'd used for Horse, Foot and Guns (itself based on the Wyre Forest Gamers scenario for Fire & Fury Francesa).

What happened?  Anything extraordinary?  (troops holding out amidst terrible odds?  Savage attacks that tore through the enemy line?  A straight string of rolling 6s or 1s?)

a. The failure of the Prussian cavalry charge was a bit surprising. A full cavalry brigade into the flank of unprotected gun batteries fails to obliterate them? The Austrian counter battery fire was also hideously effective. 

Who won and why?

a. The Austrians. They just managed to wear the Prussians down enough to stop them.

Did you enjoy the game? Why?

a. Yes. It moved along at a good pace, the players had plenty to think about and the result seemed plausible.

Advanced Questions:
After reading the rules, how many consultations occurred with the rules during the game?

a. At least three - artillery retreats, threat to leaders, and once again, the ease of getting flank attacks.

Was the scenario created for you or did you create it?

a.I created it based on another one. It has been used before with other sets of rules.

Did any troops perform remarkably good or bad?  Was it luck or part of the mechanics?

a. I would have expected the Prussian infantry to tear their opponents apart, as they did repeatedly in the real campaign. It was a bit more of a slog in the game.

What were the victory conditions in your game?

a. The Prussians had to capture Gitschin or exhaust both the Saxons and Austrians. The Austrians had to hold Gitschin and withdraw the Austrian Army in good order by turn ten.


Friday, 4 September 2020

QRF 152mm D1 howitzer

Long time readers will know my aversion to sticking metal guns together, but the last few haven't been too bad, not even the Bofors guns and the one piece Pak 38 was a real winner. I've wanted to get some proper heavy artillery for my WW2 Russians for a while, although British 5.5" guns and US 105mm and 155mm howitzers have done fine so far.

So, I took the plunge and got a couple of QRF D1s instead of the resin Gaming Models ones or Irregular Really Useful Guns I've been planning on getting. That 20% discount was very attractive.


Here they are blatting some Hitlerite invaders, and they don't look too bad do they? Well, these big boys were a right bu**er to assemble. I don't know if they were missing some parts, perhaps they were. The main problem was that they had wheels, trails, barrels and gun shields but no apparent means of putting them all together. Perhaps the gun mount was missing? The wheels just had little stubs and no axle so presumably they were supposed to stick to something.


I did get them together in the end by building a gun mount out of foamcore, slathering it in blu tak and superglue and then shoving all the bits together and hoping for the best. The blu tak gave it a bit of flexibility while the glue cured so I could keep adjusting the angle of the various bits on both guns simultaneously.

In the end they came out OK, but oh dear, what a faff.


Being heavy guns, they come with four crew figures  included (one of the really good things about QRF guns) although to my untutored eye they look suspiciously like Cold War Russians as I'm fairly sure Y strap webbing is a post 1945 thing. The US 105mm howitzer crews who were similar,  clearly Vietnam era gunners in flak jackets etc. In this scale it doesn't matter too much, just slather them in paint and they look like Russians.


View from the side. The pile of blu tak the gun barrel is sitting in can be seen but it isn't too obvious from other angles. I just did this in overall Russian Green with a bit of a highlight.

They came out OK in the end but not an experience I'd care to repeat. I may just have been unlucky, QRF stuff is normally fine, but I'd struggle to recommend these to anyone.

Sunday, 30 August 2020

Kasserine Pass

I was casting around for a manouvre type scenario for Panzergruppe (as opposed to a high intensity slog like Operation Goodwood) and I was inspired by Rick Atkinsons 'An Army at Dawn' to have a look at running a Kasserine Pass game. I wanted to cover the joint battles or Kasserine and Sidi Bou Zid as they were low density and fairly high on manouvre, with only half a dozen divisions engaged in quite a large geographical area.

I'd already beefed up my US force with a view to Tunisia (hence those Zvezda M3 Lees) and I'd also acquired some Italian M13s and a nice Valentine originally intended for Soviet use. My German stuff was in a range of colours anyway, and it was fairly easy to repaint a few of my late war German infantry in caps to stand in for Afrika Korps types.

The map was a bit of a challenge as it covers a huge area all the way from Maknassy and Faid Pass in the Eastern Dorsal up Tebessa which is well on the way to Algeria. In the end I did a bit of scale compression, with a ground scale of one hex per 15km and each turn being roughly a day, but ran it as 10km per hex. It is also quite complex, being cut up with mountains and deep wadis.


The map is on its side, so North is to the left. I was hoping to avoid loads of roads, but they were a key feature of the campaign as the offroad going was so bad during the campaign (either thick mud or mountains). Rommel later reflected that if he'd realised how bad the cross country going was, he would have done something different, and the US lost an entire motorised battalion, literally just stuck in the mud.


The action starts on 14th Feb 1943 with units of 1st and 34th Infantry Divs and 1st Armored Div scattered all over southern Tunisa under the command of Fredendalls IInd US Corps. The Germans had already captured in the Faid and Fondouk passes in earlier attacks and now things were quiet, perhaps too quiet....

Historically the battle ran in two phases, the initial attacks to capture the major valley between the mountains (the Battle of Sidi Bou Zid), then a brief pause, before DAK pressed on up the mountain passes to try and isolate the Allied armies in Tunisa (Battle of Kasserine Pass). I decided to run them both together as operationally they were essentially one continuous operation.

I had five players for this one (although Jerry could only join us for Wednesday). Tim C and John took the US forces with John also playing first Fredendall and later Alexander. John ran 34th ID (the Red Bulls) and 26th Armoured Brigade, while Tim had the Big Red One and Old Ironsides.

Simon had 10th Panzer Div with its attached Tiger battalion, Jerry had Centauro, and Tim G ran 21st Panzer Div and also took on the role of Rommel.


The table from the south. 10th Panzer is massed at Faid Pass, and 21st Panzer north of Maknassy. The bulk of 34th ID and 1st AD are on the right around Sbeitla, while two regiments of 1st ID are around Gafsa on the left.


21st Panzer Div, accompanied by Rommel. I decided to use 15mm stuff for this as the unit density is quite low. 21st Panzer only has a single infantry regiment, but has a lot of divisional assets. The whole division is rated as veteran, which makes them quite scary.


10th Panzer, accompanied by 501 Tiger Bn. 10th Panzer has a more normal establishment with two PG regiments. These chaps are veterans too.


Two Combat Commands from 1st AD cover Sbeitla from the east and south. At the base of Faid Pass is an unfortunate RCT from 34th ID, unaware that an entire panzer division is about to drive over them. There is a supply dump in Sbeitla.  


Fedendalls HQ back in Tebessa, along with a reserve RCT from 1st ID.


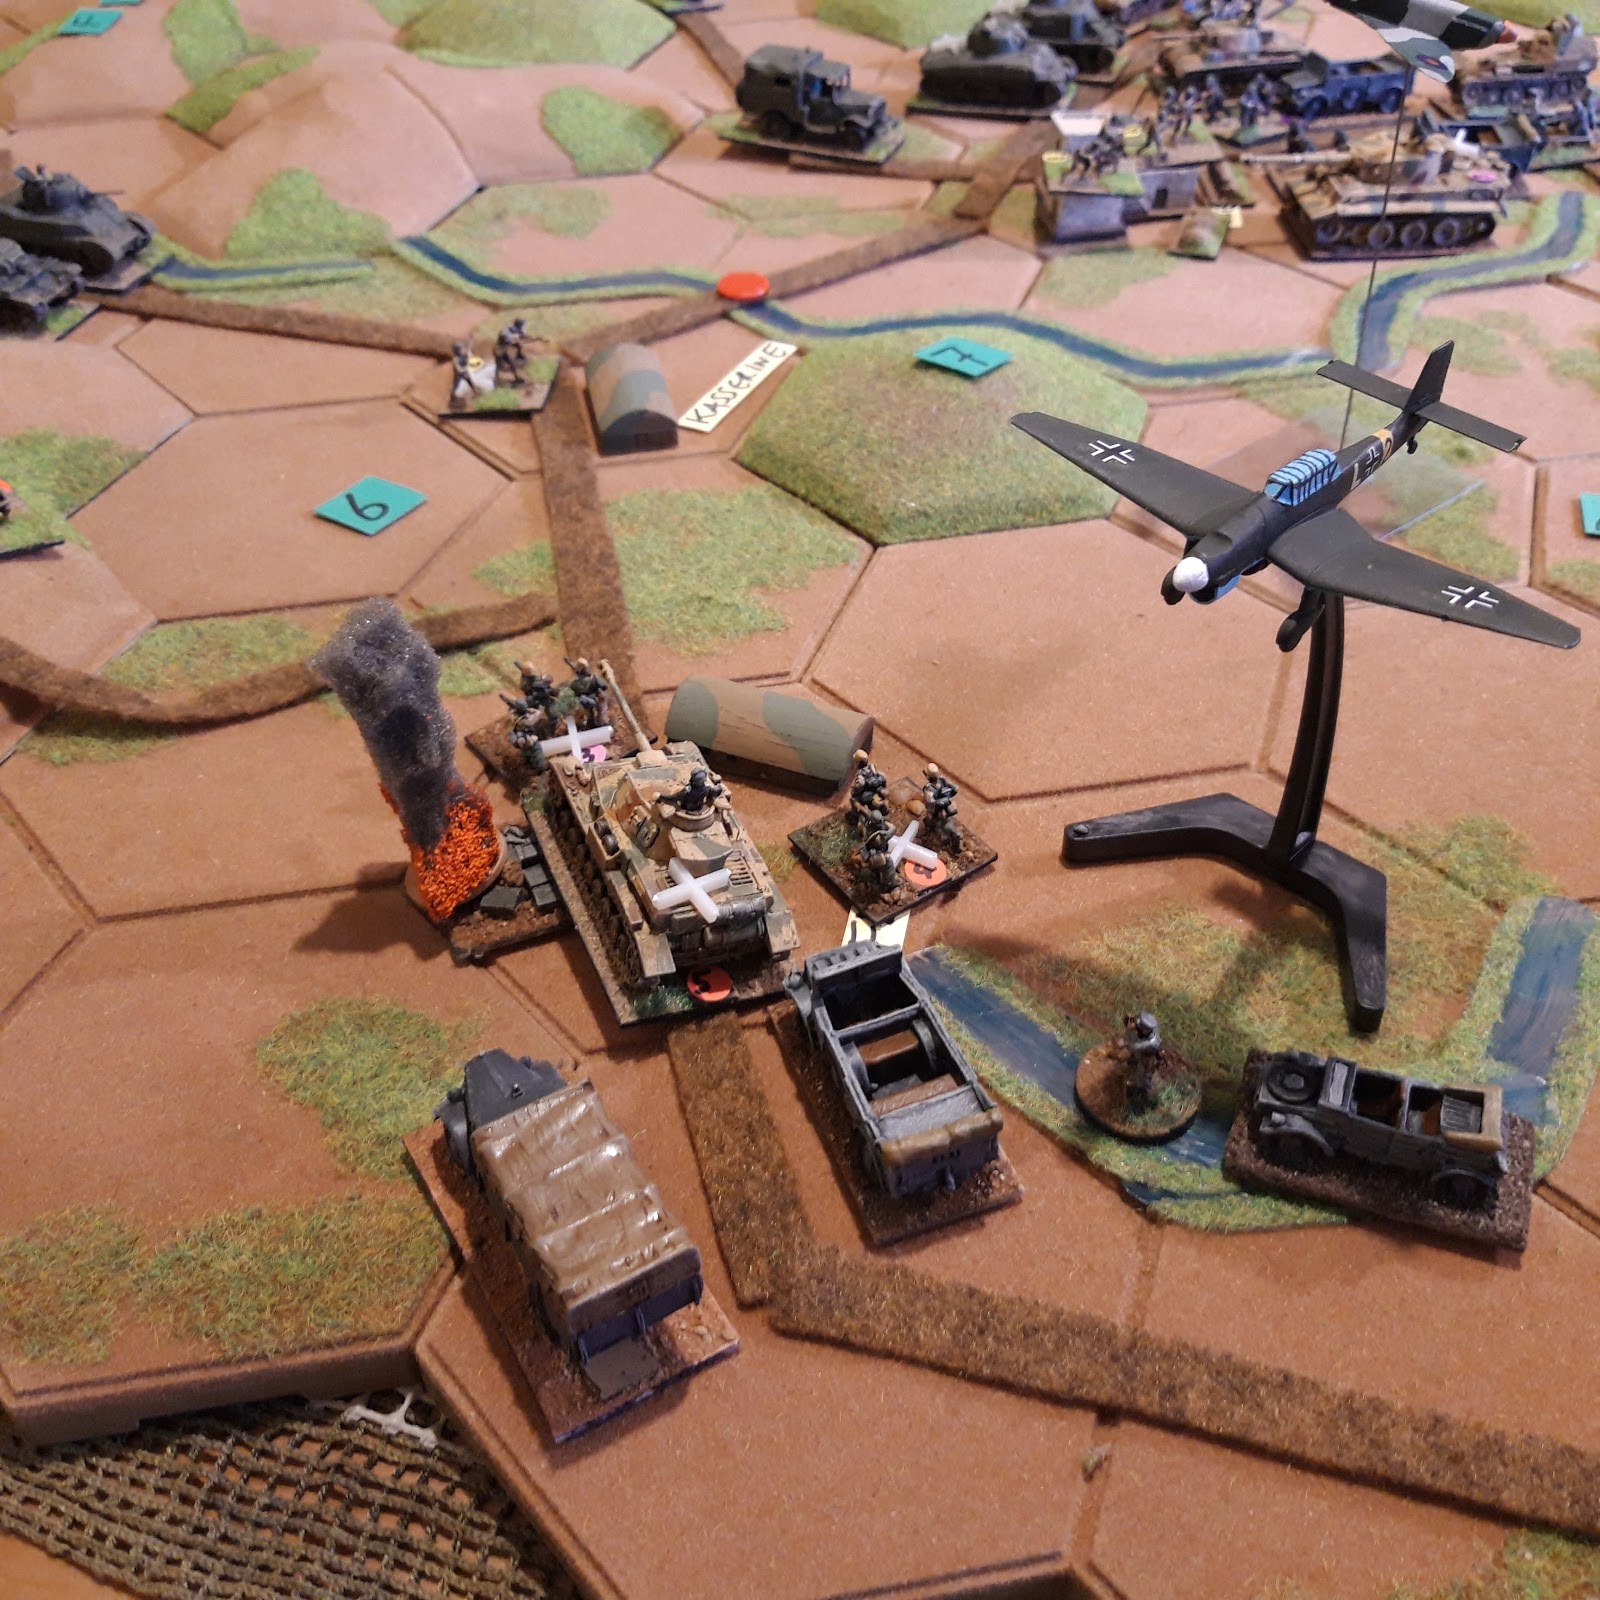
The Allied airforce! The Axis had local air superiority for the first few days of the operation as the Allies were busy attacking the supply lines back to Sicily.


1st ID dug in defending Gafsa. There had been see-saw fighting here over the winter. Zbv 288 Afrika is dug in down the road to Maknassy.


The action opened with 10th Panzer supported by Stukas attacking the RCT bellow Faid Pass. irl 21st Panzer joined in this attack, but Rommel in this game decided on a rapid deployment over to Gafsa. Unsurprisingly the RCT took heavy losses and fell back towards Sbeitla. irl it was surrounded and overrun.


21st Panzer completed its road move of 75km to Gafsa, but didn't have enough movement left for an attack that day. It was joined by Zbv 288. The Germans chose to keep Centauro in reserve as they only had limited supplies for the offensive.


1st AD moved its combat commands up to block 10th Panzer, while the shattered US infantry fell back to Sbeitla to reorganise.


The next day was overcast which restricted air power but the Stukas were still active. 1st ID has moved its other RCT over to cover the road from Maknassy, but it hasn't had time to dig in yet. 21st Panzer launched a massed assault over the wadi with the Luftwaffe in support.


Rommel secured a tactical victory and the US infantry fell back northwards up the road, pursued by the panzers. DAK had taken some losses forcing th crossing.

10th Panzer meanwhile attacked the Combat Command on the crossroads south of Sbeitla. This also scored a tactical victory and the US tankers fell back all the way to Kasserine to reorganise but not before inflicting some hits on the panzers (each Combat Command has tanks, armored infantry. artillery and tank destroyers).


The panzer regiment occupied the crossroads but left its infantry behind. The third US Combat Command arrived and the US tankers responded with a counterattack!


To everyones amazement, the US scored a marginal victory and pushed the Germans back!! Silver Stars all around. It was fairly bloody with both sides taking hits, and the Stuarts and Lees declined to follow up. One of the US victory conditions was to win at least one battle with purely US forces, so well done Tim C and Old Ironsides for pulling it off. 


Rommel decided it was time to bring on the Italians. Centauro came on via the newly captured Gafsa and set off up the road towards Sbeitla. The M13 was bought specifically for this game. The Bersaglieri motorcylists might actually be Germans. Ahem.


10th Panzer halted to reorganise after its tactical setback. The US took the opportunity to break contact and fall back to Sbeitla. There was now a 20km gap between the major combat units in this sector, with Nomansland just occupied by patrols.


The 34th ID troops around Sbeitla frantically dug in and brought up reinforcements. The third RCT from 34th ID occupied Kasserine.


With things looking a bit dicey, the Allies committed more aircraft for tactical support and achieved air parity.  In the distance, the weakened 1st ID RCTs are digging in to cover the airfield at Feriana, while 21st Panzer regroups. 


US B-25s have an eagles eye view of the battlefield. 


An RCT from 1st ID and and engineer regiment are dug in on the road to Tebessa above Feriana, looking down over the plain. The supply dump at Feriana is burning.


One of the Combat Commands is refitting in Kasserine Pass and has been joined by Valentines from 26th Armoured Brigade.


General Alexander has joined Fredendall in Tebessa.


21st Panzer is massing up the road from Gafsa.


As Centauro arrives to reinforce 10th Panzer, the whole Axis front pushes up 20km and makes contact around Sbeitla. The force ratio isn't looking too good here for the Allies.


21st Panzer makes a maximum effort attack towards Feriana, and the Allies throw in their bombers.


Despite the Allied air support, the Germans overrun the first US line of defence with Rommel personqlly leading the panzer regiment, and then crash into Feriana, wiping out the defenders there too. Disaster! Two RCTs from 1st ID have been obliterated. It turns out the supply dump wasn't quite as demolished as the Allies hoped and DAK replenishes itself. Rommel is on a roll.


The main German attack at Sbeitla focusses on the US armour,andit is forced back up the road to Sbiba. Centauro sets off in pursuit to keep up the pressure.


Sbeitla is now surrounded on four sides, but the 34th ID decide to hang on.


21st Panzer regroups and reorganises around Feriana, while 26th Armoured Brigade moves its tanks down to Kasserine.  Is the front firming up here?


The US tankers are relieved by British tankers from 26th Armoured Bde, who face off against Centauros armoured regiment. The battered US armor withdraws to reorganise.


More British reinforcements arrive, this time in the form of 'Vicforce' from 1st Armoured Division, which makes use of the road network to get into position behind the remains of The Big Red One.


The weather turns, which grounds all the aircraft, and 21st Panzer attacks Kasserine without any Stukas. The Germans achieve a minor victory but the entrenched defenders choose to stand, taking additional losses but stopping the Germans. Kasserine holds! Has Rommel met his match? (historically the Valentines were destroyed conducting a lengthy delaying action back up the pass to Thala) 


10th Panzer and Centauro conduct a concentric attack on Sbeitla and capture the town. The survivors from 34th ID don't have any option but to fall back cross country, but the bad going precludes a German follow up. If the Axis had surrounded the town, they would have completely destroyed the defenders..... In all the excitement the US forgo to demolish the supply dump, and very welcome supplies fall into the hands of the Afrika Korps. The Tigers and a panzegrenadier regiment exploit to the demolished bridge outside Kasserine.


Centauro faces off against 26th Armoured Brigade. Neither side seems inclined to attack the other, so this part of the front quietens down.


The Germans launch a massive concentric attack against Kasserine. Bad weather has still grounded all the air, but the ground forces are more than enough to score a tactical victory and the defenders of the town go into the bag. Even worse 21st Panzer exploits up the road and overruns the remains of 34th ID who were retreating from Sbeitla. The whole 34th ID has now been rendered ineffective.


As 21st Panzer drives up Kasserine Pass, it encounters the bulk of 1st Armored Div, now largely reorganised and blocking the way. Behind them, Vicforce has redeployed and dug in on the road to Tebessa. Despite capturing the extra supplies at Sbeitla and Feriana, DAK only has one day of full supply left, and Rommel realises that he isn't going to make it off the north table edge before his supplies run out, and calls it a day.  


The road to Sbiba is still held by 26th Armoured Brigade.


10th Panzer is still a powerful force, and could perhaps carry the offensive on its own for a couple more days, but with the advantage of interior lines, the allies can move to block them.


The 1st ID defenders on the mountain look down on the vast Axis traffic jam in the muddy valley, and realise that they are going to live to fight another day. 


And back at Tebessa, Alexander sends a congratulatory message to the troops.

Well that was a close run thing. The Germans inflicted far heavier losses than their historical counterparts, but the Allies held them far further south (irl the final battles were well into the mountain passes in the Western Dorsal). The Germans achieved as much as Rommel did, which is saying something, and the idea that the DAK could ever have actually driven to the coast and cut off the entire Allied army was always a bit dubious. The US armor acquitted itself magnificently,and 34th ID fought with great determination. The prize for rapid movement however goes to Centauro, who covered more ground in less time than any other division.

The Germans seemed a bit put off by a couple of minor reverses and perhaps didn't realise how great their local superiority was. They still managed to push the front forward 80km in eight days, which given the bad going and being considerably outnumbered by the Allies, was quite an achievement.

irl, after the battle  Fredendall was sent back the USA for a training assignment, and his Corps was taken over by Patton.