There are a couple of scenarios in the 'Birth of the Blitzkrieg' scenario book which are a bit small for NBC, featuring just a couple of battalions. Fine for a quick two player push around, but not so good for a multi player Zoom game.
One of these is a scenario covering 1st Armoured Divisions attack on the Somme bridgehead in May 1940. The Germans have encircled the Allied armies around Dunkirk, and are holding an outward perimeter to the south. 1st (British) AD and later 4th DCR mounted a series of attacks to break the encirclement.
It only has two British armoured regiments against a single German battalion, spread out in company strongpoints, so way too small for NBC. Fine for my One Hour WW2 version if I drop the units to companies/squadrons, and a useful tryout for the slightly revised rules. Besides, my 1940 British Cruisers and Vickers Lights haven't been out in ages...
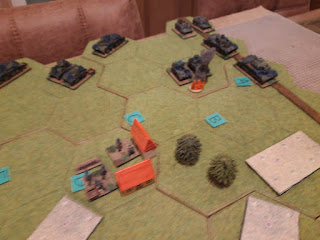
Battlefield from the south, the Somme is off to the right. The villages are Saiganville (top, church), Cambron (top right, in the big wood), Mannay (centre left) and Moyenville (bottom centre).
And with the defenders deployed. Four companies of 25th Schutzen Regiment, supported by the Regimental AT company. The Divisional engineers have helpfully laid extensive minefields along the front, with a few gaps. The British enter from the northwest and have to exit at least three units via the road to the east.
Eagle eyed readers will notice this scenario bears a 'strong resemblance' to the insurgent scenario from OHW, with minefields instead of a river, and German infantry instead of raggedy guerillas. Lets see how this pans out.
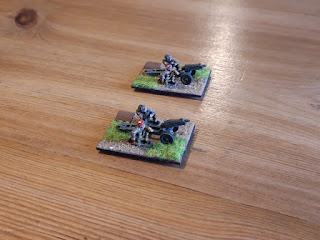
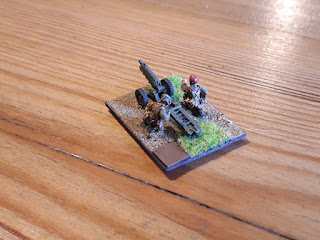
The Germans put three companies in the front line with one AT company in Saiganville on the road and the heavy Infantry Guns in Moyenville on their left.
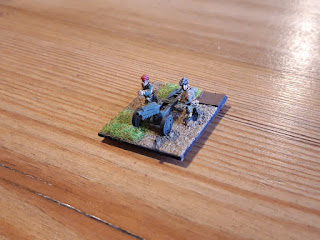
The fourth company with the remainder of the Pak 36 were in the woods near Cambron. The Luftwaffe had Me110s flying CAP.
Pete is German CO and took the southern companies, while Russell had the northern companies.
Most of the Luftwaffe was busy bombing Dunkirk, but they had one Stuka airstrike on call.
And here is 3rd Armoured Brigade, 1st Armoured Div. Two armoured regiments, 2nd and 5th RTR.. Each has two squadrons of cruisers and one of Vickers Lights. The cruisers were a mix of A9/10 and A13 irl, but I only have A13s of various types. The brigade is supported by a single Motor Company in carriers, but no artillery. Irl 2nd Armoured Brigade attacked on their left, and 65th French Infantry Div on the right.
The British are restricted to enter in the top left corner. This partly compensates for their fully mechanised force. Tim has 2nd RTR, while John has the Cruiser squadrons of 5th RTR and Simon is CO with the light squadron and motor company.
John and Simon moved to pin the Germans frontally, while Tim went on a long out flanking move to the south.
The Germans fired at what they could see, and dropped artillery one the British too. Indirect fire isn't very effective against armour, but counts as bad going, so is a means of slowing them up.
2nd RTR meanwhile roared around the bottom of the minefields. The gap was out of range of Moyenville (I surmised it was covered by another unit, but they were neutralised by the French). The Vickers are classed as 'fast', so move a whopping four hexes.
Saiganville came under attack from Simons troops. The assault was driven off with the aid of artillery fire but the defenders were left disorganised. The British pulled back to rally.
Meanwhile John attacked Mannay. Tanks against infantry dug in to a town is always a bit of a tall order, but they were keeping the Germans busy.
2nd RTR meanwhile made it through the minefield gap and headed northeast.
The Battle for Mannay wasn't going so well for the defenders, so they called up air and artillery support. Combined with defensive fire, this was enough to disorganise the light squadron. The price was using up the Stukas early.
The British responded with an armoured assault by the Cruiser squadron! The attack was repulsed, but inflicted enough losses to disorganise the defenders.
Meanwhile C Squadron, 2RTR ran for the exit, covered by fire from A and B squadrons.
5RTR rallied and kept up the pressure on the forward defences.
The Vickers end run was cut short by (very) accurate artillery and anti tank fire. It was all very glorious.
The rest of 2RTR were now stuck in something of a kill sack, under fire from three sides.
If in doubt, attack! They moved adjacent to Saiganville, which was now completely surrounded. The battered defenders became disorganised.
As were the defenders of Mannay. Things started to look a bit brighter for the Brits.
Tim's initial assault on Saiganville was repulsed.
As was Simons attack on Mannay. However both attacks inflicted losses, and prevented the German units rallying.
The second assault on Saiganville succeeded and the road to the east was clear. The British tanks declined to advance into the town.
While these battles took place, the defenders of Moyenville had pushed their infantry guns over to Cambron. The existing defenders moved into the village and dug in, putting a ZOC over the road. This was about as strong a defence as the Germans could put together.
View from the west. The defenders of Mannay are looking a bit beleaguered now, best they can do is hunker down in their trenches and hope for the best.
My fuel tanker and Morris radio truck serve no game purpose, but they look nice and support the narrative. The radio truck was instantly christened "The tea van" and spent much of the game motoring about dispensing tea and buns.
British tanks started forming up on the road as the defenders of Cambron sorted themselves out.
As the next phase of the attack was about to start, that seemed a good time to break for the evening.
The next evening we opened with some air action. The British had been a bit sad about not having any planes the day before, so it was another excuse to get out my Hurricane and Battle.
In the ensuing dogfight, the Hurricanes drove away the Me110s, and to everyone's astonishment, the Battles survived their bomb run on the Somme bridges. Not that it did any significant damage.
Back at Cambron, 2RTR provided fire support as the rest of the brigade moved up. Defensive fire disorganised one of the Cruiser squadrons.
There was a lot of milling around in the British rear areas. In hindsight, they really should have got sorted out quicker, as time was running out now.
Four squadrons/companies in contact now. Enough fire to disorder the heavy infantry, despite their cover. The Germans dropped artillery on the road to create a movement obstacle.
The rear squadrons were still passing though Saiganville. The Brigade made quite a long road column.
The German defenders were certainly looking up against it now. The Motor Company moved forwards to get into position for an assault.
The German Regimental Commander turned up in his HS 126 to see what was happening.
As the British launched an all out assault down the road with 5RTR, supported by fire from 2RTR and an assault by the Motor Company.
The leading (Light) squadron was destroyed by AT fire and the motor infantry were repulsed. The German heavy infantry seem to have rallied after this, I forgot they can't do that if they have been subject to an assault. Sorry Brits.
The Cruisers pressed on in the traditional RTR manner, and even assaulted the woods to keep the Germans pinned. This disorganised the Germans again.
Despite intense defensive fire, one Squadron of 5RTR slipped though with one hit remaining! The attackers concentrated their covering fire on Cambron and disorganised the defenders.
More units lined up on the road to try and break through. Not much time left now.
In a bold move, Russell put his depleted infantry company into the road right in front of the British tanks. This cunningly allowed the Heavy Company to occupy Cambron and put another ZOC on the road.
The British cruisers crunched the 37mm Pak under their tracks, but at that point they'd run out of time to exit the two more units needed to win, so the British conceded.
That was soooo close, as these scenarios often are. One more turn....
Hats off to the Germans for conducting a good defence, they knew when to stand and when to move, but it is always a bit depressing being outnumbered almost 2:1, so well done for the keeping their cool.
The British plan was also sound, a pinning attack and an outflanking manouvre which successfully broke through the first line of defence, but ran out of time against the German reserve line.
The rules themselves held up OK and everyone seemed happy with the revisions. I must figure out some way of remembering which units have been assaulted so they can't rally in their own turn. Maybe a casualty marker or something.


