Time to try out my new hex variant of One Hour Wargames with some humans. As ever the use of a grid involves some compromises around distances and unit footprints, particularly with a large grid.
I've run this particular scenario before, although only two of the participants took part then, but I took the precaution of swapping their sides anyway. This is the 'capture the hill' scenario from OHW, but transposed onto the assault by 1st SS Panzer Division on Hill 241 at the Battle of Kursk on 10th July 1943. The terrain maps almost exactly onto the scenario map, and the force mix (two regiments of SS LAH vs 8th Tank Corps and the remains of 183rd Rifle Div) maps very well onto the Neil Thomas six(ish) units type thing.

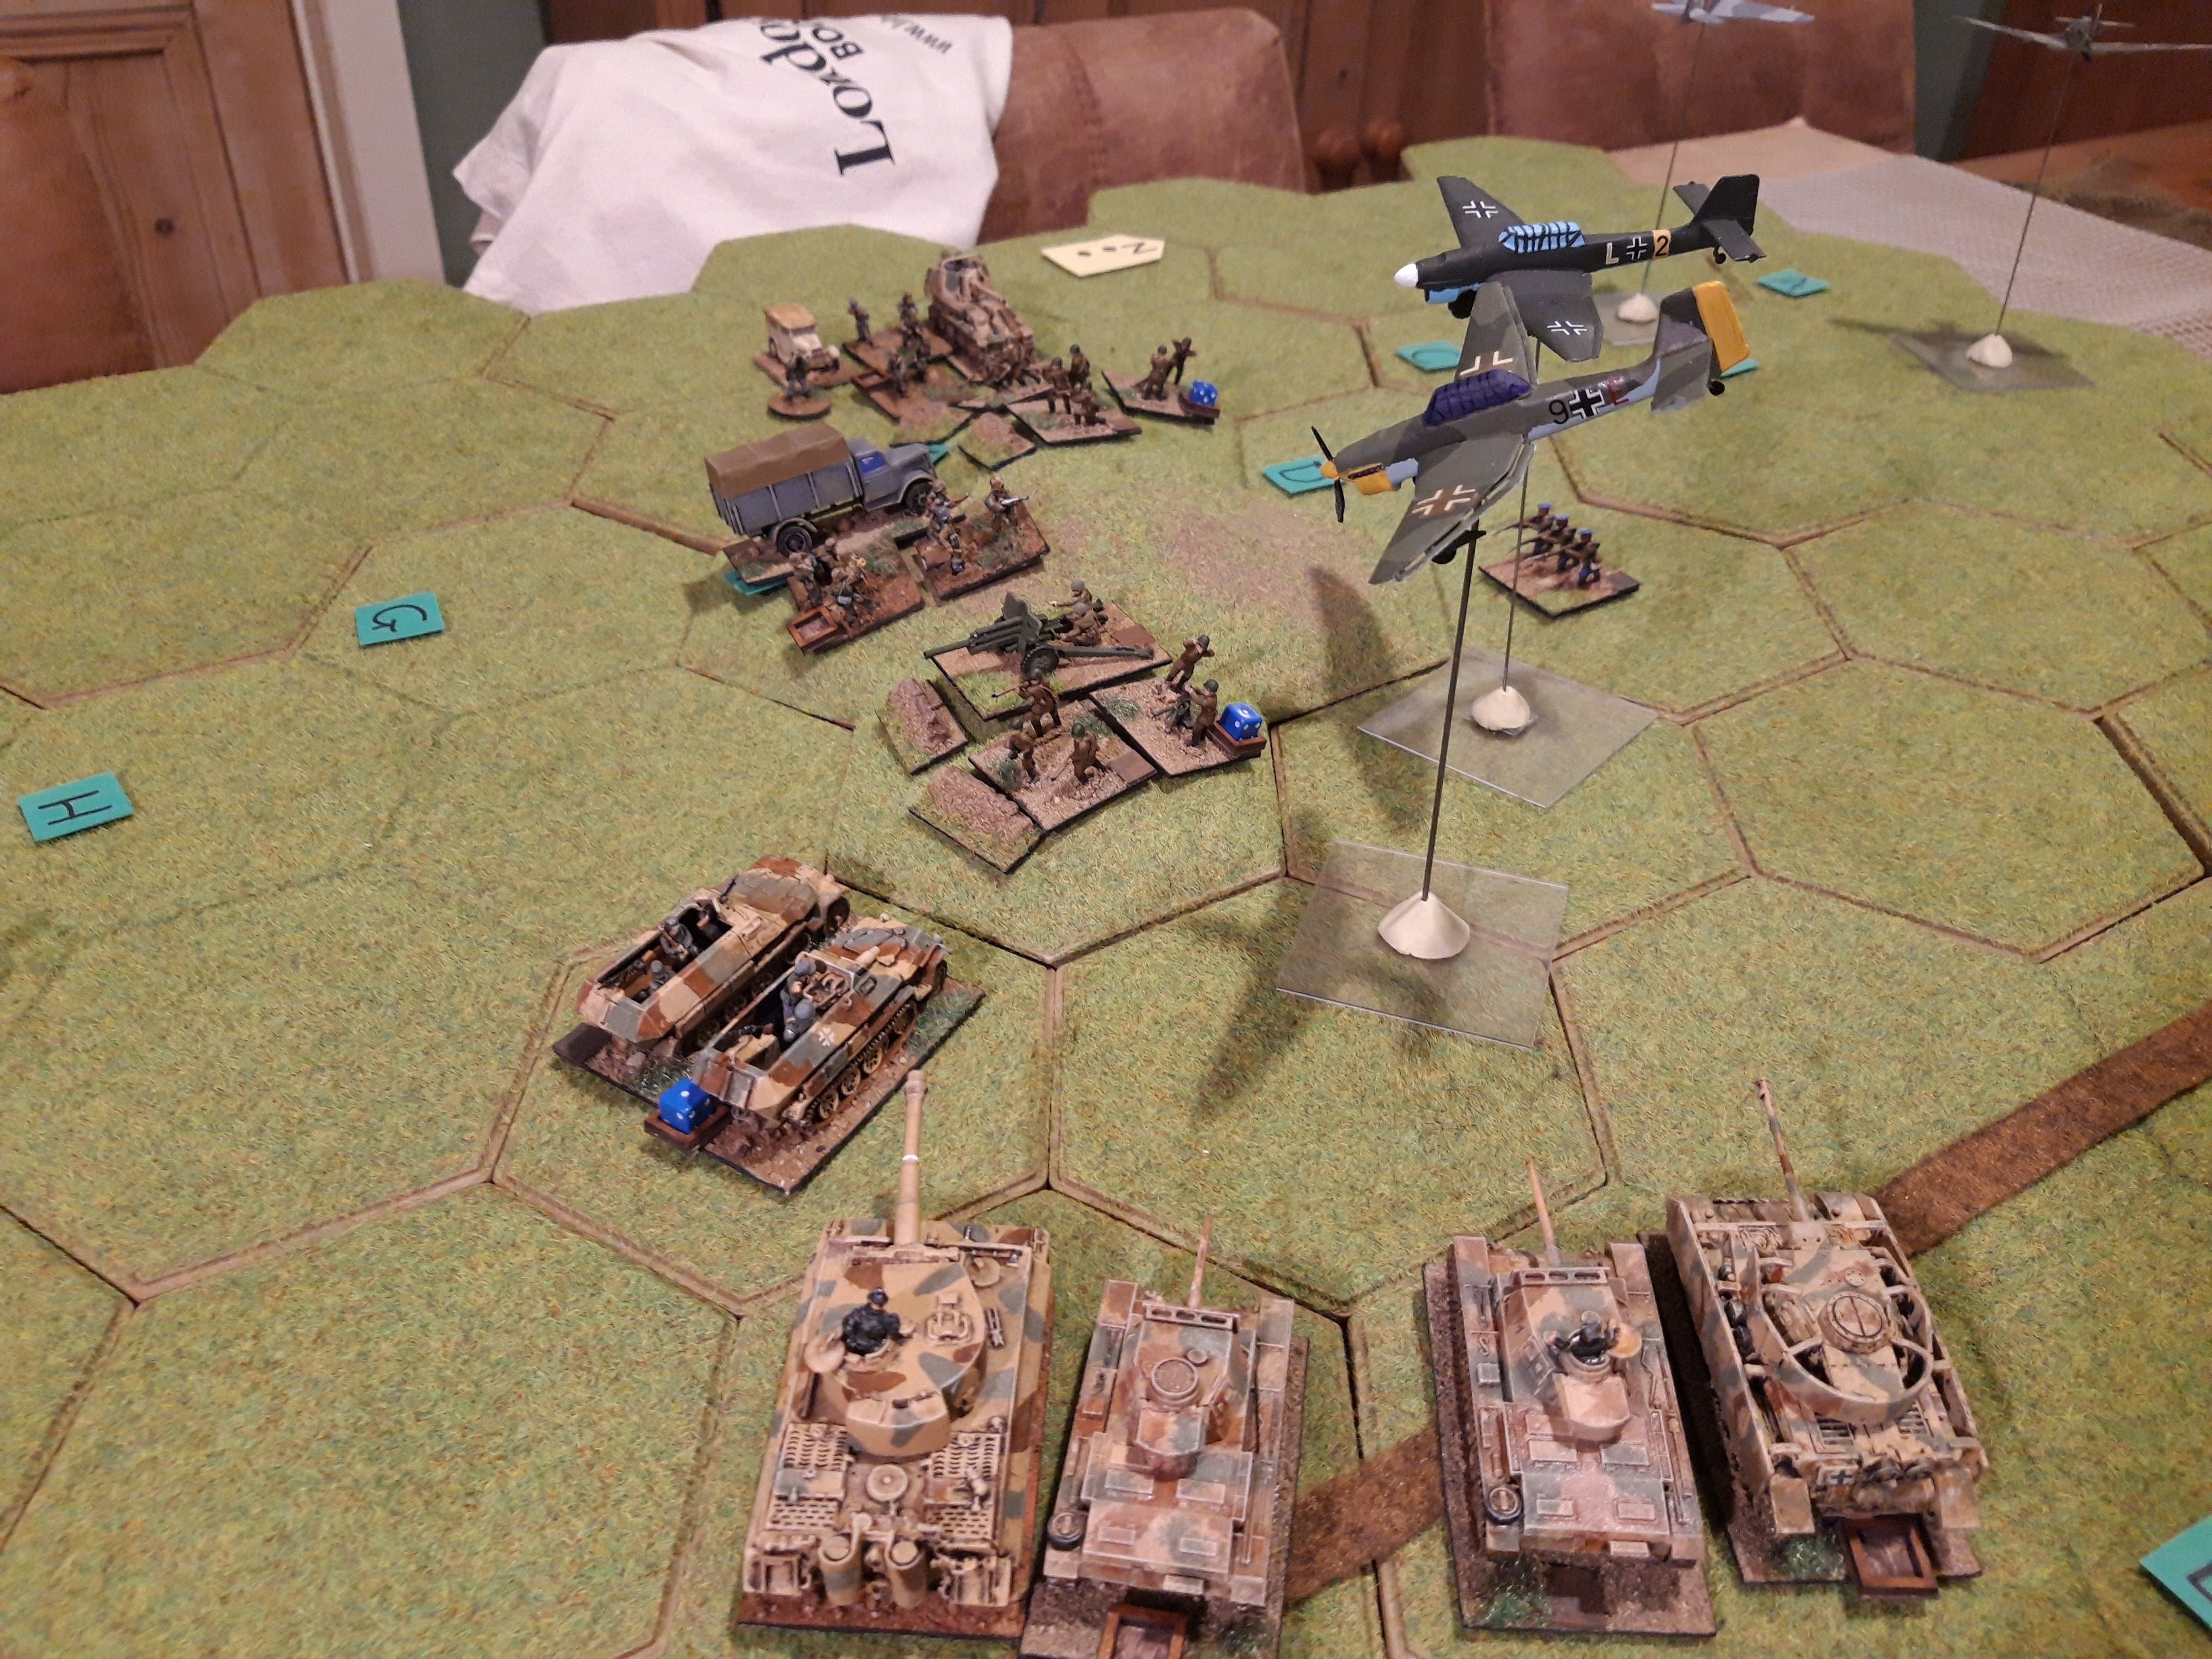
Battlefield from the south. Hill 241 is centre left, and there is a dense wood on the centre right. The road leads north to Kursk. If running this again, I'd swap the orientation by 90 degrees as with a 9x9 grid of hex rows, it overlaps my dining table with the potential for hex flipping disaster. I have also cleverly positioned my umpire station so I'll constantly be reaching over the wood and knocking the trees over. Part of the learning process I guess.

183rd Rifle Div holds Hill 241. Reducing to two weak Rifle Regiments, but dug in and reinforced with extra AT guns. First outing for my Syborg 76.2mm F22 (?) guns.
Tim commanded 183rd Rifle Div.

As ever, the NKVD are in attendance to maintain morale. WW1 Russian riflemen with blue hats.

1st SS LAH. 1st SS Panzer Regiment and 1st SS Panzergrenadier Regiment. 2nd SSPGR was reorganising on the 10th July after a major tank battle with 10th Tank Corps the previous day.

1st SS Panzer Regiment. Two battalions of mixed Pz III/IV, one of the battalions is reinforced with the regimental Tiger company. These guys are rated as 'elite', so 7SP each, roughly 1SP per 7 tanks. Also in attendance is the armoured PG battalion of 1st SSPGR, heavy Corps artillery which will bombard Hill 241 and the Divisional HQ. The field guns have been left behind, but an observer is on the right. I wonder who for...
John commanded 1st SSPR.

The balance of 1st SSPGR, reinforced with the divisional AT battalion. One of the rare outings of my Battlefront Marder. The trucks are Zvezda Opel Blitz.
Simon commanded 1st SSPGR.

Riding to the rescue is 2nd Tank Corps.Three tank brigades with a mix of T70s, T34s, a regiment of SU152 and even a battalion of Lend Lease Lees. Vehicles from Zvezda, PSC and Skytrex (my metal T70s!). These were all rated as 'poor', so only five hits ea. Russell commanded the tank element. It works out at roughly one SP per 10 tanks, and the MRR at roughly 2SP per battalion.
Tim commanded the Motor Rifle Regiment and Gun-Artillery brigade attached from division. The MRR has my home-made Gaz quad Maxim AA as regimental transport. There is also the Tank Corps HQ, consisting of a small green car and my converted officer with a big megaphone grafted on.

In the air the Luftwaffe and Red Air Force duked it out. Well, I've got the models. A Zvezda Yak and some sort of pre-painted Bf 109. The propellor even spins on the Messerschmidt.

The Germans may not have any field guns, but they do have the Luftwaffe in attendance as their 'flying artillery'. I basically treat this lot as offtable guns. A pair of Stukas and rather nice Henschel 129. They have five airstrikes of conventional bombs/cannon and one dedicated AT strike.

The German artillery bombardment was quite effective, knocking a hit off both Russian infantry units and suppressing them. The Germans followed up with right flanking move by 1st SSPR and the Panzergrenadiers rushed up behind the barrage.

As the barrage lifted, the German FAC called in the Stukas on the Russian gun positions covering the road.

Meanwhile two battalions of panzergrenadiers outflanked the left hand Rifle Regiment. The PG battalion with the Marders got right around the flank. They were both now well positioned for a close assault next turn.
At the eastern end of the hill, the armoured panzergrenadiers assaulted, covered by bombing runs from the Stukas and gunfire from the massed panzers.

Battered from all directions, the Russians hung on (the tank fire against the trenches was completely ineffective) and even managed to repel the armoured panzergrenadiers. They were down to their last SP however.

2nd Tank Corps drove on to the rescue down the eastern flank. The Motor Rifle Brigade headed for the hill while the Russian tanks and SP guns got lined up. The Soviet Gun Artillery brigade deployed to the rear.
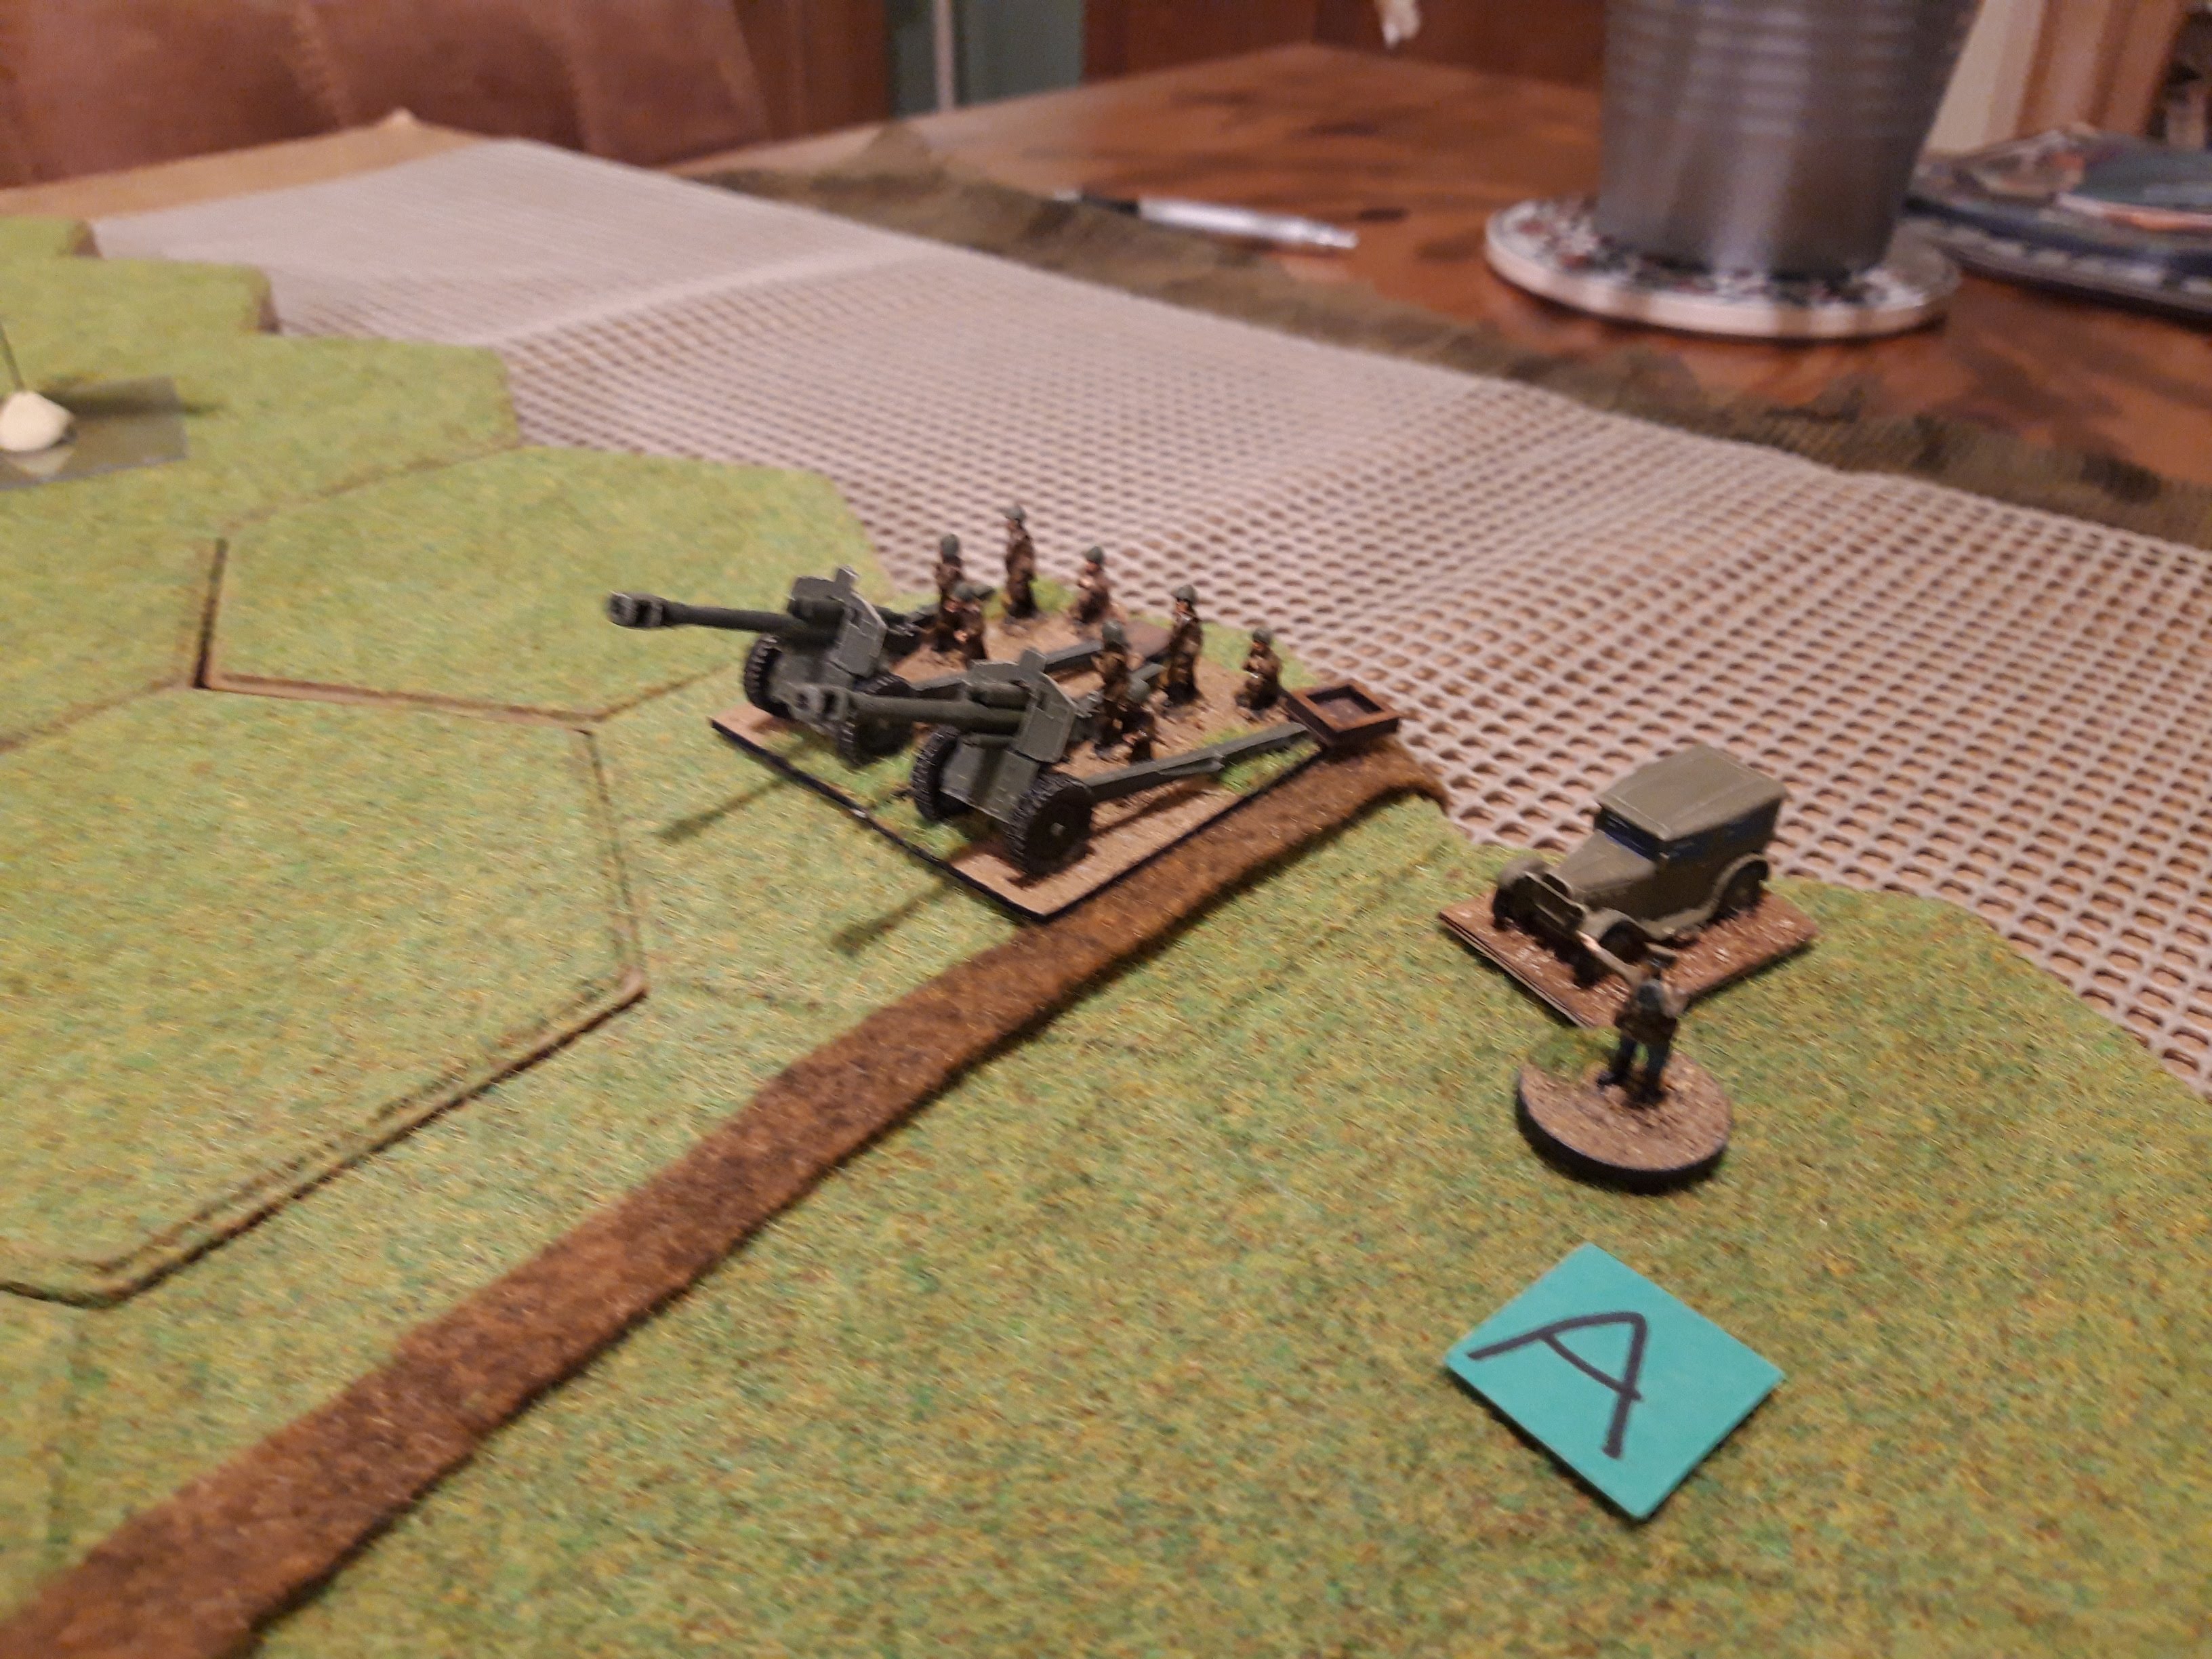
The Russian artillery are my QRF 152mm howitzers. I was going to use my Katyushas but these haven't been out for a while. 'Megaphone guy' and his little car are in attendance.

German attention switched to the western end of Hill 241. Stukas pounded the defenders and the Germans assaulted, but once again the Russians managed to hold on, and the German infantry fell back.

At the eastern end, the lorried panzergrenadiers easily overran the depleted Russian regiment, covered by the guns of the Panzer Regiment.

The Russian armoured phalanx moved into range of the 2nd Battalion, 1st SS PR. Personally I'd have closed the range right up which would expose the Germans to the threat of assaults.

The Soviet MRR drove onto the rear of Hill 241.

While the Russian artillery inflicted enough losses on the lorried grenadiers that they became disorganised.

Reduced to 1SP, the grenadiers fell back to reorganise near the State Farm.

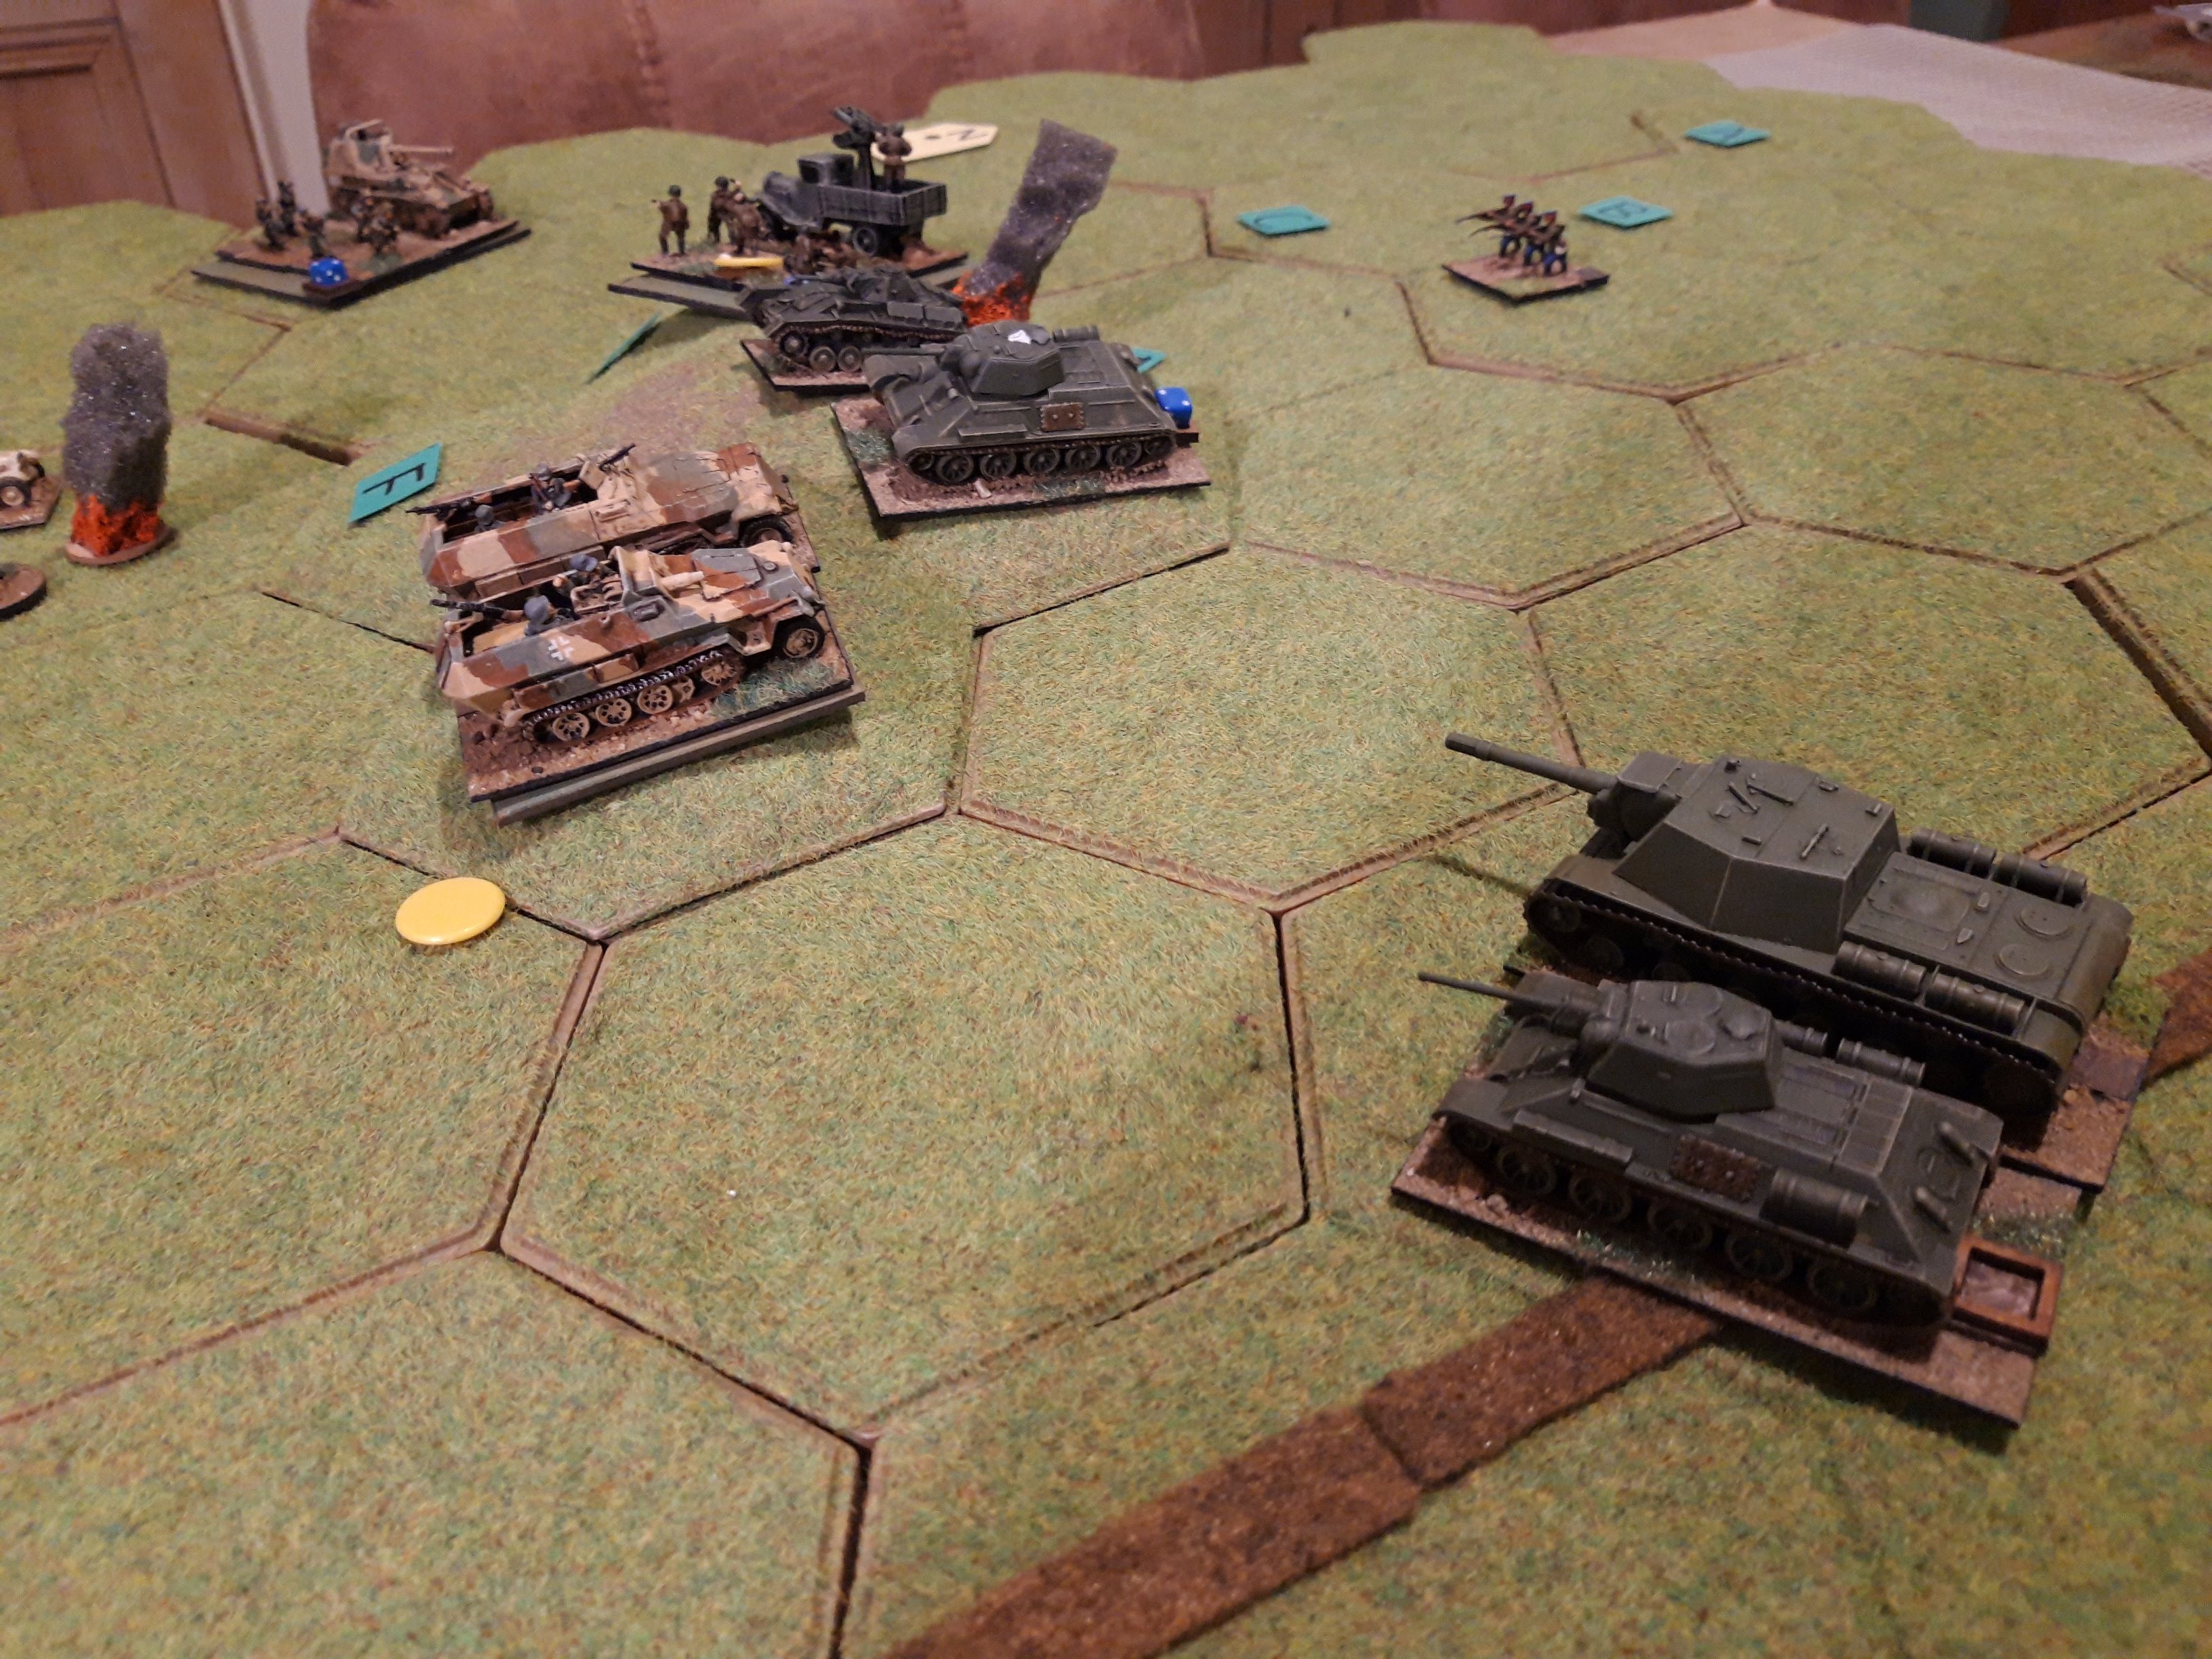
The 1st SS Panzer Battalion advanced to close the range with the Russians, supported by the armoured grenadiers who occupied the end of the ridge. The latter came under Russian artillery fire, while some Pz IIIs were knocked out by the Soviet tankers. The German FAC relocated to the 2nd Panzer Bn, which stopped the German air support this turn.

The German revenge wasn't long in coming. Henschel and Stuka tank busters pummelled the Lee/T70 Tank Brigade.

The Tigers followed up with an assaulted, covered by the 2nd SS Panzer Battalion, which duly obliterated the remains of the Russian tank brigade.

The remaining Russian tank brigades concentrated their fire on the 2nd SS Panzer battalion and destroyed it (it had already been damaged by fire on a previous turn).

The Soviet MRR assaulted the armoured Grenadiers behind an artillery barrage, but the assault failed and they fell back. The other Rifle Regiment reorganised and managed to recover some strength.

The Russian CO moved up to encourage the remaining Russian tanks to make heroic efforts. The Tigers were poised to roll up the entire Russian line however.

A general view of the proceedings. The German forces are somewhat scattered while the Russians have maintained an admirable focus of effort.

The German Tigers attempted another assault, this time on the T34 Brigade. They scored the expected number of hits (four), which wasn't enough to despatch the Russians, so instead the Germans took a hit as well and had to fall back. The T34s were left somewhat disorganised by their unpleasant encounter however.

Back on the hill the lorried Grenadiers rolled forwards again, covered by fire from the Marders. The armoured Grenadiers rallied.

The Russians counterattacked the retreating Tigers. All the infantry, artillery and the T34s fired at them, while the SU152 brigade moved up. Despite the low odds, the sheer volume of fire managed to chip some hits off the Tigers, and most important, the artillery scored a hit which disorganised them.

The Germans focused on the hill as Dorniers bombed 183 Rifle Div.

The assault, covered by the Marders, failed however and the Germans fell back again.

The Russians made no such mistake, and once again fired everything they had at the Tigers, including the heavy SU guns.

This was enough to finally despatch them, despite being elite and heavily armoured. The FAC was left on his own again!

The Marders and their infantry moved forward now, covered by the armoured Grenadiers while the lorried troops rallied. The Russian infantry were finally overrun, having put up a heroic resistance for many turns.

The Russians started working over the armoured Grenadiers now.

And the MRR advanced to contest the hill.

More German aircraft, Me 110 fighter bombers, turned up to support the German counterattack.

But once again, the Germans didn't do enough damage before the assault, and they were repulsed again. The partially rallied T34s moved up to support the now disorganised MRR.
The SU brigade and artillery covered them with fire. This was enough to send both the armoured and lorried Grenadiers heading for the rear.

And once again the FAC was left on his own. The only German unit left in the fight was the Marder battalion now.

The Russian Corps Commander moved up onto Hill 241 to hand out medals.

While the remaining Germans hunkered down around the Kolkhoz.
I was very pleased with how the new assault rules worked. They definitely discourage dashing in at half cock, while rewarding boldness. The main thing which came out was a preference for units to face hex sides rather than vertices as it was felt to be confusing and made flanking a bit too easy. I can easily incorporate that change, but I'll need to rework the movement restrictions a bit as the current straight line movement is too restrictive if using hex side facing. I also need to get the bad going restrictions clear in my head, at the moment I think they are too liberal for vehicles. It was a bit easier with rulers to sort this stuff out.
Anyway, nearly there with these. There seemed to be some enthusiasm for me to run it at COW, so I'll probably put a face to face game on then.

A very good pairing of the historical with the NT scenario and a tight contest for much of it. An interesting point of hex vertex Vs hex side! Would that need the hex ‘field’ pattern changing in the next scenario, so that the flats play down the table?
ReplyDeleteVertex vs sides is one of the perennial problems hexes, particularly in translating a ruler based set into a grid one as there are all sorts of other impacts on the movement system. It is partly my own fault as I wanted to differentiate the fireplan part of the battle from the assault phase (like NQM). It would be easier to lump it all together as combat at this level, but the players seem to enjoy the differentiation. But, yes, changing the hex orientation will have impacts on table layout. I enjoy dealing with these sorts of things, but I'm always worried I'll break something in the process.
DeleteHello Martin,
ReplyDeleteGreat report! I too got the feeling through the game that the Russians managed to be a better with concentration of force.
Also always nice when a set of rules survives impact with actual players.
Yes, in the first play of this scenario it was the Russians who scattered their troops all over the map, but this time it was the Germans. Given the extent of the rules changes it all went very well, but the core combat and recovery mechanisms hadn't changed so the players were still familiar with those.
DeleteA really good read on a game that seemed to swing to and fro.....did the Russian airforce never make an appearance? Good to see the Heroic Forces of Socialism give the Fascist Beast a bloody nose!
ReplyDeleteThe lack of Russian planes was partly a compromise around shoehorning the historical OB into the scenario limit of six/seven units. I could have given Russians the odd airstrike, but I wanted to deploy their Gun Artillery Brigade. I think now I'd have done the mix differently but I did the original scenario a few years ago (pre lockdown). In more recent games I've parcelled out air and artillery in smaller increments, but because of its suppressive and interdictive potential it is quite powerful.
DeleteMore generally, I'm contually amazed how good those Neil Thomas scenarios are, and it usually only requires a bit of tweaking to map them onto historical engagements
Delete