In this particular case I wanted to playtest the joint modifications John and I had made to the naval version of the One Hour Wargames rules to make sure they could handle cruiser/battlecruiser actions as well as more traditional battle lines.
Both battles were played with my 1/3000th scale naval stuff at the Sheffield club.
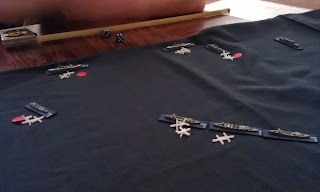
Coronel, opening moves. Otranto leads the British line while Glasgow lurks in the background. Von Spee's Germans are all lined up with Scharnhorst leading.
Otranto takes a pasting (the big red blob is ten hits!).
The British reply against the big German armoured cruisers is modest.
Otranto goes down while Monmouth and Good Hope take some more hits.
The British T is crossed, with predictable results, and Craddocks squadron goes down.
The mighty British battle cruisers, although the British player would be wise to bear in mind that these really are just heavy cruisers with 12" guns, not super fast dreadnoughts loaded up with armour. Something contemporary Admirals seemed to struggle with too.
Von Spee adopted an interesting converging formation, pairing up the armoured and light cruisers, while the British aimed to keep their BCs out of harms way and shell the Germans from long range.
A vicious close quarters cruiser action developed as the Germans tried to break through the Royal Navy.
The carnage continued.
But finally one of the German light cruisers succumbed. Meanwhile Gnesenaus was close enough to actually damage Invincible. Ooops.
The British suddenly realised the grave danger, but to late for Invincible which took a real pasting, only three hits off sinking. Gneisenau and Scharnhorst split up. taking on one BC each at close range.
Inflexible won its duel with only minor damage, and Scharnhorst went down.
But Gneisenau failed to finish off the crippled Invincible, and in turn went down in a hail of gun fire.
This all went pretty well and was a lot of fun. The British managed ot avoid the ignominy of losing one of their precious Battlecruisers and Von Spee put up a really heroic fight against very long odds. The game mechanisms all held together well, and by at large were the ones we used for Jutland.


Sounds a grand pairing of scenarios, that. :)
ReplyDeleteYes, they work very well. I've run them with a few sets of naval rules now, and they are bit easier to run than Jutland!
DeleteHello Martin; Big fan of your rules and blog. I often come back to your 1 H WWII/6 Hit, and decided to adapt the concepts to your WWI naval rules. I so far only played them solo, but they seemed to work well. If you are interested, you can check them out here: https://drive.google.com/file/d/1moY19RkzTLscs4ZW2oB9g0l-NhoS4USj/view?usp=sharing
ReplyDeleteOooh, that is a good idea. Glad you have enjoyed the rules, I must revisit the WW1 naval stuff.
Delete