Tuesday, 21 May 2013

Triples 2013

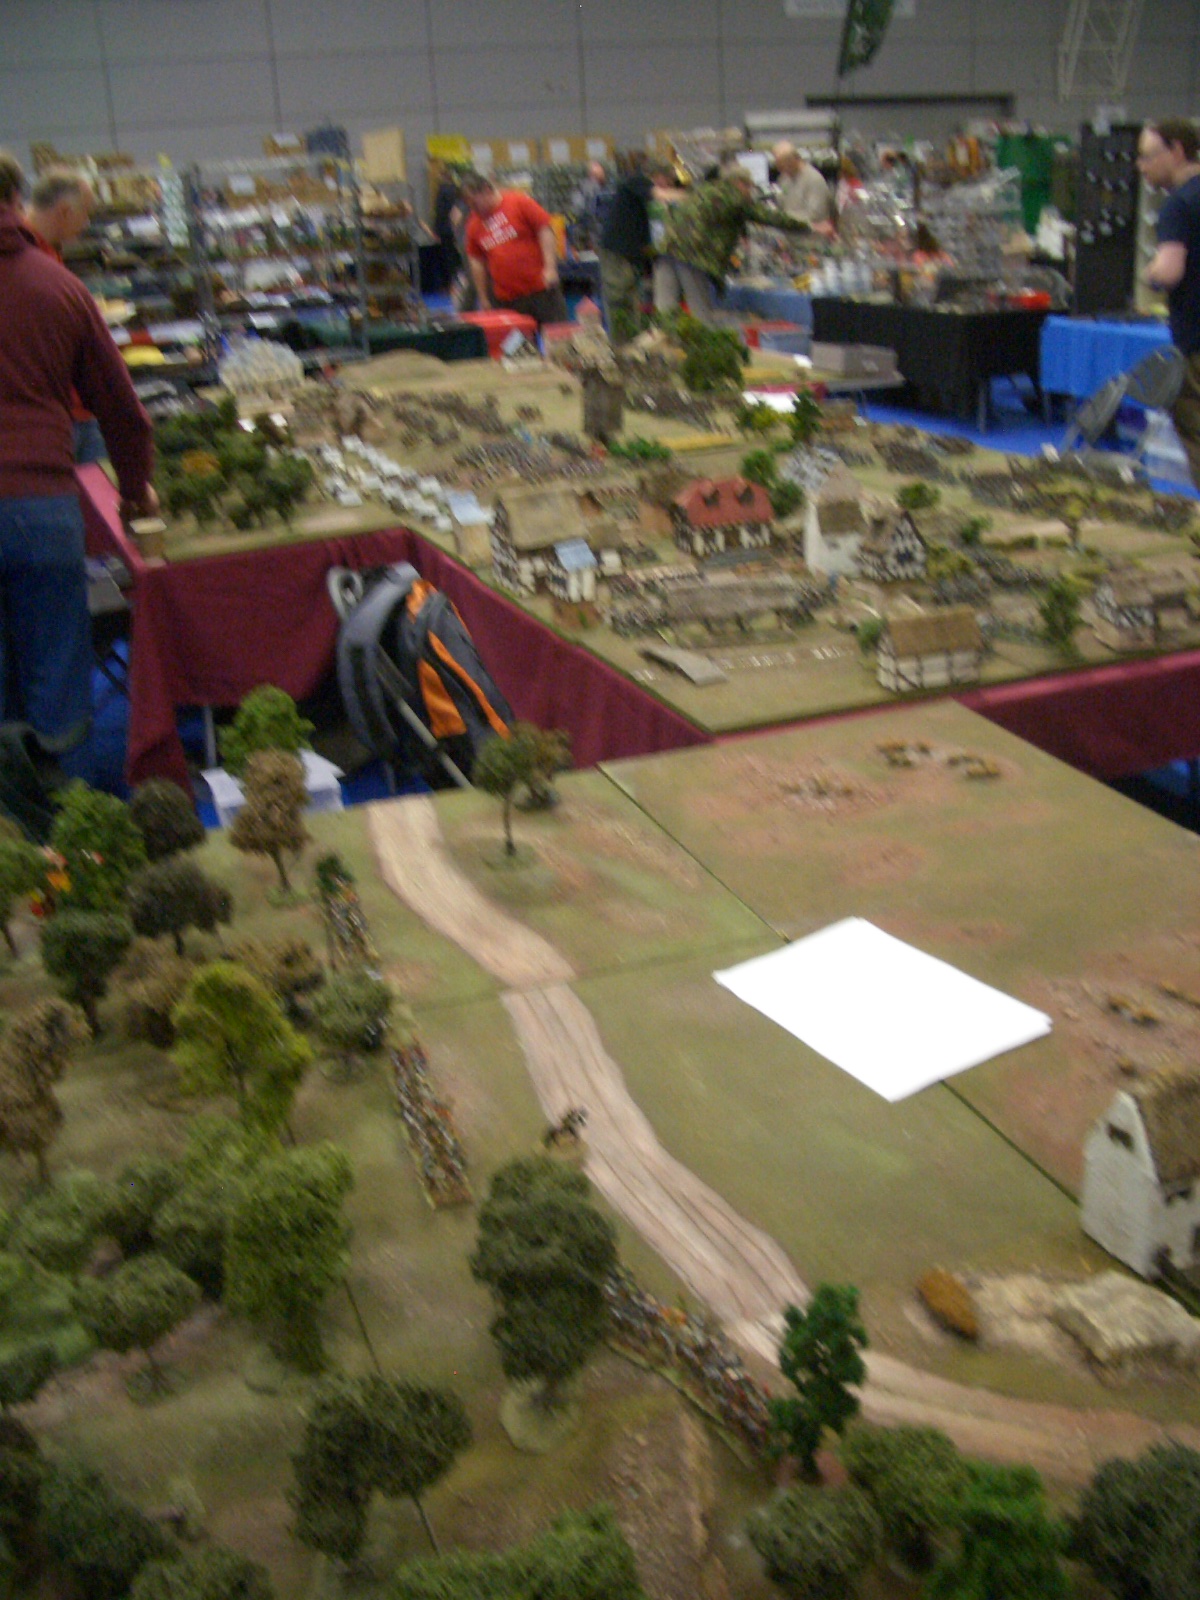
Most of the membership of Sheffield Wargames Society turned out once again to help out with Triples 2013, our annual wargames show. This was held over two days at the English Institute of Sport in Sheffield.

This year the car park wasn't being dug up, so unloading for traders on Friday afternoon and Saturday morning was very smooth. We had a good turnout of traders (I only saw one empty stand this year)  and first impressions were that the headcount was up this year.

There was a fair amount of pre-show publicity this year, including articles in the local press and an interview with Radio Sheffield (very) early on Saturday morning.

I was mainly involved in runing the Wargames Developments Display Team (north) game, Ten Rounds Rapid, which I'll cover in a seperate report. I did manage a spot of shopping two, mostly pre-ordered or pre-planned stuff including yet more 15mm WW2 Russian armour, more Kallistra hexes and a pile more stuff from Irregular including 2mm Cold War and further expansions for my 6mm IWI/APW/FPW armies. The unplanned items included a brace of Stug III Ds, some lorries (you can never have too many), a brass measuring stick in 1" increments and an amusing 'probability dice' from Magister Militum which I will no doubt find a use for.

General photo dump below, some commented. Sadly my pictures of the British Legion Funny Little wars game were too blurry to be of any use.


The calm before the storm, main hall on Saturday morning before most of the tradrers arrive.

Tim supervises proceedings, supported by Stephen Thomas's 1/35th scale flyer.

Main hall


Radio controlled tanks, these were a big hit.


Beautiful 6mm hoplites.


Paddle steamers on the Nile

Stalingrad


RC tanks in action, they used a MILES laser system to shoot


Competition tables, these ran over both days


I was rather taken with these 30mm flats.

Bellona trees too, real old school.


A massive Napoleonic game


The Ilkley Lads prize winning Italian Wars game


Ten Rounds Rapid in progress

RC tanks fight around the ruins


Tim presides over the awards presentation in his capacity as club chairman.
The highly improbable probability dice

Measuring rod

It unscrews into shorter sections


Sunday, 19 May 2013

Operation Mercury

Operation Mercury was a WW2 airsoft game put on by AGS and run at the UCAP Sandpit site near Dartford in kent, a gigantic disused quarry.

The game was set around the invasion of Crete in 1941 and featured a Bitish infantry platoon defending an airfield against a large group of FJ on one side and some Gebirgsjagers in the mountains on the other.

There was a good turnout and despite some last minute dropouts, around 25 players turned up for each side. I was rather looking forward to it both as an excuse to wear some more unusal kit and also to use my Bren in a larger game.

British line up on parade. They were a motley mix of KD, Battledress and some rather dodgy looking pullovers. Never have so many bare knees been seen in one game before...
The Germans assemble in a typical disorderly rabble.
Cheery tommies ready for action.

The mighty Bren


Fallschirmjagers pose for the camera.

 The game started with a fair number of non-combat activities. The FJ were 'dropped' without weapons and scattered over a large area on the far side of the site individually, while the GJ were a more cohesive group but fighting forward from a different area to link up with the paras. Both groups had a fair amount of marching around to do to sort themselves out. The paras in particular had to find their pals and most importantly, all their weapons and ammo which were in drop cannisters.

The German paras busied themselves grouping up and trying to locate their drop canisters.

The British meanwhile assembled around the airfield, the NCOs keeping us on our toes with drill. After a while however we had to take cover as the airfield was heavily 'bombed'. This was really quite realistic and at one point part of the roof blew in so I was glad I was wearing a helmet.


British move down to the Airfield.
After the raid A and C sections were sent to hold the gun positions to the west of the airfield, while B section was despatched up the mountain to dig in and establish an OP. This involved a lot of digging holes in the ground and wiring up the field telephone.
The corporal keeps a lookout.

Digging in.
Bren gun pit from the front.
The position was a very strong one with wire and mines covering open ground on the right, and the denser terrain on left was covered by a series of pre-existing earth banks which we dug into. The Bren and 2" mortar were sited to cover the wire and the gap beside it, with various outlying positions for the riflemen. The signal point was in the rear and the flanks were covered by precipitous cliffs.


There was a  hell of a scrap for the hill, wave after wave of Germans were mown down as they tried to make their way around the prepared defences. Unfortunately our own losses also mounted with increasing numbers wounded despite our trenches, and ammunition ran short. Despite repeated calls to HQ for more supplies we eventually ran out of ammunition and the survivors didn't have any option but to fall back down off the hill.

Germans taunt us from the mountain top.

GJ on the mountain, sorting themselves out, the airfield buildings below


Once we'd been pushed off the hill, things went downhill fairly rapidly. The OC turned up and ordered an immediate counterattack to retake it, which the German shot down as easily as we'd shot down their attacks.  The Germans then conducted their own attack down the hill, and on a broader front made excellent use of fire and movement and overran our position easily.

We fell back to cover the road to the airfield, but the GJ bypassed as and linked up with the FJ out to west, catching A and C section in a pincer movement. Again we attempted to counterattack to restore the situation, but again this failed although it was very amusing to see the looks of alarm on their faces as we appeared behind them and took them by surprise.


FJ marching towards the British blocking position between cliffs and lake.


FJ rest among the barren wastes.

An awful lot of people played the game in shorts, which was pretty heroic considering the nettles, rough ground and torrential rainfall in the afternoon.


Much of the site was very barren and rocky. Not very kind on knees.

GJ commander in his captured Bombay Bloomers.

The final British position covering the airfield soon collapsed and we were forced back into the airfield buildings where we held out for a suprisingly long time (two hours). Urban combat is always slow and the fighting was very intense. Eventually the buildings were taken and all that was left was for the survivors to try and make it to the sea to be rescued by the Royal Navy.

Rather than a careful breakout attempt, this eventually consisted of everyone running as fast as they could for the far side of the lake, while the Germans tried to intercept them.  Only eight of us made it though. I knew all that running would come in handy, even though I don't usually do it in full kit, ammuniton boots and carrying a very heavy machinegun.

The whole thing was brilliant fun and well worth arriving home utterly exhausted with piles of wet kit to sort out. An order is already in the post for some excessively baggy khaki shorts.


Wednesday, 15 May 2013

PSC 15mm 76mm guns


More 15mm PSC stuff, this time some Soviet 76mm guns. They come four to a box and include an option to make up the 57mm AT version as well. I just  needed some artillery support from my 15mm Soviets so made up four standard 76mm guns.

Business end of the 76.
These are nice simple solid models and go togther very easily (unlike some other plastic artillery peices!). I was very glad these were released as I didn't fancy the horror of trying to stick together metal version of these.


The crew figures share some poses with the heavy weapons set but also include gunners with shells etc.

The guns are supplied with various odds and ends including ammo boxes, different patterns of wheels etc, all useful stuff for the spares box along with those redundant 57mm barrels which be useful for something I'm sure.

The models are finished in my usual russian scheme of Vallejo Russian Green over a black undercoat with a peat brown inkwash and a very light drybrush of Iraqi Sand.


Sunday, 12 May 2013

Plastic Soldier Company 15mm Stugs


At Triples last year Caliver books were doing a 'five boxes of PSC for the price of four' deal, and for my extra box I picked up  a box of 15mm Stugs. There are five in a box, and they can be made up into a range of F or G models.

Some enterprising gamers have converted the Fs into earlier models, but I have no need for early war 15mm Stugs as yet as my 15mm Germans are predominantly late war, so I made them up as Gs to supplement my Peter Pig Stug III Gs.


PSC 15mm Stugs (all made up as Gs)


Stug III G (early) with boxy mantlet, one with and one without side skirts.


Stug III G (late) with Saukopf, remote MG etc.


StuH 105mm, just in case and particularly tough bunkers are encountered!

They all went together nicely, with the usual PSC caveat about the tracks fitting one, and only one, way on the running gear. Once you've done a couple it becomes very obvious which way round they go. The finished models 'sit' very well despite their light weight compared to metal ones. I really liked the sideskirts on these, went on easily and looked great. The panel lines are also well etched for a plastic kit and take a wash well.

The vehicles were all finished dunkelgelb/green/brown camo with a dark brown inkwash with extra mud and a light overall drybrush of pale tan. The ink/mud/dust helps blend the camo into a single mass of 'dirty greeny brown' as one veteran described how their vehicles actually looked. Decals are Skytrex/Command Decision.


Wednesday, 8 May 2013

Second Gaza (Part 2)

The historical background and briefings have appeared in an earlier post.

For the game Tim reprised his role of Von Kressenstein, commander of the Turkish Fourth Army, while John took on the role of Lt General Chetwode. To speed things up I skipped the two day bombardment and we just played the assault on the 19th. I calculated a bombardment resolution table to generate losses for each side instead.Toys are almost exclusively from the Irregular 6mm WW1 and Colonial ranges. I am particularly fond of their steam train set which has appeared in a number of games ranging from the Franco-Austrian War of 1859 to the Crimea in 1944! Each hex is roughly 2km and each base is roughly a battalion, the manouvre elements being brigades.


View from tank redoubt in the Turkish Lines. 53 and 54 division visible in front, 52 Div over on the coast. There seems to be a strange tracked metal thing across the valley as well...

The British rear area with the rail head from Alexandria and porters unloading supplies to be forwarded by lorry. British heavy howitzers across the wadi and various reserve infantry formations. There seem to be be an awful lot of Turks in front.

53 and 54 Div forming  up for the assault, field artillery and divisional HQs behind the  leading brigades.

The first British wave advances behind an artillery barrage. High explosive against the defences in front of Gaza, chlorine gas against the Turkish centre. In the far distance can be seen the French battleships shelling Gaza and in the centre the elderly mark 1 tanks accompany 53 Div.

Over on the desert flank, a Turkish cavalry screen prompts a forceful response from two dismounted cavalry divisions supported by armoured cars.

The sneaky Turks sidestep the marching cavalry and brush off a (very) low level strafing attack by the RFC.

52 Div moves up to pin the Gaza defences, 53 and 54 Div prepare to assault the Turkish centre. Losses to both sides in the initial bombardment had been moderate, but still amounted to several battalions. Historically the British neglected to conduct significant counter battery fire so the Turkish counter barrage was quite fearsome. The French aircraft is a spotter for the battleship.

53 and 54 Div attack while the Turks are still disorganised by the gas, but are repulsed by the defenders despite the support of the tanks. The British were a little unfortunate here as the odds were clearly in their favour.

Von Kressenstein looks inscrutable.

The British cavalry mount up to  pursue the elusive Turks, only to be subject to a strafing attack themselves.

Despite pushing up reserves, the British attack in the centre falters as the gas disperses and the 18pdr regiments fail to supress the defenders. To cap it all a storm of Turkish artillery fire decimates the  leading brigades and the tanks break down. 53 and 54 Div call it a day as their advantages fade away and the losses exhaust both formations.

Historically 'Tank Redoubt' earned its name as it ended up surrounded by broken down and knocked out tanks, a result the game replicated admirably.... In the actual battle the cavalry managed to penetrate the Turkish lines along the Beersheba Road while the  main attack faltered with heavy losses after penetrating the first line of Turkish trenches but the entire attack petered out by nightfall on the 19th.

In the game the British were somewhat unlucky not to drive in the Turkish centre although they didn't really have the strength to force a clean breakthrough. Like their historical counterparts, they were handicapped by a low artillery density relative to the frontage attacked.  This was generally a much more high tech affair than first Gaza, and the first OP14 game where we've used both gas and tanks but some light relief was afforded by the antics of the cavalry out in the open desert.


Historically it was six months before the British attacked again, so at some point we'll be off to the Third Battle of Gaza and a chance for the Australian Light Horse to cover themselves in glory.


Monday, 6 May 2013

Second Gaza (Part 1)

This was another outing to the Middle East, this time to Gaza in 1917. We've already played first Gaza, and this scenario covers the British/ANZAC attempt to try and take the town again. We used Richard Brooks OP14 for this, played on Kallistra desert hexes (2km per hex) and using my 6mm Irregular Middle Eastern WW1 figures and vehicles.

Briefings below.


Second Battle of Gaza, 17th-19th April 1917


General
Although First Gaza was reported by the British as a victory in terms of both losses inflicted and covering the coastal railway, all the participating formations knew it had been a staff bungle of monumental proportions. A few weeks later the British tried again, by which time the Ottomans had plenty of time to bring up reinforcements and dig in.


British briefing
The extension of the desert railway has allowed more guns and troops to be brought up, however there are still serious problems supplying troops with water in the deep desert flank. 52 and 54 Divs will break through the Turkish lines to the east of Gaza then envelop and capture the fortress while the garrison are pinned frontally by 53 Div. The mounted troops will guard the right flank and push through the Turkish lines on the right as the situation allows.
 
The attack will be conducted in two phases. Firstly advance from the wadi to our jumping off points. The troops will dig in while the artillery carries out a two day bombardment of the enemy defences, the main attack going in on the 19th.

Enemy forces are estimated to be two weak divisions (some 30,000 men), little match for our six divisions amply supported by 170 artillery pieces. The French navy have provided some warships for bombardment, and a company of the new 'tanks' have arrived from France along with supplies of chlorine gas shells.


Break through the Turkish lines on the 19th.
Envelop and/or capture Gaza.
Push mounted troops through the gaps to exploit.


Forces (all D8)


Desert Column (Lt Gen Chetwode)
52nd Lowland Div, 53rd Welsh Div and 54th East Anglian Div each:
HQ, 3 x Bde, 1 x Field arty (3)
Anzac Mtd Div, Imperial Mtd Div, Imperial Camel Brigade: 3 x Divs each of 4 x Cavalry + 2 armoured cars to attach.


Corps assets
Corps howitzers: 1 howitzer (3), 1 x detachment of Mark 1 tanks, French warship squadron (1)
Two x chlorine gas concentrations to deploy via artillery (non persistent).


Troops deploy in their 19th April jump off positions. Infantry 1 hex back from the Turk  line, cavalry two hexes back, all dug in.


Turkish briefing
Since the failed British attack the Gaza-Beersheba line has been heavily fortified and extra troops brought up so our forces comprise over 50,000 men and 100 guns. The line nearer to Gaza is more heavily defended than the deep desert as supply problems restrict the enemy forces which can be deployed there.


A ponderous enemy build up has been observed and it is likely they will attack again soon.

Retain control of Gaza.
Prevent the enemy breaking through.


Forces (D10)


Fourth Army (von Kressenstein)


Gaza Force:
3rd and 53rd Infantry Divisions
HQ, 5 x Infantry brigades, 2 x field artillery (2), 1 x howitzer (2) (one bde deployed in reserve)


Set up holding the sector Gaza-Beer trenches with one brigade in reserve.


Desert Force:
Group Tiller, 16th Infantry Div, 3rd Cavalry Div.
HQ, 3 x Infantry Brigades, 1 x Cavalry Div. 2 x Field artillery regt (2). (one bde in reserve)


Set up holding the Atawineh- Hareira sector with one brigade and the cavalry in reserve. The cavalry may enter anywhere from the east side of the table.


Terrain and weather
The terrain is rolling desert broken up by scrub, wadis and rocky ridges. Hills are passable obstacles for artillery and the wadis are passable obstacles for all arms. Trenches are permanent defences.

Umpires Notes
Dawn is at 0500 and nightfall at 1800. 1.5 hour turns, 8 turns per day.


British move up on the 17th and dig in to their jump off positions, at least one hex from the Turkish positions, cavalry two hexes and ANZACs in reserve.Turks deploy each force with one brigade in reserve and all artillery in the line.


17th - six turns bombardment, British FA and howitzers vs Gaza area, Turk FA and hows reply. Resolve at night - Turks in per trenches, Brits in hasty. Recover and reorg.
18th - eight turns of bombardment. Both sides in perm. Recover and reorg.
19th jump off time.

Quick bombardment resolution on the 19th.
British AvD +4 hits vs Turks (2/3rds vs Gaza)
Turk Avd+3 hits split across inf formations as the cavalry are out of range.
Half of hits can be recovered 'overnight' before the first game turn.


Gas: delivered by artillery as a bombardment, persists for two turns. Doesn't inflict significant losses but reduces combat dice one level (so D10 becomes D12) to units in the square.


French ships: range 5, (1) to hit, but do double damage vs permanent trenches (2 hits). Can only fire at coast, and visible hills unless naval spotter plane over target.

A vague attempt to model the real battlefield on my dining table. The top of the picture is the coast, the main Turkish line is along the road running top to bottom.

Map of the actual battle, Beer trenches etc referred to in the briefing marked. This is the situation later on the 19th.