Saturday, 10 August 2019

I have been to... Bamburgh

We recently returned from a trip to Northumberland, where we stayed in Bamburgh, ancient seat of the Northumbrian kings and as fans of The Last Kingdom will also know, the stolen hereditary home of Uhtred son of Uthred, Lord of Bebbanberg (as Bamburgh was once known).

It is a fairly historical part of the UK, with Lindisfarne visible on the horizon and Dunstanburgh Castle to the south, and the Church of St Aiden in the village itself.

While we spent a lot of time swimming in the sea and eating, there were also a few points of historical interest.


Bamburgh Castle looking imposing. The site has been occupied since the Dark Ages and there was a dig on while we were there. It was owned and extensively renovated by Lord Armstrong before the National Trust took it over.


The batteries featured a range of artillery, this is an eighteenth century 18pdr.


A carronade.


And a lovely mortar, date 1770.


The great hall, originally medieval.


A rather nice suit of sixteenth century armour.


The armoury was well stocked, a stand of muskets.


Blunderbuss with spring loaded bayonet.


Adams revolver.


Some really nice Anglo-Saxon relics. The tiny bits of gold include the often reproduced image of the Beast of Babbenburgh. The sword looks a bit wrecked, but is the only surviving example of an Anglo Saxon sword made from six interleaved iron rods with steel edging. Supposedly a kings blade (but Uhtreds sword Dragonbreath is made the same way!).


Well, it had to be done. The castle was also interspersed with the Anglo-Saxon legend of the Laidley Wyrme, a fire breathing dragon, laid to rest by Childewynd. He is still commemorated today in the nearby Wynding Road.


My attractive assistant models King Oswalds throne. A reproduction based on fragments, it also has a dragon motif.


Both attractive assistants are in the stocks!


The Norman Keep.


There was a repro Anglo-Saxon encampment inside the curtain wall.


We also took a trip to the Farne Islands. Breeding season for puffins, kittywakes, guillemots and shags. 


Puffin burrows, various teenage pufflings were in evidence.


Dunstaburgh Castle. One in the eye for Edward II from the Earl of Lancaster. The earl was executed for his trouble and the castle passed to John of Gaunt.


The main keep.


View across the marshes under the cliffs.


Inside the keep.


Near to Dunstanburgh is the village of Craster, famous worldwide for its smoked herrings. The smokehouse was in full flow, and some packets of herrings duly purchased. In their UK Food Standards Agency mandated packaging, naturally.


Craster is also famous for its seafood in general. Mmmmm.


A local heroine is Grace Darling, who was born and died in Bamburgh. There is a really well done done museum in the village covering her life and her famous rescue.


Here is the very boat she used to rescue the survivors from the 'unsinkable' Forfarshire.


And her grave in St Aidens churchyard.


St Aidens was first founded in the 600s, and was originally made of wood. The stone building now on the site dates from the 1400s and is largely unchanged from then, and there is some surviving Norman stonework.


This beam has been dated to 637, and is the last surviving part of the original church. Supposedly St Aiden was leaning against it when he died, and it was built into the roof to stop pilgrims shaving bits off it!


Cragside, one of the (many) homes of Lord Armstrong. Famous, and vastly wealthy, for the Armstrong rifled cannon. This was a stunning Arts and Crafts house set in amazing grounds.


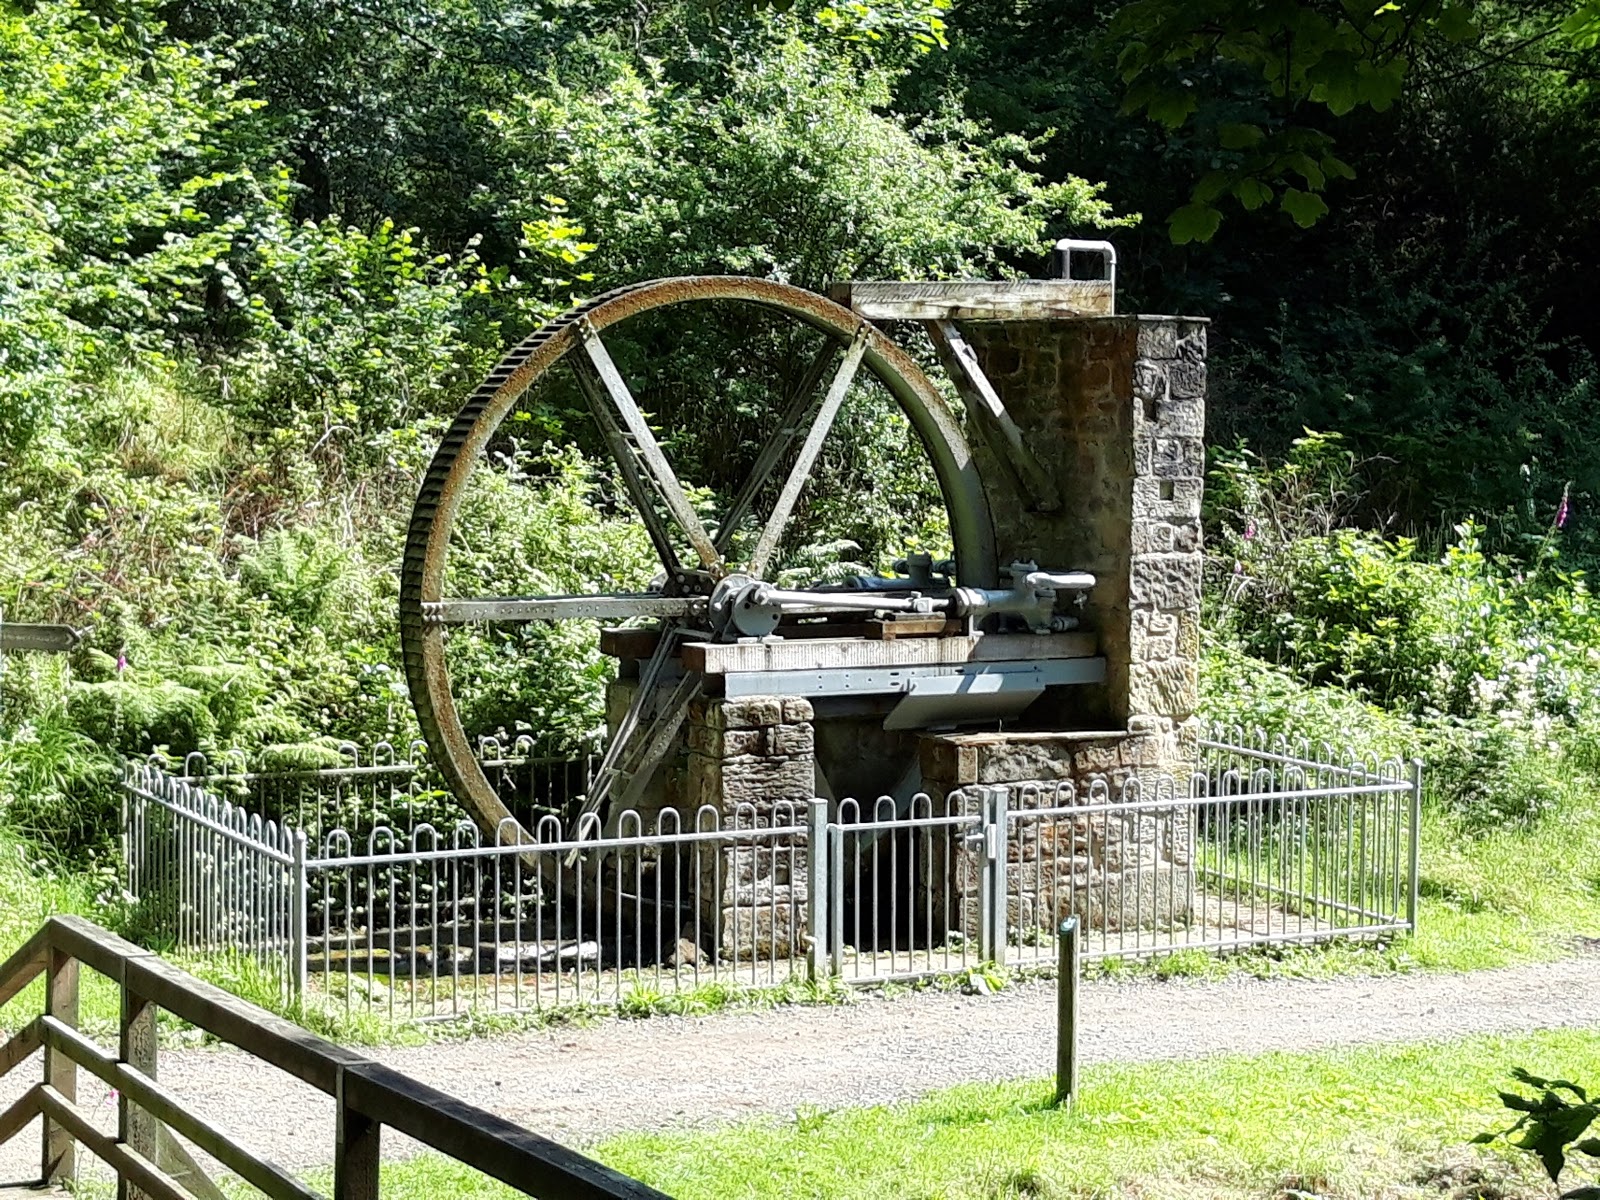
The estate was dotted with examples of mid Victorian engineering, this is one of the many water powered engines. Te house was one of the first in the country to have electric light, power from one (later two) hydro-electric power stations.


Kiplings Kharkee Gentleman. Handwritten and signed by the author.


The magnificent kitchen range featured water powered rotating spits.


The inevitable long gallery, painted Farrow and Ball Picture Gallery Red.


I rather liked this, which I thought was a Turner It wasn't.


We also took a trip to Lindisfarne. The Tudor fort dominates the landscape.


A bit of a scramble up, but not as high as Bamburgh.


A depiction of the Spanish Armada being seen off by the plucky English.


After the fort fell into disuse, it was taken over by a number of well heeled individuals and converted into a holiday home. Like Cragside, it was plastered with beautiful Arts and Crafts features.


One of the gun platforms. Not quite Vauban, but the walls are already low and thick.


The remains of the priory.


Looking back to the mainland. The marked footway is invisible but the road causeway is off to the right. In the foreground is St Cuthberts Island, where he lived as a hermit for some years. He died in 687 and was buried nearby but after repeated Viking raids his remains were later moved inland and reputedly formed the site of Durham Cathedral.


Thursday, 8 August 2019

QRF Dodge Ambulance

I felt my slowly expanding US forces could do with a bit of command/logistic type transport (and it might also turn out to be useful for my Russians as a Lend Lease vehicle for some lucky Brigade Commander). So, on my list of desirable purchases, was a Dodge Ambulance, to go with my M3 Scout Car. Along with some other stuff, off went an order to QRF.


Here it is in all its glory. I wasn't quite sure what to expect, some QRF models are nice and simple, others are a bit fiddly depending on their provenance. This turned out to be just two pieces! The body (hollowed out) and a roof. Thankfully the wheels were just moulded on. 


The separate roof allows the drives compartment to be modelled, and there is quite a nice driver with a steering wheel etc in there. It could just as well have been modelled with a closed cab, but I expect that would have made it harder to carve out the inside of the truck body. The only slight complaint is that the roof doesn't quite touch the windscreen posts, even with a bit of bending, but it hardly shows. If I'd have been that bothered I'd have put a dab of filler on. 


You can see from the side view it is a little crude, particularly the spare wheel, but good enough for wargaming purposes and for the price  can't complain (typically QRF offerings are priced at rather less than the competition, and vastly less than BF). I could probably have tried to clean off the mould lines a bit more, but they coincided with some panel lines.


I did the rear windows as painted in, as that seemed quite common. Otherwise it was just finished in plain OD with no markings so it can serve in a range of armies. A good no-nonsense wargaming model which will come in very handy.


Saturday, 3 August 2019

Bloody Big Battles ACW

Being something of a fan of Fire and Fury and its innumerable variants (I've mainly used it for FPW and early WW1) as well as a fan of Chris Pringles various nineteenth century rulesets, I rushed out to buy a copy of Bloody Big Battles when it came out. Having read it through it has subsequently sat firmly on my bookshelf as I've been stuck fiddling around with other things.

Tim C returned enthused from the recent BBB games day, and offered to put an ACW on using his (very pretty) 6mm figures. I hurriedly re-read my copy of the rules and was equally enthused.


Jerry and me got to play the goodies. We had several divisions of various size and quality scattered about defending some vital river crossing. Unfortunately our chaps had been caught napping and all started 'disrupted', so had to rally to do anything useful.


A close up of the lovely terrain and toys. Baccus 6mm on 1" bases, buildings, rivers and bridges a mix of Irregular and Leven. Woods made from cut up carpet tiles, and a base cloth made from old velvet curtains. Roads are strips of cloth. The white markers are unit stats (size, rating, weapons), the little yellow dice show we are disrupted.


The wicked Rebs pouring on in marc column. March columns give a bonus to activation rolls and allow double movement down roads. All very Volley & Bayonet.


Close up of the Rebs. The white dice indicates that the hill is also an objective. Firmly in rebel hands I think.


Tim and John both sported Rebel kepis.


The action opened when I pushed our cavalry pickets and a small division forward to slow up the Rebel cavalry. Our musketry was lucky and disrupted one of the cavalry units.


Over on the left flank the Rebs seemed to have got stuck in the woods and all was quiet.


Sadly the the Confederate infantry made short work of our cavalry and began deploying in scarily large numbers. I pushed another division forward, and withdrew back from the hill to conform. I do like manouvering whole divisions.


A more general view. One of our reserve divisions is moving off to the right. The Rebel column stuck on our left flank is visible in the distance, but the bulk of their strength is on the right. By this time both sides were exchanging a fair degree of cannon and musket fire to little effect.


The rebel centre looking a bit congested.


Sheridans Division made an appearance as welcome reinforcements. The cavalry vanguard secured the bridge objective.


The Rebels pushed forward and things started hotting up. Both my lead divisions were disrupted and one lost a base.


Our left flank was now starting to look pretty secure as the reinforcements rolled in. 


I formed up the units here into an extended firing line with supports.


Sadly my depleted division failed to rally and was left stuck in place to face the Rebel onslaught.


The rest of the chaps had fallen back to defend the river line. Oh well.


The rebels surged forwards and my entire line was disrupted under a hail of fire. The only good thing was that  we managed to halt both the right hand and left hand rebel units with defensive fire.


The Rebs rallied and surged forwards again, and my firing line failed to rally. Ouch.


They also poured over the hill into my isolated troops who were still milling around in disorder. 


For good measure the enemy cavalry charged over the stream! They were duly repulsed but kept my unit occupied.


My division behind the hill was unsurprisingly overrun in close combat. 


And the Rebel assault on the village pushed my guys back over the river.

At that point we called it a day as an honourable draw. It all rattled along very nicely and was a good tryout of all the mechanisms.  I'd be keen to try it for the FPW (for which it was originally written), and naturally I'll need to do a grid based variant. I did actually to a hex modified version of Great War Spearhead using the F&F/BBB activation system, so it would be easy enough to take the move distances and ranges from that.