Tuesday, 7 September 2021

Quartermaster General 1914

 The other game we managed to get through on our 'rainy day at Tims' was Quartermaster General 1914. This one is rather more involved than QMG WW2, and requires a degree of preparation and planning by the players. I really like the points scoring only happening every few turns as it encourages  players to plan their objectives for the year, unlike the WW2 one where it is every turn. It better reflects the more deliberate nature of WW1.

The Central Powers were Russell (Germany) and Tim (Austria-Hungary and Turkey), while the Entente was Pete (Russia), Lloyd (US/UK) and myself (France/Italy).


1914/15 saw heavy fighting in the west and a major Entente presence in the east. Serbia held out, Rumania joined the allies and the British managed to take Istanbul! The Russians expanded West but failed to take Prussia, and heavy fighting broke out in Northern Italy between Austria and Italy. The Allies established an early points lead due to seizing so many production centres. I also had a hilarious status card where I got +1 VP for every attack I made with France in the west, which encouraged a rather aggressive French approach...


The Allies hold the Balkans.


The Germans were being pretty aggressive in the west, and a number of naval actions were fought in the North Sea. This position was a springboard for an early 'Kaiserschlacht' and 'Caporetto' which completely destroyed the French and Italian armies along the entire front. This was so monumentally frustrating as I'd just been about to play the 'Verdun' card and a number of other defensive cards. Oh well. Things started going better for the Central Powers.


The end of 1917. The Germans were now pushing the Russians back, and the Western Front was held mainly by the US and British. France and Austria were almost out of cards, oops. This rather restricted their options! In the east there was heavy fighting in and around the Caucasus and Persia as Russia and Turkey vied for dominance.


The Western Front in 1918. The Austrians have taken Northern Italy and control the Adriatic, while the Germans are in Burgundy. Fortunately Rome and Paris are heavily fortified. The British have managed to retake Picardy, but the German High Seas Fleet is still at large. 


In the East, Russia has lost Poland and Galicia but now controls both the Caucasus and Persia. Although Serbia has fallen, The British hold Greece, Istanbul and the Middle East, while amazingly, Rumania is still holding out. 

Although the Central Powers closed the gap in the last two years of the war, it isn't quite enough to overtake the Entente, and we win by 6 points (59 vs 53 iirc). Those extra points for Rumania and Istanbul clinched it for us, despite the reverses in the West.

What a great game, a very clever design and a bit less random than the WW2 one. Nice to be able to play it to a conclusion in a single session.


Saturday, 4 September 2021

French and Indian Wars with Fistful of Lead

 We were supposed to be playing a big naval game outdoors at Tims, but sadly Storm Evert intervened, so we retired indoors with suitable precautions in place. First up, Tim put on another 54mm skirmish game using Fistful of Lead, our go-to set of rules for single figure activation skirmish games.


This one was set during the French and Indian Wars. Some settlers and rangers were holed up in this farmstead and an Indian raiding band was after some prisoners.


Here are my chaps. Two armed with muskets and one with a tomahawk. All beautifully painted by Lloyd. We had three similar groups, and being familiar with the terrain, the were able to move offtable from one patch of forest to another.

The Rangers, four of them armed with muskets. I'm not sure what they were supposed to be originally, but they have a look of WW2 Lovat Scouts!


The action opened with us sniping at the defenders of the farmstead. Russell got lucky and one of the Rangers went down with a musket ball between the eyes. His chap armed with a bow took advantage of this to dash across the open ground.


My chaps were banging away at the Ranger facing them, and mainly succeeded in putting lots of holes in the farmstead. Dimly visible are the farmer and his daughter/wife (we were never quite sure which).


One of my chaps dashed for this clump of rocks but was gunned down on the way. Ouch!.


We finally got the better of the defenders on this side. Lloyd managed to wound his opponent and closed in. I got lucky and killed the Ranger behind the wall.


My musket armed chap cautiously approached (the black marker indicates it is currently unloaded). Lloyd meanwhile leapt the wall and found out the hard way the even wounded Rangers are pretty tough in hand-hand combat!


Meanwhile I approached the back of the farmstead and tried to capture the daughter/wife (this required a 'kill' result in hand-hand combat). I managed to grab her, but was then beaten back by the farmer who belted me with his barrel! 


Russell had meanwhile managed to capture one of the Rangers, and the remaining Indians moved in and the farmer went down. In the confusion the daughter/wife got away and my guys contented themselves with running off with a captured musket and the farmers barrel of beer. Result!

That was loads of fun and very cinematic. Although the scenario was very simple, the card play activation mechanism requires a good degree of engagement and thought by the players and it resulted in people having meaningful decisions to make and having plenty to do.


Sunday, 29 August 2021

Custoza, 1866

 After our trip to Froeschwiller, I wanted to try out Belle Epoch again, albeit with a few mods. I added in some tried and tested things from our other regular rules (rallying, reserved fire for activated units) and had a fiddle around with the movement modes and rates so you didn't have silly things like cavalry marching 5km and then conducting a charge at the end of it. Units now had a march move which was fast, but involved no combat at all, and a tactical move, which was slower, but allowed for some combat activity. I also reduced the brutality of the activation system so that units could fire with a single dice if they failed to activate, and made the close combat system use the same combat resolution as firing instead of the slightly odd crap shoot it currently is.  


Battlefield from the south. The river Mincio is on the left, with Peschiera at the top where the river empties into Lake Garda. Valaggio and Villafranca are in the south, Sommacompagna in the north east  and Custoza is perched on a saddle between two mountain ranges. The brown topped hills are mountains (really big mountains which rear up from the valley floor - I've flown over them en route to Venice, and they were quite impressive).


The Austrian left wing coming on from the northeast, including Von Pfulz's cavalry division.  Tim commanded the entire Austrian Army (three Corps worth) as we were short of players. After their defeat in 1859, the Austrians had adopted French style assault tactics, and their column formations gave the otherwise rather inert Austrian units an activation bonus, at the expense of making rather good targets. This would prove to a be a bit of a problem in Bohemia when faced with Prussians armed with breech loading rifles. But not so much against the Italians armed with muzzle loading rifles.


The Austrian right wing due east from Peschiera. I had to slightly fudge the Austrians, each stand is half a Corps ie a division equivalent, whereas irl each Corps had three (big) brigades. Archduke Albrecht has established his HQ in the centre. The Archduke was one of Austrias better generals, and he showed it in the game by rolling amazing numbers of command points each turn. 


Prince Umbertos Savoyards hurriedly rushing north to deal with the unexpected Austrian flank attack. Umbertos Corps will all come on the vicinity of Villafranca on the Italian right. John played the Prince, mightly pleased to be Savoy Royalty. The Italian troops were all rated as poor due to their lack of divisional cohesion (the Austrians were all poor too!).


La Marmora slums it in Valeggio while a couple of his divisions wander northeastwards through the mountains. La Marmora was was the Italian CinC and was played by Simon.  Historically he was a fairly awful commander who had already frittered away the massive numerical advantage enjoyed by the Italians in side operations. He was rated as poor, and never rolled more than five command points the entire game. 


Over in the east, Prince Umbertos leading division met Von Pfulz's cavalry, who launched an inffective charge against the marching Italians. The Austrian cavalry were rated as 'bold, dashing and dense', which caused a degree of hilarity. The dense bit referred to their tactical posture, as the Austrians were all charging around in assault columns, but hey ho.


In the west, both sides scrambled up their respective mountain ranges and exchanged some cannon fire. The Austrians had nice new rifled guns and the Italians came off worst. In the real battle hundreds of soldiers died of heat stroke climbing these mountains in the wool uniforms under the blazing Italian summer sun.


An Austrian infantry assault northwest of Sommacompagna was repulsed, so Von Pfulz launched another cavalry charge to cover the town. Unfortunately in his haste, he hadn't noticed that the Italians hadn't activated yet... 


Prince Umberto piled in command points and the Italians activated to pour a withering volley into the dense Austrian cavalry. They fell back behind the town to lick their wounds. Their sacrifice had at least stopped the Italians as they'd used their activation to shoot instead of moving. Irl Von Pfulz routed the leading Italian division and the rest of Umbertos Corps formed square and hunkered down for the rest of the battle! 


Things were looking a bit sticky at Sommacompagna as the Italians pushed along the mountains.


But Albrecht used his wealth of command points to march another Austrian division into the town before the Italians could get there. I do like the command system in these rules, they work really well.


Over in the west, the gunnery duel continued. The Italians used their positional advantage against the Austrians in the valley (the mountains negated cover lower down, and the Austrians were also dense targets - ouch).  The problem the Italians had was getting their units to activate to fire effectively.


By request, the mountain hat background. I picked this hat up in a fancy dress shop, but I do rather look like Tancredi in 'The Leopard' while wearing it. The hat is pretty much where the bottom of Lake Garda is irl.


Now it is the turn of the Italians to be pushed back from Sommacompagna. Pretty well all the units on both sides have taken one or more hits now. The only fresh unit is the Italian reserve cavalry division. Von Pfluz is busy trying to rally but keeps failing his activation rolls, and Albrecht has too much other stuff going on to waste command points on it.


The Italians roll forward in the east again. It is becoming a real bloodbath around here.


However another Austrian Corps has turned up in the centre and is threatening Custoza. Weight of numbers in the west has finally managed to eliminate one of the mountain top Italian divisions, at some cost to the Austrians. The Italian numerical advantage has been negated, both sides have eight (bad) divisions each, Albrecht is the better commander, but the Italians still hold the mountain chain. 


The Italian left wing is looking a bit thin! One division against three, but one of the Savoyard divisions is heading towards Custoza.


The real slugging match is the east. The Austrians are slowly gaining the upper hand here as Albrecht has spent most  of his command points in this sector, but all the Austrian units are weak now.


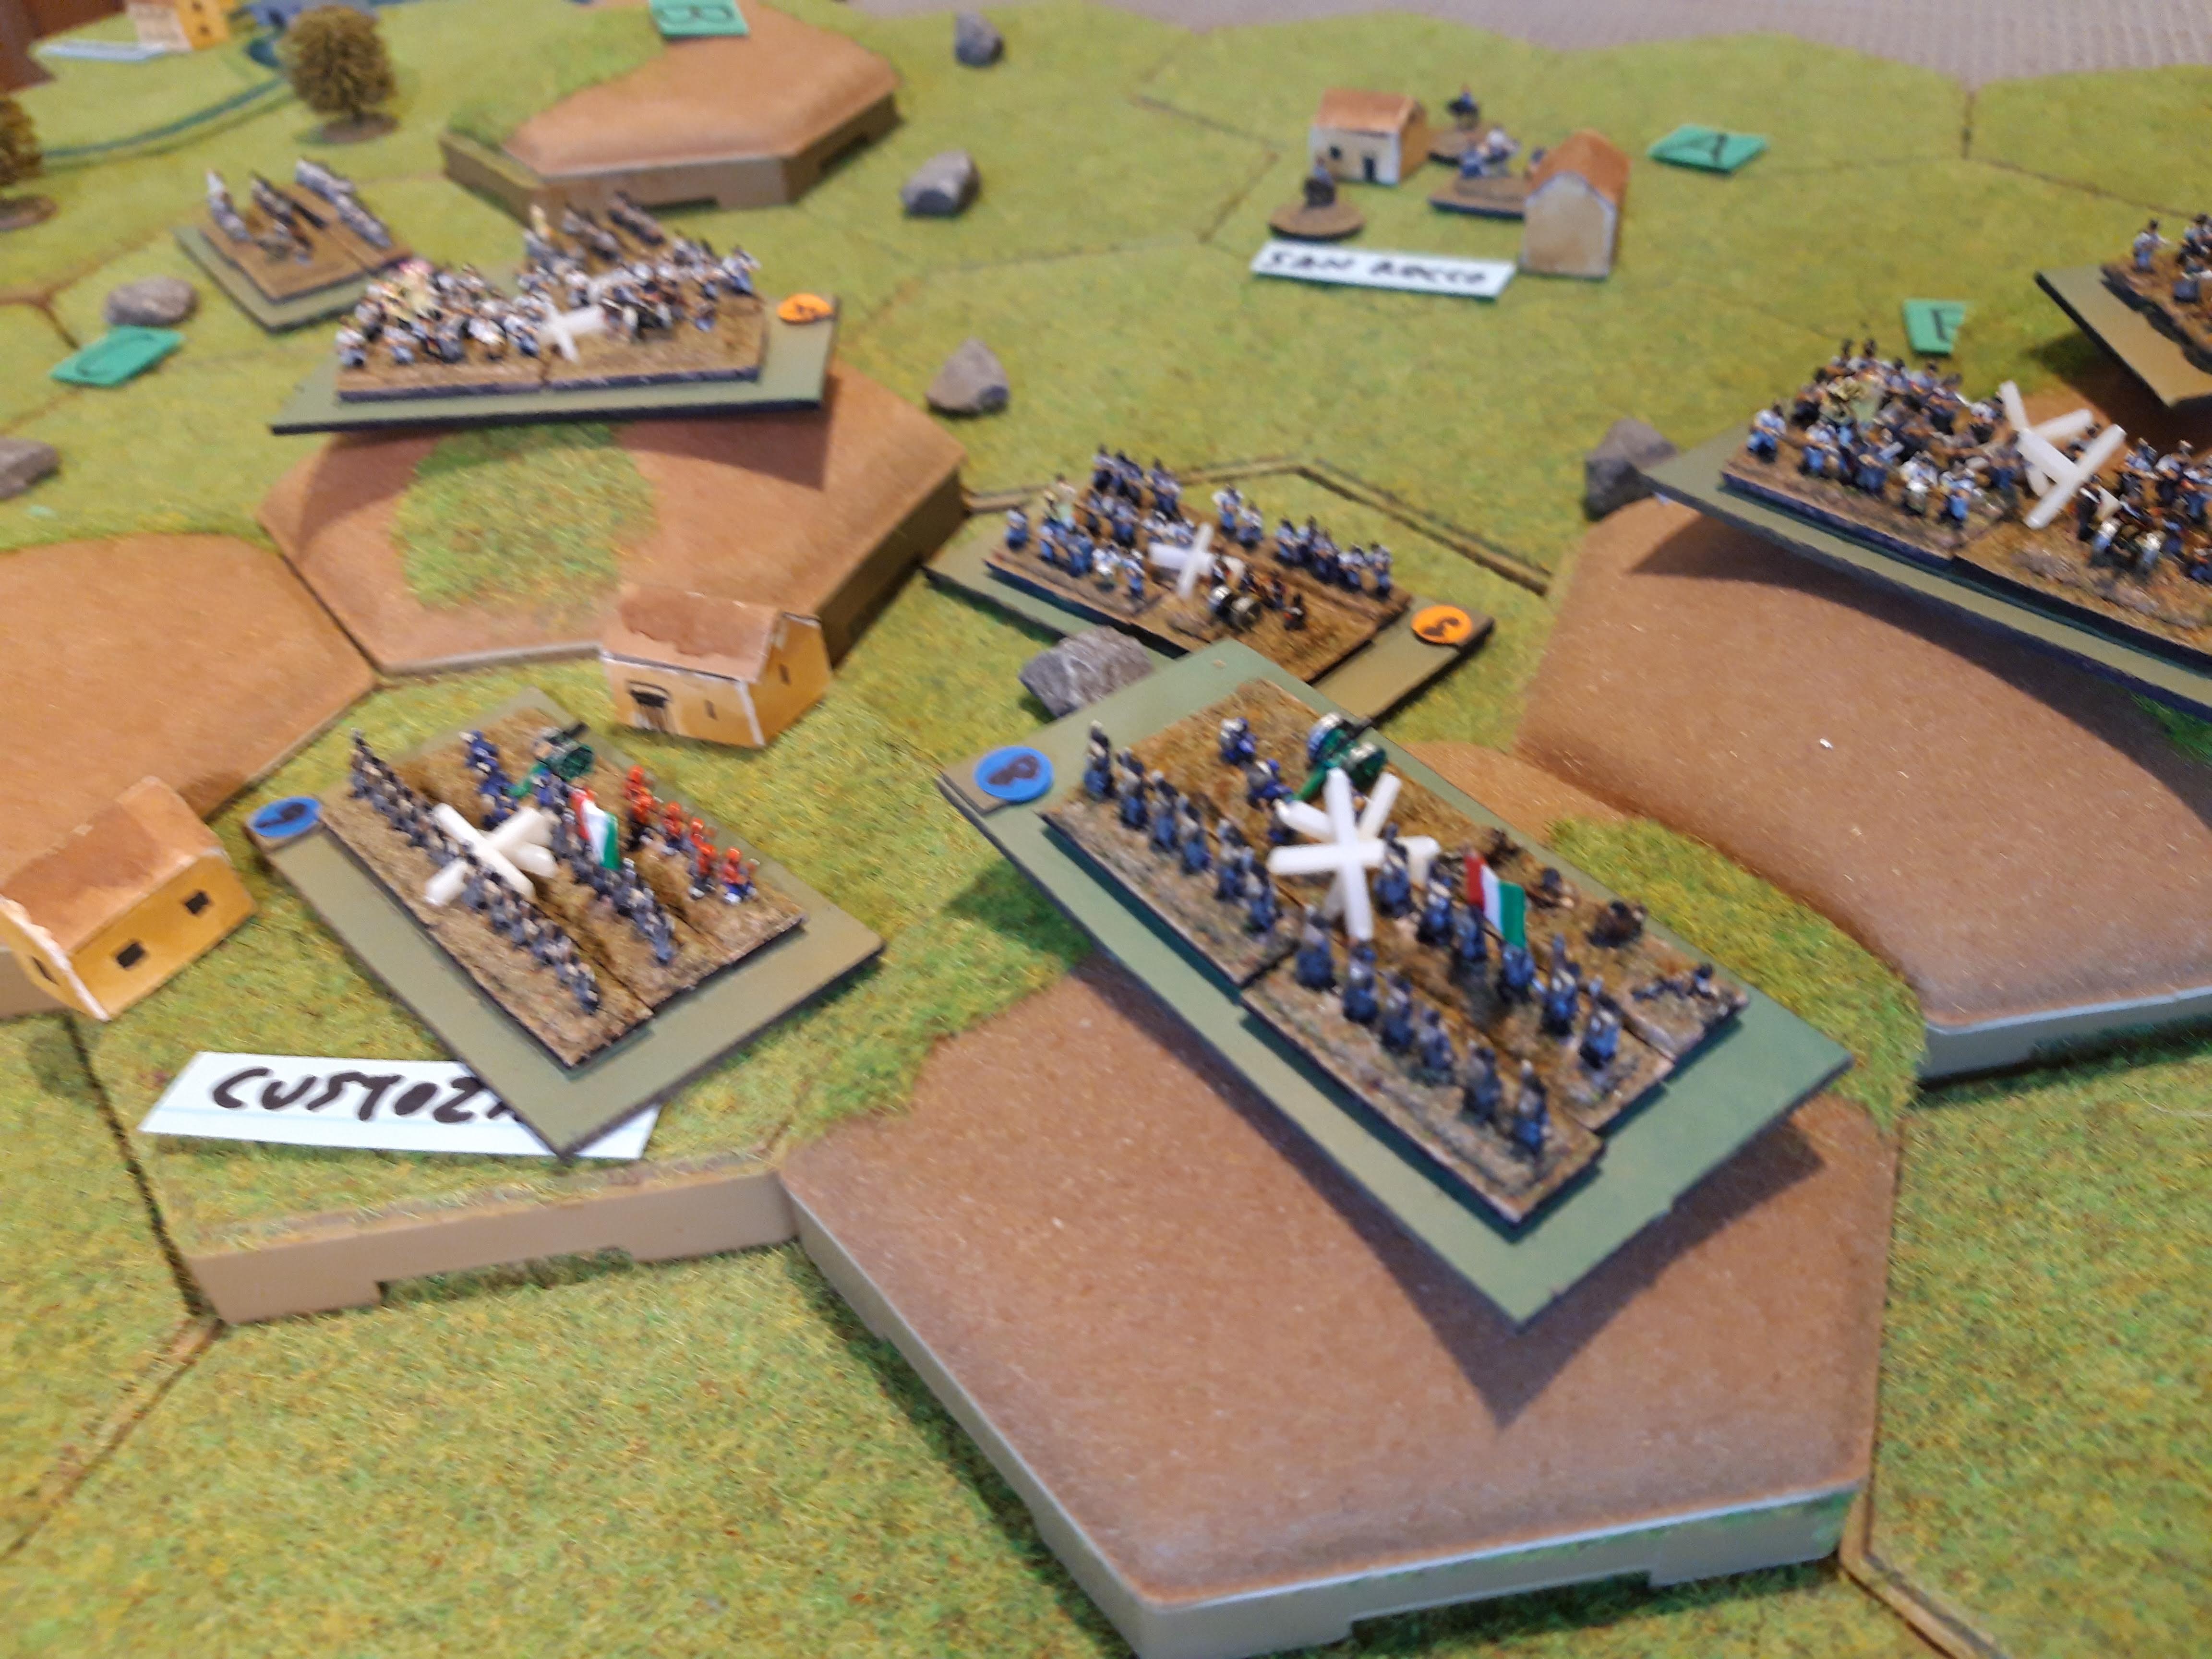
The Italians form a line at Custoza as the Austrians try to combine artillery fire and infantry assaults.


While on the plain to the east, both cavalry divisions meet once more. Von Pfulz is a brigade down however....


The Austrians however pour artillery fire into the Austrian cavalry from the heights, and before they can respond, Von Pfulz charges and the Italians are routed! What a shabby trick.


Von Pfulz pursues to the outskirts of Villafranca. Cavalry aren't very good in towns.


Things aren't looking too good at Custoza for the Italians either as the Austrians finally storm the mountain northeast of the town, while pinning the other Savoyard divisions in place. Hits abound on both sides.


The Italian left has vanished and two Austrian divisions head for the supply base at Valeggio. But what is this? A sneaky Italian division appears over the Mincio.


Von Pfulz occupies Villafranca, and now has a clear run down the valley into the Austrian rear.


The Italians are hemmed in at Custoza and pounded from all sides.


And the Italian right has now vanished.


Custoza falls under a hail of artillery fire.


The Mincio bridghead however repulses the Austrian right. At least the Italian survivors have a retreat route. And with that we called it a day as the Italian Army had been thoroughly beaten.


Pleasure cruises resume on Lake Garda from the port at Peschiera (this is actually one of my Euphrates gunboats).

That all went pretty well, although irl it was the Italian centre which crumbled  while Umberto cowered around Villafranca. The rules mods seemed to work alright, although I'm not convinced about the close combat revisions, I need to have a think about those. The players all made positive noises, which is encouraging, and we got through eight turns in two and a quarter hours, which isn't bad. There is quite a lot of stuff for the umpire to keep track of, so I think eight or nine units a side is about the limit of what it is feasible to umpire remotely. It may well play faster f2f, but there are quite a few decision points which have fairly serious consequences, I can imagine some of my regulars having analysis-paralysis in a f2f setting. 

Anyway, I'm happy enough with it for now, and as is my usual habit, now I've found something that works, I will instantly lose interest in it and do something else. 


Saturday, 21 August 2021

Portable SCW

 Simon, Jerry and I have all recently purchased Bobs latest book - a reprint of his 'Arriba Espana' rules, which also include his SCW rules based on the Portable Wargame along with several scenarios.  Simon was first off the mark in putting a game on, which we played using the vanilla published rules and one of the scenarios on a square grid. We used his 20mm SCW collection for this.

Tim G, Tim C and I were the defenders of the Republic, while John and Jerry were the wicked Nationalists. The scenario was based on the Siege of Toledo. A small Nationalist force is holed up in a monastry on a hilltop, surrounded by a motley collection of Republicans, with a relief force from the Army of Africa on the way. 


The Nationalists started with a unit of Falangists and a unit of Civil Guards. The units roughly equate to battalions. The Republicans had two units of Anarchists (commanded by Tim G), two Socialist units (one infantry, one MG commanded by Tim C) a unit of Communists plus an Anarchist overall CO (both played by me).

The Nationalists are all reasonably well disciplined, but the Republicans require dice rolls of varying difficulties to activate depending on the political allegiences of the units compared to the commander. The Communists weren't keen at all, the Socialists were so:so while the Anarchists were up for it. So our 'plan' was to put the surly Communists to block the road south, the dilatory socialists to operate in support from the northeast, while the keen anarchists would lead the attack from the west shot in by the socialist MG unit. 


The game opened with air attacks from both sides. The air support mechanism is based on that in Arriba Espana, with the likelihood of getting (and keeping air support) based on time period and which side you are. In 1936 air attacks are fairly rubbish, which didn't stop the Nationalists putting two hits on one of the Anarchist units and pinning it. Ouch. Our planes naturally didn't turn up at all although Simon kindly put the model on the table.


The Nationalists moved their Falangists to cover the west side of the hill having won the initiative. This was followed up with some pretty decent Republican activation rolls as everyone activated apart from the surly Communists (who needed 5+). The pinned Anarchists unpinned themselves, the other Anarchists plus the CO moved up into the dead ground behind the hill while the Socialist MG moved into range and opened a withering fire on the Monastry. Despite the penalties for moving and cover  (6 needed to hit!) the Guardia took a hit and were pinned. 

This was followed up by the Socialist infantry marching straight down the road, turning sharp right and mounting an (unsuccessful) assault on the flank of the pinned Guardia. I have to say that this is one aspect of the PW which bothers me a bit - the ease of being able to carry out flanking attacks after a headlong march move followed by a 90 degree change of direction. I would be very minded to introduce some of the restrictions on assaults used in the Neil Thomas rules.

Anyway, as it turned out, the attack was ineffective despite the flank attack bonuses as we'd not noticed the penalty for pinned units in Close Combat (it is explained in the rules on pinning but not included in the lists of combat modifiers). 


The Anarchists added insult to injury by doing the same thing on the other flank. I'd hoped to pin the Falangists with the other anarchist unit but they failed to activate. Jerry was now in a dire situation - he couldn't unpin as he was adjacent to enemy units, he couldn't initiate an assault as he was pinned, and apparently he couldn't fire as he was adjacent to an enemy although it isn't that clear in the rules. Bob later clarified that adjacent units can shoot at each other, so that was a mistake on my part.


The Falangists duly wheeled and attacked the flank of the Anarchist on the hill. The presence of the anarchist CO gave them a combat bonus so I was able to fend this off. I Meanwhile the Nationalist relief column arrived from the south and duly ran into the Communist roadblock. It didn't matter that they were hard to activate, they worked fine just sat in the way as their ZOC blocked the Nationalists nicely.


The other Anarchists finally activated and hit the Falangists in the flank. We'd now inflicted enough losses that the defenders on the hill became exhausted, and two further close assaults polished off the Guardia Civil (as they were pinned they couldn't retreat).  The Falangists were unable to move to re-occupy it as it would involve leaving the ZOC of one enemy unit an entering another.


In the south a fairly bloody close combat was underway (both sides rolled a 1, which in PW SCW is bad). It didn't really matter though as things were almost over on the hill. 


The only thing which could go wrong now was the Anarchists failing to activate. Anything but a 1.... but they managed it and the buildings duly fell. Victory to the good guys for once.

That rattled along at a fair old pace and we finished up in just over an hour. We had a fair amount of discussion afterwards about how it worked as game. I liked the faction activation, and I can't see any reason why it couldn't also be used for Nationalist units who suffered all sorts of factional infighting of their own. As with other PW games, the exhaustion mechanisms and rather gentle combat system also worked well.

Some of the mechanism are a bit random and brutal though, and I'm sure they work fine for solo play or short linked scenario campaigns, but perhaps aren't so good for our once per week multi-player gaming session as some players were left with nothing to do and no way to influence the outcome. We had the same problem with some of the Neil Thomas rules, but it is easy enough to tweak simple rule sets to work better for multi player.

A couple of simple suggestions were to allow units adjacent to enemy to try and rally using the existing hit table, and another was to be a bit more generous with the firing arcs. A 45 degree arc may be appropriate for close order musketry, but perhaps not for dispersed twentieth century units armed with automatic weapons. We will give it another go with a few tweaks, and I'd particularly like to try out one of the multi-game scenarios included in the book.