John put on Fuentes D'Onoro using Brown Bess Squared. Myself, Mark and Tim C were the French, while Tim G and Russell were the perfidious Brits. I've actually gamed this battle three time before, using Horse Foot and Guns, DRAM and 2x2 Napoleonics. It is an interesting engagement and bit of a sticky wicket for Massena. I have actually won it as the French, but I can't quite remember how I did it now as it was some years ago and pre blogging.

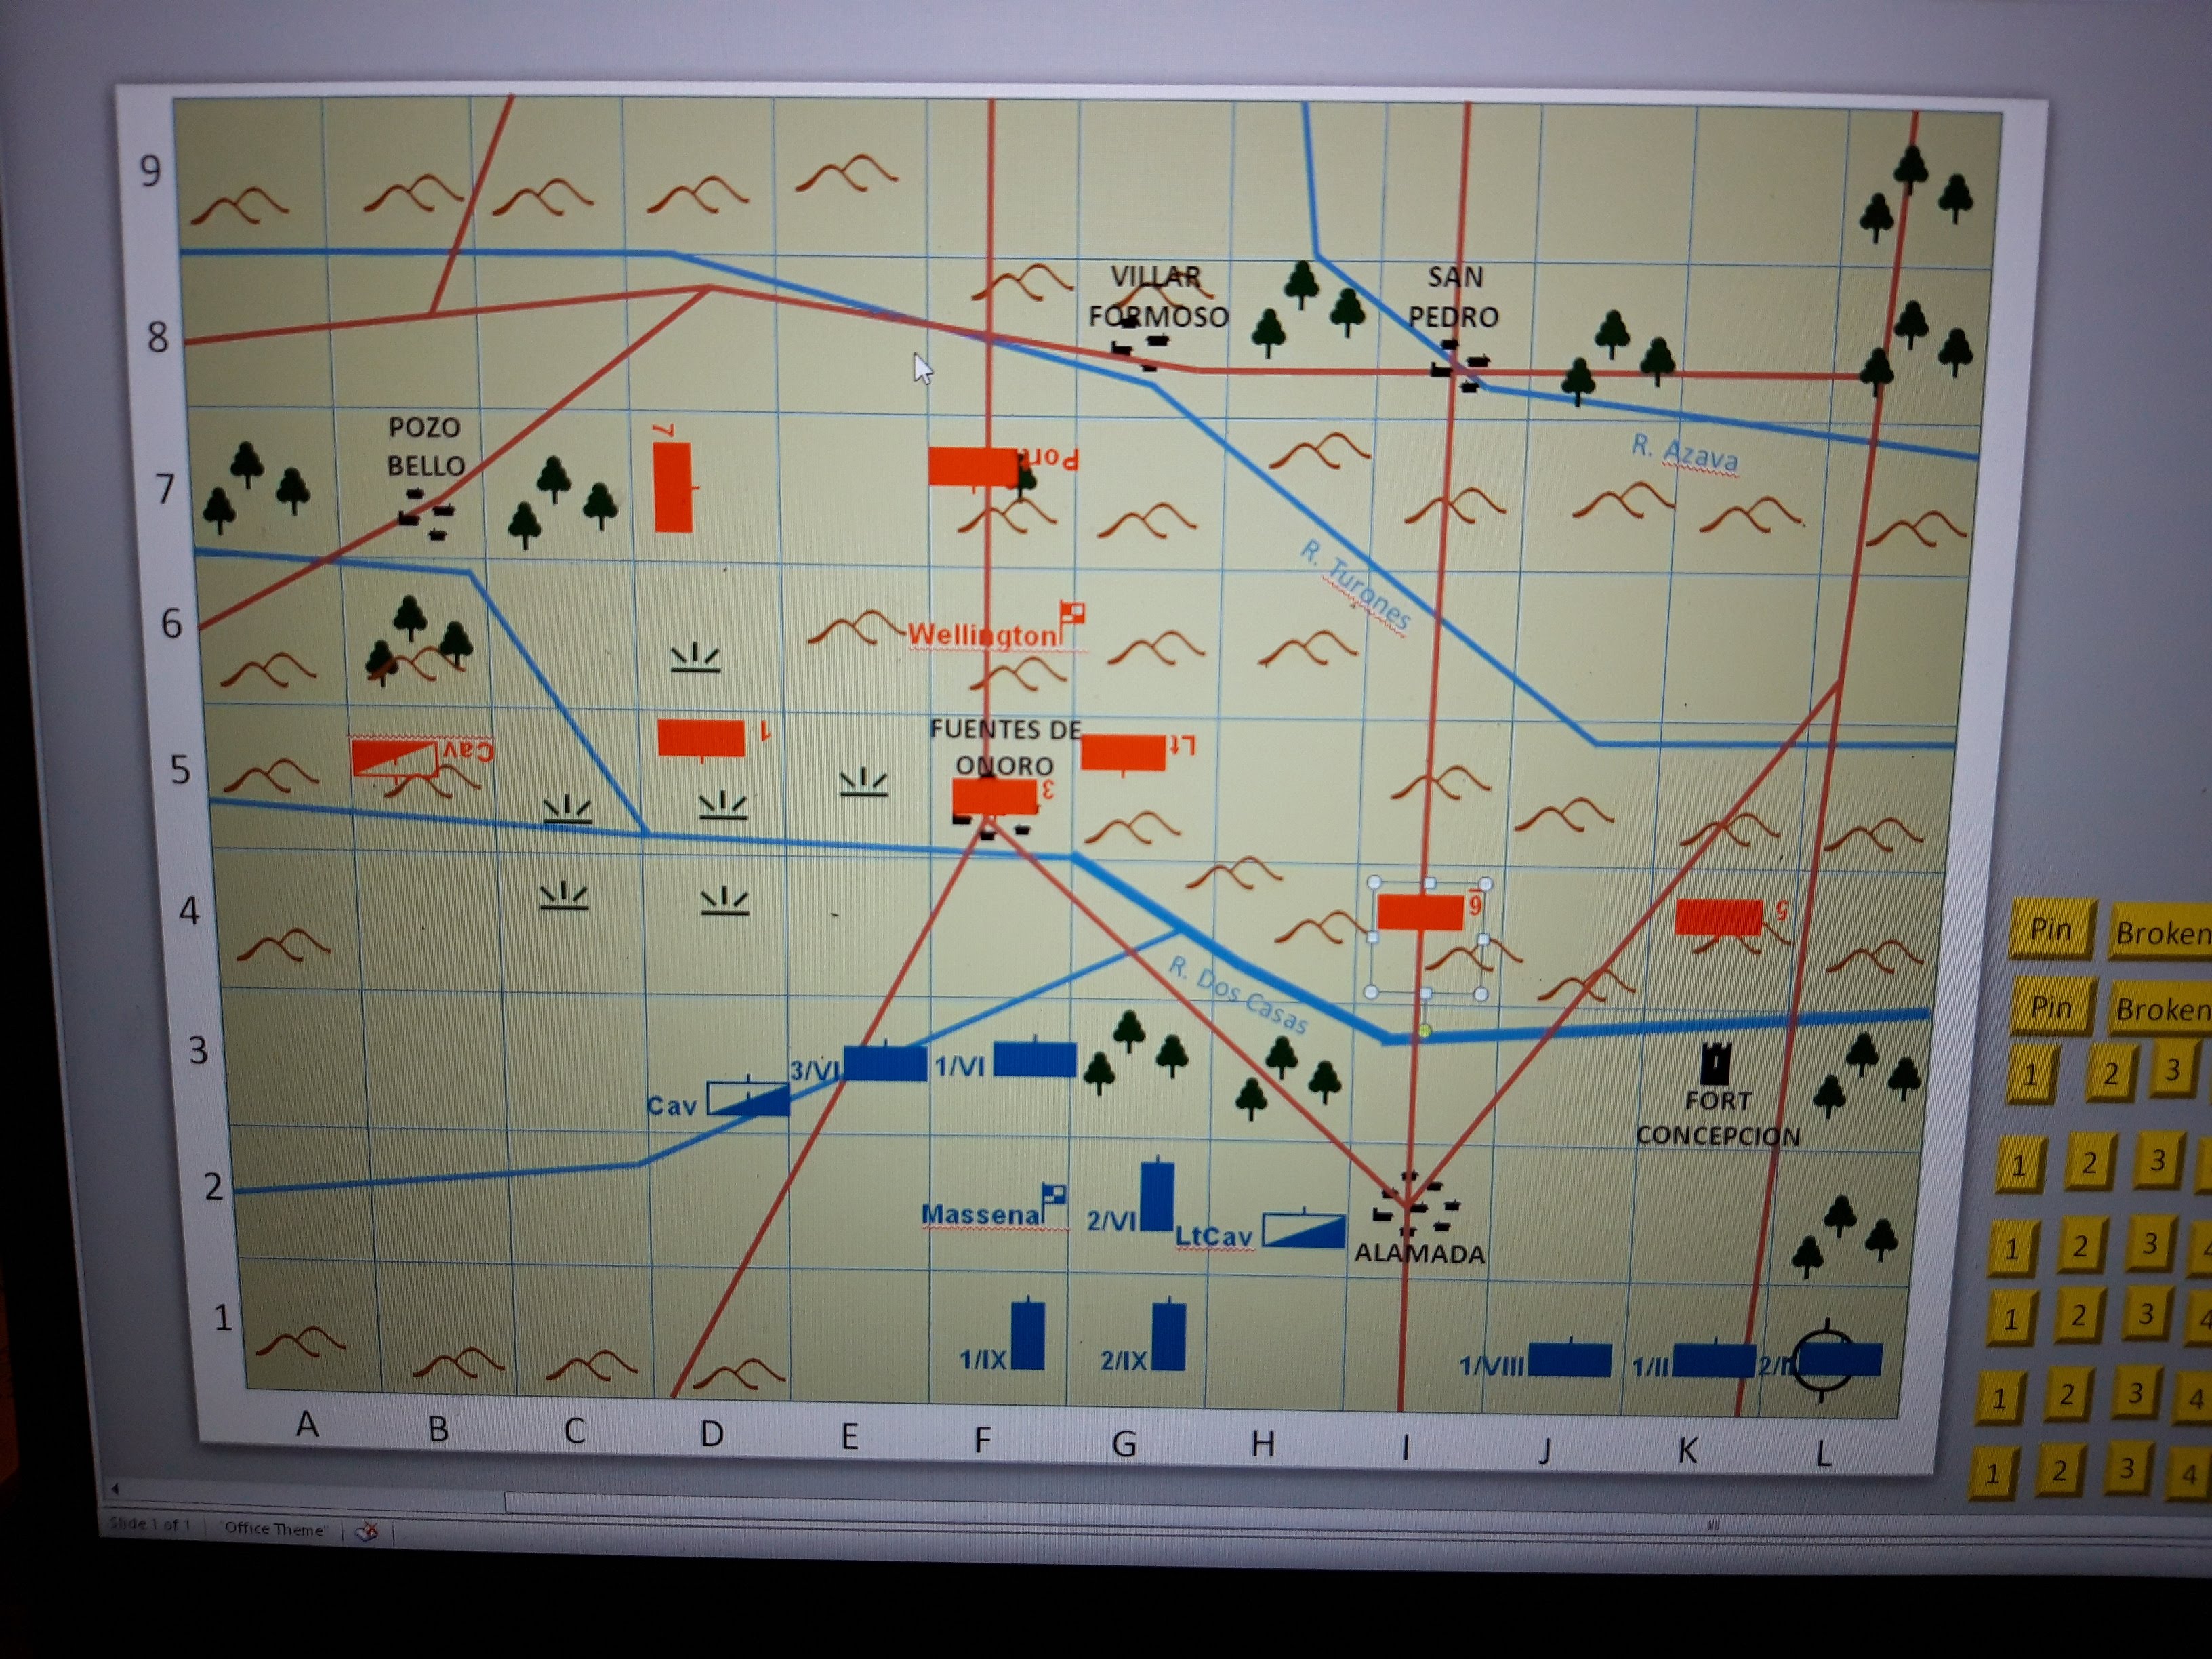
John had set the terrain and forces up as per Oman, whereas I based my games on Pagets "Wellington in the Peninsular". Irl Massenas most successful attack was via the south, but I have to say all those marshes make that look a distinctly uninviting route! Perhaps they were a bit drier in the real battle, but in Brown Bess they are an almost insuperable obstacle, far worse than then the enormous ravine north of Fuentes.
Anyway, I had a look at the map and came up with a plan. Mark would take the left wing and demonstrate strongly against Fuentes while screening the left flank with the cavalry. Tim would take the right wing and hang back a bit, then make a violent concentrated assault against the right. Given Wellingtons forward deployment, the road network mitigated against easy reinforcement of the right.
I kept a single Corps of two divisions in reserve, located behind Mark but with an eye on all those lovely roads on the right leading across the gorge and off the table (we had to exit two divisions to lift the siege of Almeida).

In the event, Russell couldn't make it, so Tim took the British on his own.
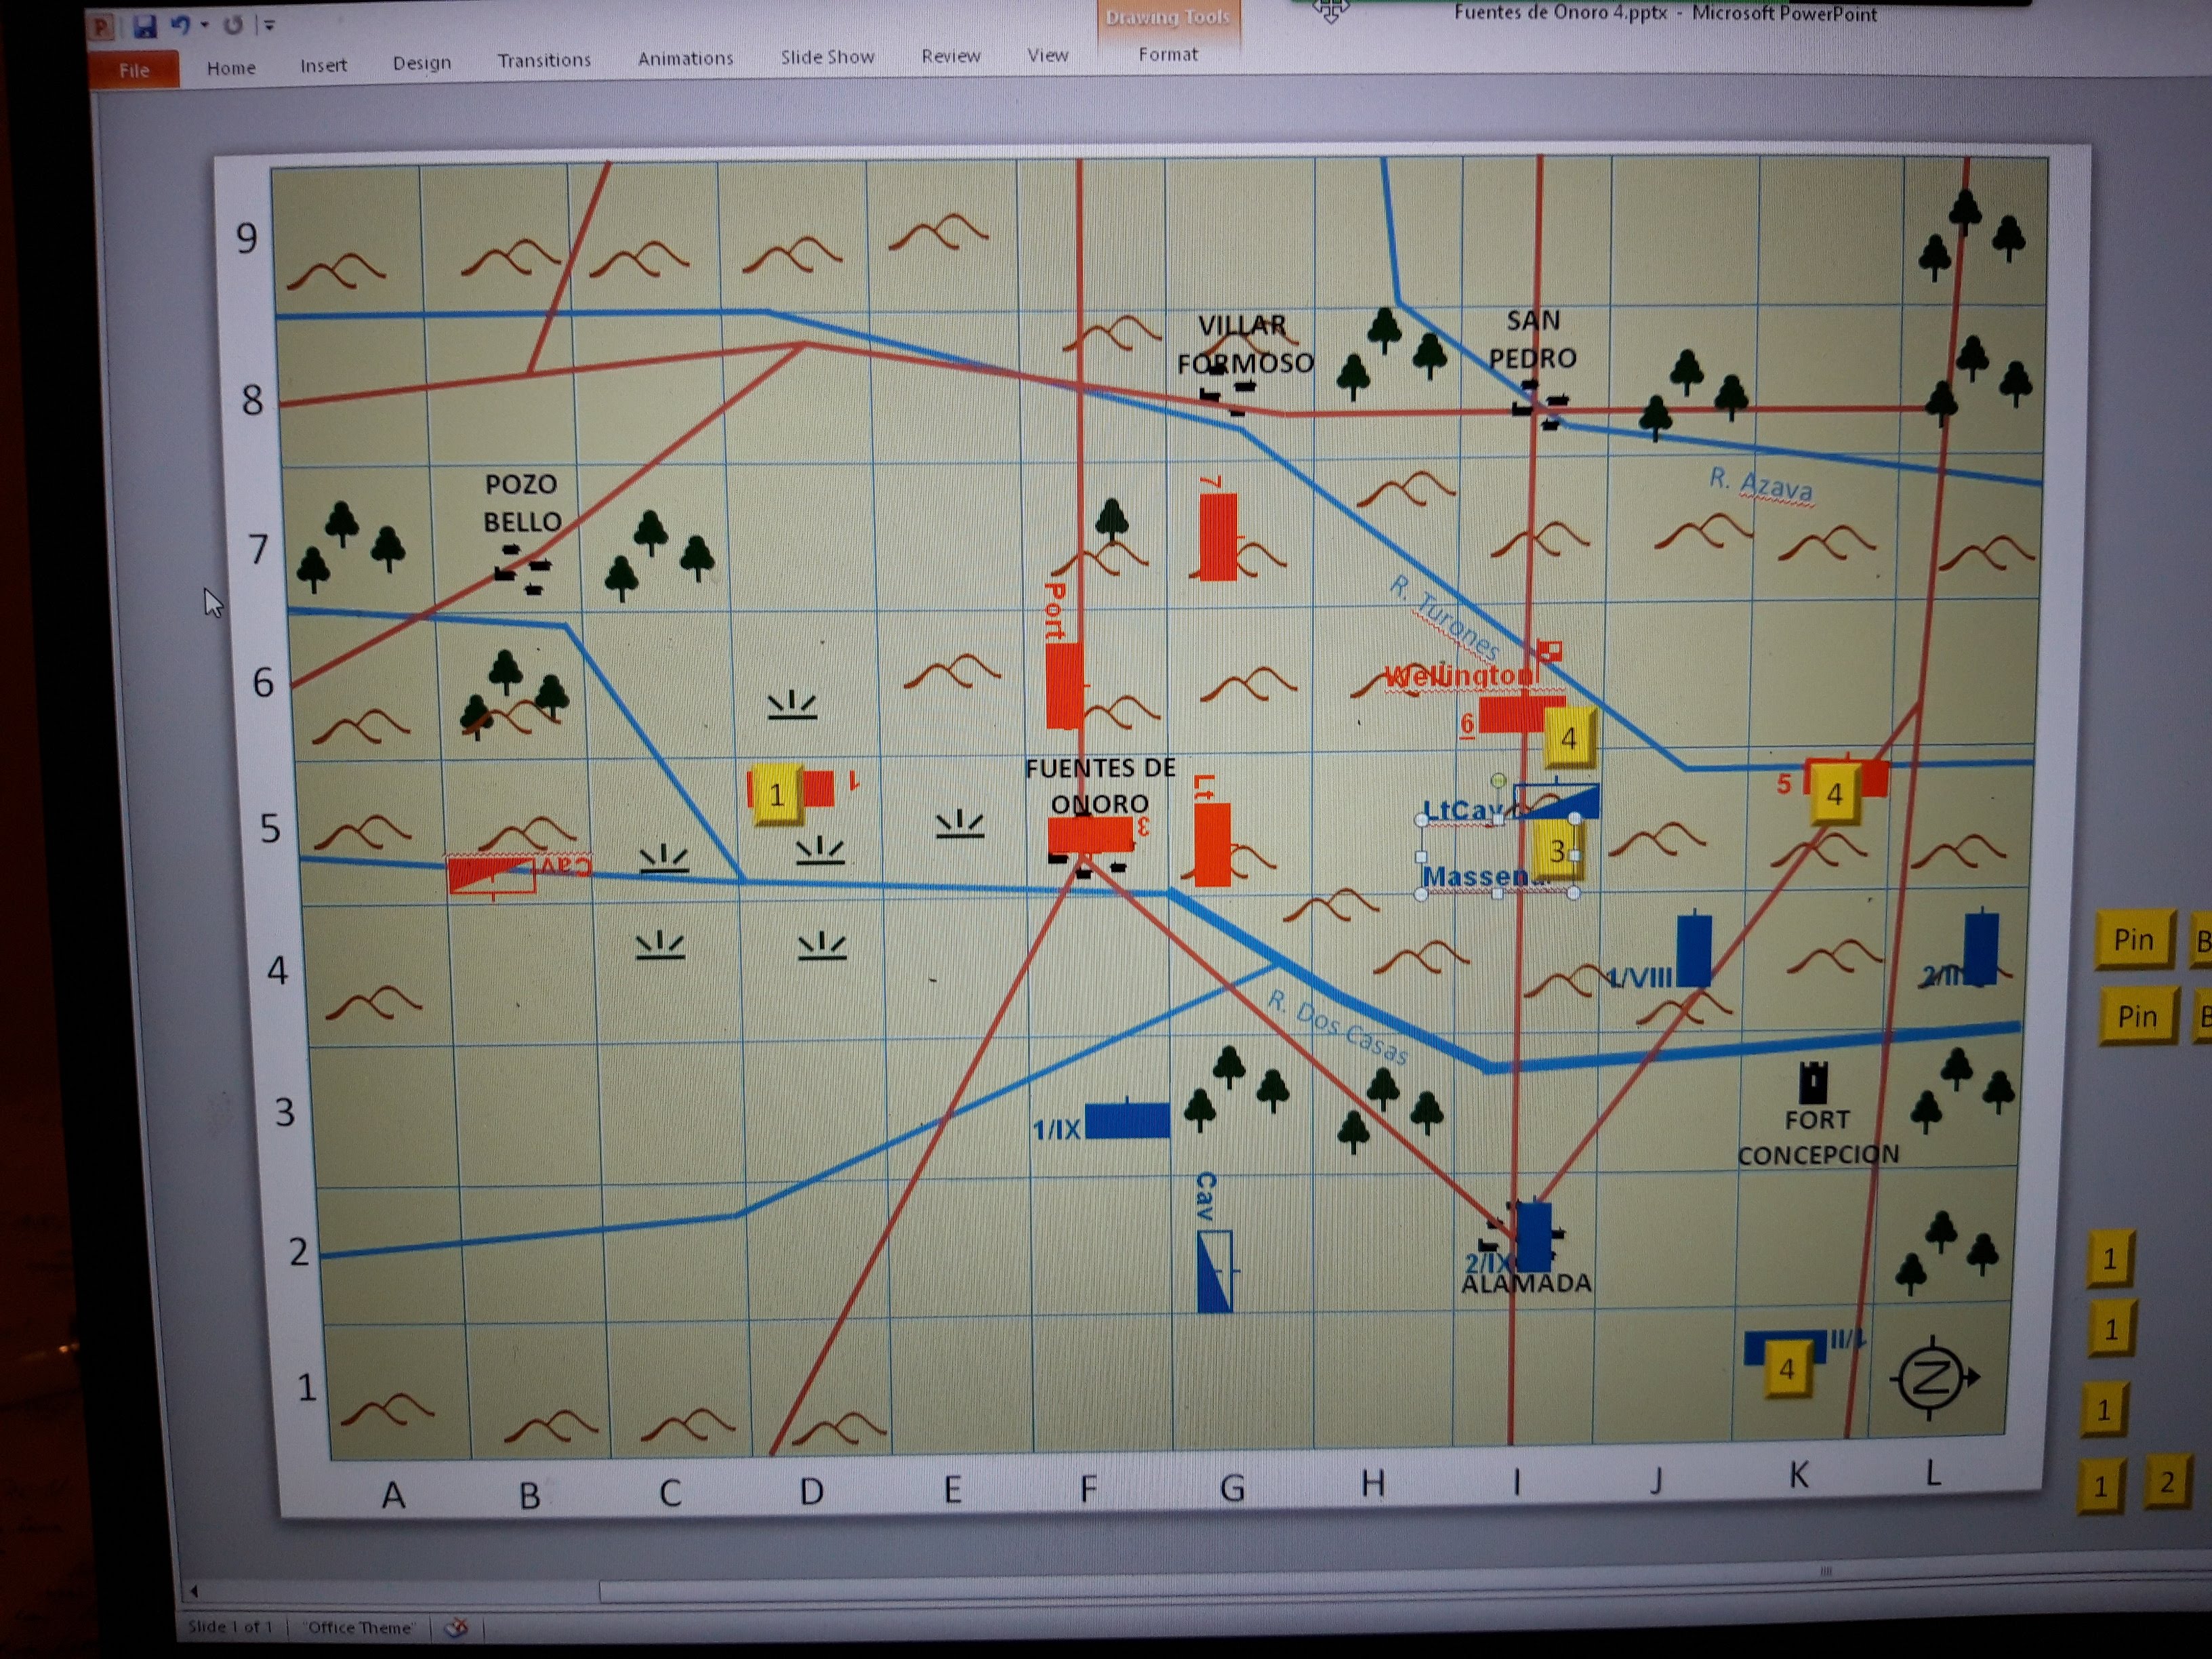
Marks Corps formed up with much fanfare for a frontal assault on Fuentes, while Tim C shuffled sideways surreptitiously. The woods rather interfered with the movement and Mark ended up in a ragged line. The British obligingly moved lots of troops forward to mass against the apparent threat.

The pinning attack on Fuentes could have gone better. Mark advanced in line with two divisions arriving before the third, and was shot to pieces by the three British divisions waiting to receive them. We did inflict some damage on 2nd Div in return, but that was all. Meanwhile Tim C advanced en masse to the river, and his Guard Light Cavalry dashed across the bridge into the British on the other side, who had advanced up to the river just within charge range and neglected to form square. Ooops.

The British aroudn Fuentes routed the remains of Marks Corps, and the fighting on the right wasn't going brilliantly. One hit on the British infantry and two hits on the Guard Cavalry. Our infantry had damaged the lone division on the far right though.

Things took a turn for the better fairly soon however. Massena dashed over to encourage the Guard cavalry, and although one of our infantry divisions was routed, both British divisions fell back in disorder and our troops formed column ready to exploit. Wellington suddenly realised the peril he was in and dashed northwards to rally the troops, while the British lines ponderously turned and began plodding towards the new threat.
Time for our carefully planned masterstroke. Tim's columns pushed across the gorge in pursuit of the division on the right. My Reserve Corps left one division to mask Fuentes, while the other division and the Dragoons dashed across to Alamada. The Guard Light Cavalry pursued the retreating infantry in front of them (naturally!).

Tim handily obliterated the routed British on the right as his columns advanced, and the Guard Cavalry wiped out the British on the left, killing Wellington in the process. Disaster! The British were a bit purturbed to find a cavalry division in their midst and all three divisions formed square. Meanwhile I'd put my reserve division across the gorge to threaten their flank and the Dragoons formed march column on the road to the rear.
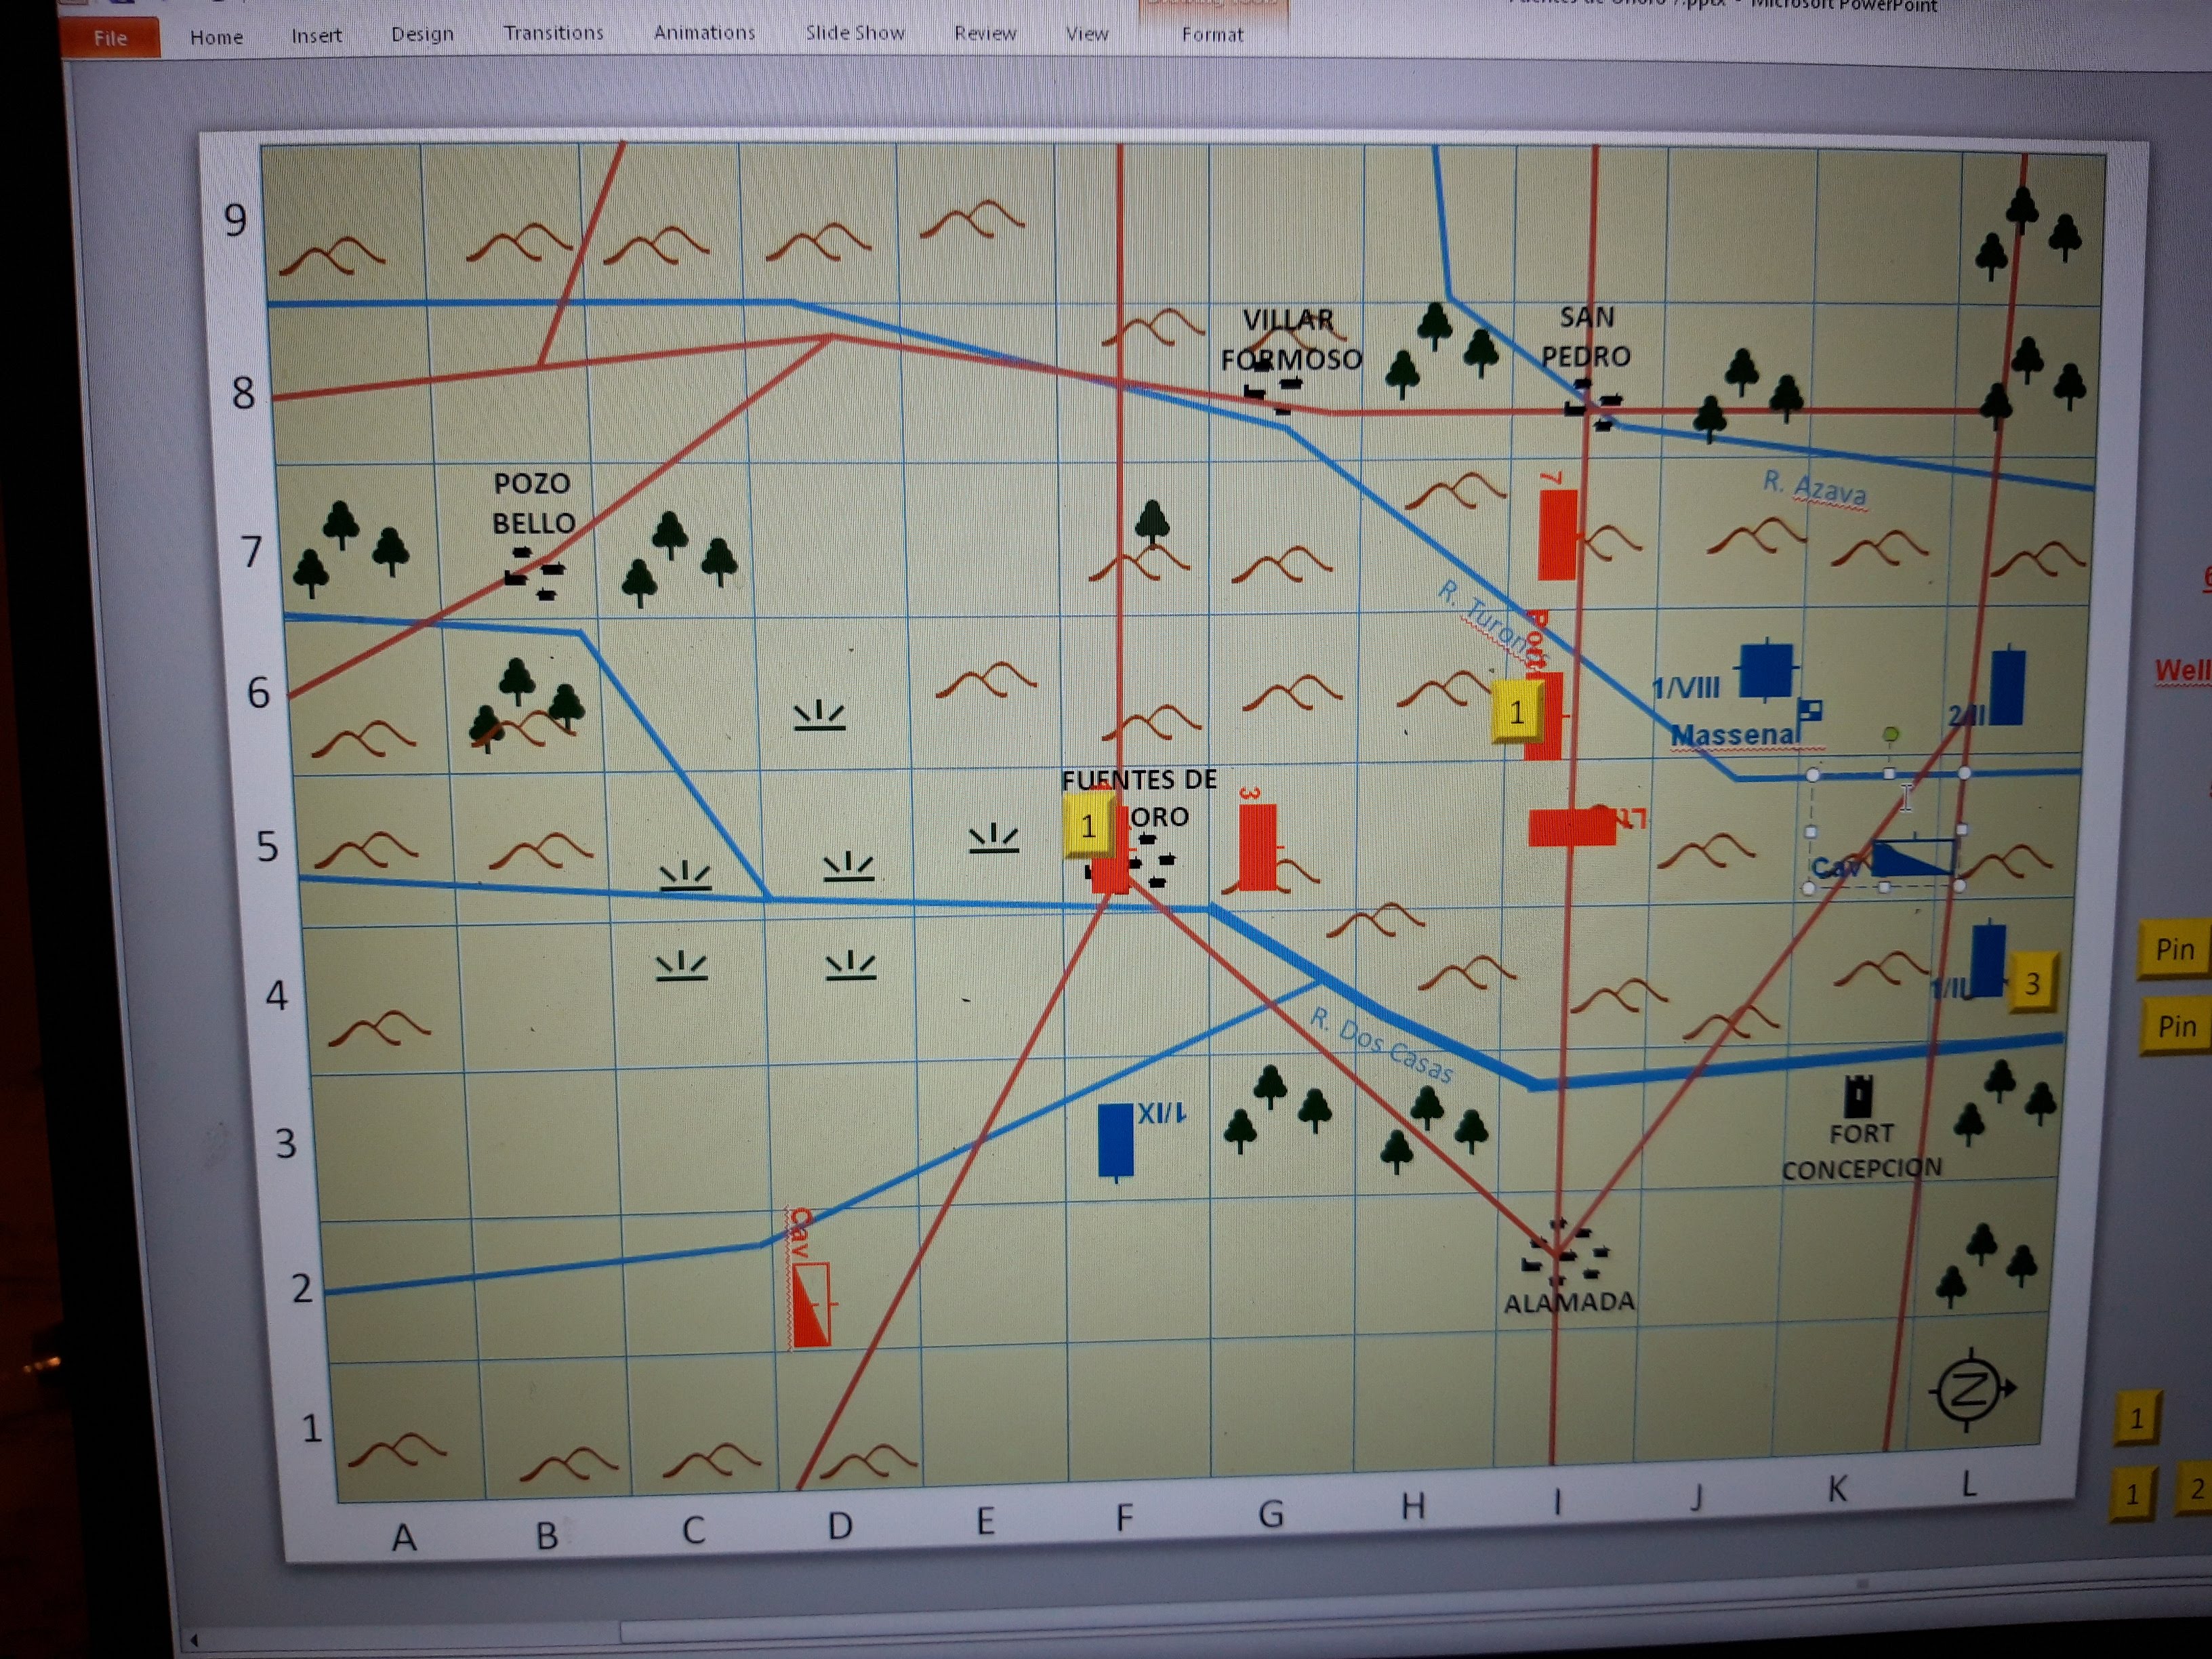
Sadly my reserve division was gunned down by the Light Division who had very unfairly formed line before I could charge them. The British squares also saw off the Guard cavalry. All the delay had allowed the two French divisions on the far right to form into March column on the road to Almeida though, and the dragoons dashed up the highway in support.

The British were just too far away now, and screened by a division on their left, and supported by the Dragoons, the two French divisions on the right marched off the table and brought much needed supplies to the Almeida garrison. Vive la France!
The was loads of fun, and although at one point I thought things were looking pretty hopeless for the French as the British infantry are just so good, it worked out in the end. Mark was a bit unlucky to lose his entire Corps in two turns(!) but the Guard Cavalry got a bit lucky in their charge and that really opened things up. After that, we were able to exploit the breakthrough faster than the British could respond, although there were a couple of hairy moments in the centre.

Very nicely done.
ReplyDeleteThanks Norm. It is an interesting battle and quite a challenge from the French pov.
DeleteI hope my fate is remembered by my comrades as a toast to absent friends - their sacrifice was not in vein
ReplyDeleteYou kept the British thoroughly occupied. Apologies, I'd forgotten quite how bloody Brown Bess can be, so perhaps hanging back might have been wiser, but hey, the plan worked.
Delete