I had actually lined up a different game, but then as I was planning to run this in the third week of December, I thought a winter game would be fun (like last years outing to St Vith). That meant digging out the snow cloth, which in turn meant yet another One Hour Wargame, about the only thing I play with rulers over Zoom.
I was looking for something around Stalingrad, but in the end plumped for Zhukovs counter offensive around Moscow. There was a considerable amount going on in the vicinity of Tula on 16th December 1941 as Zhukov tried to encircle Guderians 2nd Panzer Group and I thought one of the 'flank attack;' scenarios covered the Germans tactical dilemma rather nicely as Soviet blocking troops infiltrated through the huge gaps in their lines and disrupted their attempts to fall back to more defensible positions and reorganise.
At this point, all the units were drastically under strength. The Russian ones had barely rebuilt from the bloodletting earlier in the year, while the Germans were at 20% strength or less. This scenario therefore featured an awful lot of 'divisions' with only two battalion sized stands...
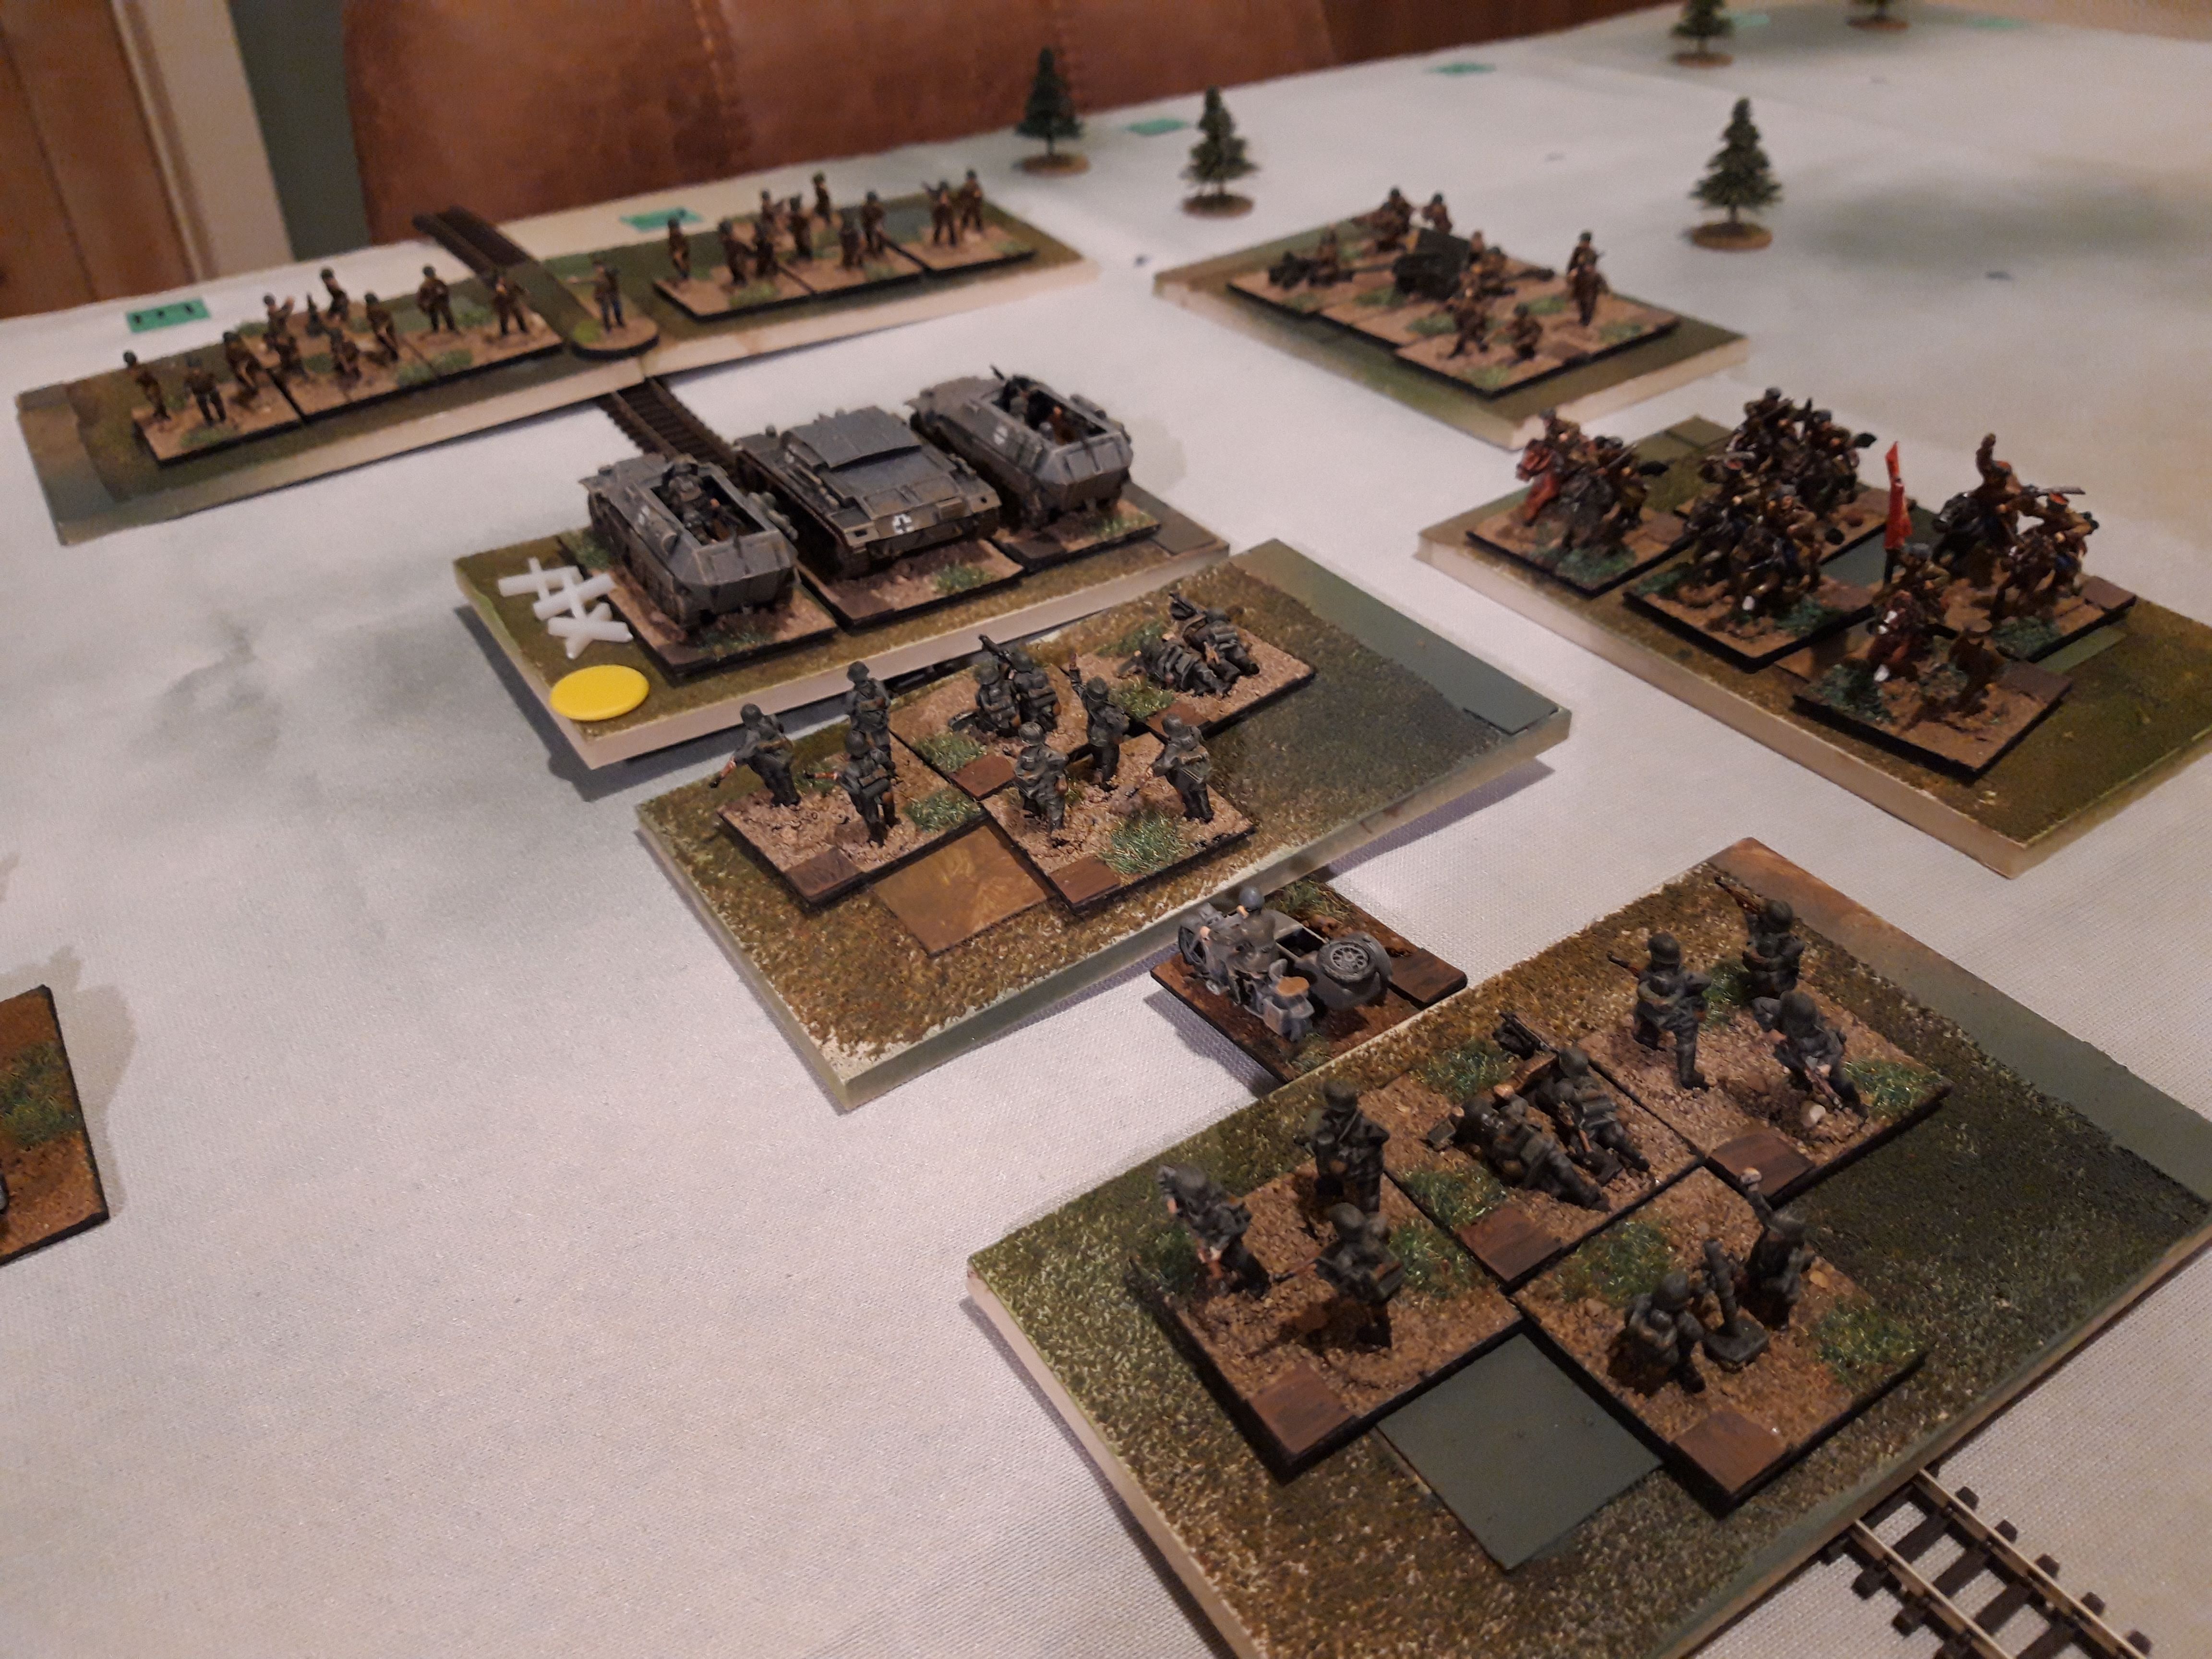
The initial setup. The German column (representing Geyr von Schweppenburgs XXIV Panzer Corps at approx 20% strength) is heading down the rail line. The Russians (elements of Boldins 50th Army) have managed to insert a blocking force ahead of them, while the rest of their troops swing in from the right flank. To win, the Germans have to escape with half their force (three units) via the rail line to the west, anything else is a Soveit victory.
The German column from the rear. In order from the camera, 3rd Mot Division (Simon), 3rd Panzer Div (John) and finally Panzer Group Eberbach aka 4th Panzer (Tim C) accompanied by Geyr Von Schweppenburg. All the remaining German armoured and tracked elements are concentrated under Eberbach at the front.
7th Ski Brigade (Mark) is across the railway line in their way. irl XXIV Panzer Corps had about 50 operational tanks by now, but had also massed all their remaining halftracks mainly stripped from armoured engineer companies into a composite panzergrenadier battalion supported by SP guns, which I guess were Stugs but might have been Jagdpanzer 1s.
The rest of the Russians are 18th Rifle Brigade (Mark) nearest the camera, 15th Cavalry Division (Pete) with two regiments and finally 141st Tank Brigade (Tim G). There is also a detachment of NKVD to encourage shirkers to greater efforts.
The NKVD urge the cavalry onwards.
Tims tank brigade. Even this late in 1941 the majority of Soviet tanks available were T-26s, with a few T34s and KVs mixed in. The tanks are tucked away out of sight behind the ridge.
Panzer Group Eberbach, 4th Panzer Regiment and 4th Schutzen Brigade respectively. Geyr von Schweppenburg gives a morale bonus. The Germans had decided to try and smash through rather than use their central position to fall on the Russians to the north, worried they'd run out of time.
The opening moves saw the Soviet line to the north surge forward and the Tank Brigade occupy hull down positions on the hill. The Germans stolidly plodded forwards but 3rd Mot veered off to engage the Russians.
At the head of the column the panzers moved south for an outflanking manouvre but the mechanised infantry group ended up being the sole target of three Russian units and suffered heavy losses, becoming disorganised.
3rd 'Panzer' Division closed up behind and the Russian cavalry got scarily close.
One regiment of 3rd Panzer engaged the cavalry while Von Schweppenburg moved back to bolster the mechanised infantry.
In turn the Russian Rifle Brigade slammed into their flank. Ouch. The Germans were paying the price for putting their head into the trap. The Germans were annihilated in close combat.
Further back along the line the Russian cavalry was heavily engaged and the German infantry units had largely given up trying to dash to the west. 3rd Panzers leading regiment was now facing with same dilemma as the mechanised infantry.
Simons reserve regiment was still unengaged however and moved back to the railway line. Lots of disorder markers now appearing in the close battle.
The Panzers tore into one of the ski battalions, which had very wisely turned to face, but sadly wasn't dug in and didn't have any significant anti-tank support. Oh dear.
The Russians returned the favour as their Tank Brigade came down off the hill into the gap left by 3rd Mot. The Russian cavalry was looking distinctly ragged now.
Johns leading regiment was now caught between two Russian units and outflanked with heavy losses.
The Russians destroyed the leading regiment of 3rd Mot but in turn the reserve regiment assaulted the Tank Brigade in the side, inflicting enough losses to disorder it.
Johns reserve regiment continued to battle the Russian cavalry.
And put them to flight with light losses.
Unfortunately 4th Panzers lead regiment, outnumbered and outflanked, was destroyed, although the Rifle Brigade was fairly chewed up in the process
The Panzers meanwhile had overrun one the ski battalion facing it without any losses at all! Tanks against infantry in the open are quite good.
With their line now rather tatty and with both units carrying a number of hits, the Soviet Tank Brigade and surviving cavalry withdrew to reorganise.
Further west the Russians fell back behind the railway line in the face of the mighty panzers, the way to the west was open! The Rifle Brigade busily reorganised itself to face the armoured onslaught.
The German infantry now began to pile down the railway line heading for the exit, and the Russians responded by rapidly redeploying their (slightly) replenished Tank Brigade. The cavalry were still sorting themselves out.
The Panzers meanwhile engaged in a gunnery duel with the remaining ski troops.
While John reorganised, Simons remaining regiment marched west and the Panzers pulled forward right up to the rail line to keep it open.
Suddenly realising that the Germans had a chance to escape, the Russians threw all their units into combat, regardless of their current state. The NKVD chivvied the cavalry along. The most important move was from the Russian Tank Brigade, which assaulted Johns last infantry regiment and pinned it into place. The Germans would only be able to escape if they defeated the armour to their front.
The Russians all-out attack paid off and Johns disorganised infantry disintegrated under the Russian tank assault, which left just Eberbachs panzers and the remains of 3rd Mot to leave the table to the west. As the Germans were now only able to exit two units, it was a Russian victory.
The surviving Germans were in a good position. The Russian infantry didn't really have an answer to the panzers, although if they'd have dug in it would have helped, but they never had time, and there wasn't any difficult terrain to hide in.
The surviving ski troops and the Rifle Brigade still had a couple of hits on them at the end.
As did the Russian tanks and cavalry, despite taking a couple of turns out to reorg.
That went really well, even if it ended up being a quite a short game. Both sides have a number of tactical options - do the Russians try to relieve their blocking force or just attack the German column? Do the Germans exploit their central position to defeat each Russian wing in turn or concentrate on on breaking out? In the end the Germans opted for a dash for the exit, which was always going to be a bit problematic for the unit at the very front. It is a scenario which warrants some replay.
I'm very pleased with this iteration of the rules. They give a good game over Zoom, despite the absence of grids and the players have meaningful choices to make. I'm, particularly pleased with the way the reorganise mechanism works as it gives the players choices about how aggressive to be, but also encourages them to think about how to fix the enemy in place so they can't escape. As Patton said, "Hold em by the nose and kick em in the pants". The big bases also let me field lots of toys, which I think is fine for the level of battle being represented. It isn't as if I've got anything else to do with them.
Finally, eagle eyed students of history may have noticed that this engagement bears a distinct resemblance to Salamanca and it is indeed a disguised scenario. The battle starts at the point Wellington has inserted a division between Marmonts advance guard and the main body of the French army. The hill to the east (used so effectively by the Russian tanks) is standing in for Los Arapiles.
Another great scenario from One Hour Wargames.
One thing which did occur to me after the game was that if I'd just turned my movement bases over so the white side showed, they would have looked a bit more like snow. Oh well. maybe next time.


Fantastic battle report. I think the OHW ww2 rules lend themselves well to more "grand tactical" actions. I have been wanting to try your rules for a Kursk battle. Any suggestions for a OHW scenario to use? Thinking "static defense."
ReplyDeleteI actually did a Kursk game last year
Deletehttps://tgamesweplay.blogspot.com/2020/04/hill-241-10th-july-1943.html
the OHW scenario (take the Hill) mapped perfectly on to the real battle.
I have often fantasised about doing Gross Deutschland and it's 200(!) Panthers, for which Fortified Defence would be an obvious candidate.
Heading there now! Thank you sir!
DeleteThat was a great game Martin- really enjoyed it. I doubt I'd escape the attentions of the NKVD the same way again though.
ReplyDeleteCheers,
Pete.
Thanks Pete. I enjoyed putting it on, and I do like getting my Russian cavalry out.
DeleteAs Soviet CO my 'plan' was to attack the Germans and keep attacking. There seemed little point in trying a more subtle approach!
ReplyDeleteThat did indeed seem to be a sensible approach. I liked the tactical use you made of the hill.
DeleteThat was a really interesting game of flank and counter-flank. It must have been really good to coordinate/umpire? Your figures and vehicles look superb.
ReplyDeleteRegards, James
Thanks James
DeleteMartin
ReplyDeleteI like it. you've tempted me to try One Hour WW2 again. I particularly like the way you have upped the scale of the game, moving it away from a skirmish.
I've got a few of questions:
- Was this your variant or the out of the book rules?
- No hexes, so presumably you've reverted to free format movement.
- How big were your bases? How big was your table? How far could the units move? I have a lot of kit, and use big bases for other periods, so using big bases in WW2 kind of appeals.
- you mention a "reorganise mechanism". This isn't in your variant. What is it?
Hi Steve. This is an evolution of my WW2 variant, using the six hit/1-3 dice combat system.
DeleteIt is essentially the Ancients OHW used for WW2. Leg infantry move 6", cavalry/mech 9" and recce 12". Max spotting/direct fire range is 6". The rules just seem to work better free format than with a grid. Standard 3'x3' OHW table.
Sabot bases are 5" x 3" (my old DRAM bases).
'Reorganise' lets units remove hits (half, fractions rounded down) if they aren't in combat. Units also get disorganised at half strength, which reduces their effect. Infantry can also dig in over a couple of turns.
I wanted to add a bit of chrome to give the game a bit more depth and give the players some more options.
This version will be published in the Wargames Developments Journal (if it hasn't been already) as I ran a session using it at the Conference of Wargamers last summer.
Thanks Martin
DeletePlayed your rules two weeks ago at our club. Three teams each played three scenarios (2-10) from OHW using your variation of the rules as a mini-campaign. Each game finished in about an hour, the Americans beat the DAK rather handily over all (the theme being pseudo-Kaserine Pass.
ReplyDeleteThat sounds like great fun! Glad you enjoyed it.
Delete